Microsoft Outlook 2010 Tutorial
How to configure Microsoft Outlook 2010 to connect to your email account
Microsoft Outlook 2010 is an email client for Windows users that comes prepackaged with Microsoft Office 2010 (Home and Business, Standard, Professional, Professional Plus editions). It runs on Windows XP (with Service Pack 3), Windows Vista (with Service Pack 1), Windows 7, Windows Server 2003, Windows Server 2008.
Before you add a new email account in Outlook first you have to create it. You can do this from the Email section of the HostKnox control panel. Read the tutorial on creating an email account to learn how to do it.
If you're upgrading a previous version of Outlook, all email accounts will be transferred from the old version to the new Outlook 2010. You can't have more than one Outlook version installed on your computer.
If you don't have any email accounts or you're not upgrading a previous version but making a fresh installation, when you start Outlook 2010 the process of adding a new email account will start automatically.
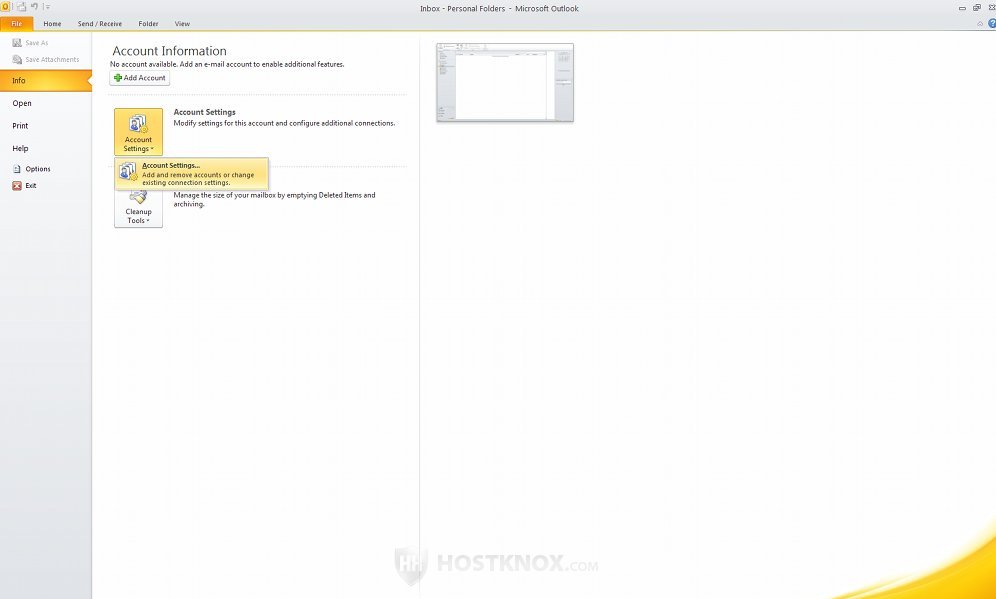
Otherwise, to add a new email account, after you start Outlook 2010 click on the File tab in the upper left corner, then on Account Settings:
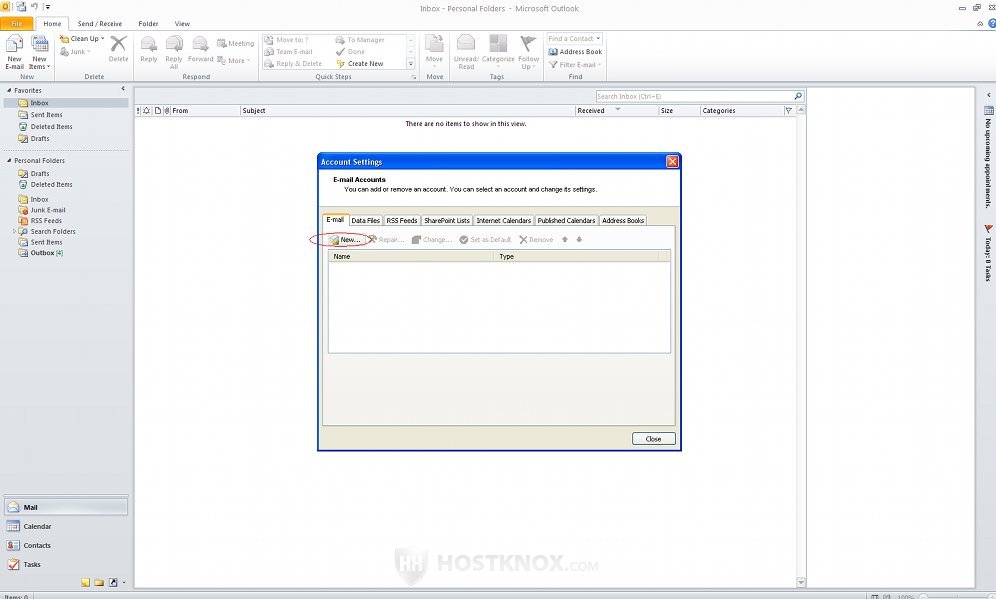
On the window that pops out click on the New button:
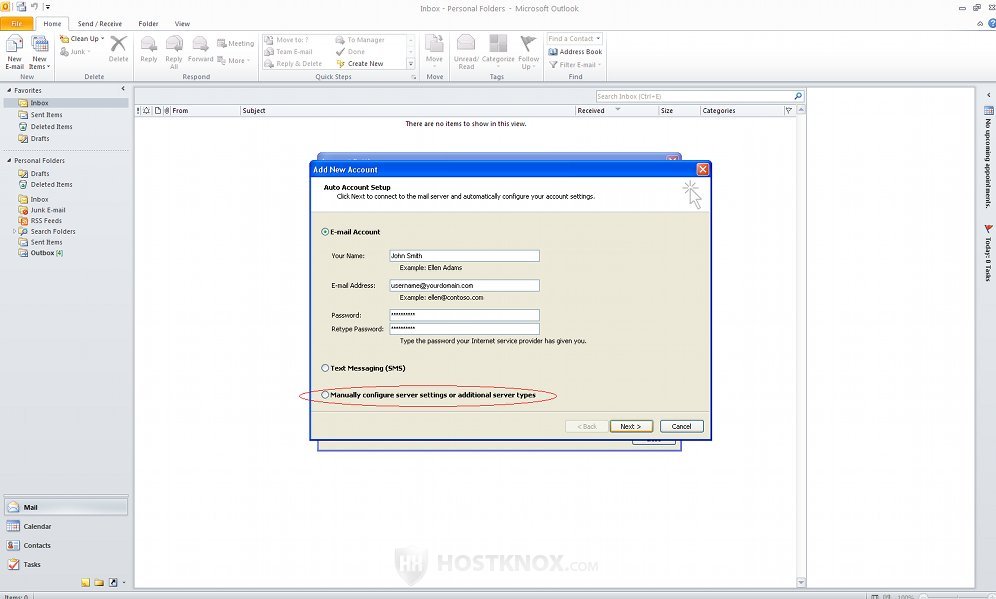
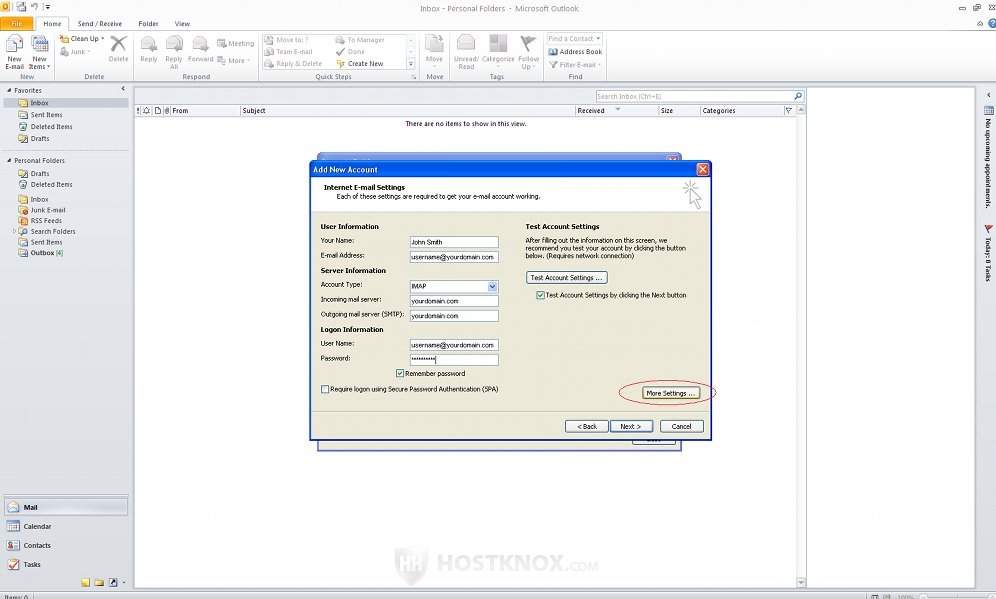
On the next window (Auto Account Setup) type the name that you want other people to see when they receive emails from you. It can be any name that you want to use, it doesn't have to be the username part of the email address. Type your full email address (e.g. username@yourdomain.com) as you have created it from the Email section of the HostKnox control panel, and you also have to type twice the password for the email account. Then mark the button labeled Manually configure server settings or additional server types and click on Next:
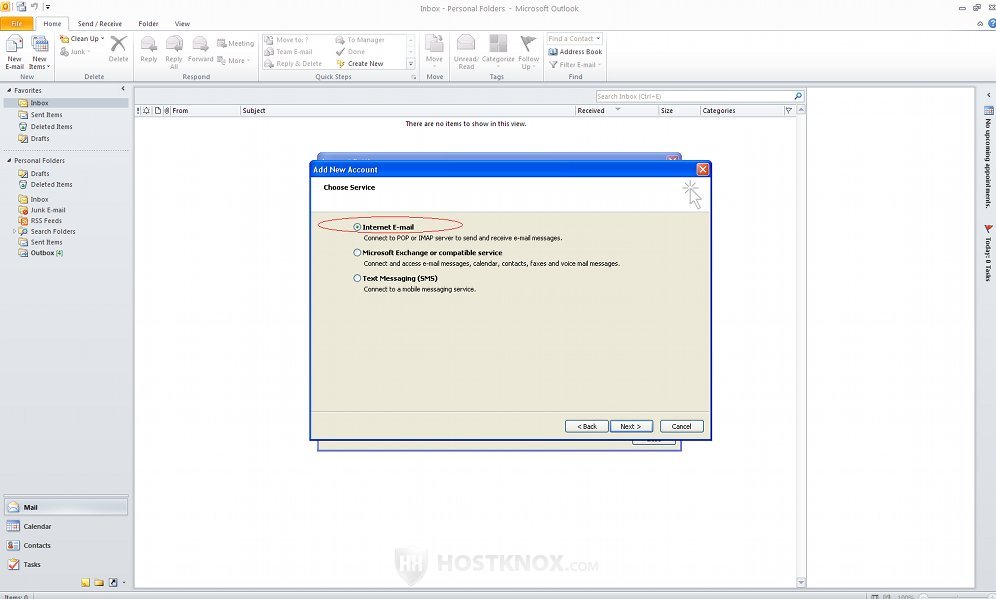
On the next window (Choose Service) the Internet E-mail button is marked by default. Leave it like this and click on Next:
On the next window (Internet E-mail Settings) from the Account Type drop-down menu select either IMAP or POP3. The most significant difference between them is that with IMAP (Internet Message Access Protocol) you can read and manage your messages directly on the server which means that you can do it from different locations, while with POP (Post Office Protocol) messages have to be downloaded on your local computer before you can read them.
For both incoming and outgoing server you can use just your domain name (e.g. yourdomain.com), as long as it points to our servers, or the name or IP address of the HostKnox server hosting your account. However, if you want to be on the safe side and use encryption you have to use the name or IP address of the server. It's the same for both incoming and outgoing mail.
In the field for User Name be sure to type the full email address (e.g. username@yourdomain.com). You also have to type the password for the email account again. After that click on the button More Settings:
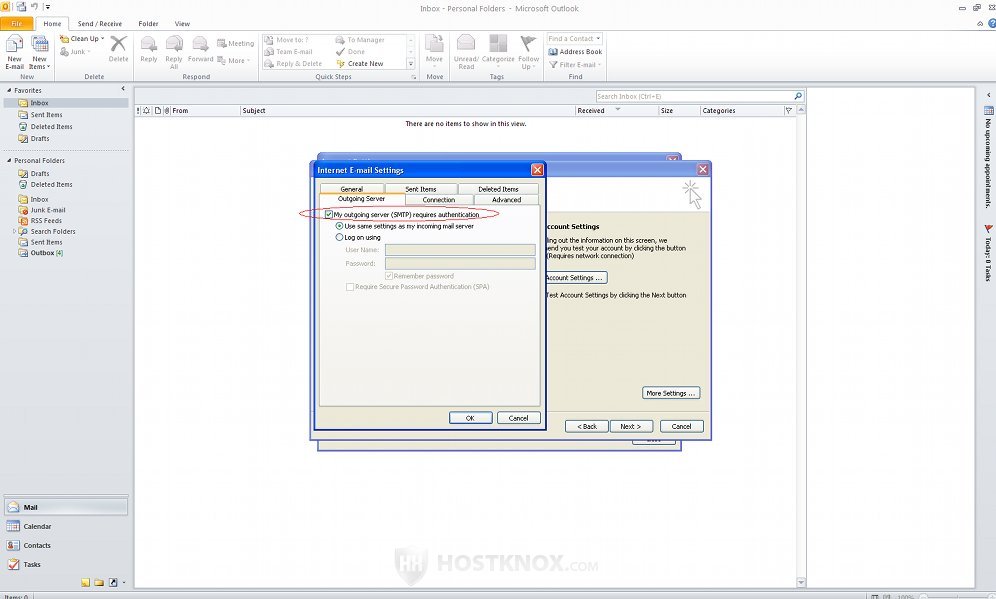
On the new window that opens click on the Outgoing Server tab and mark the checkbox for My outgoing server (SMTP) requires authentication. This is an anti-spam security measure; if you don't mark the checkbox you won't be able to use your email account.
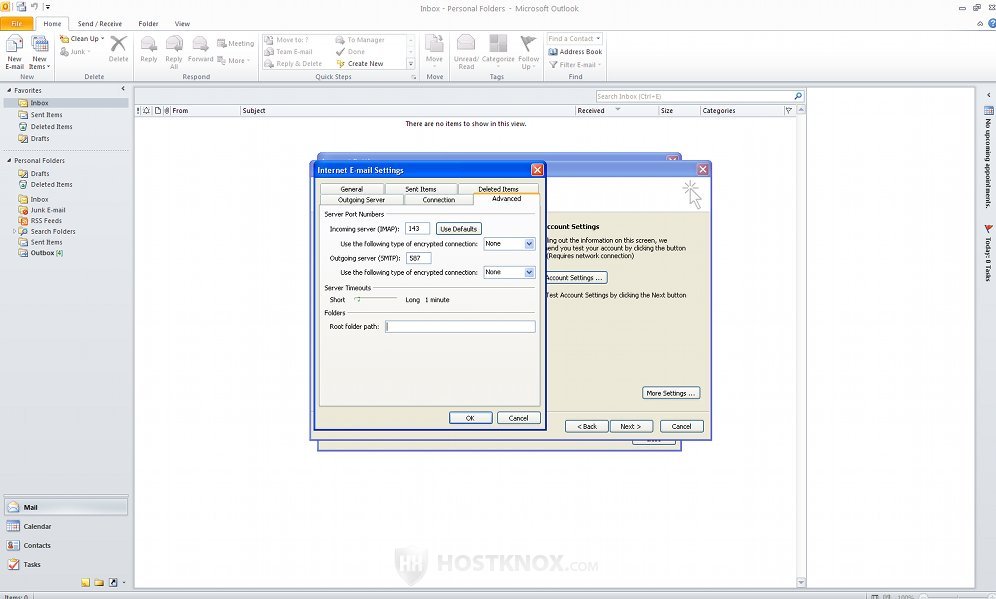
Then click on the Advanced tab. If you want to use encryption select SSL from the drop-down menus labeled Use the following type of encrypted connection, for both incoming and outgoing mail server. You also have to change the port numbers for the servers. The correct ones are: 465 for outgoing server with SSL enabled; 587 for outgoing without SSL; 993 for IMAP with SSL; 143 for IMAP without SSL; 995 for POP with SSL; 110 for POP without SSL.
From the drop-down menus you can actually choose between two encryption protocols: SSL and TLS. It doesn't matter whether you choose one or the other because in both cases the data transfer will be encrypted with TLS. However, if you select TLS from the drop-down menus you have to use the regular, non-encryption port numbers (587, 143, 110).
In our example we'll use IMAP for incoming server and we'll set both incoming and outgoing without SSL, so we use the port numbers 143 and 587 for incoming and outgoing mail server respectively:
After you have configured all the options click on OK, then back on the Add New Account window click on Next and then on Finish. Now you should be able to use Outlook 2010 to manage your email account.
You can also configure Outlook 2010 to connect to your accounts in web-based email services such as Yahoo, Gmail, and Hotmail. In this way you can manage all your email accounts with a single email client. Check out the tutorial on configuring email clients to connect to email accounts in Yahoo, Gmail and Hotmail to learn how to make this work.