Magento Category Display and Custom Design Settings Tutorial
How to configure and manage the category display and custom design settings in Magento
When you add a new product category to your Magento store you only have to configure its general settings in order for the category to be functional and shown on the frontend. For information on how to add a category and configure these settings read the Magento categories tutorial.
There are however some optional category settings that allow you to configure various display and custom design functions. In this tutorial we'll review these settings.
Display Settings
After you log in to the admin panel of your Magento select the Catalog menu from the top navigation bar and click on Manage Categories. In the left column of the page that is displayed click on the category/subcategory that you want to edit; this will display its settings on the right. At the top of the settings there are a few tabs, click on the Display Settings tab to manage the display settings:
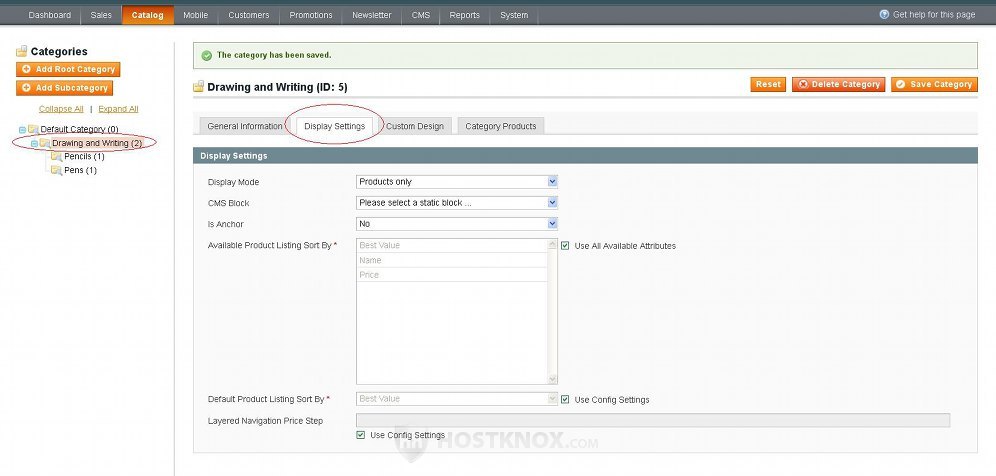
In our case we have selected to edit the display settings of our example Drawing and Writing category. The first display option is Display Mode. By default it's set to Products only; the other two options are Static block only and Static block and products. With the default Products only option when a customer opens the particular category on the frontend all the products in that category are listed. If you select Static block only, when the category is opened the products in it will not be listed, a CMS block will be shown instead. You can select that block from the CMS Block drop-down menu (it's right under the Display Mode drop-down menu). You can select from the CMS static blocks that you have previously created; you can create new ones and manage the existing ones by selecting the CMS menu in the top navigation bar of your admin panel and then clicking on Static Blocks. For more information on how to do it check out the Magento static blocks tutorial.
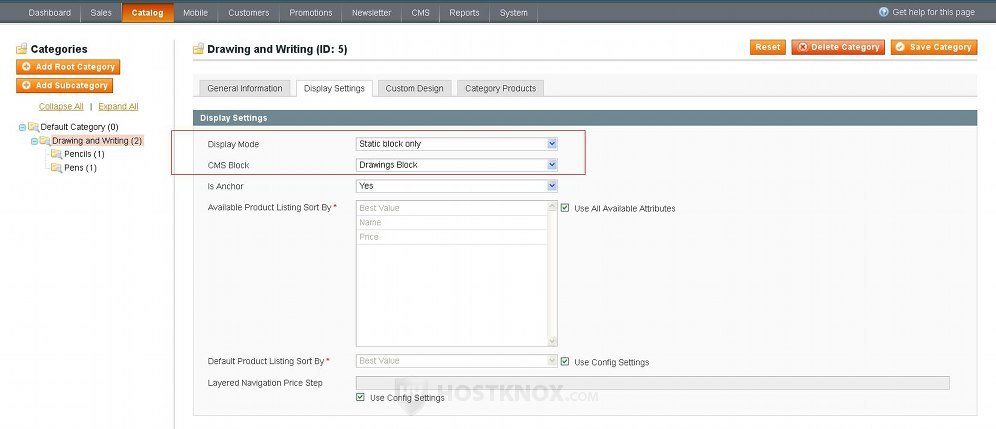
The last option that you can select from Display Mode is Static block and products. With this option when the category is opened on the frontend the chosen static block will be shown and under it will be listed the products in this category. You can use static blocks to display banners, links, text, etc. For instance, our Drawing and Writing example category has subcategories Pencils and Pens. We want when users open the parent category Drawing and Writing to see a couple of drawings and not a list of the products that are in the subcategories. If they want to see the products, they can do that by opening the subcategories. So for the parent category Drawing and Writing we'll select Static block only from the Display Mode drop-down menu and then from the CMS Block drop-down menu we'll select a static block that we have previously created:
Now if we refresh the category page on the frontend only the pictures of those drawings that we've included in the static block will be displayed. No products will be shown:
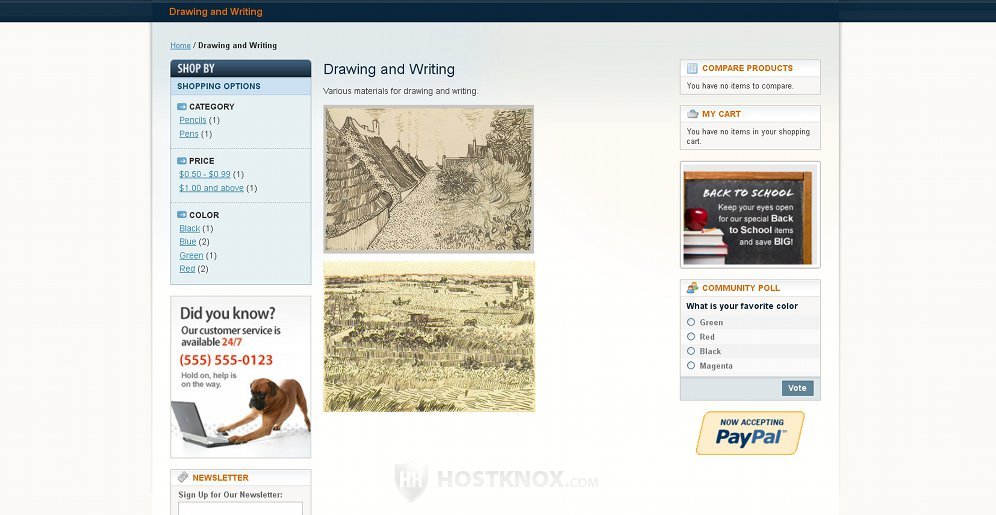
The products in the subcategories can be viewed by using the links in the Layered Navigation menu, by using the links in the top navigation menu or by using directly the URL address of the particular subcategory. By editing the static block we can also make the pictures links to any page on the site (e.g. links to subcategories of the category).
The second display option, as we already said, is CMS Block. We explained its function.
The third option shown by the Display Settings tab is Is Anchor:
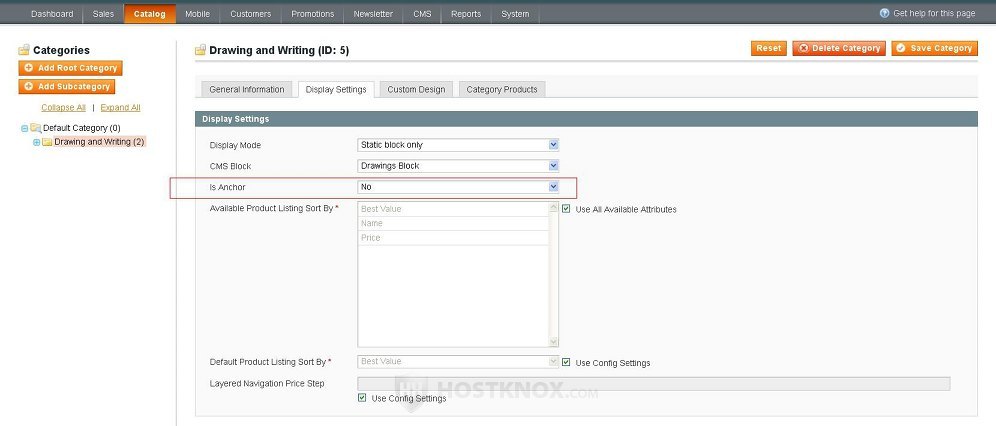
By default, it's set to No. This option has to do with Layered Navigation. Layered Navigation is used for improving the navigation in the categories that you have created; it makes it easier for customers to view your products based on various criteria/attributes. If the Is Anchor option is set to No, when a customer opens the particular category the Layered Navigation displays links to the subcategories within the category. If you set the anchor to Yes, various attributes of the products that are within the category and subcategories will be displayed by the Layered Navigation block (e.g. color, size). Not all attributes will be displayed, only those that are configured to be filterable and whose input type is set to be a drop-down menu. For more information on layered navigation you can check out the Magento layered navigation tutorial.
The next two options are Available Product Listing Sort By and Default Product Listing Sort By:
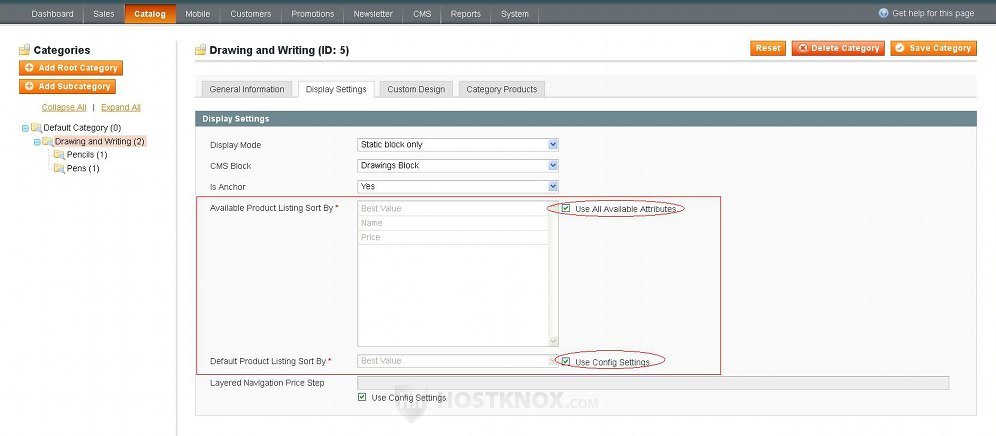
If you want to limit the number of the available product listing options, unmark the checkbox for Use All Available Attributes and highlight the attributes that you want to be available. Keep in mind that the default listing option has to be one of those attributes. If it's not you can change it by unmarking the checkbox for Use Config Settings and choosing the attribute from the drop-down menu for Default Product Listing Sort By; it has to be an attribute that you have made available from the option above.
The last option on the Display Settings tab page is Layered Navigation Price Step. The global configuration price step is used by default; the global option is configured to set the price steps automatically based on the prices of the products in the category. You can change the price step for the particular category to whatever you want. Just unmark the checkbox for Use Config Settings that's under the text field and in the text field type the desired number; for example, we've made the price step 0.50 dollars:

In this way when a customer opens the category the Layered Navigation will show price steps, for example, from 0.10 to 0.49 dollars, from 0.50 to 0.99 dollars, etc. When the customer clicks on one of these steps all products whose price falls within that step will be shown. The steps that are shown also depend on the prices of your products, of course. Using our example with the 0.5-dollar step, if the cheapest product in the category is 0.5 dollars, there won't be a price step for up to 0.49 dollars.
Custom Design Settings
Each category that you create also has some custom design options. You can use them to change the layout and theme of the category. To view and change these settings go to Catalog menu>Manage Categories, select the category on the left and then click on the Custom Design tab:
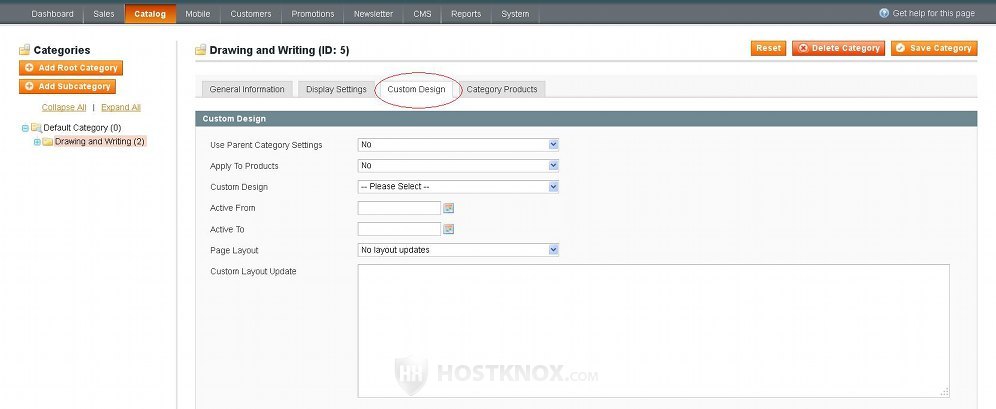
Let's review the settings in more details:
- Use Parent Category Settings-from the drop-down menu of this option you can select Yes and No; it's set to No by default. If you're creating/editing a subcategory and you want the settings of the parent category to apply to this subcategory, just select Yes and click on Save Category. This, of course, has any meaning if the parent category is configured with settings different than the default design settings. Otherwise, leave it to No if you want to be able to change the rest of the settings and give the category its own distinct look.
- Apply To Products-this option is set to No by default. This means that the design and layout that you choose for the category you're editing will apply only to the category pages that list the products in the category; the pages displaying each product and its details will not be affected by the design and layout changes. In case you want those changes to apply to the product details pages, just set the drop-down menu to Yes.
- Custom Design-this option let's you choose the theme/design for the category. Use the drop-down menu to select the theme from the ones that you have installed. This lets you choose a theme other than the default global theme of the store. For more information on themes check out our Magento themes tutorial and our Magento themes switch tutorial.
- Active From and Active To-these two options can be used to select a period for which the design changes will apply. Use the calendar buttons next to the fields to select the date. The changes will be applied automatically according to the specified dates. If you don't set any period, the changes will apply immediately and they will last for as long as you don't disable them or you don't make any further changes.
- Page Layout-with this drop-down menu you can make layout changes. There are several options: empty, 1 column, 2 columns with left bar, 2 columns with right bar, 3 columns. You can use them to control what's displayed on the page. With Empty only the title and the products will be shown on the page (no side blocks, logo, search bar, top and footer links, etc.). 1 column layout will display the logo, search bar and top and footer links. 2 columns with left bar will add the blocks that are displayed in the left column by default (e.g. layered navigation, the "dog" banner, newsletter block), while 2 columns with right bar will show everything that's displayed with the 1 column layout plus those blocks that by default are shown in the right column (e.g. compare products, my cart, "back to school" banner, etc.). 3 columns will show everything displayed by the 1 column layout plus the blocks in the left and right bars. With the Page Layout option you also have to take into account the layout of the particular theme.
- Custom Layout Update-this is for inserting custom code.
Category Products Tab
The last category tab is Category Products:
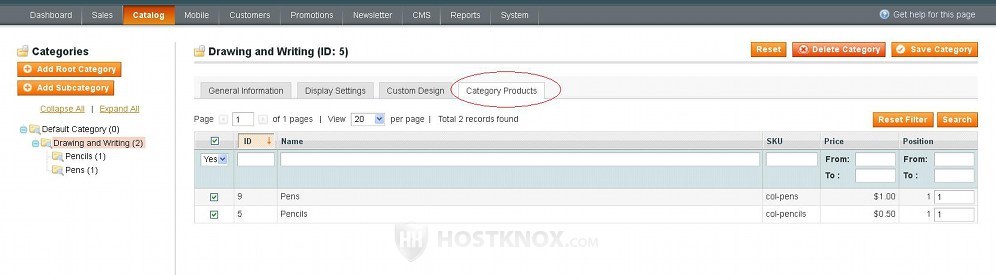
It lists the products that you have added to the category.