Magento Customer Configuration Tutorial
How to manage the customer configuration settings in Magento
In this tutorial we'll examine the system customer settings. These are the settings that apply to all customer accounts and to the customer registration process, and in some cases to the checkout process. We'll describe the function of each of these settings. For basic information on managing customers and customer groups check out the tutorial on managing customers in Magento.
To access the customer configuration options, log in to the admin panel of your Magento and go to System menu>Configuration>Customer Configuration button in the Customers section on the left. This will display several panels on the right:

These panels are:
- Account Sharing Options
- Online Customers Options
- Create New Account Options
- Password Options
- Name and Address Options
- Login Options
- Address Templates
- CAPTCHA
Let's go through the options contained in each panel. The Account Sharing Options panel has an option about the level at which customer accounts are shared:
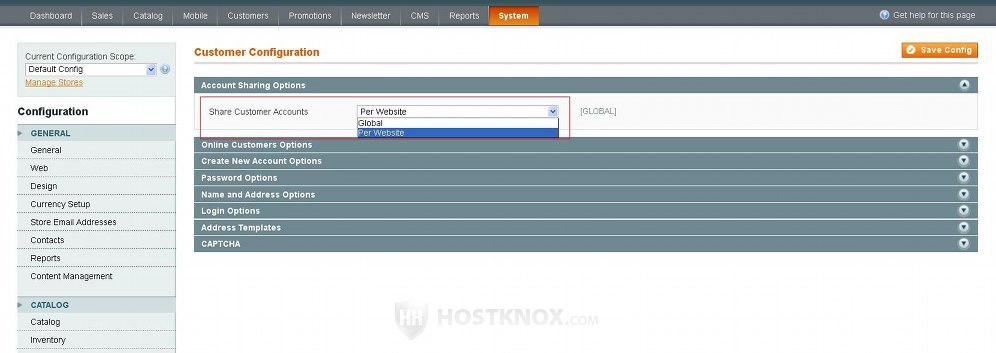
By default the drop-down menu for Share Customer Accounts is set to Per Website which means that once a customer creates an account on a website managed by this Magento installation they can use that account to log in only on that particular website; the account is shared across all store views of the website. You can also set the drop-down menu to Global which is useful if you have created a multistore with more than one website. In this case if a customer creates an account on one of the websites they will be able to log in with that account on the other websites in the multistore. If you have a multistore and you leave the Share Customer Accounts drop-down menu to Per Website, the customer will be able to log in and use an account only on the website for which it was created.
The Online Customers Options panel contains the option Online Minutes Interval:
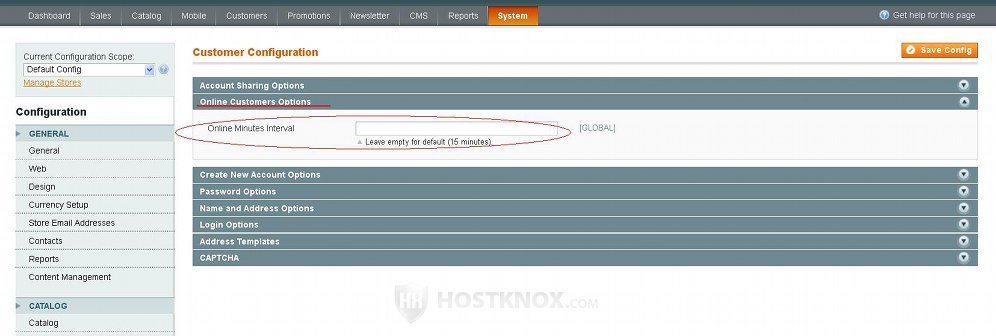
The field for this option is empty by default which means that it's set to the default value of fifteen minutes. This is the interval used for refreshing the list of the online customers. So if you want the number of online customers to be refreshed every thirty minutes, just put 30 in the field for Online Minutes Interval. You can check the list with the customers currently online from the admin panel; go to Customers menu>Online Customers.
The panel Create New Account Options has various useful settings:
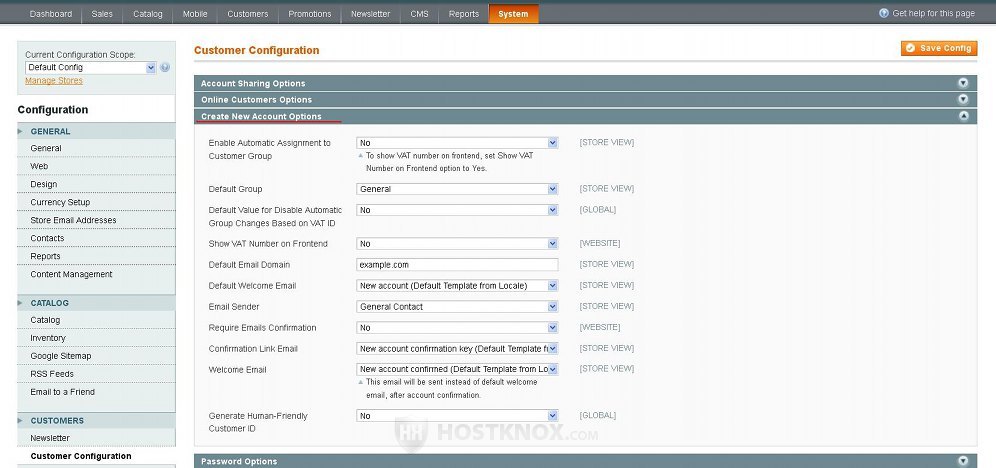
- Enable Automatic Assignment to Customer Group - this option is set to No by default. You can set it to Yes if you want to use the VAT ID Validation functionality. VAT ID Validation applies only to business-to-business transactions where both the seller and the customer are businesses registered in any of the countries in the European Union.
If you set this drop-down menu to Yes, a few more drop-down menus related to VAT ID validation will appear; these include options for selecting the address (billing or shipping) on which the tax calculation should be based, a few menus for assigning customer groups based on the result of the VAT ID validation (domestic valid, intra-union valid, invalid, etc.), and a menu for selecting whether a validation should be performed for each order.
Setting up the VAT ID Validation functionality is a lengthy process which we'll not describe in this tutorial; it involves creating the necessary customer groups, configuring the above mentioned options, and creating tax rates and rules. - Default Group - from this drop-down menu you can select the default group to which customers will be assigned when they create an account in your shop. Magento comes preconfigured with a few customer groups. By default, this drop-down menu is set to the General group. You can create and edit groups from Customers menu>Customer Groups; for more information see the tutorial on customers and customer groups in Magento.
- Default Value for Disable Automatic Group Changes Based on VAT ID - like the first option this setting is related to the VAT ID Validation functionality.
- Show VAT Number on Frontend - this is set to No by default. This setting is also related to the VAT ID Validation functionality.
- Default Email Domain - it's set to example.com by default. If you want to you can change it with your domain name. This setting, however, doesn't really affect the account registration process. And in general this will not really have any effect on the functions of your Magento.
- Default Welcome Email - from this option you can select the email template that is used when sending a welcome email to newly registered customers. Magento comes with some preconfigured email templates. They are sent automatically by your Magento in various occasions (e.g. customer registration, password recovery, order confirmation, etc.).
There's a preconfigured default template for each of these occasions. From System menu>Transactional Emails you can create new templates. You can do that by editing an existing template or by creating a new template from scratch.
Note that in order to create a new template from scratch you need to have some knowledge of HTML. While, for example, if you only need to translate a template which you want to use for a store view with another language, you can just translate only the text of an existing template without editing the code; so for this task you don't need to know anything about HTML. You can use translated templates and assign them to a store view corresponding to the language. Just select the store view from the Current Configuration Scope drop-down menu in the top left corner of System>Configuration and select the template from the Default Welcome Email drop-down menu. - Email Sender - from this drop-down menu you can set what will appear in the From field of the welcome email sent to newly registered customers. Magento comes with a few store email addresses: one for the general contact, one for the sales representative, a customer support address and a couple of custom ones.
By default, the addresses for these contacts are set to respectively owner@example.com, sales@example.com, support@example.com, etc. You can change each of these from System menu>Configuration>Store Email Addresses button in the General section on the left.
By default, the Email Sender drop-down menu is set to General Contact which means that if you haven't edited the general contact email address from System>Configuration>Store Email Address, the address that the customer will see in the From field of the welcome email message will be owner@example.com. And, of course, if the customer tries to reply/send a message to that address it will not be received since there's no such address.
These email addresses, however, will not affect the sending of transactional emails from your Magento installation since that's managed by the email server responsible for your Magento hosting account and has nothing to do with the email address that appears in the From field of these transactional email messages. - Require Emails Confirmation - this is set to No by default. This means that the email address provided by the customer during the account registration process is not verified. It can be a real or a fake email address, and it may or may not belong to the customer. If you want to verify the email address, set this drop-down menu to Yes. After you do that those who register a new account we'll receive an email message with a confirmation link. The user has to click on that link to activate the account.
- Confirmation Link Email - similarly to the Default Welcome Email option in this same panel (check the information above), from this drop-down menu you can change the email template. This, however, as the name suggests is the template used for email verification. It applies only if you have enabled email verification from the Require Emails Confirmation drop-down menu.
- Welcome Email - this is also an option from which you can change the email template for the particular email transaction. This welcome email, however, is only sent when email confirmation is enabled. In this case once a customer registers an account, they will first receive an email with a confirmation link. When they click on that link the account will be activated and a welcome email message will be sent. You can change the email template for this welcome message from the Welcome Email drop-down menu. This is what makes it different from the Default Welcome Email message that's sent only to newly registered customers when email confirmation is disabled.
- Generate Human-Friendly Customer ID - this is set to No by default. You can enable it by setting this drop-down menu to Yes.
The next panel is Password Options:
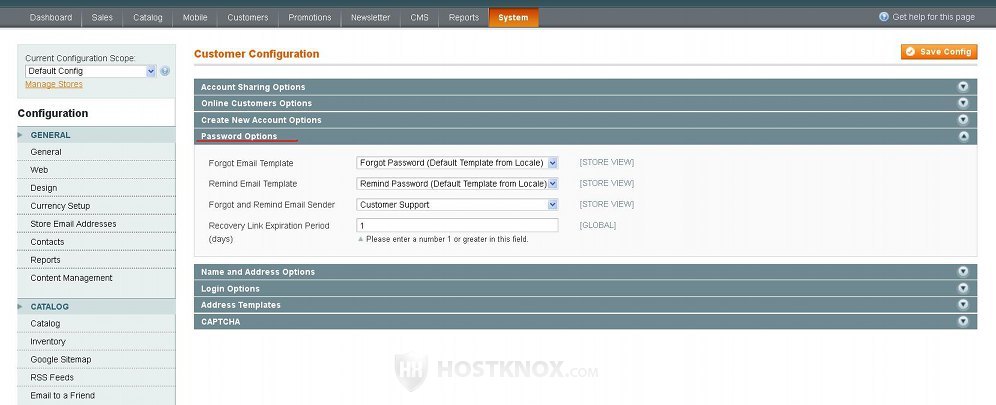
It contains a few settings:
- Forgot Email Template - this has the same function as the Default Welcome Email option in the panel Create New Account Options, only this one is used to change the template of the email message sent when the customer wants to reset their password because they have forgotten it. On the login page on the frontend there's a Forgot Your Password link. When the customer clicks on it they have to type the email associated with their account in the field that's provided on the following page, and Magento will send to that email address a message with a recovery link. When the customer clicks on that link, they will be redirected to a page on the frontend that has two fields for typing the new password. You can add and edit email templates from admin panel>System menu>Transactional Emails.
Otherwise, when it comes to resetting passwords this can also be done manually from the admin panel (Customers menu>Manage Customers). - Remind Email Template - like the previous one this option is also for changing the template for the particular email transaction. In this case it's the remind password function.
- Forgot and Remind Email Sender - you can use this drop-down menu to choose the email address that will be displayed in the From field of the forgot and remind password messages sent to customers. By default, it's set to Customer Support which means that if you haven't edited the email address for customer support it will be support@example.com. You can change this email address, as well as the other store emails, from System menu>Configuration>Store Email Addresses button in the General section on the left.
- Recovery Link Expiration Period - this option specifies for how many days the recovery link in an email message for resetting a password will be active. It's set to 1 by default which means that if the link is not used within a day, the customer will have to request another change of the password.
You can use the Name and Address Options panel to include more fields to the registration form, as well as to the accounts of customers once they are registered:
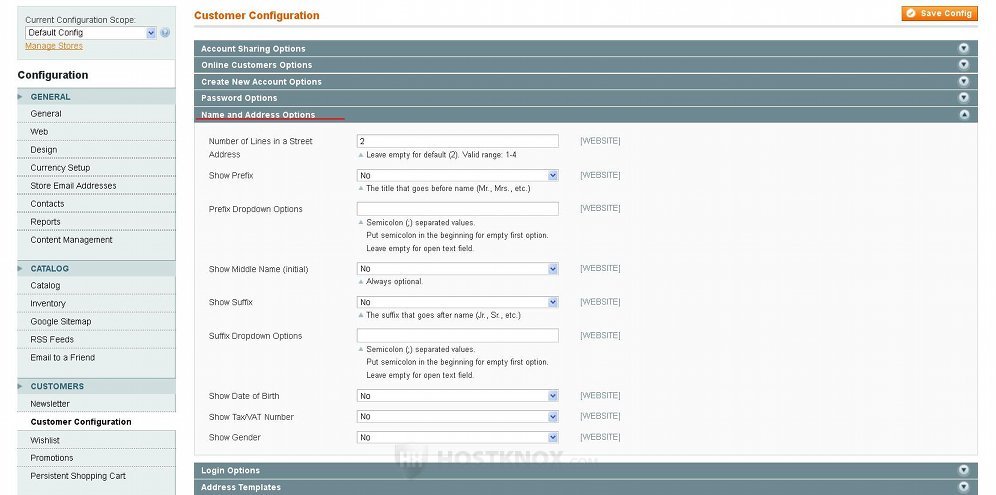
The options in this panel are:
- Number of Lines in a Street Address - as the name suggests from this setting you can specify the number of lines provided for the street address of the customer. It's set to 2 by default. This setting affects the places where an address is displayed both on the frontend (e.g. customer accounts, checkout process) and on the backend (when editing customer accounts, placing orders, etc.).
If you want to change the number of lines, just put the corresponding number in the field. The allowed range of lines is between 1 and 4. If you put a higher number than 4, the change will be saved but still four lines will be displayed for the street address on the frontend. The allowed range will not affected the backend, so if you put 6 in the field, six lines will be shown wherever a street address setting exist on the backend, but on the frontend only four lines will be available. - Show Prefix - this is set to No by default. With this option you can include a field or a drop-down menu from which the customer can select values such as Mr., Mrs., Ms., Dr., etc. Depending on whether you want to include this setting on the registration form as an optional or a required field you can set the Show Prefix drop-down to Optional or Required. In addition to the registration form the option will also be included on the frontend in the Account Information section of the accounts of existing customers; whether you enable it or not this option is included as part of the customer account settings in the admin panel (Customers menu>Manage Customers) anyway.
- Prefix Dropdown Options - this setting is applied on the frontend only if you have enabled the Show Prefix option. If you leave it empty only a text field will be displayed on the frontend. Customers can use that field to type a prefix. If you want the prefix option to be included as a drop-down menu with preconfigured values, type these values in the field for Prefix Dropdown Options; separate the values with a semicolon (e.g. Mr.;Mrs.;Ms.).
- Show Middle Name (Initial) - this option is set to No by default. It can be added to the registration form and customer accounts on the frontend only as an optional field. Just set the drop-down menu to Yes.
- Show Suffix - this is disabled by default. You can add a suffix (e.g. Jr., Sr.) as an optional or a required field by setting the Show Suffix drop-down menu to respectively Optional or Required. The option will be included on the registration form and in the Account Information section of customer accounts on the frontend.
- Suffix Dropdown Options - this is used only if you have enabled the Show Suffix option. You can use it to determine whether the suffix option should be just an empty text field in which customers can type a value, or whether it should be a drop-down menu from which customers can select from preconfigured values. If you leave the field for Suffix Dropdown Options empty, the suffix option will just be a text field. If you want it to be a drop-down menu, type the values in the field and separate them with semicolons (e.g. Jr.;Sr.).
- Show Date of Birth - this option is also disabled by default. You can include it as optional or required on the registration form and in customer accounts by selecting Optional or Required.
- Show Tax/VAT Number - This is disabled by default. It's connected with the VAT ID Validation function. For more information check out the description for the option Enable Automatic Assignment to Customer Group. When the Show Tax/VAT Number option is set to Optional or Required the field will be displayed on the frontend even if the Show VAT Number on Frontend option in the panel Create New Account Options is set to No (it's displayed on the registration form, on the checkout page and in customer accounts). When both are enabled there are two fields for VAT number on the checkout page. When only the Show VAT Number on Frontend option is enabled, a VAT field is displayed on the checkout page, but not on the registration page and in customer accounts.
- Show Gender - this is set to No by default. If you want to add on the registration form and in the Account Information section of customer accounts a drop-down menu from which customers can select their gender, enable this option by setting it to Optional or Required depending on whether you want it to be a required setting.
Although it's not mentioned for every of the above options managed from the Name and Address Options panel, when you enable one of these options it's shown on every page where there's personal information. On the frontend these are the registration page, the Account Information section of the accounts of registered customers and the checkout page.
When it comes to the backend even if these options are not enabled, a field for each is present on the edit page for each customer account (Customers menu>Manage Customers>Edit button of the particular account>Account Information button on the left), on the page for adding a customer (Customers menu>Manage Customers>Add New Customer button), and on the page for placing orders (Sales menu>Orders>Create New Order button).
These fields are optional by default, but if you make them required from the options in the Name and Address Options panel, they will be required when adding/editing a customer account and placing orders from the backend too.
The next panel is Login Options:
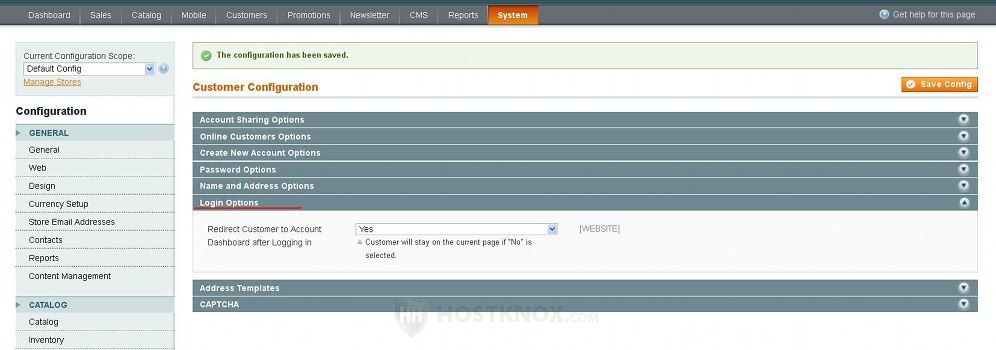
There's a single option associated with this panel:
- Redirect Customer to Account Dashboard after Logging in-it's enabled by default. This means that if, for example, a user who already has an account, but is not currently logged in, is viewing at the moment some page on your site, then by logging in the customer will be automatically redirected to the dashboard of their account (the page from which they can view and edit their account options). If you disable this redirect, the customer will not be redirected to the dashboard but will be left on the page that they were viewing before logging in.
From the Address Templates panel you can edit the address templates:
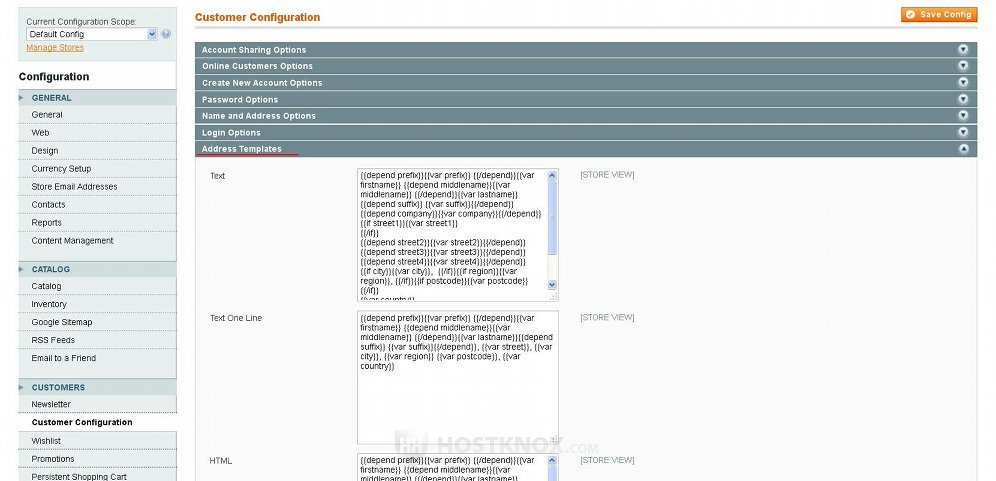
The templates consist of variables. It's not advisable to edit them unless you know exactly what you're doing.
The last panel is CAPTCHA:
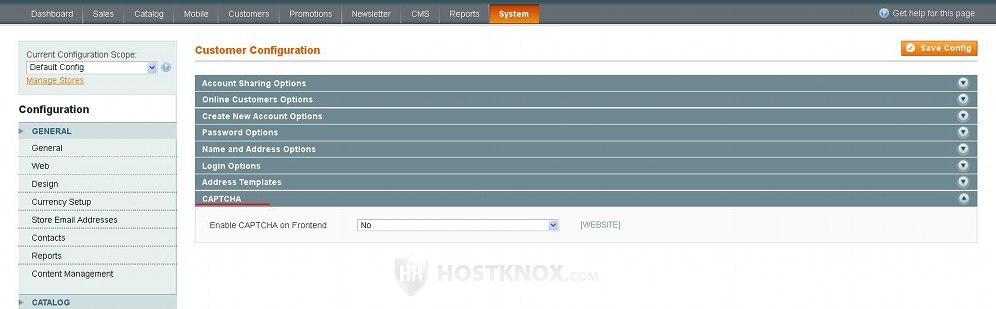
It contains the option Enable CAPTCHA on Frontend which is disabled by default. If you want to enable visual tasks to help you stop bots, you can enable CAPTCHA by setting this drop-down menu to Yes. Once you do that several other options will appear:
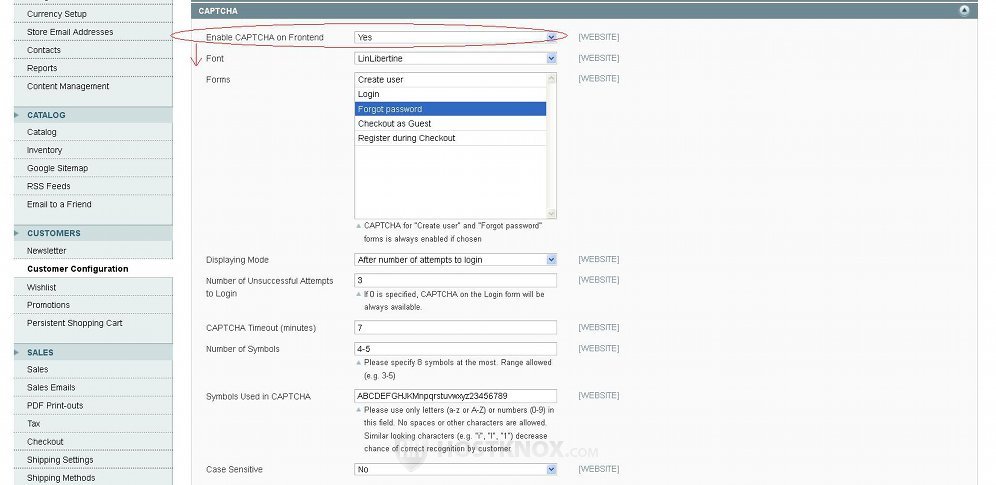
Let's go over these additional settings:
- Font - this drop-down menu is for changing the font of the letters and numbers displayed by the CAPTCHA task, but by default there's only one font available.
- Forms - you can use this option to choose on which forms on the frontend should the CAPTCHA task be displayed. There are a few forms listed (e.g. Create user, Login, Forgot password, etc.). By default, only the form for requesting a new password is selected.
The pages on which CAPTCHA can be included are the Create user page (that's the registration form for new customers), the Login form (by default, the CAPTCHA task is displayed only after three unsuccessful login attempts; we'll come to this in while), the Forgot password form (in addition to typing the email associated with the account the customer also has to solve the CAPTCHA task), the Checkout as Guest and Register during Checkout forms.
As you know guest checkout is enabled by default in Magento, so if a guest proceeds to buy a product, the CAPTCHA task will be displayed at the Billing Information step of the checkout; this is also the step at which CAPTCHA is displayed when it's enabled for registering an account during the checkout. You can select one, all or some of the forms. To select more than one and to unmark selected values press and hold the Ctrl button on your keyboard and click with the left mouse button on the form. - Displaying Mode - if you have selected to include CAPTCHA on the Login form, from this option you can select whether the CAPTCHA task should always be included on the login page or whether it should be enabled only after a certain number of unsuccessful login attempts. By default, CAPTCHA is displayed after a number of failed attempts to login. If you set the Displaying Mode drop-down menu to Always, CAPTCHA will be displayed every time a customer wants to log in.
- Number of Unsuccessful Attempts to Login - this is set to 3. If you have left the Display Mode drop-down menu to the default value After number of attempts to login, then CAPTCHA will be displayed only after three unsuccessful login attempts. You can change the number for the unsuccessful login attempts.
- CAPTCHA Timeout (minutes) - this is set to 7 by default. This option specifies the time for which a particular CAPTCHA task has to be solved. For example, you have enabled CAPTCHA for the login form and a customer opens the login page on the frontend but doesn't login or change the page, then after more than 7 minutes the customer tries to login typing the correct numbers and letters displayed by the CAPTCHA but receives an error because the particular CAPTCHA task is no longer valid. So in this case the customer just has to solve the next CAPTCHA that's displayed after the page is refreshed.
- Number of Symbols - the default is 4-5 which means that CAPTCHA displays four or five symbols. You can set this option to just one number so that each time only a precise number of symbols are displayed, or you can set a range of symbols in which case CAPTCHA will randomly display a number of symbols that is within the range.
- Symbols Used in CAPTCHA - this option specifies the symbols that are allowed to be used in a CAPTCHA task. You can add or remove symbols but only upper and lowercase letters are allowed, as well as numbers.
- Case Sensitive - by default CAPTCHA is case insensitive. This means that a CAPTCHA task can contain upper and lower case letters but it doesn't matter whether the customer types upper or lower case letters. For example, if the CAPTCHA is R5hQ2 and the customer types r5hq2, it will be accepted as a valid match. You can set the Case Sensitive drop-down menu to Yes in which case CAPTCHA will be case sensitive and the customer can't use, for example, a lowercase letter instead of an uppercase one. If you enable this option, a warning message that the CAPTCHA is case sensitive will automatically be added under CAPTCHA tasks on the frontend.
If you make changes to any of the customer configuration settings don't forget to click on the Save Config button in the upper right corner of the page.