Magento Orders Tutorial
How to manage orders in Magento
In this tutorial we'll describe how to view and manage your orders in Magento. This, of course, is done from the admin panel. So after you log in go to Sales menu>Orders. On the page that opens you'll see a table with all the placed orders regardless of their status (e.g. pending, complete) and whether they have been placed by registered customers or guests.

To view, process or edit an order click on its View button or directly on its row in the table. There are also several other things that you can do on this page. You can create an order manually by clicking on the Create New Order button in the upper right corner and configure the settings that are displayed.
You can perform various other actions by marking the checkbox of one or more orders, selecting the action from the Actions drop-down menu that's in the top right corner of the table and clicking on the Submit button next to it. In this way you can cancel, hold or unhold orders, you can print invoices, packing slips and credit memos of one or more orders. With the Export option that's above the table you can also export the order information of all orders into a CSV file which you can view with an application such as Microsoft Excel or OpenOffice Spreadsheet.
When you click on the View button or on the row of an order in the table you'll see all the details connected with that order on the page that opens. There are several blocks that show different information related to the order. One of the top blocks displays the order number, the date on which the order was placed, the order status, the website, store and store view from which the products were ordered and the IP address of the customer; the other one shows the name, email address and customer group of the customer:
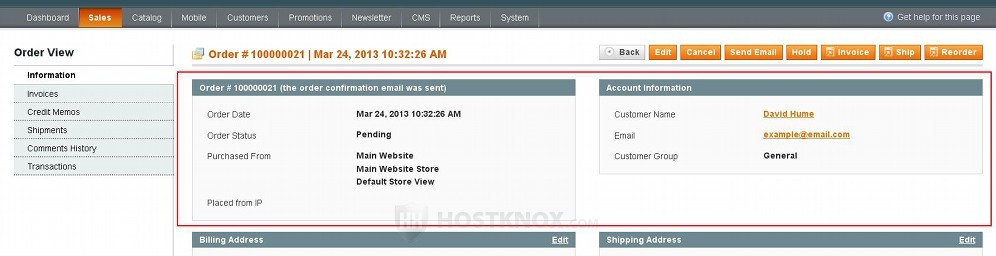
If you click on the name of the customer, this will automatically display a new browser tab with the account information of the customer (that can otherwise be accessed by going to Customers menu>Manage Customers).
The two blocks that are under the top ones display the billing and shipping address of the customer:
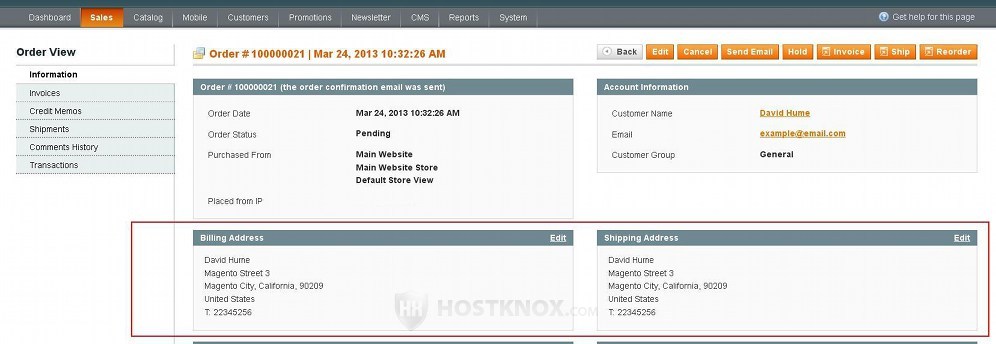
In the top right corner of each of the two blocks there's an Edit button with which, if necessary, you can manually edit the billing and shipping address.
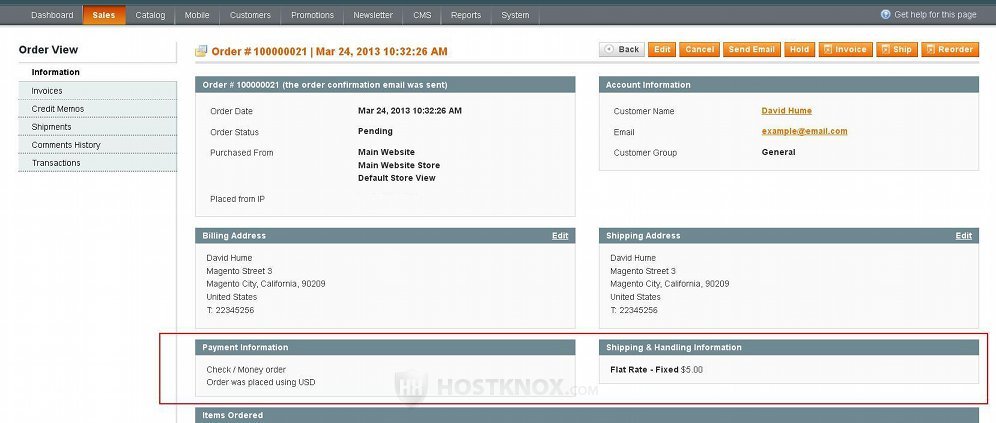
The next two panels are Payment Information and Shipping & Handling Information which show the payment method and currency and the shipping and handling charges respectively:
The block that's below the ones for the payment and shipping information displays the ordered products:
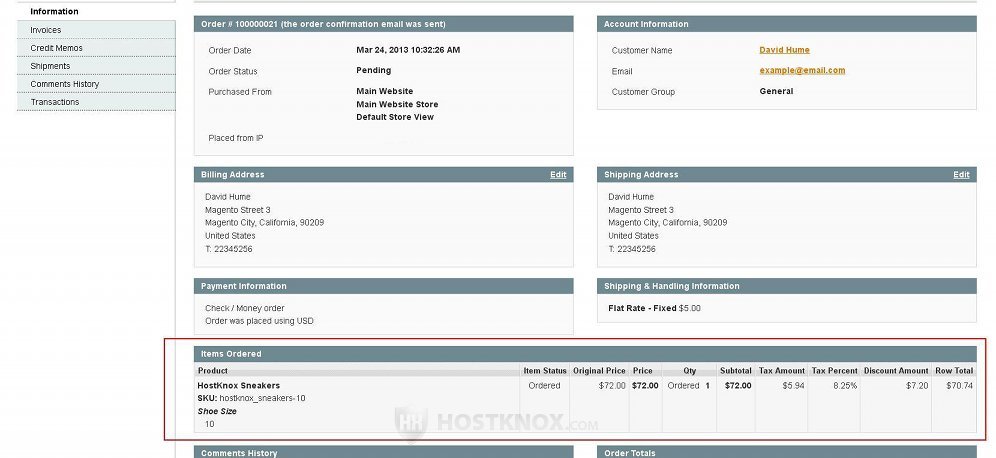
You can see the number of units ordered per product, the price, tax amount and percent and discount amount (if any) for each product.
The bottom two blocks are Comments History and Order Totals:
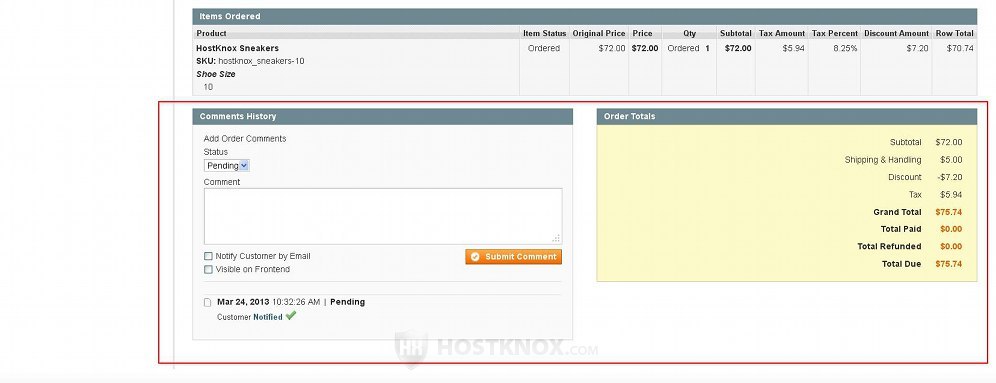
From the Comments History block you can see the current status of the order and you can submit any comment(s) related to the order. Just type the comment in the text area and click on the Submit Comment button. The comment will be displayed just below the text area. If you want the customer to be able to view the comment from their account settings on the frontend, then before you submit the comment mark the checkbox for Visible on Frontend. If you also want the comment to be emailed to the customer's email address, mark the checkbox for Notify Customer by Email.
In the Order Totals block you can view the amounts for the subtotal, grand total, shipping and handling charges, tax, discounts, etc.
In the top right corner of the order information page there are several buttons with which you can perform different things connected with the order:

For example, if you click on the Edit button, you can edit any aspect of the order (e.g. you can add/remove products, you can add a custom price to a product, apply discount coupons, change shipping and payment methods, etc.). If you want to delete this order completely, you just have to click on the Cancel button. If for some reason you want to temporarily stop the processing of this order, click on the Hold button. There are also buttons for generating an invoice and for marking that the order has been shipped.
Once an order is placed and you receive the payment you can generate an invoice by clicking on the Invoice button. On the page that opens just scroll down to the bottom and click on the Submit Invoice button:
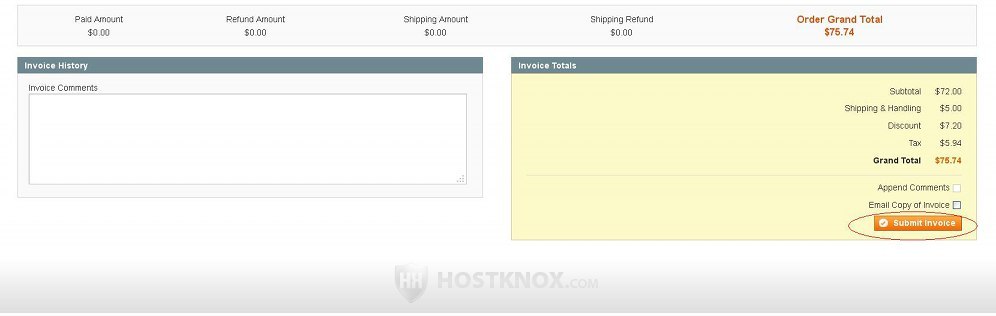
In case you want a copy of the invoice to be sent to the customer's email address mark the checkbox for Email Copy of Invoice before you submit the invoice. After that the status of the order will automatically change to Processing.
To continue processing the order, after you sent the actual products go to the order information page and click on the Ship button. On the page that opens click on the Submit Shipment button:
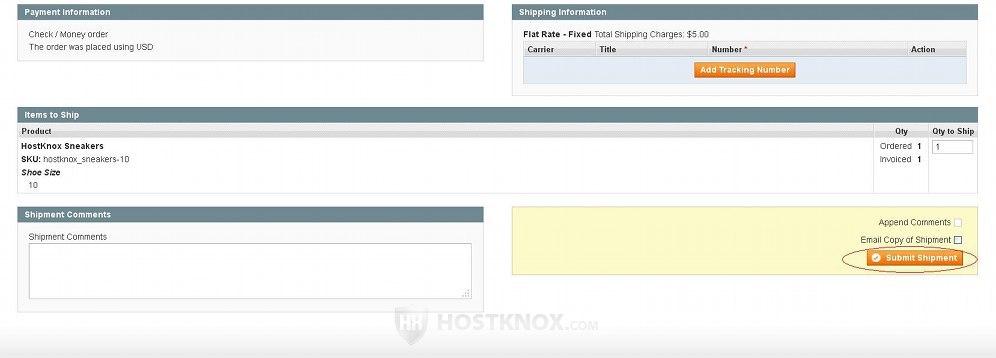
If you want the customer to be notified with an email, mark the checkbox for Email Copy of Shipment before you click on the button. Once that is done the status of the order will automatically change to Complete and everybody should be happy.
On the left side of the order information page in the admin panel there are a few other buttons:
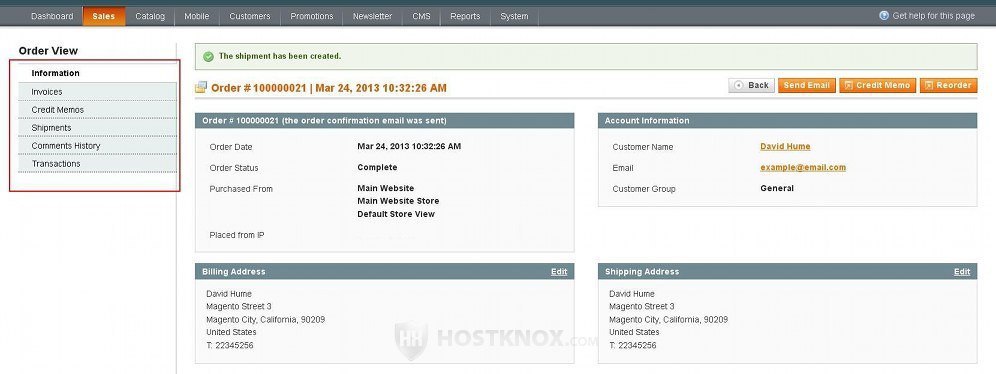
When you view an order the Information button is clicked by default. It displays the general order information that we discussed so far. There are some additional buttons with which you can view the invoice(s), credit memos, shipments, comments history and transactions (if any) associated with the order.
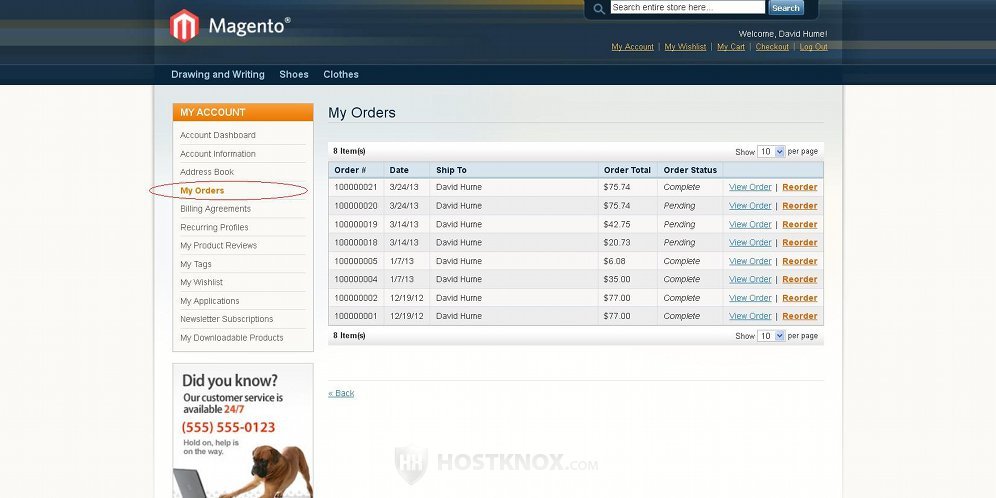
Registered customers can view their orders on the frontend (no matter of their current status) from their account settings:
Guests can also view their orders on the frontend of your site by using the Orders and Returns form. There's a link to it in the footer of the frontend:
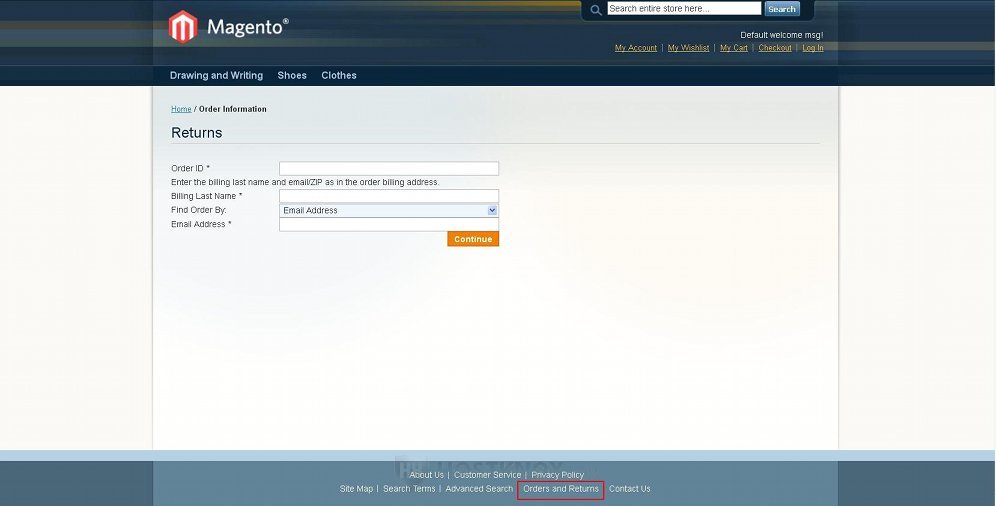
The customer needs to type in the respective fields the order ID, the billing name and the email address (or ZIP code) associated with the order.