Magento System Sales Settings Tutorial
How to configure and manage the system sales settings in Magento
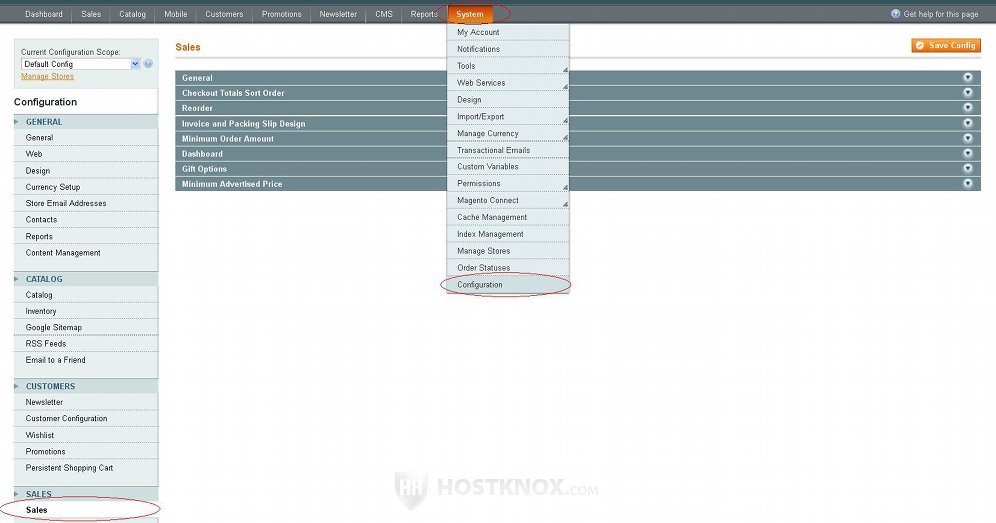
In this tutorial we'll go over the system configuration sales settings. To access and configure them log in to the admin panel of your Magento and go to System menu>Configuration>Sales button in the Sales section on the left. The panels with the settings will be displayed on the right:
The blocks with sales settings are:
- General
- Checkout Totals Sort Order
- Reorder
- Invoice and Packing Slip Design
- Minimum Order Amount
- Dashboard
- Gift Options
- Minimum Advertised Price
General
The General panel contains an option for hiding the IP address of the customer from being displayed in orders, invoices, etc.:
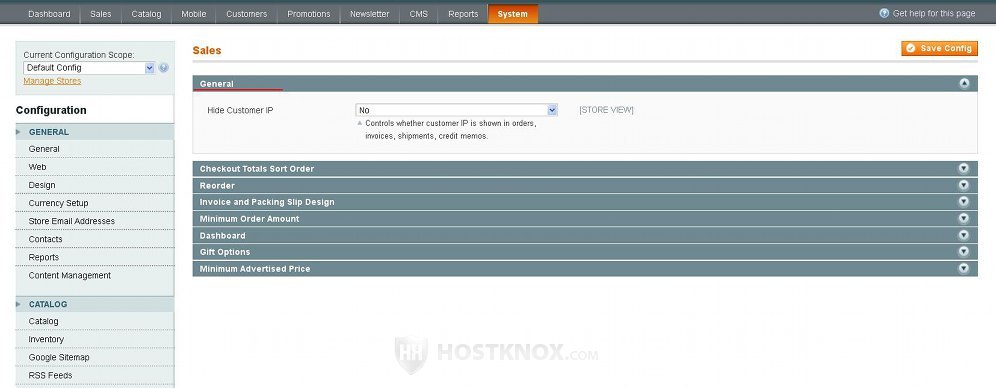
By default, the option Hide Customer IP is set to No which means that when you manage in the admin panel orders, invoices, shipments and credit memos the IP address of the customer will be displayed. Note, however, that even with this option disabled the invoices and shipment information that's sent to the email addresses of customers doesn't contain the IP address of the customer. If you don't want the IP address to be visible on the order, invoice, shipment, etc. information page in the admin panel, set this drop-down menu to Yes.
Checkout Totals Sort Order
You can use the options in the Checkout Totals Sort Order panel to change the order in which price totals are displayed:
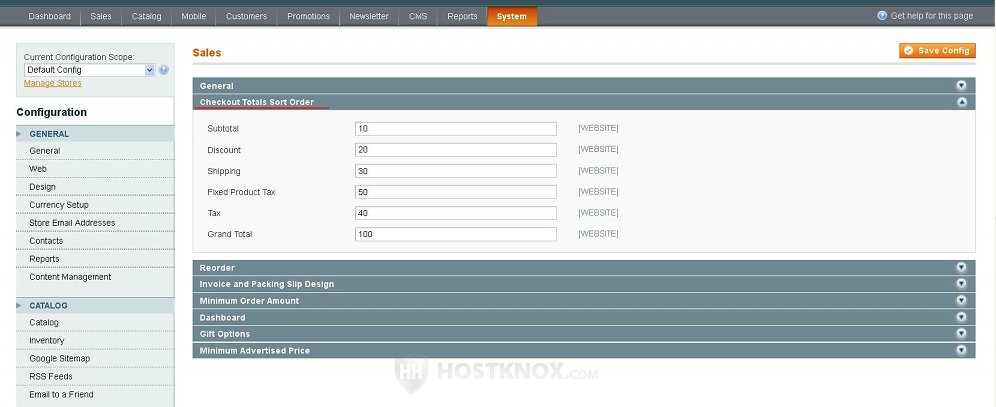
With the default settings, for example, the subtotal of an order is displayed first, followed by the discount amount (if any), shipping charges, etc., and the grand total is at the bottom. For each setting there's a number indicating where in the list should the item appear. Those with lower numbers are displayed above those with higher ones. For example, Subtotal is set to 10 and Discount is set to 20 which means that the subtotal is displayed above the discount. If you want to reorder the checkout totals, change the numbers to correspond to the order that you want.
Keep in mind that even if you set the number for the grand total to a lower number than some of the other elements, the grand total will still be displayed last.
The change in the order will affect the shopping cart page and the checkout page on the frontend. The order of the totals will not be changed in the order information in the admin panel or in the order information and invoices sent to the email addresses of customers.
Reorder
In the Reorder panel there's an option with which you can specify whether a reorder button should be available in the customer account settings on the frontend with which customers can quickly order products that they have already ordered:
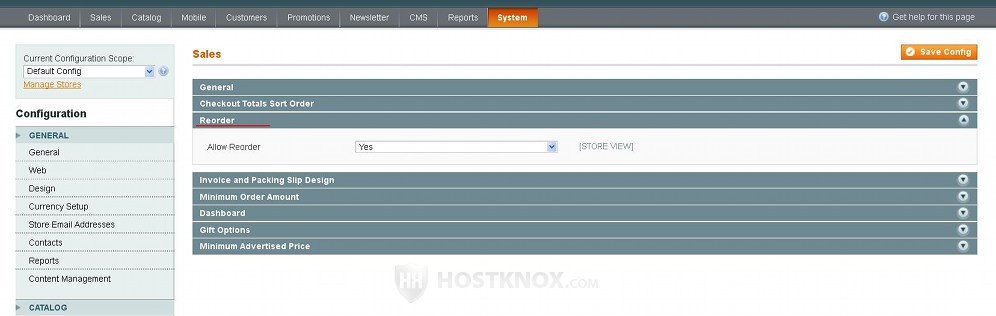
By default, the Allow Reorder option is set to Yes which means that in the My Orders section of the frontend customer account settings there will be a Reorder button for each of the placed orders:
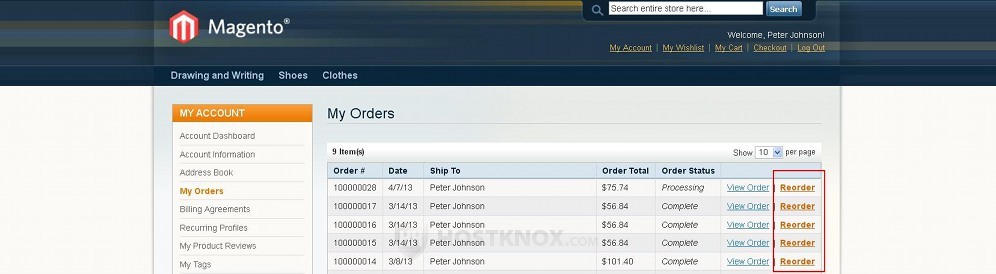
If you set the Allow Reorder drop-down menu to No this button will be removed which, of course, doesn't mean that customers can't order products that they have already ordered; they just have to do it from the catalog.
Invoice and Packing Slip Design
Using the settings in the panel Invoice and Packing Slip Design you can change the logo that appears on PDF print-outs:
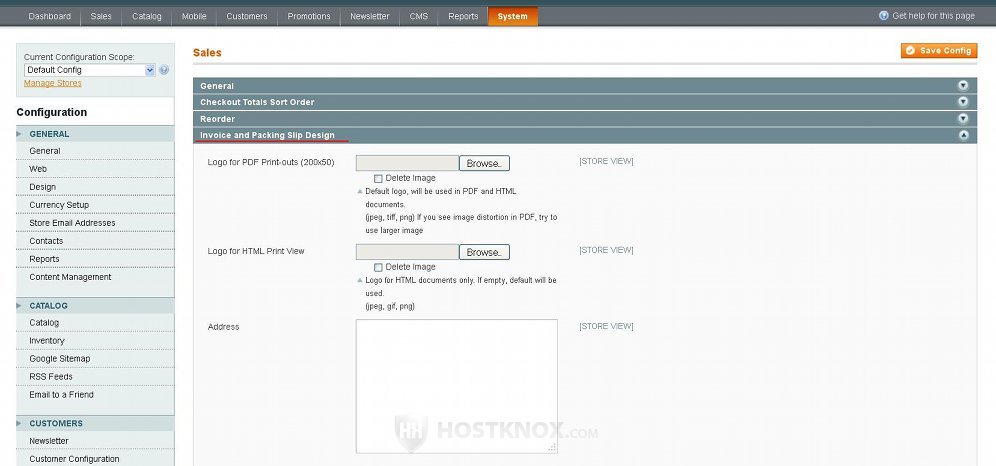
Use the Browse button to locate the image on your local computer and click on the Save Config button to upload and save it on your hosting account. The logo will be displayed on all PDF print-outs (e.g. invoices, packing slips, credit memos).
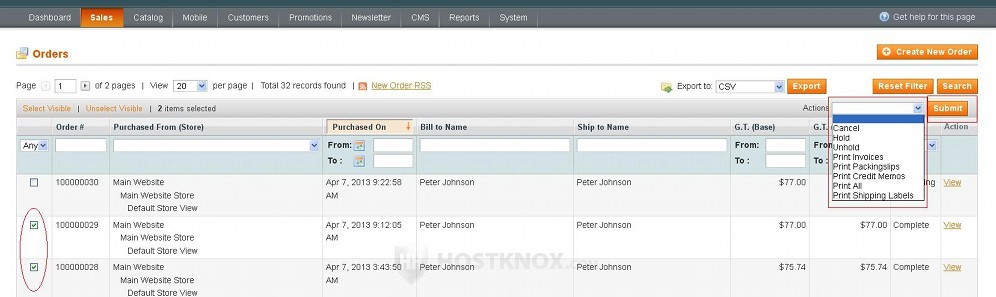
To download PDF print-outs go to Sales menu>Orders in the admin panel, on the page that opens mark the checkbox(es) of the orders for which you want to download invoices, packing slips, etc. in PDF format, then select the action from the Actions drop-down menu and click on the Submit button that's next to it:
Minimum Order Amount
The settings in the Minimum Order Amount panel can be used to specify a sum to be the minimum order amount and to configure the error messages associated with that:
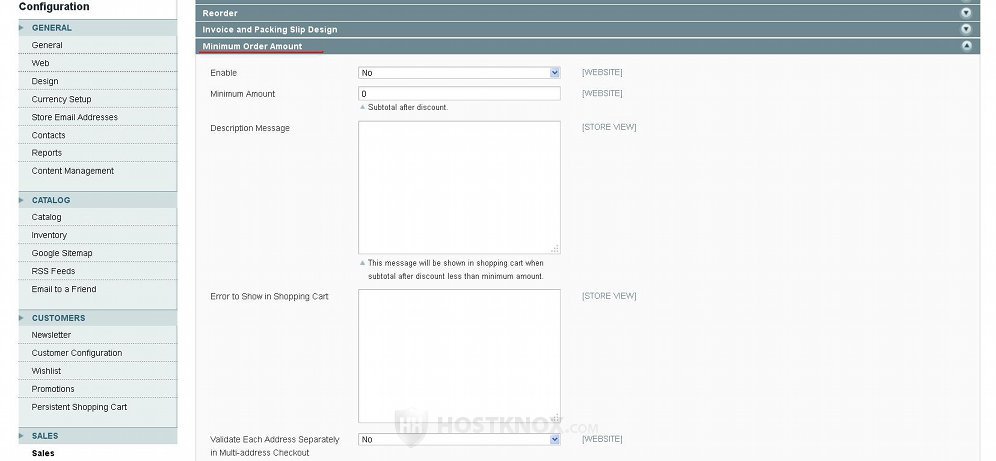
- Enable - from this drop-down menu you can enable and disable the minimum order amount function. By default, it's disabled. If you want to enable this feature, just set the drop-down menu to Yes.
- Minimum Amount - in this field type the number corresponding to the sum that's to be the minimum order amount. For example, if you don't want customers to be able to place an order that has a subtotal of less than $20 (after discount, if any, is applied), type 20 in this field.
- Description Message - when there's a minimum order amount and the subtotal of the shopping cart is less than that amount, customers will not be able to check out. The Proceed to Checkout button on the shopping cart page will not be clickable, and a message at the top of the page will be displayed informing the customer that there's a minimum order amount. You can use the Description Message text area to type the message that's displayed at the top of the shopping cart page when the subtotal amount is less than the minimum order amount. If you don't type anything, a preconfigured default message will be displayed; this message is Minimum order amount is $20.00 (of course, $20.00 is replaced with your actual currency and minimum order amount).
- Error to Show in Shopping Cart - in this text area you can type another error message to be displayed on the shopping cart page when the subtotal is less than the minimum order amount. The difference with the description message is that this one is displayed when the customer clicks on the checkout link in the header or in the shopping cart sidebar. If the subtotal is less than the minimum order amount, the customer is not redirected to the checkout page but to the shopping cart page instead, and the specified error message is displayed at the top of the page. If you don't type any message, the preconfigured error message will be shown: Subtotal must exceed minimum order amount.
- Validate Each Address Separately in Multi-address Checkout - as you know, registered customers can checkout with more than one shipping address (there's link for that just under the Proceed to Checkout button on the shopping cart page). For example, if they have three different products in the cart, they can choose a different shipping address for each product. When this validation option is set to No, the sum of the prices of all the different products in the cart is compared with the minimum order amount. If it's bigger, the customer can proceed both to the normal checkout process or they can use the multi-address checkout. If you set this option to Yes, however, the price of each of the different products in the cart is compared separately with the minimum order amount, and if any of the products has a price that's less than the minimum order amount, then the customer cannot use the multi-address checkout.
For example, let's say that you enable this option and you set the minimum order amount to $20. The customer puts two different products in the cart; one that costs $12 and another one that costs $8, then the customer will be able to checkout using the regular checkout process but will not be able to checkout with multiple addresses. If each of the products costs $20 or more, then the customer will be able to use the multi-address checkout.
Dashboard

The Dashboard panel contains a setting called Use Aggregated Data with which you can speed up a little the dashboard of the admin panel. By default, it's set to No. If you want to improve the performance of the dashboard, set it to Yes. This, however, as the description under the option informs you, will affect the data that's displayed on the dashboard.
Gift Options
In the Gift Options panel there are a couple of options with which you can allow customers to add gift messages to the order:
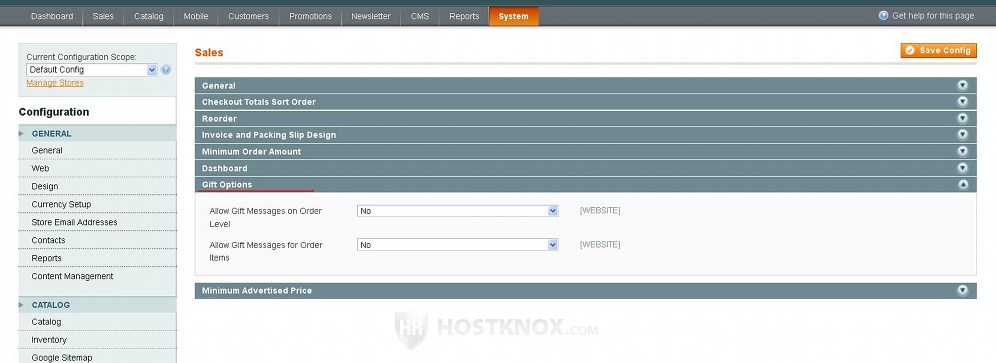
By default, the options are disabled. If you want customers to be able to add a gift message only for the whole order, set the option Allow Gift Messages on Order Level to Yes. If you want customers to be able to add messages for each product in the order, set the option Allow Gift Messages for Order Items to Yes.
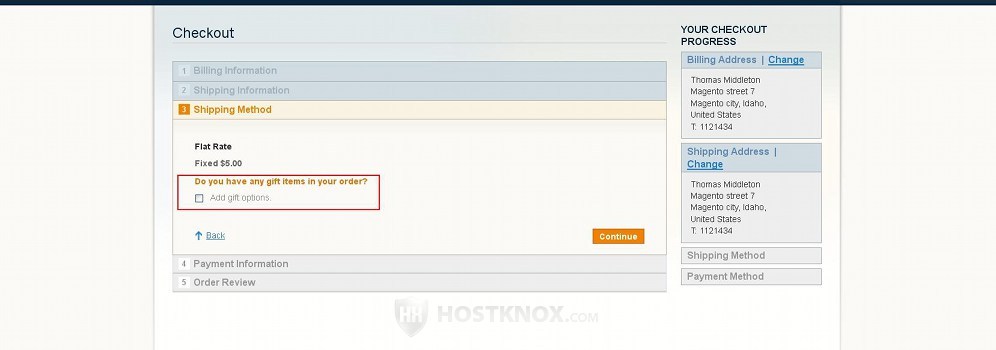
When you enable any of the two options a checkbox will appear at the Shipping Method step of the checkout process:
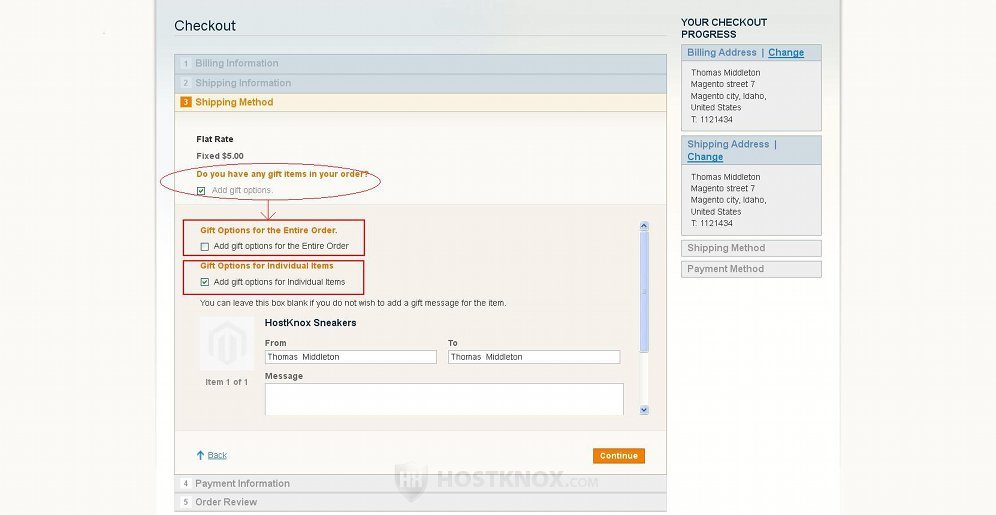
When the customer marks the checkbox one or two additional checkboxes will appear depending one whether one or both options for gift messages are enabled. If both options are enabled, a couple of checkboxes will appear from which the customer can select whether to add a message for the whole order or per product. When the customer marks one of these checkboxes a text field(s) will appear in which the customer can type the gift message(s):
Once the order is placed the gift message will be displayed on the order information page in the admin panel.
Keep in mind that the system gift settings apply to all products. However, if you have enabled gift messages per individual items and you don't want customers to be able to add messages to particular products, you can disable the gift message for a particular product from the settings of that product. To do this, in the admin panel go to Catalog>Manage Products, select the product that you want to edit, on the edit form with the product's settings click on the Gift Options tab on the left, then on the right unmark the Use Config Settings checkbox, set the Allow Gift Message drop-down menu to No and save the change.
Minimum Advertised Price
Some manufacturers have specific requirements that if you offer their products with a price that's lower than their minimum advertised price, then you can't show that price in your catalog (or on certain pages of your site). The Minimum Advertised Price panel has options with which you can configure your store so that it complies with these specific regulations:
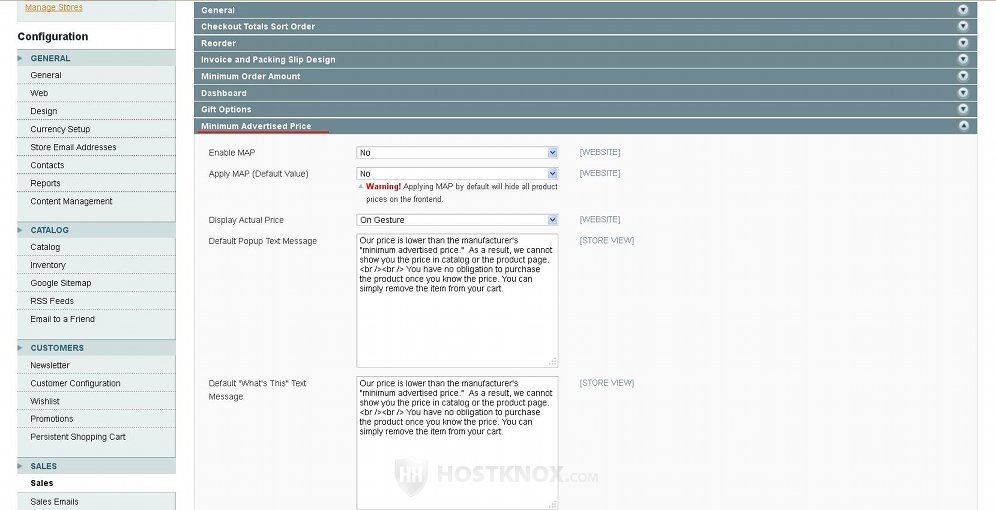
- Enable MAP - by default, the minimum advertised price function is disabled. To hide the prices of all or some of the products set this drop-down menu to Yes.
- Apply MAP (Default Value) - by default, this option is set to No. In this case if you set the Enable MAP option to Yes, then you have to edit the price settings of each product for which you want to hide the price. So this is useful if you want to hide the price only of some of your products. If, however, MAP is enabled and you set Apply MAP to Yes, then the prices of all products in your catalog will be hidden automatically; you can still edit the price settings of each product and disable the minimum advertised price function for any product you want.
- Display Actual Price - from this option you can select where the actual price should be visible. If you select In Cart, the price will be visible on the shopping cart page, in the cart sidebar and at the Order Review step of the checkout process (not on product list and product details pages). If you select Before Order Confirmation, the product price will be shown only at the Order Review step of the checkout process. If you leave the option to the default value On Gesture, the price can be viewed by clicking a Click for price link that's shown on product list and product details pages. When the customer clicks on that link a window will pop out displaying the price and a message. The message can be specified with the option Default Popup Text Message (described below). With On Gesture the price will be displayed directly on the shopping cart page, the cart sidebar and at the Order Review step of the checkout process.
Note that if you select In Cart or Before Order Confirmation, the link Click for price will also be shown on product list pages. However, it will just redirect the customer to the product details page of the particular product where a message will inform the customer that the price is visible in the cart or on the checkout page (depending on whether you've selected In Cart or Before Order Confirmation).
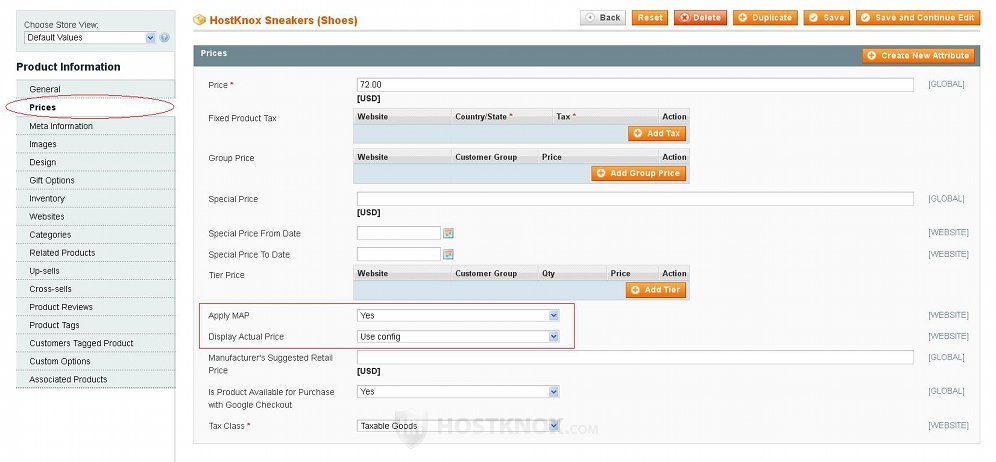
Once the minimum advertised price function is enabled, no matter what you select from the Apply MAP option you can show/hide the price of any product and you can change the actual price display method from the settings of that particular product. These product specific settings will override the system ones. To do this, when you go to Catalog>Manage Products in the admin panel and you select the product that you want to edit, on the edit form page click on the Prices tab on the left and use the Apply MAP and Display Actual Price options on the right to configure the minimum advertised price function for that product:
Let's go back to the rest of the system MAP settings:
- Default Popup Text Message - in this text area you can type the message that is displayed in the popup window that's shown when a customer clicks on the Click for price link. As we mentioned, this message can be viewed if the setting Display Actual Price is set to On Gesture.
- Default "What's This" Text Message - here you can type the message to be shown in the popup window that appears when the customer clicks on the What's This link. This link is shown on product details pages, and, as the name suggests, is used to inform the customer about the reason for hiding the price. The link and respectively the popup message is displayed on product details pages no matter what you select from the Display Actual Price drop-down menu. The popup window itself shows only the message without any price.
Here is an example of a product details page with minimum advertised price enabled and the Display Actual Price option set to On Gesture:
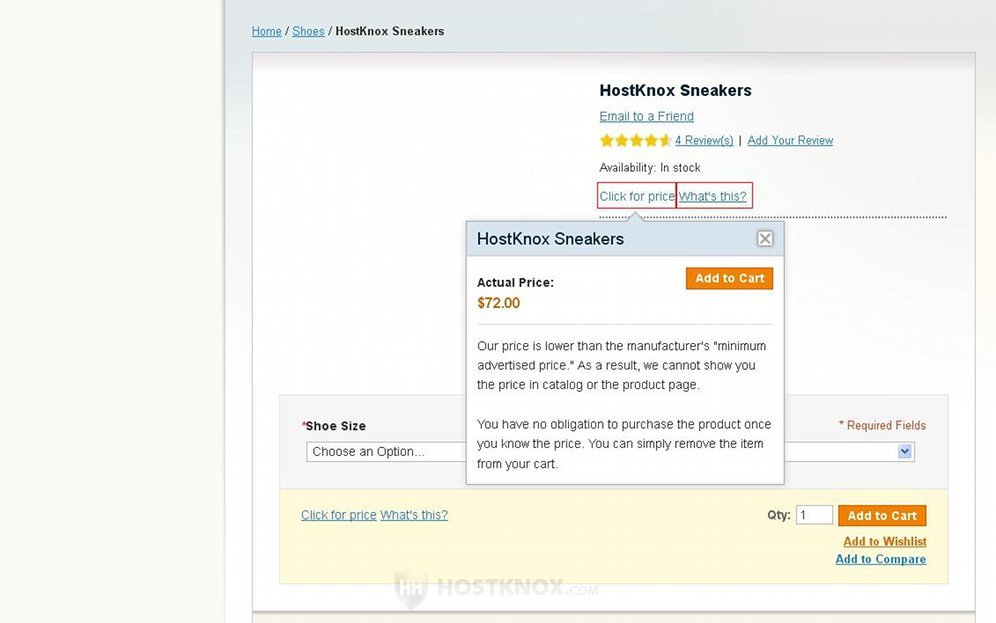
As you can see in the above example screenshot the Click for price link is clicked and the popup window with the price and the popup message description is displayed. As we already explained, this link is shown on product details pages only if the Display Actual Price option is set to On Gesture. It's also shown on product list pages no matter what's selected from the Display Actual Price option, but if it's not set to On Gesture, no popup window will be shown when a customer clicks on the link; the link will just redirect the customer to the product details page. The link What's this is shown only on product details pages no matter what you select for price display.
If you make changes to any of the settings don't forget to click on the Save Config button.