PrestaShop 1.5/1.6 Categories Tutorial
How to add and manage categories in PrestaShop 1.5 and 1.6
In PrestaShop you can organize your products into categories. You can organize the categories themselves into levels. There's one parent home category that contains the top level categories. You can add top level categories or you can add subcategories to those categories. If you want to, you can go down more levels and create subcategories of the subcategories, etc. You can add and manage categories from the admin panel of your PrestaShop. In this tutorial we'll go into details on how to do that. We'll show you how to:
- access the Categories section of the back office
- add new categories and configure the category options
- edit existing categories
- delete categories
- disable and enable categories
- switch category positions
In this tutorial we've used as a basic example PrestaShop 1.6. The screenshots are also from that PrestaShop version. Although the design of the admin panel is different than that of PrestaShop 1.5 the options for managing categories are the same. If there are some differences we'll make notes about that in the tutorial.
Categories Section of the Admin Panel
To access the Categories section of the admin panel, log into the admin panel and go to Catalog menu>Categories sub-menu:
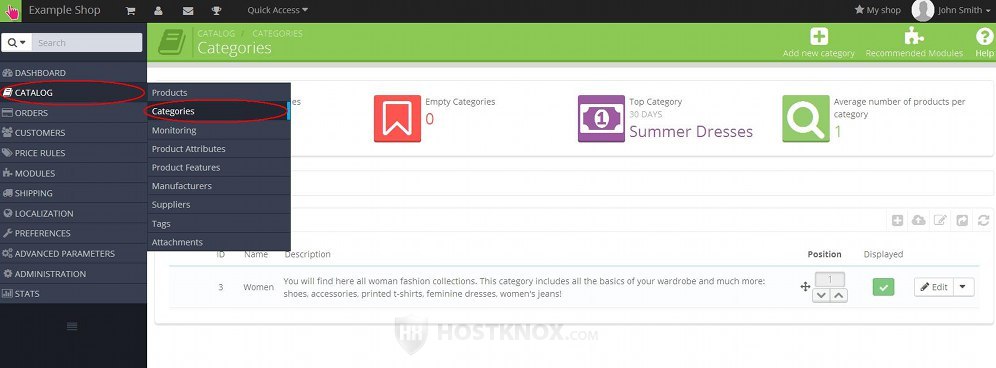
On the page that opens you'll see a table with the existing top level categories. PrestaShop comes with a few sample categories. The top level categories are in fact subcategories of the category Home (this is the category that holds all other categories). PrestaShop 1.6 comes with one sample top level category (subcategory of Home) and a few subcategories of that top level category. To see and manage the subcategories of a category click on the row in the the table of that corresponding category. A new page will be displayed with a table showing the subcategories (if any) of the category. You can use the buttons in the table to manage the subcategories.
Add New Category
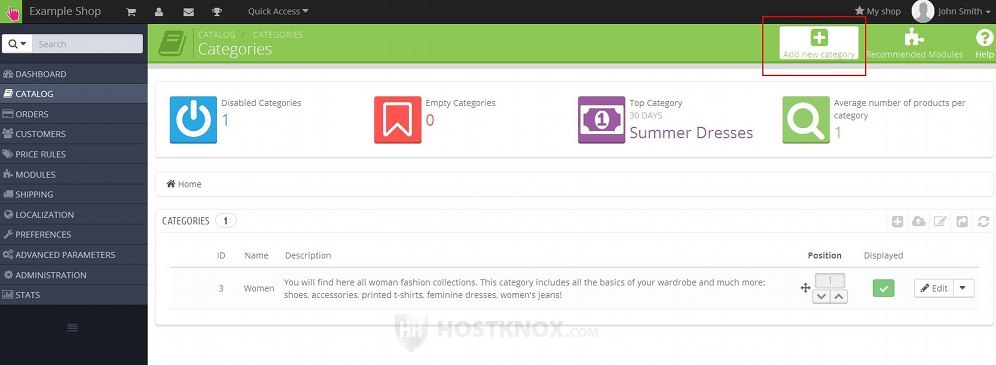
To add a new category, log into the admin panel, go to Catalog menu>Categories sub-menu and on the page that opens click on the Add new category button that's in the top right corner of the page (in PrestaShop 1.5 the button is labeled Add New):
This will open the form for adding new categories. The options on the form for editing existing categories are the same. Note that most of the options are not required; to be able to save and create the category you have to type a name and a friendly URL. The required options are marked with a red asterisk. Now let's go over the options themselves. At the top of the form are the options for the name, description, etc.
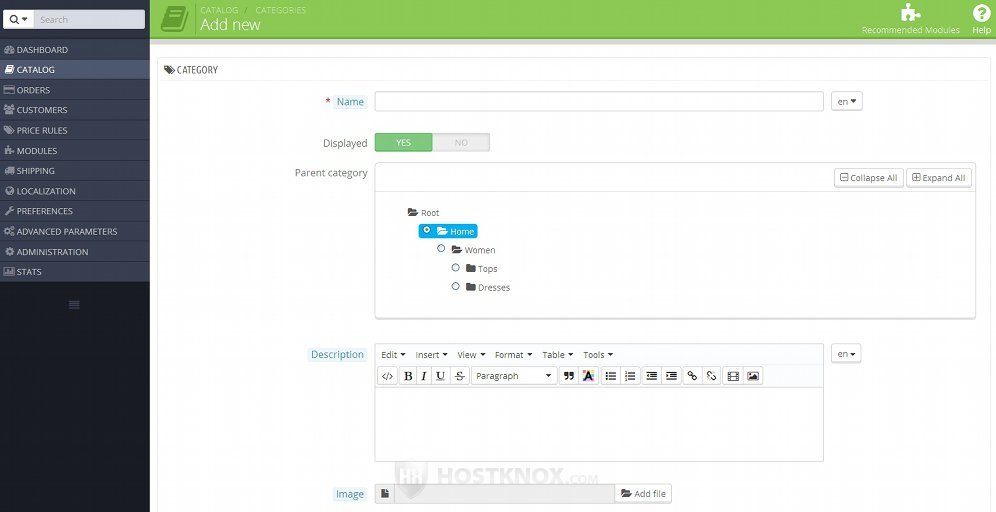
Starting from the top of the page the category options are:
- Name - in this field simply type the name of the category. That's the name that will be shown on the frontend and in the admin panel. If you have installed other languages and you want to type the name for the category in another language, click on the small drop-down menu on the right side of the field, select the particular language and then type the translated name. Note however that there should be a name in the default store language. In PrestaShop 1.5 it's not a drop-down menu but a flag of the default language; when you click on it you can select the flag of the installed language into which you want to translate the name.
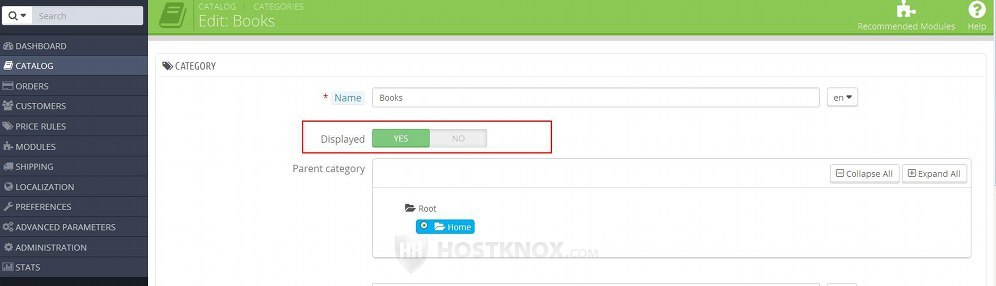
- Displayed - by default, this option is enabled which means that after you save the category it will be visible on the frontend. If you mark the No button, the category will be disabled and it will not be shown on the frontend.
- Parent category - by default, the new category is automatically put as a top level category in the Home category (that's the default category that contains all other categories). If you want the category that you're adding/editing to be a subcategory of any of the existing categories, just mark the radio button of the category. You can use the Collapse All and Expand All buttons that above the list to hide/show all existing categories and subcategories. If you click on the name of a category and it contains subcategories, the list will be expanded showing the subcategories of the particular category.
- Description - the description is optional so if you want to, you can leave it blank. Otherwise, you can use the built-in text editor to type a description of the category. The description will be shown at the top of the category page on the frontend. You can use the language button on the right side to type a description for any of the languages that you've installed.
- Image - from this option you can upload an image to be displayed at the top of the category page on the frontend. Click on the Add file button (in PrestaShop 1.5 it's labeled Browse button), then use the pop-out window that appears to find an image on your local computer and upload it on your hosting account. The image will be uploaded after you save the category and some other copies with different dimensions will be created. One of the resized copies is shown on the category page. The default dimensions of the copy that's shown on the frontend of PrestaShop 1.6 with the default theme are 870 x 217 (in PrestaShop 1.5 they are 500 x 150 pixels). You can edit the default dimensions for each image size (e.g. category, small, medium, etc.) from Preferences menu>Images sub-menu. For more details check out the tutorial on how to configure and manage the image options in PrestaShop. If you use some other theme than the default one, there might be some other theme-specific specifications and/or settings related to images.
Note that in order for the resized image copy/copies to fit the required dimensions some white areas or background may be automatically added to the image. So for better results it might be a good idea to crop and/or resize the image to the default category dimensions (e.g. 870 x 217) before uploading it.
The image that you upload when you create or edit a category is saved together with the resized copies in the folder public_html/img/c on your PrestaShop hosting account (assuming that your PrestaShop is installed directly in the public_html directory on the hosting account).
If you use PrestaShop 1.5 or older versions, you can also turn the category image into an image map so that it contains links to products within the category. You can do this from Catalog menu>Image Mapping sub-menu in the admin panel. For more information check out the tutorial on how to manage image mapping in PrestaShop 1.5.
Scrolling down the form for adding/editing categories there are some more options that you can configure:
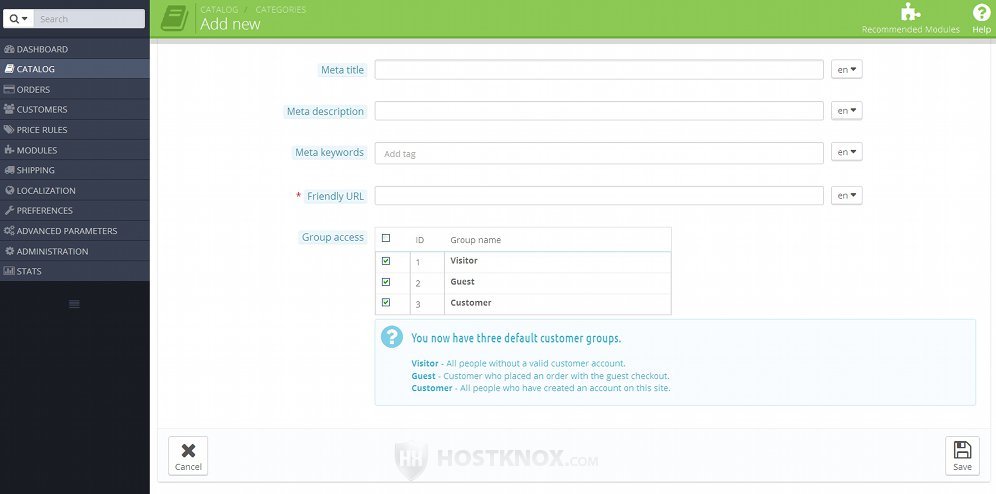
These options are:
- Meta title - this, as well as the other two meta options, is not required. If you want to, you can put the title/name of your category.
- Meta description - you can type a very short description of your category.
- Meta keywords - here you can list words that are related in some way to the category. Separate the words with commas.
These meta options are used for search engine optimization (SEO). Theoretically, they will improve the ranking and visibility of your category when it comes to search engines. Practically, this doesn't really make much of a difference and some search engines don't even make use of the meta information. The title and description may or may not be shown on search result pages; this also depends on the search engine.
- Friendly URL - this field is required, but even if you leave it empty the category will be saved. PrestaShop automatically uses the name of the category for the friendly URL. If you want to, you can type something different in the field for friendly URL. Use lowercase letters and separate words with hyphens. Don't type the whole URL of the store and the category but just the name of the category. It's added automatically to the store URL. For example, if you put name-of-category in the field for Friendly URL, the whole friendly URL of the category will be yourdomain.com/name-of-category. Note however that, depending on the PrestaShop version that you use, friendly URLs might be disabled by default. If necessary you can enable them from Preferences menu>SEO & URLs sub-menu in the admin panel. For some more information check out the article on how to enable friendly URLs in PrestaShop.
- Group access - by default, everybody can visit and view the category page on the frontend. This option lists the currently existing customer groups. You can use it to limit the access to the category to specific groups or a group of customers. If the checkbox of a group is marked, customers belonging to it will have access to the category. For more information on customer groups read the tutorial on how to manage customer groups in PrestaShop.
After you're done with the options click on the Save button in the lower right corner of the page (in PrestaShop 1.5 it's in the upper right corner). After the category is created it will be shown on the frontend (unless you've disabled the display option). A link to it will also be automatically added to the Categories menu on the frontend. You can change the order the categories are listed in this menu. For more information check the section on how to change category positions in this tutorial. Note that when you create a category it's not automatically added to the top navigation menu on the frontend. You can do this by editing the settings of the module Top horizontal menu. However, if the created category is a sub-category of a category that's already added to the top navigation menu, then the subcategory will appear in a drop-down menu when the mouse pointer is hovered over the parent category in the top navigation menu on the frontend.
Edit Existing Categories
To edit the options of any of your existing categories, log into the admin panel and go to Catalog menu>Categories sub-menu. On the page that opens there's the table that lists all existing top level categories. If the category that you want to edit is a subcategory of a category, click on the name of the category in the table and this will display a new page with the subcategories of the category. On the right side of the table there are a few buttons for each category. Click on the Edit button for a category to edit its settings. It's the button that looks like a small pencil:

This will open the edit form with all the category settings. They are the same as the ones on the add form. For a review of these settings check the section in this tutorial on how to add categories.
Delete Categories
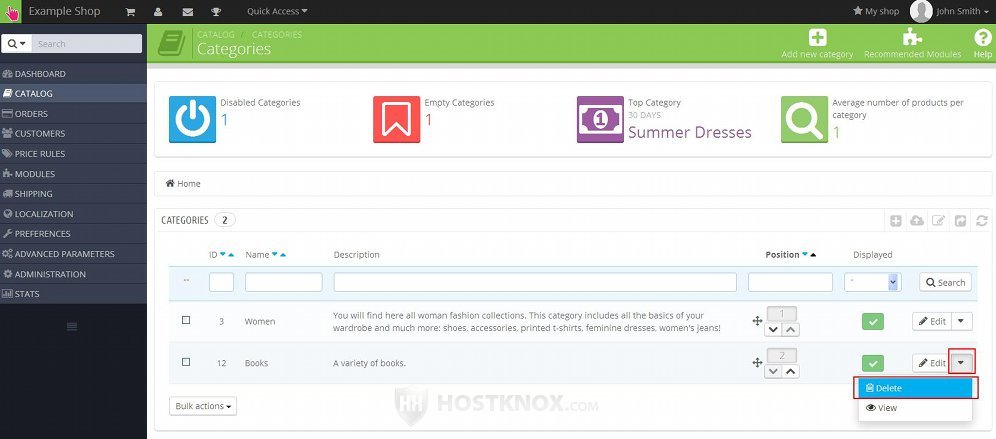
To delete categories, in the admin panel go to Catalog menu>Categories sub-menu, then in the table that lists the categories click on the arrow that's next to the Edit button for the particular category. From the drop-down menu that appears click on the Delete button; it looks like a trash can (in PrestaShop 1.5 the button is in the right most column of the table):
When you do this a menu will appear at the top of the page with a few options from which you can choose what to do with the products that are in the category that you want to delete:
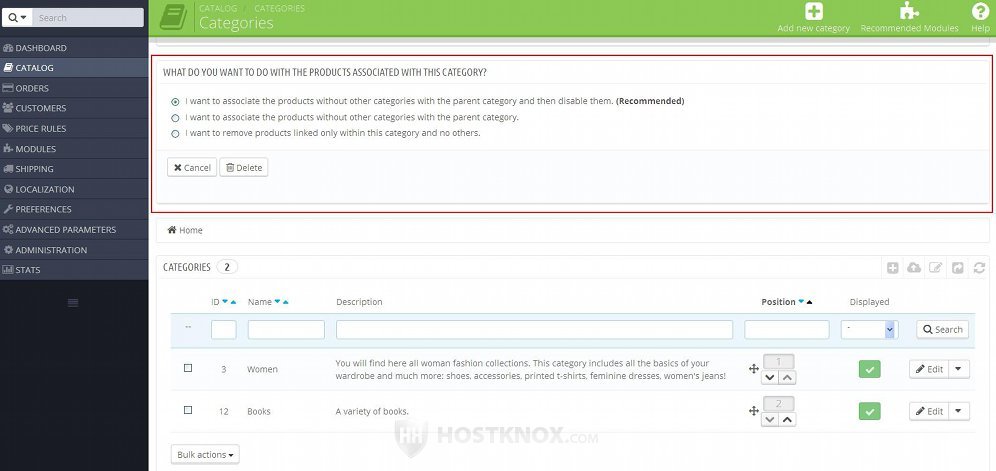
You can move the products that are not assigned to any other categories to the parent category and disable them. You can just move the products that are not assigned to any other category to the parent category without disabling them. And the last choice is to delete the products that are not assigned to any other category except to the one that you're about to delete. Mark the radio button corresponding to your choice and click on the Delete button (in PrestaShop 1.5 the button is Validate).
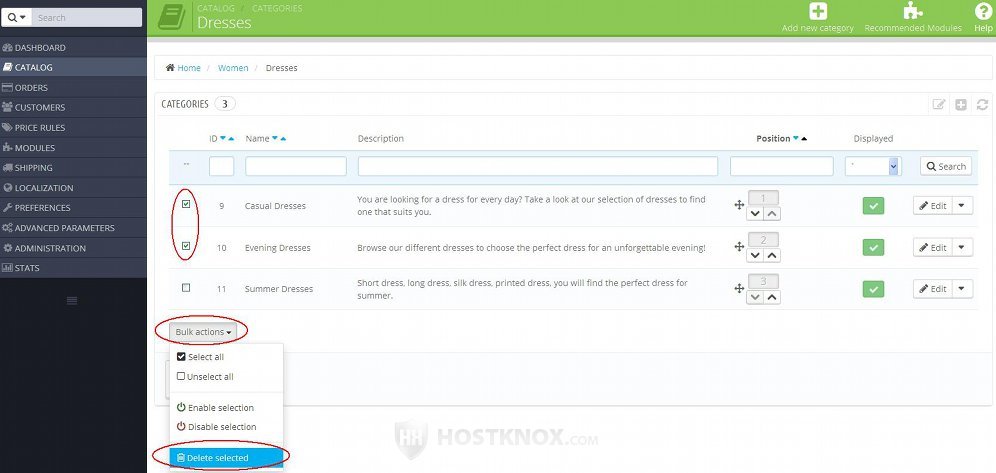
You can delete more than one category at the same time. To do this, mark the checkbox for each category that you want to delete (there's a checkbox for each category in the left column of the table that lists the existing categories), then click on the Bulk actions drop-down menu that's under the table and choose Delete selected:
This will display the menu with which you can select what to do with the products that are in the categories which you're about to delete.
Disable and Enable Categories
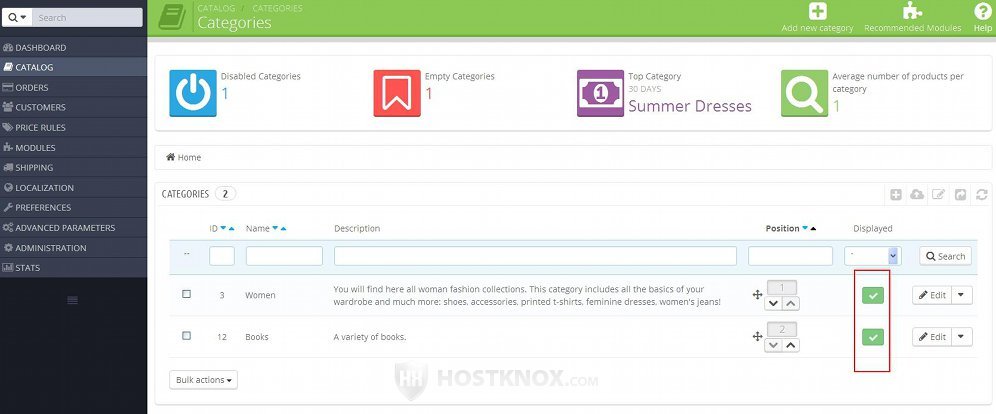
By default, when you add a new category it's enabled which means that it's visible on the frontend. If you want to hide the category from the frontend but you don't want to delete it, you can just disable it. To do this, in the PrestaShop admin panel go to Catalog menu>Categories sub-menu. In the table that lists the existing categories there's a column labeled Displayed. If there's a green check mark for the particular category it means it's displayed. To disable a category click on that green check mark:
When you do this the green check mark will turn into a red X symbol indicating that the category is disabled. If you click on that red X symbol the category will be enabled again.
To disable/enable more than one category at the same time, mark the checkboxes of the categories, click on the Bulk actions drop-down menu that's under the table and select Disable selection or Enable selection, depending on whether you want to disable or enable the categories. These bulk action options are not available in PrestaShop 1.5.
You can also disable a category from its edit from. When you click on the button for editing a category this will display all the category settings. You can enable/disable the category by marking the respective button for the Displayed option:
Then click on the Save button.
Change Category Positions
When you go to Catalog menu>Categories sub-menu in the PrestaShop admin panel you'll see that the categories are listed in the table there in a certain order. That's the order in which they appear in the Categories sidebar menu on the frontend. This is also the order in which subcategories of a category are shown when that category is added as a top level item in the top navigation menu on the frontend; when the mouse pointer is hovered over a category link in the top navigation menu on the frontend a drop-down menu appears that shows its subcategories (if any), and the order in which the subcategories are listed depends on their position number specified in the admin panel.
You can rearrange them and change the order in which they are listed on the frontend. You can do this using the Position column of the table:
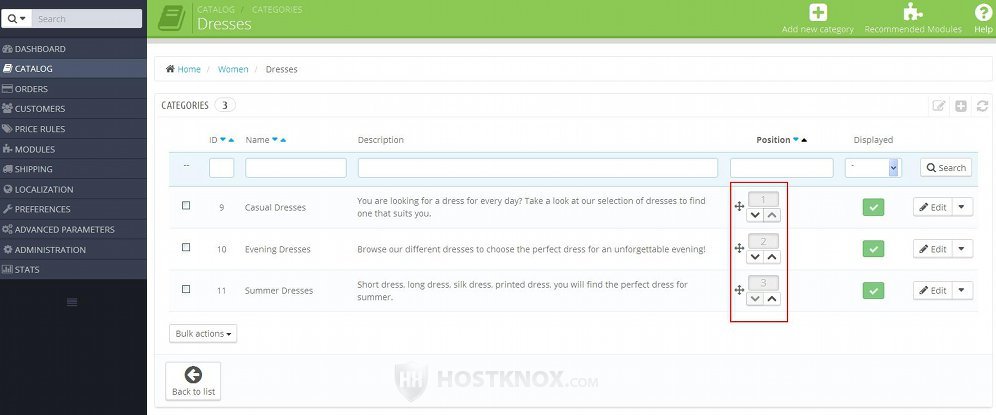
To move a category up or down the list simply click on the respective arrow for that category. This change of position will also be automatically reflected on the frontend.
If you want to move a category several positions at a time, there's a quicker way you can do this instead of using the arrows. Hover the mouse pointer over the four-arrow icon for the particular category until it turns into a four-arrow cursor. Then click and hold the left mouse button, using the mouse drag the category to the desired position and release the left mouse button.
In PrestaShop 1.5 if in the Position column you see only numbers for each category, click on one of the arrows that are right under the name of the column. Arrows will appear for each of the categories in the table. You can use them to move the categories up and down. You can also use the drag-and-drop technique; hover the mouse pointer around the arrows for the particular category until it turns into a four-arrow cursor, and drag and drop the category in the position you want.