PrestaShop 1.5/1.6 Theme Settings Tutorial
How to configure and manage themes in PrestaShop 1.5-1.6
From the admin panel of your PrestaShop you can manage various aspects of the default theme that comes prepackaged with PrestaShop, as well as of the other themes that you've installed. You can edit different settings related to how the theme appears visually on the frontend, you can change the header logo, the invoice and email logos and some other icons and logos; you can also edit the name of the theme, the folder on the hosting account in which it's stored, you can delete the theme and perform some other tasks.
You can change how your theme looks and works by modifying the code of its files, but in this tutorial we'll go over the things that you can do from the admin panel.
For information on how to install themes and change the active theme check out the tutorial on how to install and switch themes in PrestaShop 1.5-1.6.
In this tutorial we'll show you:
- how to change and manage the logos of your site
- how to modify themes with the Theme Configurator
- how to change the frontend colors and fonts with Live Configurator
- how to manage the advanced theme settings
- how to export themes
- how to create new themes
- links to other of our tutorials and articles related to themes
In this tutorial we've used as a basic example PrestaShop 1.6. The screenshots are also from that PrestaShop version. Although the design of the admin panel is different than that of PrestaShop 1.5, themes are managed in pretty much the same way in both versions. If there are some differences we'll make notes about that in the tutorial.
Manage the Logos
PrestaShop comes with an example header logo. The same logo is used on invoices and in emails. To change the logo, go to Preferences menu>Themes sub-menu in the admin panel. At the top of the page that opens you'll see listed the current theme. Right under it is a block with a few tabs. From this block you can upload new logos. By default, the Logo tab for managing the header logo is clicked:
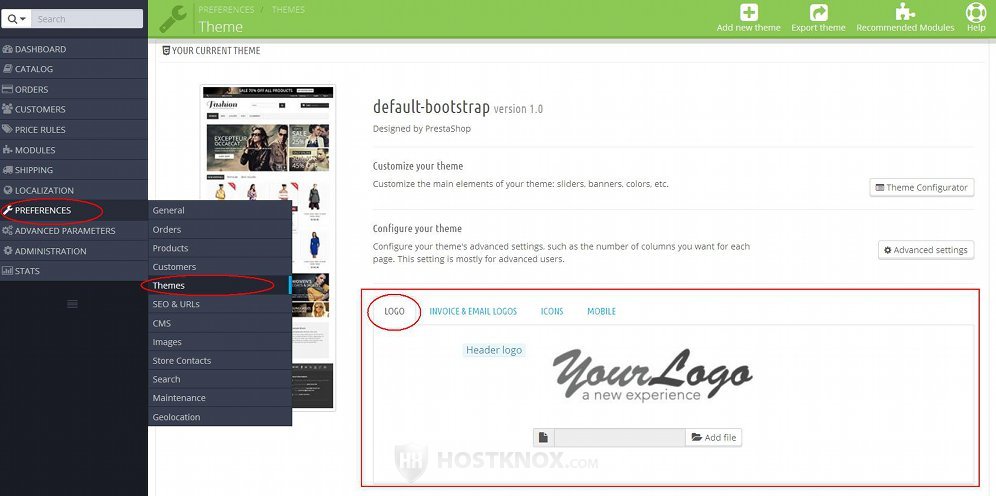
You'll see the header logo displayed. That's the logo that appears at the top on the frontend of your site. The default theme comes with a sample logo. To change it, just click on the Add file button, locate the image on your local computer and click on the Save button to upload it to your hosting account. You may need to scale and/or crop the image before uploading it.
If you want the logos that appear on invoices and in emails to be different than the main header logo, click on the tab Invoice & Mail Logos:
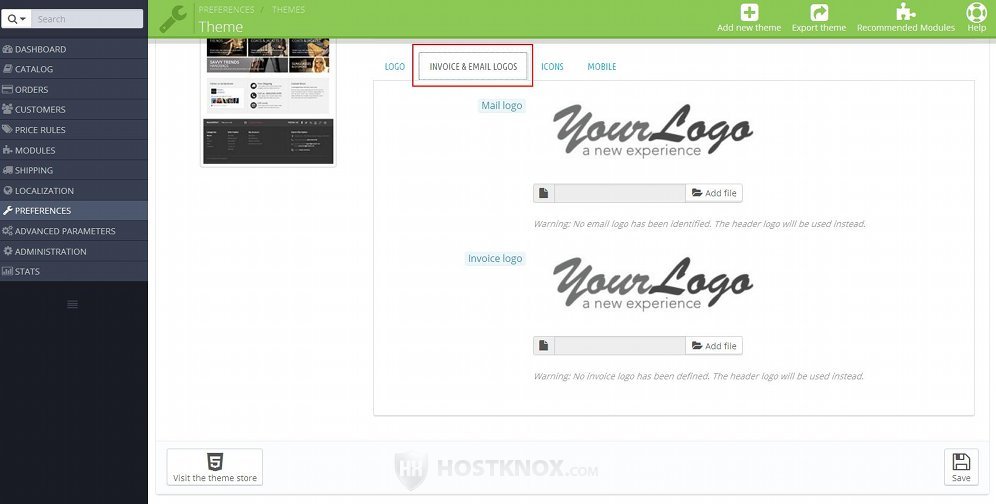
Then use the available options to upload a mail and/or an invoice logo. If you don't upload any mail and invoice logos, the header logo will be used.
To change the favicon and store icon click on the Icons tab:

The favicon is the small icon that appears in the address bar of the web-browser. The store icon is used on Google maps.
If you use any of the options to select an image, don't forget to click on the Save button so as to upload it on your PrestaShop hosting account.
Click on the Mobile tab to manage a couple of options related to how the theme is displayed on mobile devices:
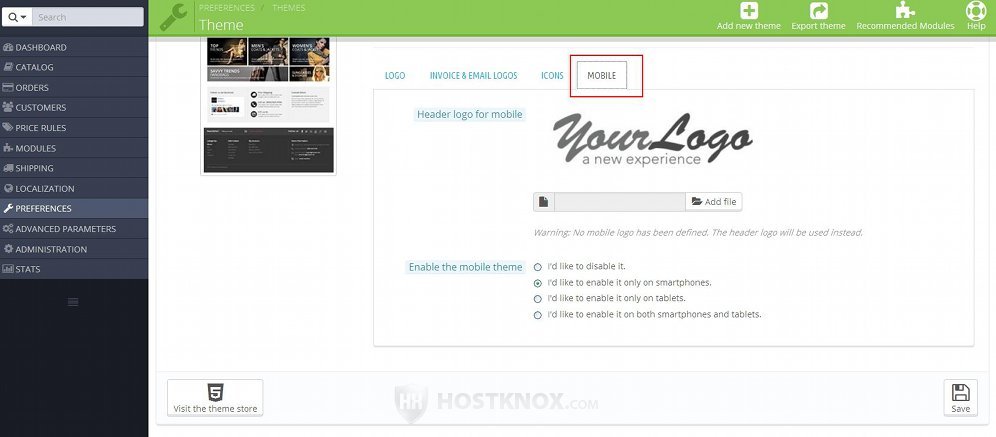
The available options are:
- Header logo for mobile - if you want to upload a specific logo for mobile devices and you want that logo to be different than the main header logo (the one uploaded from the Logo tab), you can use this option.
- Enable the mobile theme - some themes come with a mobile version that's a lighter variant of the theme and that's used for mobile devices. If your theme has a mobile theme, from this option you can select whether it should be enabled, and whether it should be displayed when the site is viewed with a smartphone and/or with a tablet. The default theme that comes prepackaged with PrestaShop has a mobile version.
Note that in PrestaShop 1.5 the settings for the different logos are not displayed with tabs. Instead they are all listed one under the other in a panel labeled Appearance. Otherwise, the actual settings are the same.
Edit Your Theme with the Theme Configurator
Beginning with PrestaShop 1.6 the application comes with a core module called Theme Configurator. This module makes it easier to manage which of the frontend modules should be displayed; you can configure the options of these modules, you can also manage the various pictures (and upload new ones) displayed on the homepage in the different positions/hooks for which pictures are allowed (e.g. home, top, left, right, footer).
Note that not all themes make use of the theme configurator. There are many that are not designed to work with it. The default theme that comes prepackaged with PrestaShop, for instance, can be used with the theme configurator.
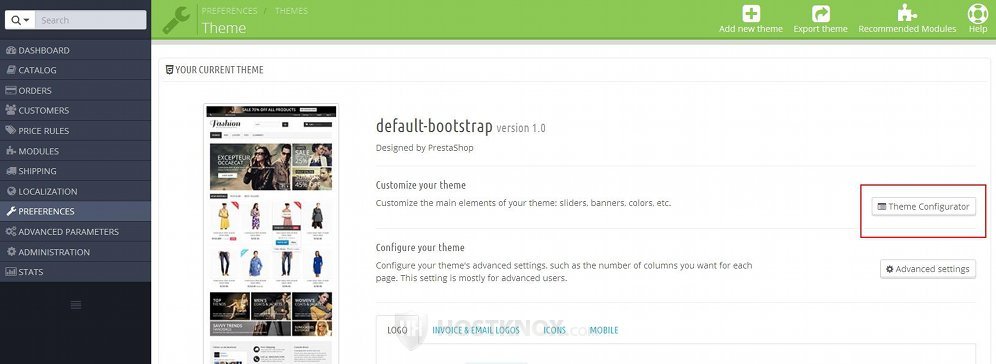
To access the theme configurator, go to Preferences menu>Themes sub-menu in the admin panel. On the page that opens you'll see the current theme listed at the top. If the theme can be used with the theme configurator and the theme configurator module is enabled, then there will be a button Theme Configurator:
Since the theme configurator is actually a module you can also access its settings by going to Modules menu>Modules sub-menu, finding the module in the list and clicking on its Configure button.
In any case, on the page that opens you'll see a list of links, blocks, etc. that are displayed or not on the frontend:
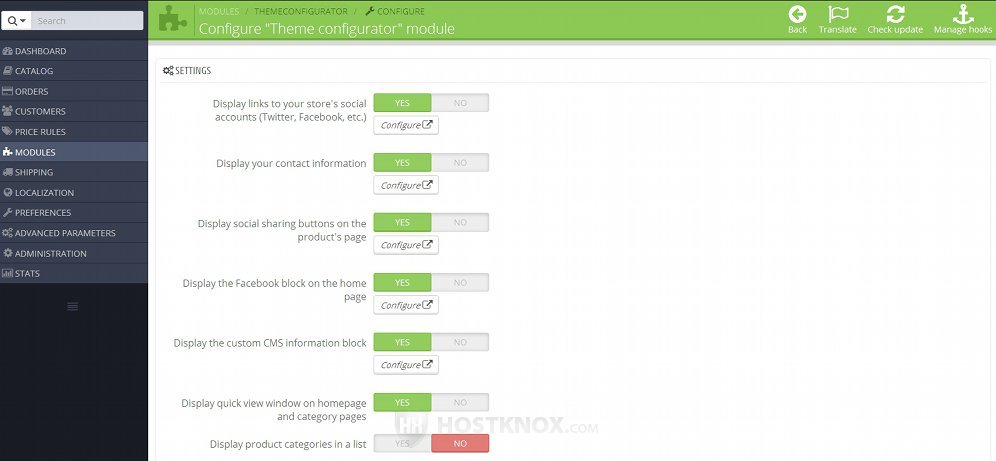
If you want a particular group of links or a block to be shown or not on the frontend, select respectively Yes or No for the particular option, and then click on the Save button. For example, if you don't want the contact information to be shown on the frontend, mark No for the option Display your contact information and click on the Save button.
Note that these options listed by the theme configurator actually correspond to particular modules. Selecting Yes or No for the option will respectively enable or disable the module. So, for example, if you select No for the option Display your contact information this will disable the module Contact information block; that's the module with which the store contact information is managed and displayed on the frontend. If you click on the Configure button that's under the option this will open the settings of the module. Alternatively, instead of going to the theme configurator first, you can go to Modules menu>Modules sub-menu, find the module and enable/disable it, or edit its settings.
The list presented in the settings of the theme configurator is not a full list of all the modules that are shown or can be shown on the frontend of your site. To view all the possible front office blocks and features, go to Modules menu>Modules sub-menu and select the section Front Office Features.
In the theme configurator, under the options for the different frontend blocks, there are some options with which you can manage the images displayed by the frontend hooks that support images:
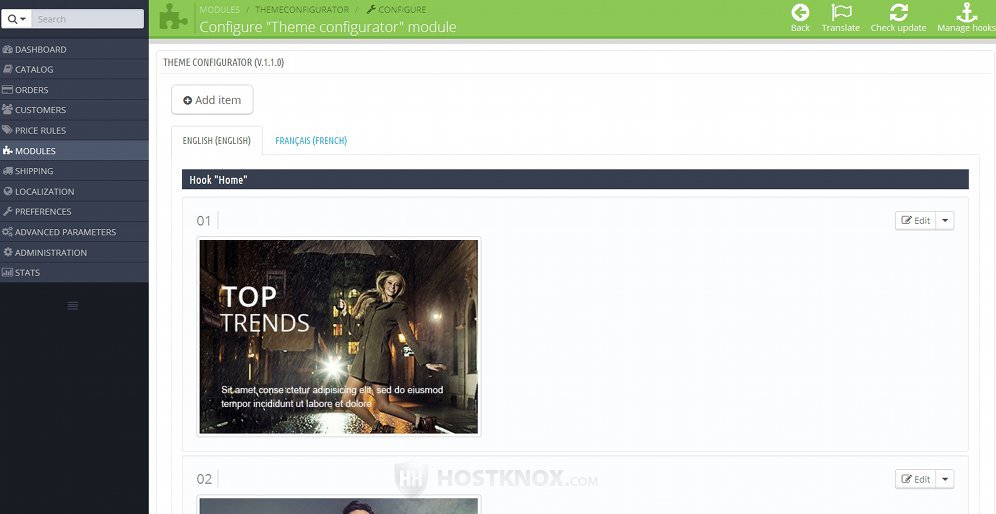
You'll see the pictures that are currently displayed and the hooks (e.g. home, top, etc.) with which they are associated. To check where exactly the hook positions the images on the frontend, just open the frontend of your site. For each image there's an Edit button with which you can edit the options of the image (we'll discuss these options a bit further down); if you want to remove the image, click on the arrow next to the Edit button and select Delete item. In case you don't want the image to be visible on the frontend, but you don't want to delete it, edit the image and unmark the Enable checkbox.
If you have more than one language installed, you can have different images for each language version of the site. The tabs for the installed languages are listed above the images.
To add a new image, click on the Add item button that's above the pictures. This will expand a panel with some options:
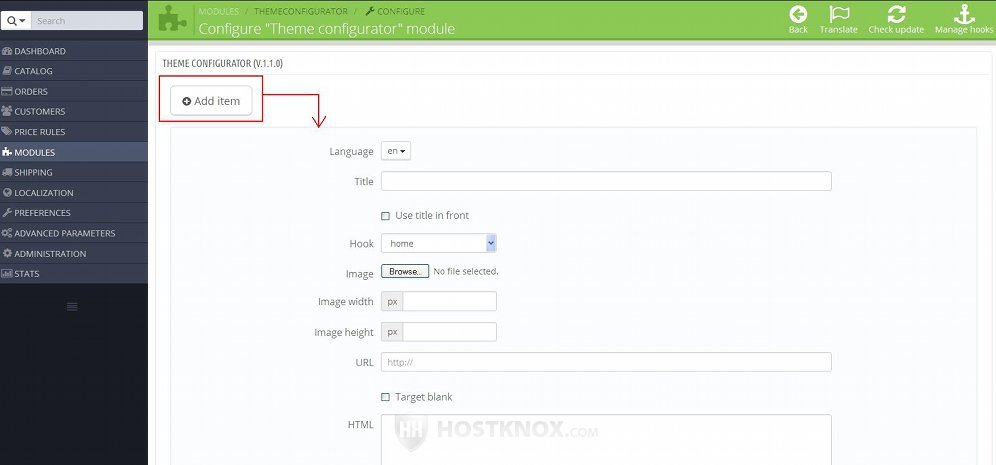
The options are the same as when editing the settings of an image that's attached to a hook. They are:
- Language - if you have more than one language installed, you can select the language version of your site on which you want the image to appear.
- Title - if you type some title for the image in this field, it will be shown on the frontend when the mouse pointer is hovered over the image. If you leave it blank, no title will be shown.
- Hook - from this drop-down menu select the hook to which you want to attach the image.
- Image - from this option you can select the image that you want to upload. Click on the Browse button and use the window that pops out to find the image on your local computer.
- Image width and Image height - with these two options you can set the dimensions of the image as you want it to appear on the frontend. Just type the numbers in the respective fields. They are set in pixels.
- URL - if you want the image to be a link to a page on your site or to an external site, type the full URL in this field.
- Target blank - this option is related to the URL setting. If you have made the image a link, and you want the page to which it points to be opened in a new browser tab, mark this checkbox. Otherwise, the page specified in the URL field will be opened in the same browser window.
After you're ready with the options don't forget to click on the Save button that's under them.
In PrestaShop 1.5 there's no theme configurator. But whatever PrestaShop version you use you can always control which modules are to be shown on the frontend by disabling/enabling them directly from the Modules section in the admin panel (Modules menu>Modules sub-menu). From there you can also configure the settings of each module, for those modules that have configurable settings.
Don't forget that you can rearrange the frontend modules by changing their positions. You can do this from Modules menu>Positions sub-menu in the admin panel. For more information check out the tutorial on how to manage module positions in PrestaShop 1.5-1.6.
Change Frontend Colors and Font with Live Configurator
The Live Configurator is actually a part of the theme configurator. With it you can change some of the frontend colors and the font of the text shown on the frontend. As we explained, whether you can use the theme configurator depends on your theme, and so whether you can customize the frontend with the Live Editor depends on the theme. For more information on the settings that the theme configurator provides check the previous section of this tutorial.
To launch Live Configurator, go to Preferences menu>Themes sub-menu, click on Theme Configurator, on the page that opens scroll down to the option Display Live Configurator, make sure it's set to Yes and click on the View button under it:
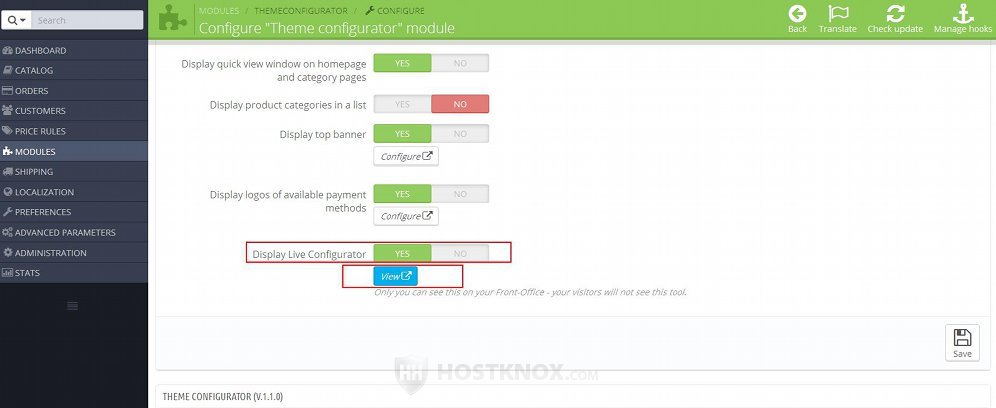
This will open a new browser tab with the frontend of your site. On the left side of the page there's a button with an icon consisting of a few gear-wheels. Click on it and a panel will expand:
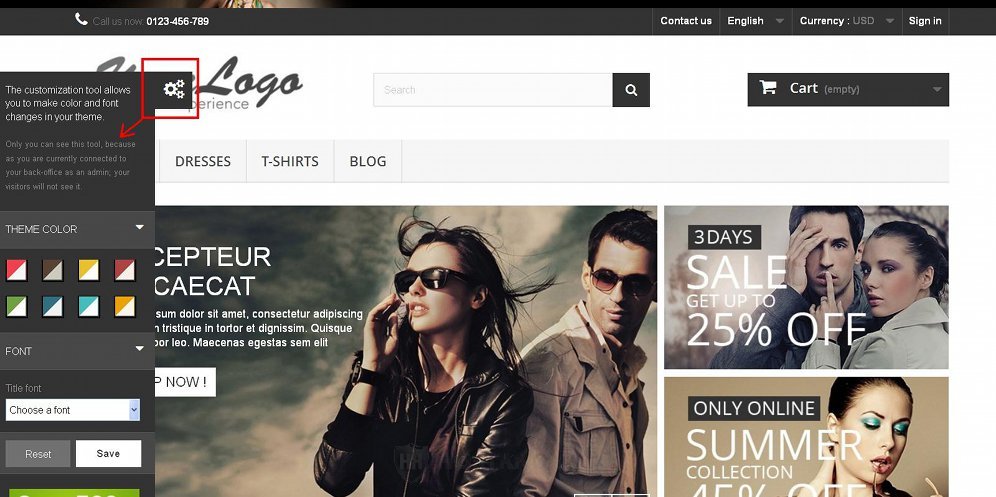
There's an option with which you can change some of the frontend colors, and another one with which you can change the font of the text. The things you can do with this editor a quite limited but still it might be useful. If you make any changes to the options, don't forget to click on the Save button that's under them.
As we mentioned, the Live Configurator is accessed from the Theme Configurator, and so whether you can actually use it also depends on your theme.
In PrestaShop 1.5 there's no such tool.
Advanced Theme Settings
To manage the advanced settings of the current theme, go to Preferences menu>Themes sub-menu and on the page that opens click on the button Advanced settings:
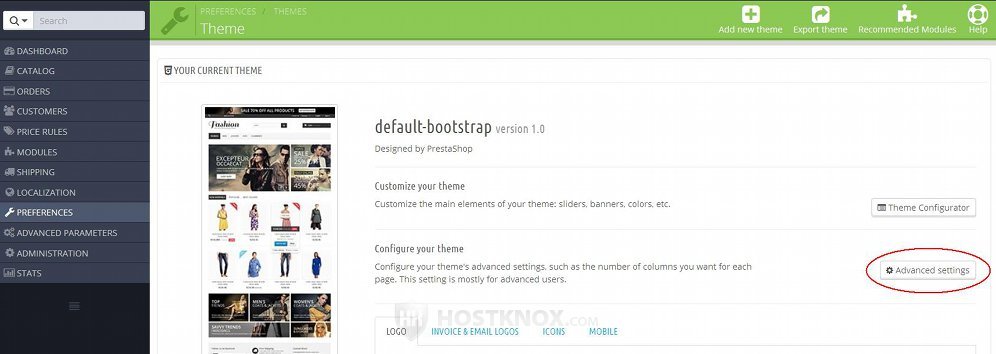
This will open a new page with some options. The first section on the page contains some options related to the name of the theme, the number of products per page, the theme's directory etc.:
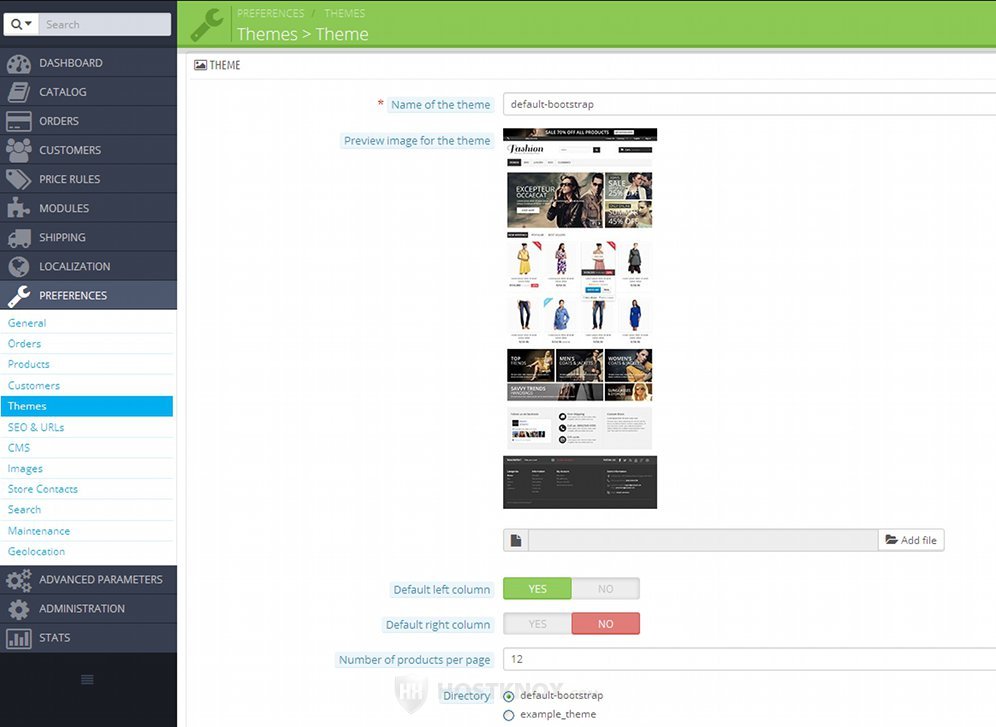
These options are:
- Name of the theme - this is the name of the theme as it's used in the admin panel. It's for internal use. If you want to change it, just type the new name in the field. This will not change the name of the folder on your PrestaShop hosting account where the theme's files and folders are stored.
- Preview image for the theme - basically, this is a screenshot of the theme as it appears on the frontend. This screenshot is used in the admin panel so as to give an idea of what the theme looks like. If the theme is installed but not activated, this image is shown for the theme in the list with the installed themes. You can change it by uploading a new image from your local computer. To do it, click on the Add new button, then use the window that pops out to find the image on your local computer.
- Default left column and Default right column - these options indicate whether the theme has respectively a left and right column. Note that these options don't have any actual function that affects the frontend, meaning that editing them will not display or hide columns on the frontend. For example, if on the frontend the theme displays a left column and you set the option Default left column to No, this will not remove the left column.
- Number of products per page - with this option you can set the number of products to be shown on category pages on the frontend. Unlike the options for the default left and right column, this option affects the frontend. So if you change the number, that will be the number of products shown on each category page. Changing this setting will automatically change the option Products per page that's available when you go to Preferences menu>Products sub-menu. So you can use any of these two options to change the number of products per page.
- Directory - this option lists all directories that are in the themes folder on your PrestaShop hosting account. By default, it's set to the folder that contains the theme's files and folders. It's recommended that you don't change this option, unless you know exactly what you're doing. Otherwise, you may mess up your theme.
If you make any changes to the options don't forget to click on the Save button.
On the same page with the advanced theme options there are also some settings related to the appearance of columns on the frontend. There is a list of the different frontend pages (e.g. login, category, etc.). For each page it's indicated with a green checkmark or a red X symbol whether the left and right columns appear on that page:
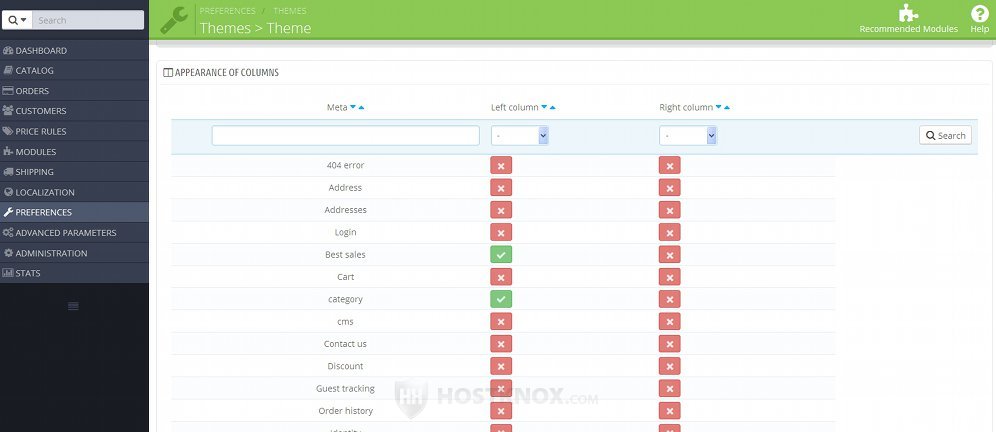
So, for example, if there's a green checkmark under Left column for the category page, this means that the left column is displayed on category pages. You can click on the checkmarks and X symbols and they will turn into the opposite. For example, if you click on the green checkmark under Left column for the category pages, it will turn into a red X mark. This in turn means that the left column will be removed from category pages.
Editing these options, however, doesn't necessarily mean that the changes will be reflected on the frontend. For some pages it may work, while for others it may not work (it depends on the theme).
Note that in PrestaShop 1.5 most of the advanced theme settings described above are not available. A few of the options, however, can be edited for each theme. When you go to Preferences menu>Themes sub-menu you'll see the installed themes listed at the top of the page. Click on the edit icon (looks like a pencil) for the particular theme. On the page that opens the only options that you can configure are for the name of the theme and the directory in which the theme's files and folders are stored.
Export Themes
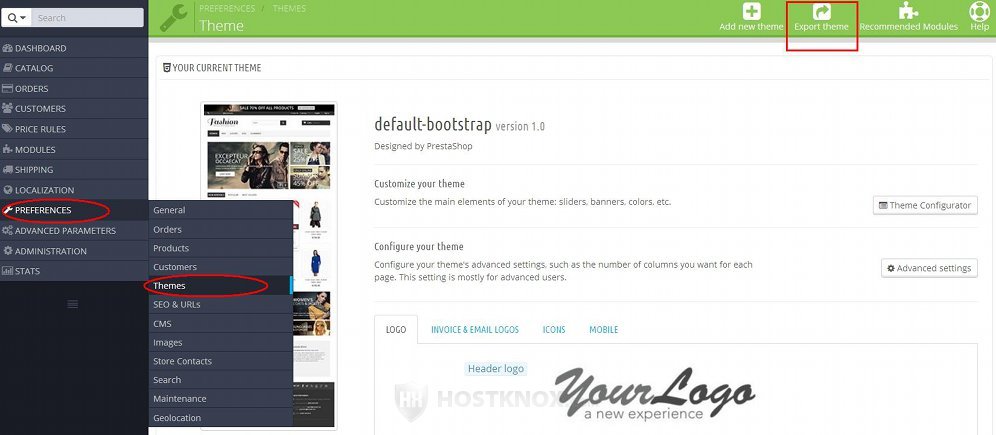
In PrestaShop you can export any of the installed themes. This is useful if you want to back up one or more of the themes, or if you want to offer a theme to other people so that they can install it. To export a theme, go to Preferences menu>Themes sub-menu in the admin panel and click on the Export theme button:
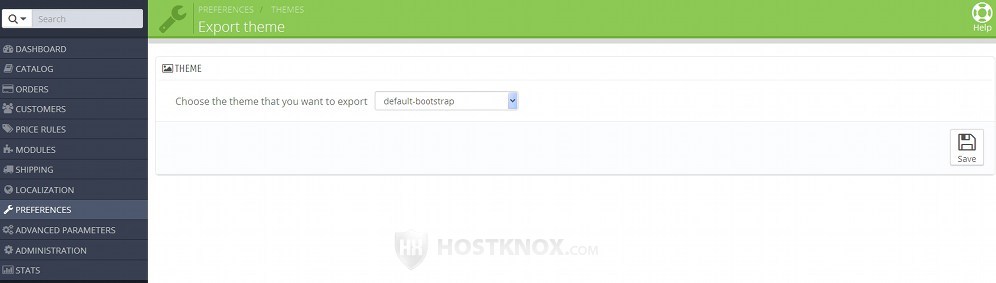
On the page that opens select the theme from the drop-down menu and click on the Save button:
On the following page there are some options related to the general information about the theme:
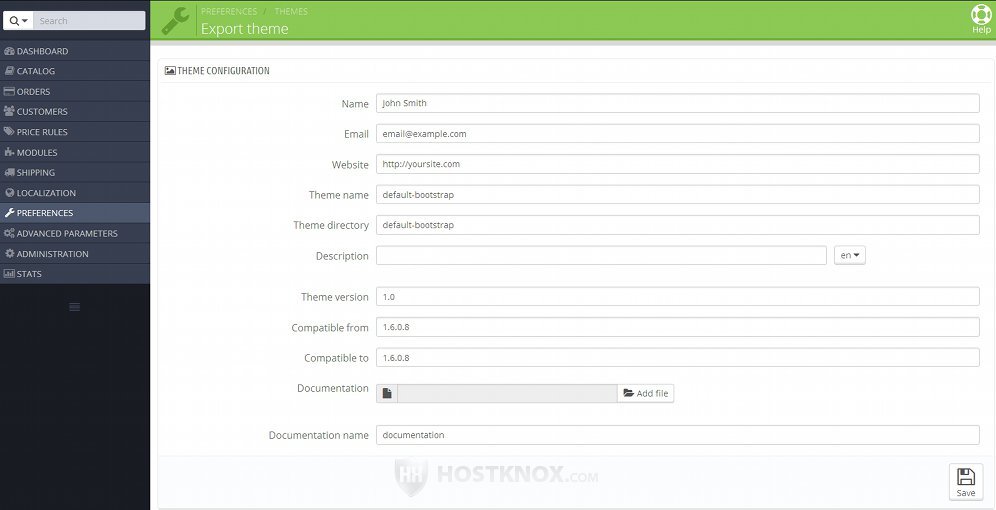
The fields are not required and if you want to, you can leave some of them blank. You can provide your name, email address and site; if necessary you can change the name of the theme, add some description, and specify the PrestaShop versions with which it's compatible. If you have created on your local computer some text file with any additional information, documentation and/or instructions about the theme, from the Documentation option you can include that file in the theme package that's about to be exported.
After you're done click on the Save button. PrestaShop will automatically pack the theme into a ZIP archive and a window will pop out with which you can download it on your local computer. The name of the ZIP file will be a long string of letters and numbers; if you want to, after you download it you can rename it with the name of the theme.
In PrestaShop 1.5 exporting themes is done from a different place in the admin panel. Go to Modules menu>Modules sub-menu, on the left side of the page that opens select the Administration section, find the module Import/export a theme and click on its Configure button. On the next page there's a panel labeled Export a theme; use the drop-down menu there to select the theme and click on the button Export this theme. This will open the page with the settings that you can configure before exporting the theme; they are the same as the ones shown in the screenshot above.
Create New Themes
If you want to create a new theme, one way you can do this is by using as a base an existing theme that you have installed. In order for a theme to function properly it needs to have specific files and a folder structure. So by using an existing theme you'll make sure that you don't miss anything. A good way to start is to use the default theme that comes prepackaged with PrestaShop.
Here we'll show you how to do this automatically from the admin panel. You can also do it manually; for more information check out the article on how to create a child theme in PrestaShop.
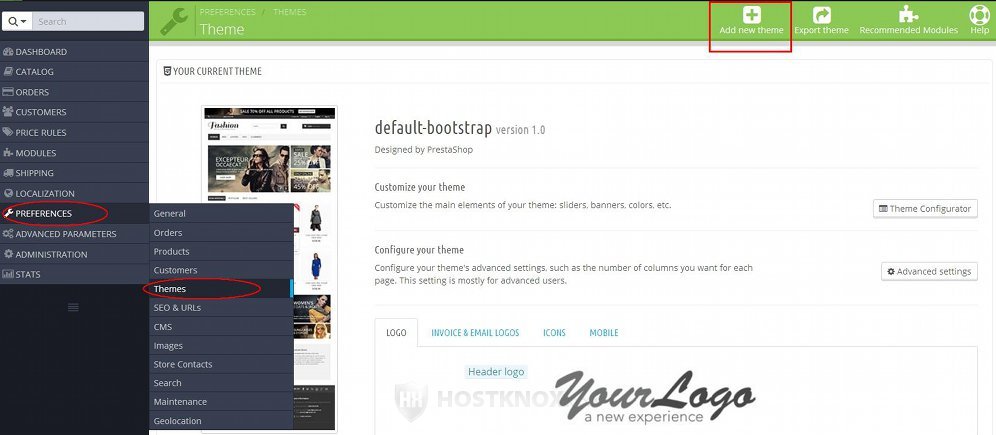
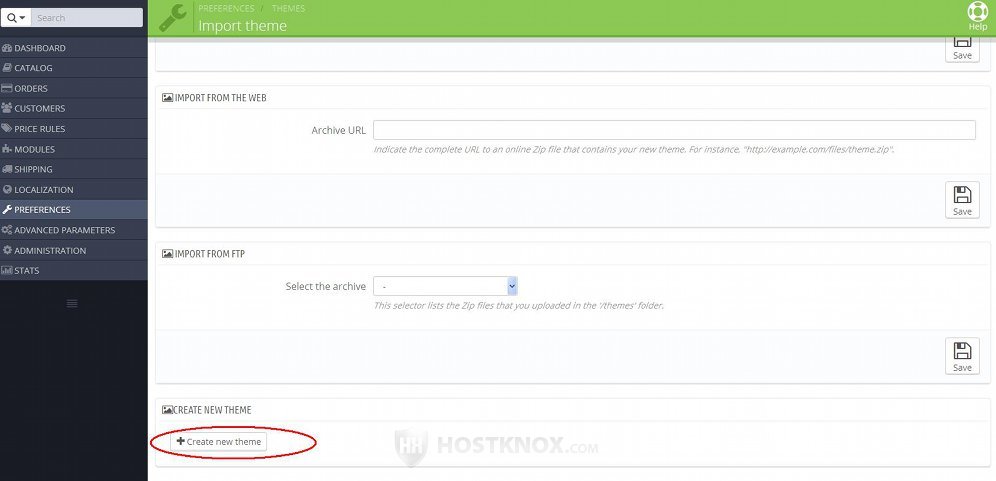
The admin panel has options with which you can start building a new theme. To do this, go to Preferences menu>Themes sub-menu and on the page that opens click on the Add new theme button:
On the following page scroll down to the bottom and click on the button Create new theme:
This will open the page with the settings for creating a new theme:
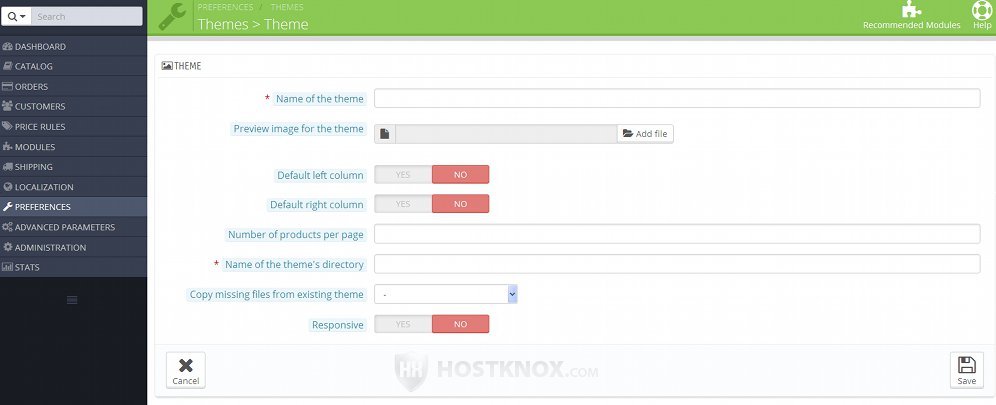
Most of the options are the same as when editing the advanced settings of an existing theme. For a more detailed description of these options check the section in this tutorial on the advanced theme settings.
Basically, you need to type a name for the theme and a name for the directory in which the theme's files and folders will be stored. PrestaShop will automatically create this directory in the themes folder on your PrestaShop hosting account. If the name of the directory consists of more than one word, separate them with underscores (e.g. example_theme), don't use blank spaces. From the drop-down menu Copy missing files from existing theme you can select one of the installed themes that you want to use as a base for the new theme. The files of that theme will be copied into the folder of the new theme. The rest of the options are not that essential. You can set the number of products to be shown on category pages, you can indicate whether the theme will have a left and/or a right column, and whether it will be a responsive theme (these three options are only informational, and you can change them at any time after the theme is created).
From the option Preview image for the theme you can upload a screenshot of the theme. Since at this point the new theme is not ready and you're still going to modify the way it looks, you can leave this option and upload a screenshot later when the theme has its own distinct look. After the theme is created and you make it the active one, you can edit its settings, including the option for the image of the theme.
After you're ready with the options click on the Save button. The theme's directory will be created on the PrestaShop hosting account. You should check whether all the files of the base theme are copied into the folder of the new one. You may need to manually copy some of the files and folders of the base theme to the folder of the new theme; in fact, doing it manually is a more reliable way. For information on how to manually create a new theme based on an existing theme check out the article on how to create a child theme in PrestaShop.
At this point the theme will look in exactly the same way as the existing theme from which you copied the files. To change the design and functions of the new theme you'll have to modify the code of its files.
To create a new theme from the admin panel in PrestaShop 1.5, just go to Preferences menu>Themes sub-menu and click on the Add new button. On the page that opens you'll see the options for the name of the theme, the theme's directory and for choosing an existing theme from which to copy the files.
Links to Tutorials and Articles On Themes
You may find helpful our other tutorials and articles related to managing themes: