SugarCRM Users Tutorial
How to add and manage users in SugarCRM
In this tutorial we'll show you how to add new users (employees) and how to edit the settings for the existing ones.
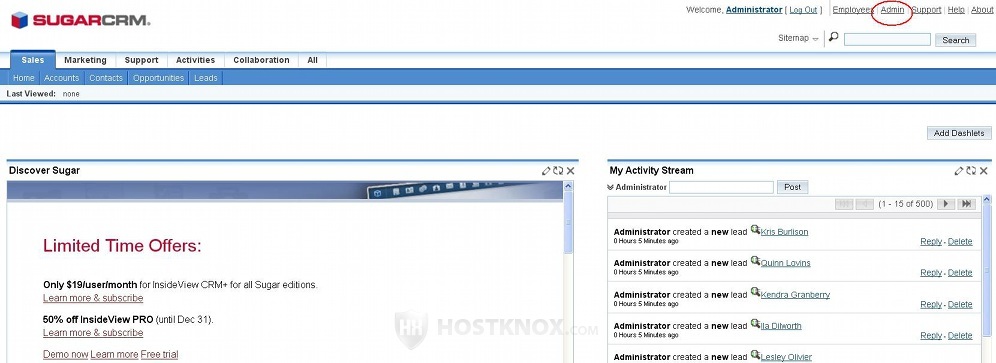
As an administrator you can pretty much do anything in your SugarCRM application. One of the things that you can do is to add new users. First, log in to your account in SugarCRM. On the home page click on the Admin link in the upper right corner:
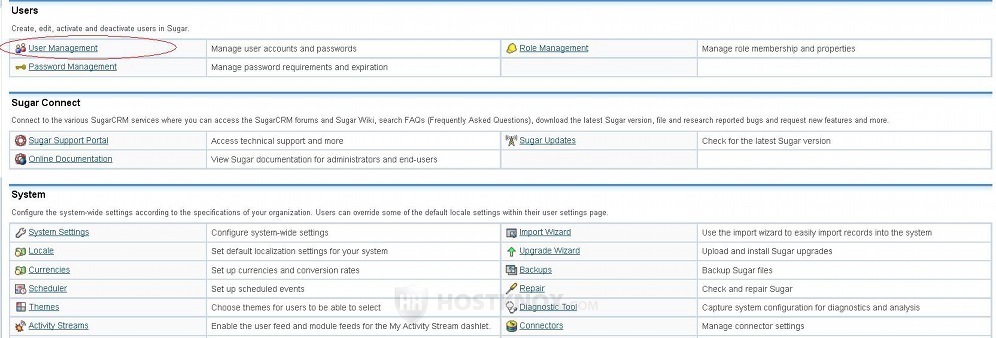
On the page that opens scroll down to the section called Users and click on User Management:
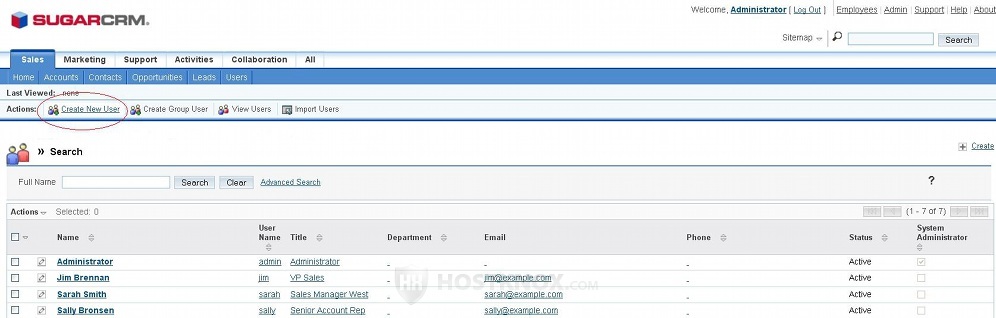
On the page that opens there's a table with all the users listed in it. If you installed the sample data, there should be some example users. Otherwise, the table will be empty. To edit the account of any of the users, just click on the name of that user. To add a new user click on the button Create New User that's above the table:
On the page that is displayed after you click on that button there are two tabs with settings: User Profile and Advanced. By default, the options displayed by the User Profile tab are shown first. The options are divided into three sections: User Profile, Employee Information and Email Settings.
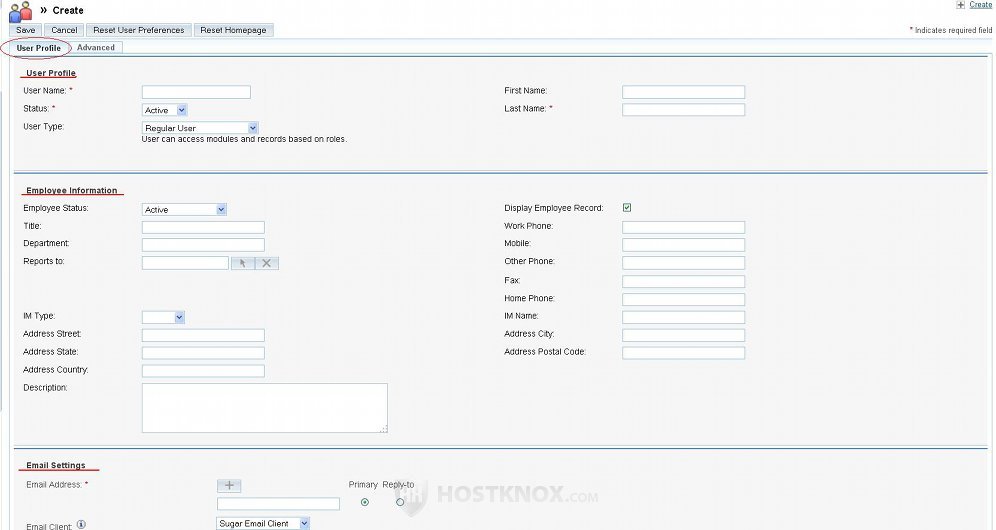
You don't actually have to configure all the settings. The only required ones that you have to set in order to add the user are marked with a red asterisk. They are User Name, Last Name and Email Address. The Status option is also required but it's set to Active by default. Of course, you can configure all the options.
When the user logs in for the first time, he/she will be prompted to change the settings before going to the application's home page. This is shown in the second part of the tutorial on the initial SugarCRM settings. The user can also change the settings later (at any time), as long as they're logged in. With a few exceptions the user can change all the settings.
Let's have a bit more detailed look over the settings. The first section on the User Profile tab page is also called User Profile:
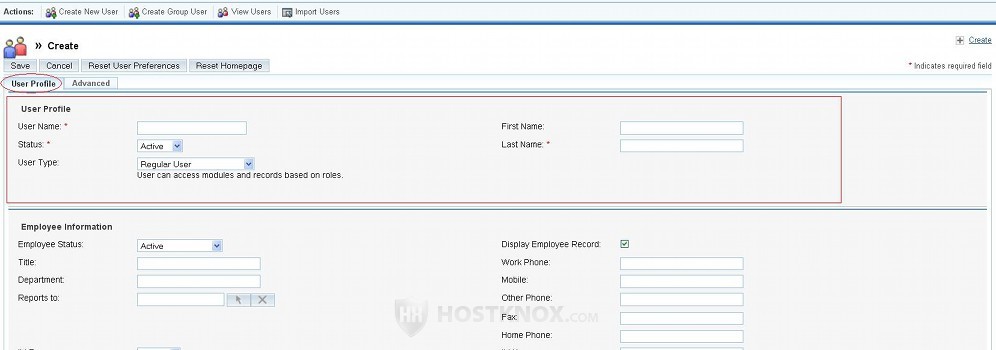
In this section you can specify the user's first and last name. The status is set to Active by default and the user type is set to Regular User. The other user type that you can choose is System Administrator User, which, of course, is only used when you want make somebody an administrator and give them full access to everything. You can additionally restrict the things that regular users can do by assigning a role to the particular user. To learn how to create roles and assign them to users check out the tutorial on SugarCRM role management.
In this section you're required to type a user name for the user. It will be used by the user to log in to their SugarCRM account. The user will also need a password. SugarCRM is configured to generate and send automatically a password (together with the user name specified by you) to the email of the user, which you also have to provide before saving the user settings. For the SugarCRM application to be able to send mails you have to configure the settings for the outgoing mail server too. If you haven't done this so far, the tutorial on the initial SugarCRM settings will provide you with more details on that subject.
It's possible to change the password settings so that you can manually set a password and then send it to the user (together with the user name). To learn how to do it read the article on setting passwords for new SugarCRM users manually.
Once the user logs in they can change all the settings in this User Profile section, except for the Status and User Type.
The next section on the User Profile tab page is Employee Information:
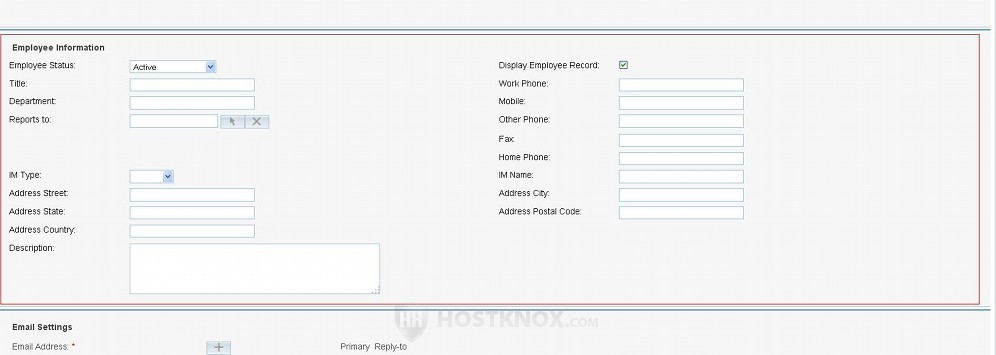
There are no settings in this section that you are required to configure so that you can create the user. It's up to you to configure all, some or none of the options, or just leave it to the user. The section is for personal information about the user (e.g. address, phone numbers, etc.). The options are pretty much self-explanatory. The only settings that the user can't configure in this section are Employee Status (set to Active by default), Title (e.g. Sales Manager), Department (e.g. Sales), and Reports to. So if you want these particular settings to be specified, you, as an administrator, have to configure them yourself.
The last section on the User Profile tab is Email Settings:

In order to be able to create the user account you have to type the user's email in the field for Email Address. This is the email for incoming messages. You should have already configured the settings for the SMTP server. So at this point you won't need to configure the setting Email Provider. In our example we have set the options for the outgoing mail server, but we need to provide the customer with his/her own credentials. So we need to type the full email address in the field for SMTP Username, and the password for that address in the field for SMTP Password. To learn how configure all the SMTP settings read the tutorial about configuring the initial SugarCRM settings.
In case you enabled the option which allows users to use the same email credentials for the outgoing system email, the options SMTP Username and SMTP Password won't be displayed on this page.
In any case, when these options are configured correctly the user will be able to send mail directly from the SugarCRM application. If you provided the user with their own email credentials for the outgoing server, they can use the same email account in the field for Email Address (incoming mail).
As we mentioned earlier in this tutorial there's another tab with user settings: Advanced. None of the settings displayed by this tab are required in order to create the user. You can leave them as they are, or change them. After the account is created the user will be able to modify all of these settings anyway. The first two sections on the Advanced tab page are called User Settings and Layout Options:
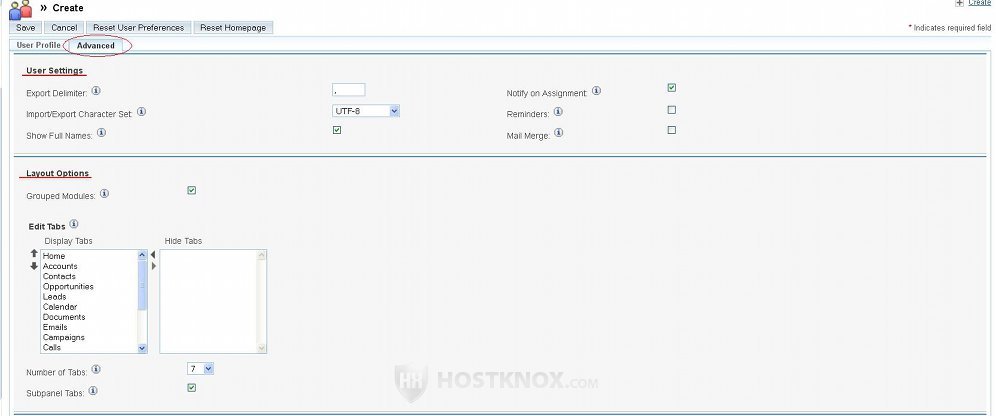
From the User Settings section you can change the character used as an export delimiter. This is the character that will be used to separate values when you export data. By default, it's a comma (you don't have to change it). You can also change the character set. You can choose whether the user's full name or their user name should be shown in assignment fields. You can also set the SugarCRM application to send a notification email to the user when they receive an assignment (Notify on Assignment option), and you can also set reminders.
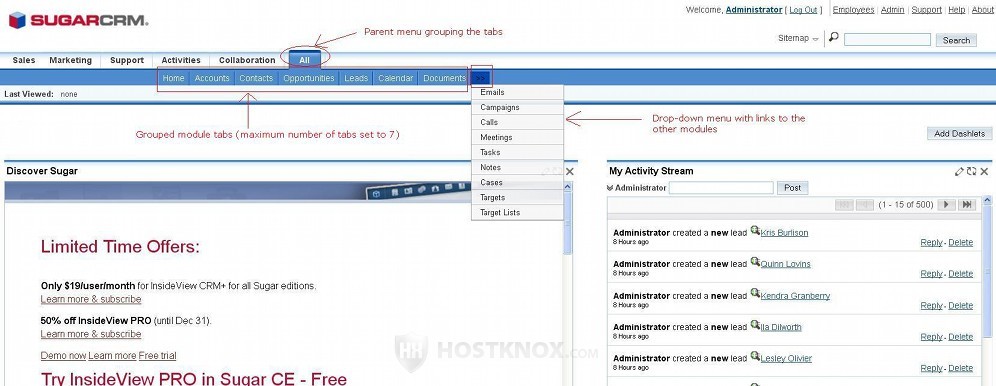
From the Layout Options section you can configure how the tabs will be shown in the user's account. The tabs are displayed in the navigation bar at the top of the application; they are direct links to the different SugarCRM modules. There are more than a dozen modules: Home, Accounts, Contacts, Opportunities, Leads, Calendar, Documents, Emails, Campaigns, Calls, Meetings, etc.
The first option is Grouped Modules and it's enabled by default. This means that the tabs linking to the different modules are grouped into several parent menus. The Edit Tabs option lets you choose which tabs to be displayed in the navigation bar and which are to be hidden; you can also select the order of the ones that are displayed. From the Number of Tabs setting you can also select the maximum number of tabs that appear in the navigation bar; the rest of the tabs are displayed in a drop-down menu:
For more information on how to manage module groups and add new ones globally (for the whole application) check out the article on configuring grouped modules in SugarCRM.
Back to the Advanced tab page of the user settings, the last two sections are Locale Settings and Calendar Options:
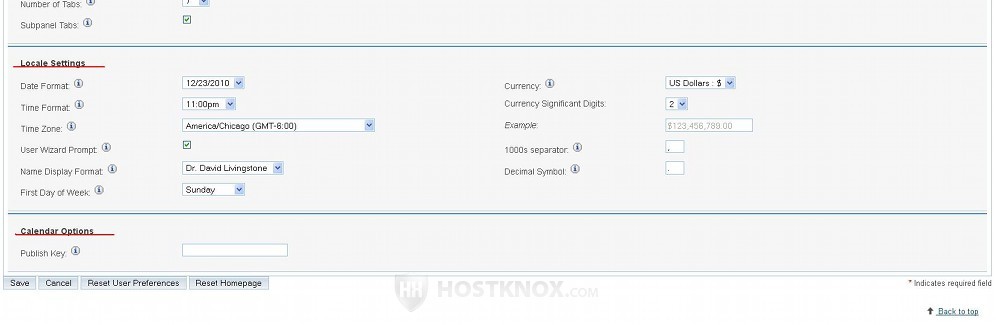
From the Locale Settings section you can set the date and time format, the time zone, name display format, first day of week, and some currency options. The setting User Wizard Prompt is enabled by default; this means that when a new user logs in for the first time they will be prompted to configure or change the settings for their account. These include most of the settings that we have described so far. Of course, users can change their settings whenever necessary. To do this, after they log in to the home page of the application they just have to click on their name. It's displayed in the upper right corner of the page.
The Calendar Options section has only one setting (Public Key). It can be used to enter a key that will prevent unauthorized publishing of the user's calendar.
After you're done with the settings click on the Save button to add the user (an employee record will also be created for that user). If you haven't changed the default settings for the automatic generation of passwords, the application will automatically send the user name and password to the user's email address that you specified in the settings. If you have disabled the automatic generation of passwords, you'll have to send the user name and password yourself.
After you add the user another tab will appear next to the tabs User Profile and Advanced. This tab is called Access. When you click on it you will see which modules the user is allowed to access and what actions they are allowed to perform. By default, regular users are allowed to access all modules and perform all actions (e.g. edit, export, import, etc.); they can't do only admin-specific things. From this tab you can assign a role to the user. Roles give you the chance to restrict the access to modules and to restrict the actions the user can perform. Only administrators can create and assign roles. To learn how to create roles and assign them to users, read the tutorial on how to create and manage roles in SugarCRM.