Joomla Migration Tutorial
How to migrate Joomla from version 1.5 to 1.6 or 1.7
The upgrade process from Joomla 1.5 to 1.6/1.7 or newer versions involves some big changes and is a bit more complicated. That's why it's rather a migration than an upgrade. Newer versions of Joomla are easier to upgrade, for example the upgrade from version 1.6 to 1.7 is less complicated than from 1.5 to 1.6.
This, however, doesn't mean that it's too difficult or that you shouldn't migrate your site. Joomla 1.5 is still supported (until April 2012) and it's up to you to decide whether you are going to wait a bit more or migrate your site now.
Whatever you decide, there is a convenient non-commercial plugin that will practically perform the whole operation. It's called jUpgrade and you can find it on the official Joomla site. There are also some commercial solutions if you prefer to use them. But in this tutorial we will upgrade Joomla using jUpgrade.
Needless to say, before you start anything, make a backup of the Joomla files on your hosting account and of the database used by your Joomla installation.
Before you start the migration make sure that your Joomla 1.5.x is upgraded to the last available version: 1.5.23. You can find 1.5.x update patches from the Joomla download section.
Download the package you need (e.g. Joomla_1.5.20_to_1.5.23) on your local computer, then unzip the archive and with an FTP client (e.g. FileZilla) upload the folders and files to the root Joomla folder on your account. If you haven't used an FTP client or you don't know how to configure it, check out the tutorials on configuring FTP clients.
There are also a few other things you have to keep in mind before starting the migration. It's not a bad idea to check whether the third party extensions you have installed have native versions for Joomla 1.6 or 1.7 (depending on the version to which you want to migrate). If there are such versions, jUpgrade will upgrade them during the migration process.
You will also have to check whether your template is compatible with the version of Joomla to which you'll migrate (1.6 or 1.7). Changes to core Joomla files will be lost.
Once you have Joomla 1.5.23 you can move to the migration to 1.6 or 1.7.
The next step is to download jUpgrade. You can find it on the official Joomla site. After you download jUpgrade on your local computer, you have to install it as a regular extension. To do this, log in to your site's backend (admin panel) and go to Extensions>Install/Uninstall:
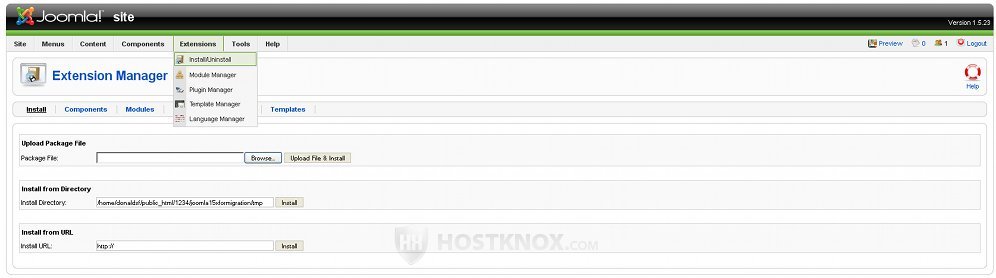
In this example we'll use the first method for installing extensions (Upload Package File), so you should just click on the Browse button to find the jUpgrade archive on the local computer and then click on Upload File & Install.
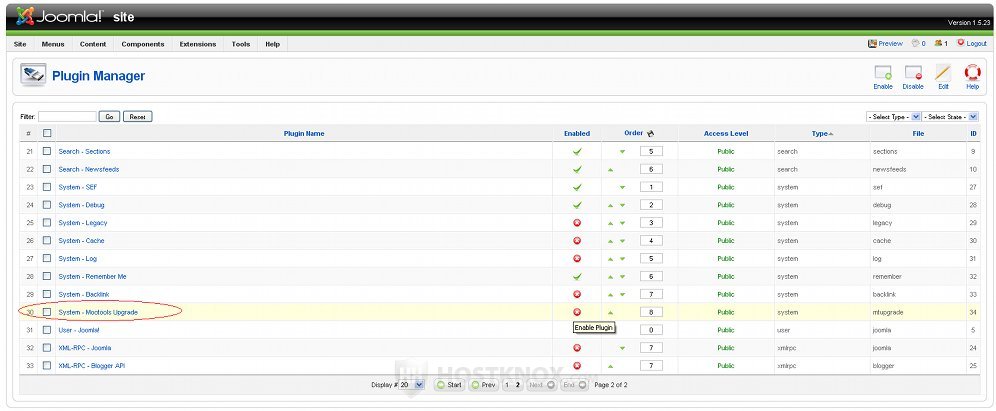
The next thing you have to do is to enable the Mootools Upgrade plugin. Go to your backend's Plugin Manager (Extensions>Plugin Manager), find the plugin named System-Mootools Upgrade and either click on the red icon in the Enabled column, or mark the checkbox in front of the plugin name and click on the Enable button in the upper right corner:
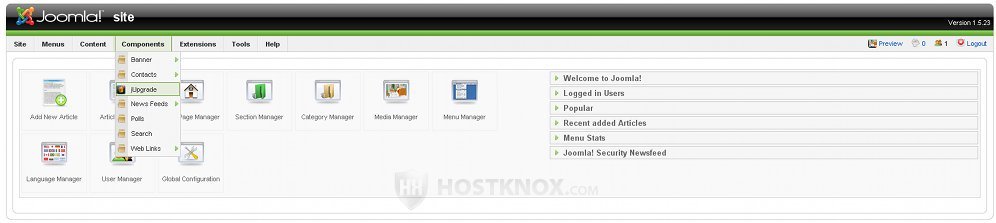
Next, go to your backend's Components menu and click on the jUpgrade menu item there:
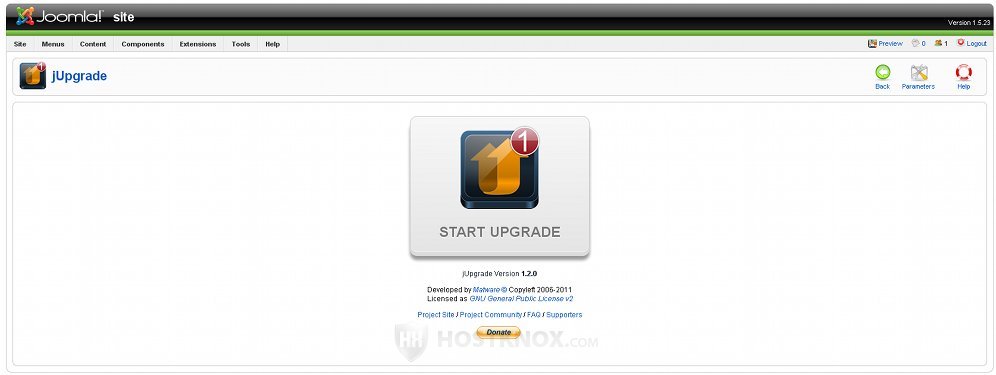
On the jUpgrade page, before you click on the big Start Upgrade button in the middle, click on the Parameters button in the upper right corner to configure some options. A new window will open:
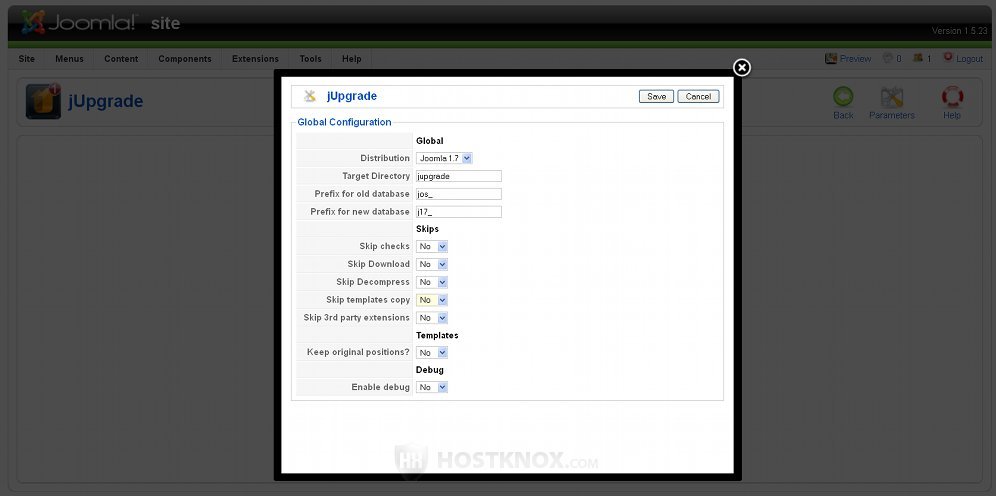
From the first group of options (Global) you can select to which version of Joomla you want to migrate (1.6 or 1.7).
In the field for Target Directory, if you wish you can change the default directory in which your new site will be installed. If you leave the default jupgrade, your new site will be installed in a folder called jupgrade inside the root Joomla directory on your account.
So, for example, if your Joomla files are in a folder called joomla on your account, the new site will be installed in public_html/joomla/jupgrade (with the URL respectively yourdomain.com/joomla/jupgrade).
Even if you don't change the default directory now, you can later move the old site from the root joomla folder to a subfolder and move the content of the new site from the jupgrade folder to the root joomla folder.
From the other Global options you can also change the database prefix for the old site; change it only in case you changed the default jos_ prefix during the installation of Joomla 1.5.x. You can also change the database prefix for the new site (it's optional).
All the Skips options are set to No by default. In this way jUpgrade will download and decompress the installation package by itself, and it will also check for updates for third party extensions and copy the templates.
If, for example, you set Skip Download to Yes, you have to upload the zipped Joomla package (version 1.6 or 1.7) to the tmp folder inside the root Joomla directory on your account (e.g. public_html/joomla/tmp). You can do that with an FTP client or, if you are a HostKnox client, through the Files section of the HostKnox control panel.
You shouldn't have any problems if you leave all the options to their default values and let jUpgrade do all the work. Only if there are troubles during the migration process with the downloading and decompressing of the new installation package, you might need to do those steps manually, and then change the respective options before you repeat the process of migrating your Joomla.
If you want you can set the Keep original positions to Yes in order to keep the present positions of your modules. If you set Enable debug to Yes, you'll see additional information during the migration about its progress.
If you make any changes to the options, click on the Save button in the upper right corner of the window. After that just click on Start Upgrade:
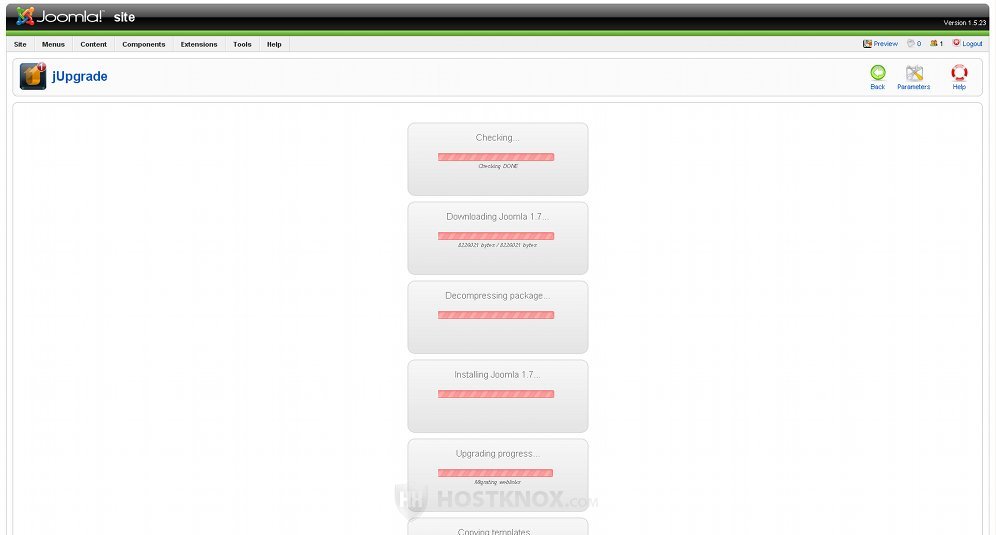
If you have left the default options, jUpgrade will download and decompress the installation package of the new Joomla version, then it will install the new Joomla in the default folder (e.g. jupgrade) and will also create new database tables with the set prefix inside the database used by your old installation.
It will also migrate the users, links, menus, modules, etc. from the old to the new site. You can see all the processes displayed on the screen:
After the process is finished, at the bottom of the page you'll see links to the frontend and backend of your migrated site:

Check whether everything on your new site is the way it should be: categories, menus, users, banners, etc. You might need to do some minor adjustments but everything should be fine.
As we mentioned earlier your new site will be located in the target subfolder you've set from the jUpgrade options. If you haven't changed the default, the new site will be in the subfolder jupgrade.
So, for example, if your old site is accessible at yourdomain.com/joomla, your new site will have the URL yourdomain.com/joomla/jupgrade. So next you can make your new site accessible at the URL address for the old site, but before that just to be on the safe side make a backup copy of the folder with the new site.
To make your new site accessible at the URL address for the old site, first create a subfolder inside your root Joomla folder and name it for example oldsite (e.g. public_html/joomla/oldsite). Then copy all the folders and files inside the root directory, except for the jupgrade folder with the new site, and paste them in the oldsite folder.
Next, delete all the files and folders in the Joomla root, except for the folder with the new site and the newly-created folder with the old site. Then copy the content of the folder with the new site (e.g. jupgrade) to the root Joomla directory. In this way your new site will be accessible at yourdomain.com/joomla and your old one at yourdomain.com/joomla/oldsite.
After you make sure that everything with your new site is fine you can delete the folder with the old site, or if you want to, you can keep it for a while just as a backup variant. All these things can be done from the Files section of the HostKnox control panel.
The above is, of course, in case you want to keep your old site for a while. If everything with your new site is fine, you can directly delete the files and folders from the root Joomla directory, except the folder with the new site, and then copy the content of the folder with the new site (e.g. jupgrade) to the root Joomla directory. Besides, you should also have a backup copy of your old site, as well as the new one, on your local computer.
Once you decide to remove the old site completely you can also remove its database tables. You can do that through phpMyAdmin. HostKnox clients can do this by going to the Databases section of the HostKnox control panel and clicking on the phpMyAdmin link on the right. Inside phpMyAdmin find the database for both Joomla installations in the left frame and click on it to open it. Then mark the checkboxes in front of the tables only for the old site (e.g. with default prefix jos_) and from the With selected drop-down menu at the bottom of the page choose Drop. Then click on Yes to confirm the action.
If you had the nerves to read to the end of this long tutorial, thanks. By now hopefully you should have some idea on how to perform the migration. And even if you don't know how to do it or you just don't feel comfortable enough migrating your Joomla, you can take advantage of the HostKnox Joomla hosting services and have our Joomla experts do the migration for you, free of charge.