PrestaShop 1.5/1.6 Product Combinations Tutorial
How to add and manage product combinations in PrestaShop 1.5-1.6
In PrestaShop you can offer the same product in different variations. For example, you can have the same product but in different colors, sizes, etc. Instead of creating a separate product for each variant you can add a single product in the catalog and then add combinations using product attributes (e.g. color, disk size, memory, etc.). To be able to do this you need to have the product attribute groups and attributes configured in advance. You can do this from Catalog menu>Product Attributes sub-menu in the admin panel. For more information check out the tutorial on how to add and manage product attributes and attribute groups in PrestaShop.
You can add and manage the combinations of a product by editing the particular product. For basic information on adding and editing products check out the tutorial on how to add and manage products in PrestaShop. In this tutorial we'll concentrate on product combinations. We'll show you:
- how to access the combinations options for a product
- how to add product combinations manually
- how to add product combinations automatically using the combinations generator
- how to edit and delete product combinations
- how to set the quantities of product combinations
- links to other tutorials and articles related to managing products
In this tutorial we've used as a basic example PrestaShop 1.6. The screenshots are also from that PrestaShop version. Although the design of the admin panel is different than that of PrestaShop 1.5 the options related to adding and managing product combinations are practically the same in both versions. If there are some differences we'll make notes about that in the tutorial.
Access the Product Combinations Options
To add combinations to a product you have to edit the product. If you're adding a new product, you can configure the options for product combinations only after you save the product. On the form for adding/editing products there's a Combinations tab on the left. Click on it to open the page for adding and managing variations of the product:
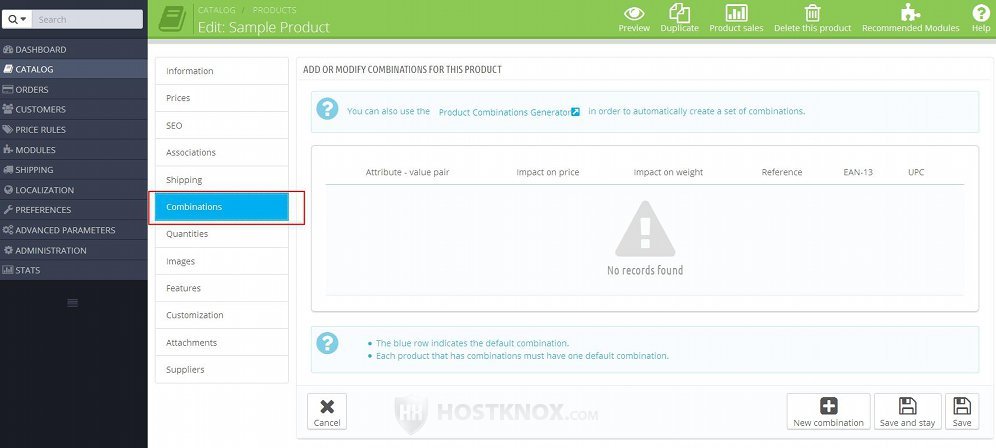
You have the choice either to add each combination manually, or in case there are a lot of combinations that you have to add you can use the product combinations generator. It will create all possible combinations with the attributes that you select. Then if necessary, you can edit or remove some of the combinations.
In the next a couple of sections in this tutorial we'll go over both methods.
Add Product Combinations Manually
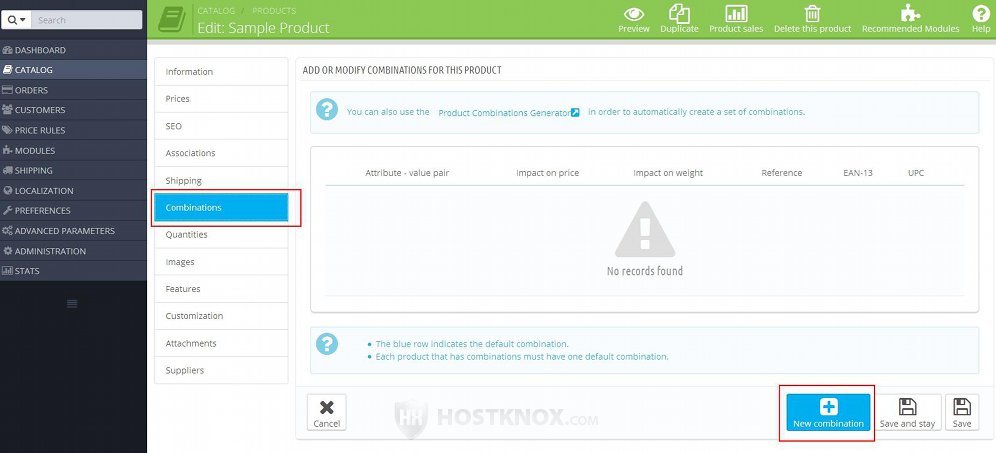
To add a product combination manually, on the page with the combination settings that's displayed after you click on the Combinations tab of the form for adding/editing products click on the New combination button in the lower right corner of the page (in PrestaShop 1.5 it's in the upper right corner):
This will display the settings for adding a product combination. At the top of the page are the options for selecting the attributes for the combination:
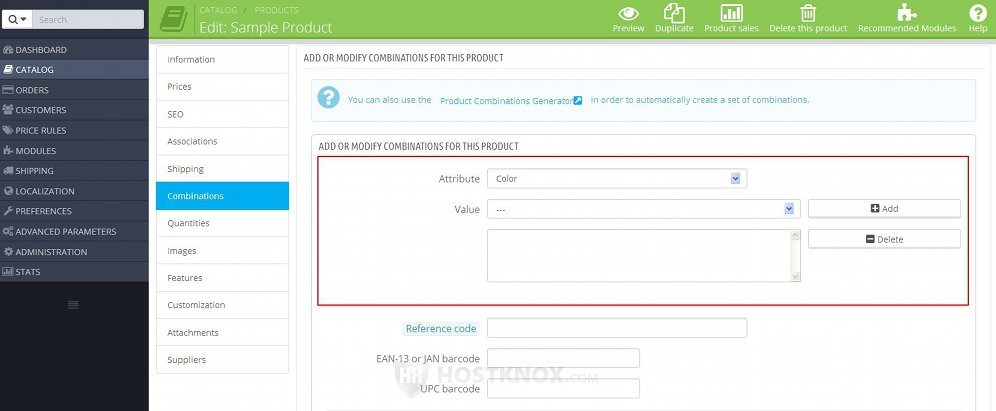
These options are:
- Attribute - from this drop-down menu you can select the attribute, or more precisely the attribute group from which you can choose a value from the next option. Attribute groups can be, for example, color, size, disk space, memory, etc. You can choose from the available attributes that you have created from Catalog menu>Product Attributes sub-menu in the admin panel. PrestaShop comes with some example attributes.
- Value - from this drop-down menu you can select one of the available values that belong to the attribute group that you chose from the previous option. For example, if the attribute you selected is color, you can choose from values such as green, red, black, etc. You can add values to attribute groups from Catalog menu>Product Attributes sub-menu.
After you select the attribute and value that you want click on the Add button. The attribute value will be listed in the text area under the drop-down menus. To remove an attribute, select it in the text area by clicking on it with the left mouse button and click on the Delete button.
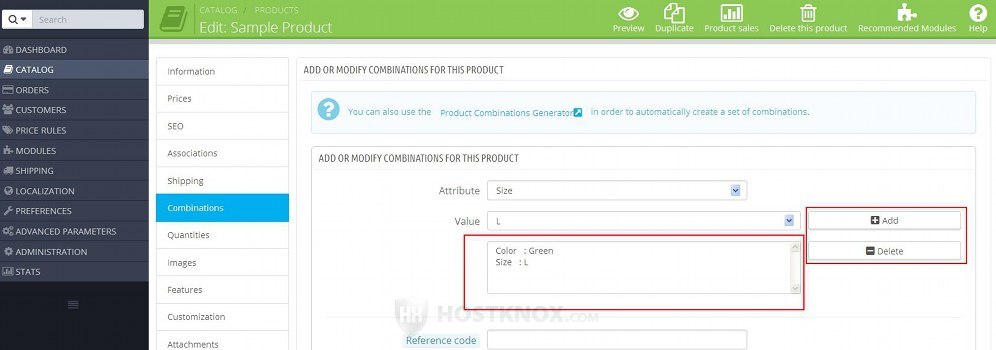
You can add as many attributes as you want. Just repeat the same procedure: select the attribute and then the value from the respective drop-down menus and click on the Add button. Note that you can put only one value from an attribute group.
Now let's continue with the rest of the options. Under the options for selecting attributes there are a few barcode and reference options:
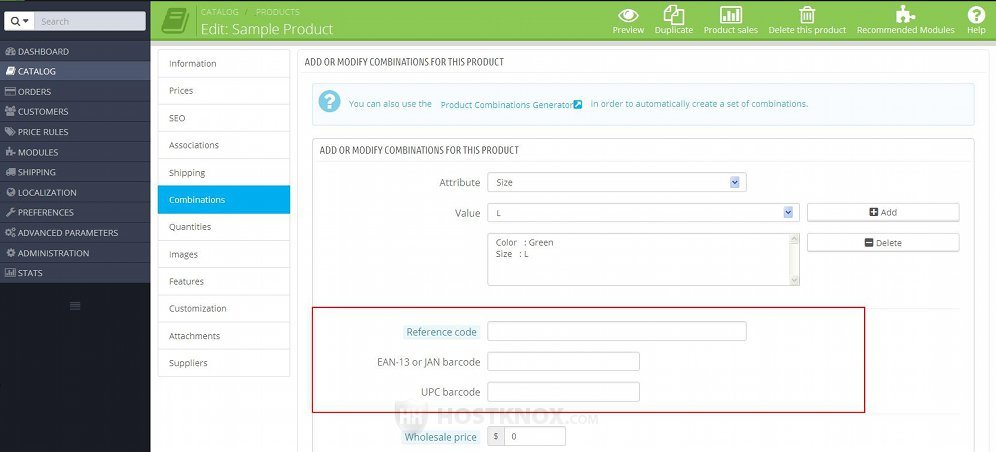
These settings are:
- Reference code - if you want to, you can put some reference code for the product combination. It's for internal use.
- EAN-13 or JAN barcode - in this field you can optionally put the barcode digits of the product. EAN-13 is an international barcoding system and JAN is the Japanese variant of the barcode system.
- UPC barcode - if your product has a barcode that uses the UPC system, you can put the barcode digits in this field. UPC is a barcoding system that's used primarily in the U.S, Canada, the U.K., Australia and New Zealand.
Below these settings there are some options related to the price and a few other options:
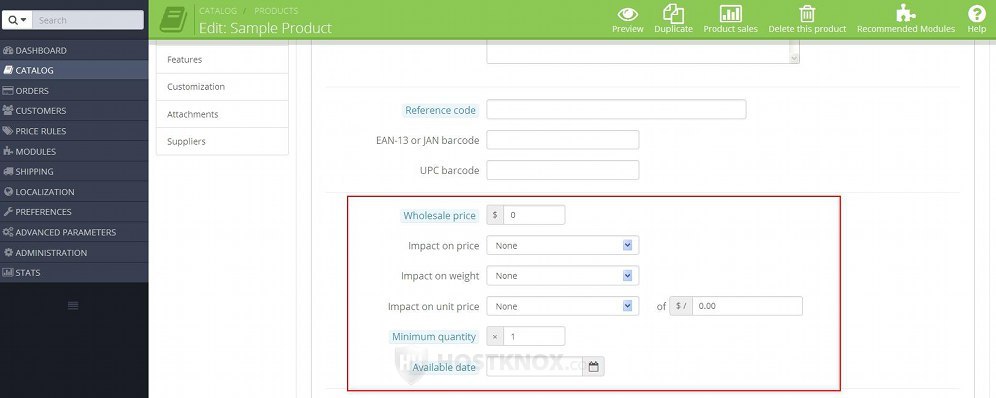
The settings are:
- Wholesale price - if the wholesale price of this product combination is different than the general wholesale price that is specified from the Information tab on the left, then you can put the wholesale price for the product variant in this field. If the wholesale price is the same, just leave it to the default 0. The wholesale price is the price at which you bought the product.
- Impact on price - if the price at which you're going to sell the product combination is different than the base price specified from the Prices tab on the left, then you can use this option to set the price of the product variant that you're adding/editing. From the drop-down menu Impact on price you can select either Increase or Decrease (in PrestaShop 1.5 it's labeled Reduction). When you do this a field will appear next to the drop-down menu in which you can type the amount to be added to or subtracted from the base price. For example, if the base price is $120 and you want the price of this product combination to be $140, select Increase from the drop-down menu and in the field that appears type 20.
- Impact on weight - this option functions in the same way as the above one. You can use it to specify the weight difference (if any) of the product combination compared to the base weight. To do this, select either Increase or Reduction from the drop-down menu and in the field that appears type the weight to be added to or subtracted from the base weight.
- Impact on unit price - if the product consists of more than one unit and there's a difference in the price of the product combination as compared to the base price, you can specify the price difference per unit (the base price per unit is set from the Prices tab on the left). Select Increase or Reduction from the drop-down menu and put in the field next to it the amount that has to be added or subtracted.
- Minimum quantity - by default, this option is set to the general minimum quantity for the product. The general minimum quantity can be set from the Quantities tab on the left. So, for example, if the basic option for the minimum quantity is set to 2, then each time you add a product combination the Minimum quantity option for that combination will be set to 2. If you want the minimum quantity of the particular product combination to be different than the general minimum quantity, then you can specify it using this option. Just type the number in the field. When a customer puts the product combination in the cart, the minimum quantity will be automatically added. Customers will not be allowed to purchase fewer units than the specified minimum quantity.
- Available date - if you have specified an available date from the general product option from the Quantities tab on the left, then the Available date option for each product combination will be set to that date by default. Otherwise, the field will be empty. In case the product combination is out of stock and you know the exact date when it will be available again, you can put the date in the field. It will be shown on the product page on the frontend when the product combination is selected.
One very important thing that should be remembered is that the quantity of the product combination is not set on this page. You can do this from the Quantities tab that's on the left side of the form for adding/editing products. There you can set and change the quantity of each variant of that product.
The last product combination options that can be configured are the one for associating one or more images with the product combination and for choosing whether this should be the default product combination:
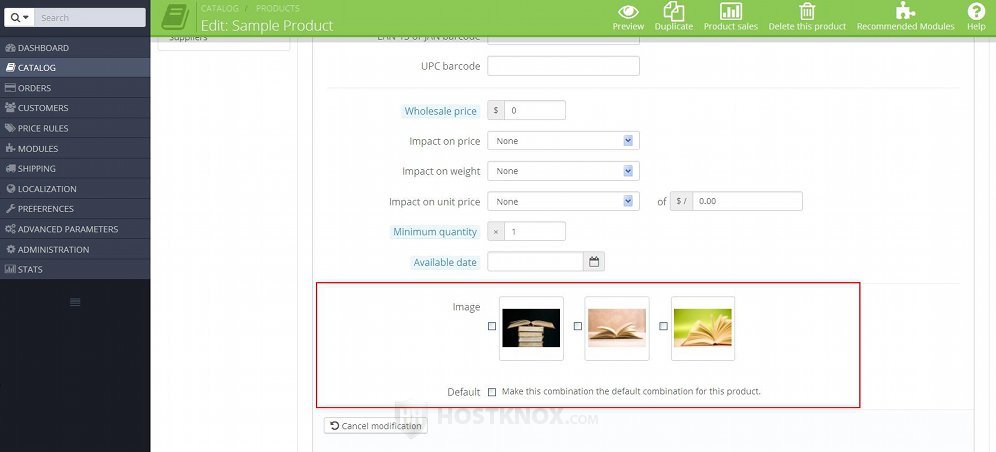
To be more precise, the options are:
- Image - this option is a list of all the images that you have uploaded for the particular product. A small copy of each image is shown. You can associate one or more images with the product combination that you're adding/editing. To do this, mark the checkbox(es) of the respective image(s). When a customer selects the product combination on the product page on the frontend, the image of the product combination is automatically displayed. The actual images are not uploaded and managed on this page. You can do this from the Images tab on the left. For more information check the section on images in the tutorial on how to add and manage products in PrestaShop.
- Default - if you want this product combination to be the default one, mark this checkbox. The combination will be the one that's shown by default on the product page on the frontend, and if the customer doesn't choose another one and clicks on the Add to cart button, it's the product combination that's added to the cart.
After you're done with the options click on the Save button at the bottom to save the combination and exit the product form, or on the Save and stay button to save the combination and stay on the same page.
Add Product Combinations Automatically
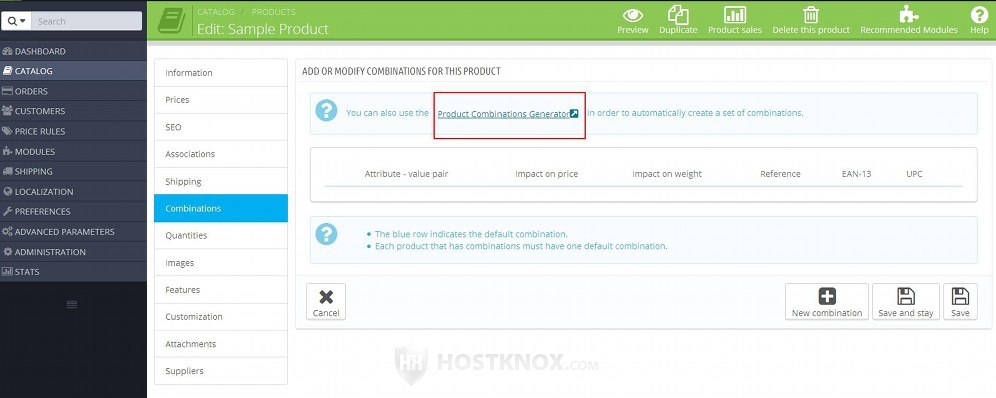
Another way to add product combinations is with the combinations generator. It will create automatically all the possible combinations with the attributes that you choose. This is especially useful if you want to combine several or more attributes. To use the product combinations generator, after you access the add/edit product form and you click on the Combinations tab on the left click on the Product Combinations Generator link that's at the top of the page:
This will display on the left side of the page a list of all the attribute groups with the attributes belonging to those groups:
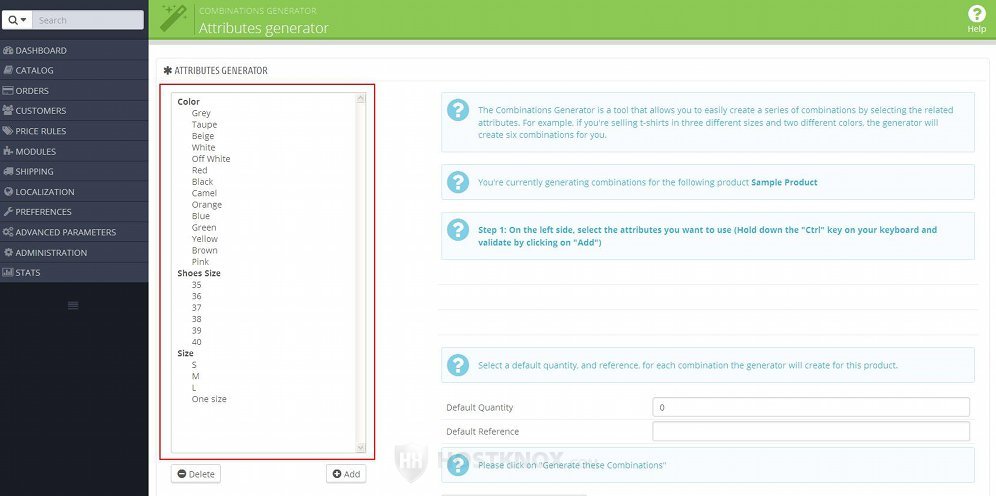
The available attributes depend on what's added from Catalog menu>Product Attributes sub-menu; that's where you can create and manage attributes.
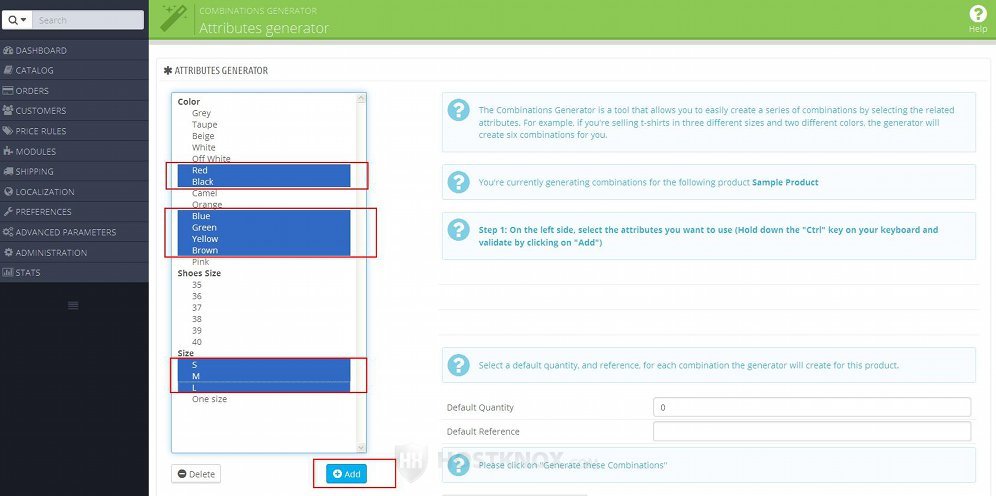
To add product combinations, first you have to select the attributes that you want to combine. To do this, press and hold the Ctrl button on your keyboard and click with the left mouse button on the names of the attributes. After that click on the Add button that's under the attribute list:
This will list the selected attributes on the right side. For each attribute there are fields which you can use to specify whether the particular attribute affects the base price and weight of the product:
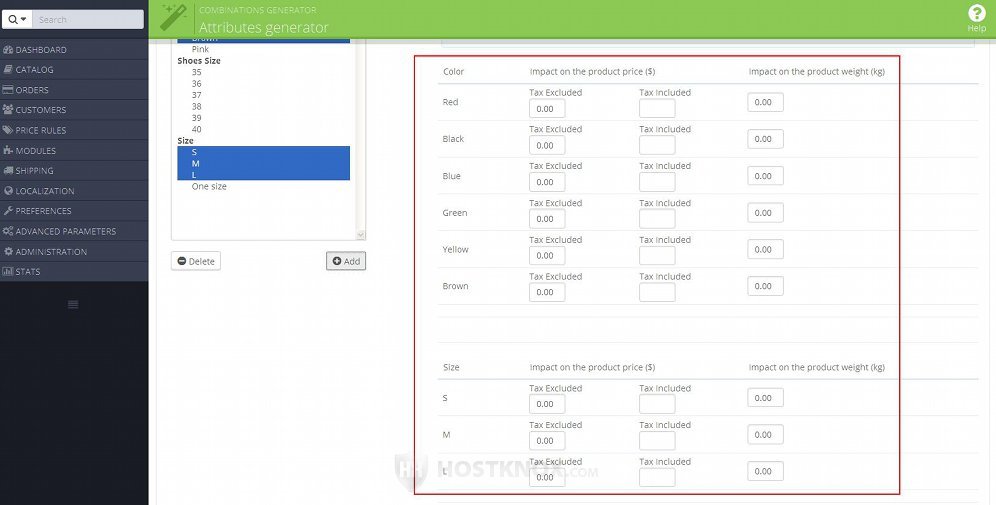
When it comes to the impact on the price there are a couple of fields: Tax Excluded and Tax Included. It's usually more convenient for people to specify the impact on the price with the tax excluded. Note that in the field for impact on the product price you can put the amount that's added to the base price; don't put the actual price. The amount will be added to the price of all combinations that contain the attribute. For instance, on our example screenshots we have added as attributes some colors and three sizes. If we increase the price of the large size, then all colors that are offered in this size will be more expensive (e.g. large red, large black, large blue, etc.). Note that on this page you can't decrease the price of a combination. This can be done by manually editing each individual combination.
The same things apply to the option for the impact on product weight.
Under the options for product price and weight there are couple of settings for default quantity and and reference:
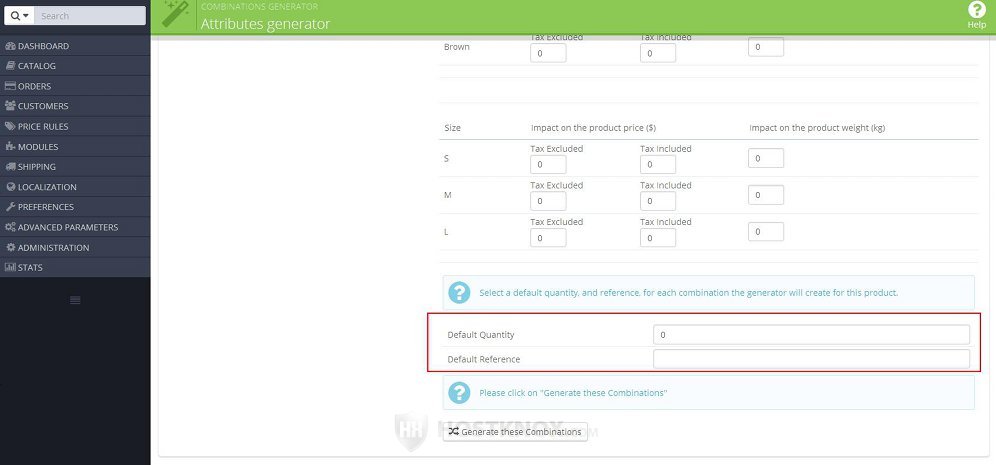
The quantity that you put in the Default Quantity field will be applied to all combinations that are about to be created. If you want the different combinations to have a different quantity, after you create them you can set the quantity of each combination from the Quantities tab on the left. For more information check the section in this tutorial on how to manage quantities of product combinations.
If you want some reference code (it's only for internal use) to be applied to all combinations, type it in the field for Default Reference. After the combinations are created you can specify a different reference for each combination by editing that combination.
After you're done with the options click on the button Generate these combinations.
To associate images with each combination, edit their barcode settings, minimum quantity, etc. you have to edit each separate combination.
Edit and Delete Product Combinations
To edit and delete the product combinations of a product, on the add/edit product form click on the Combinations tab on the left and on the page that opens you'll see the existing combinations listed in a table. To edit a combination simply click on the Edit button for that combination:
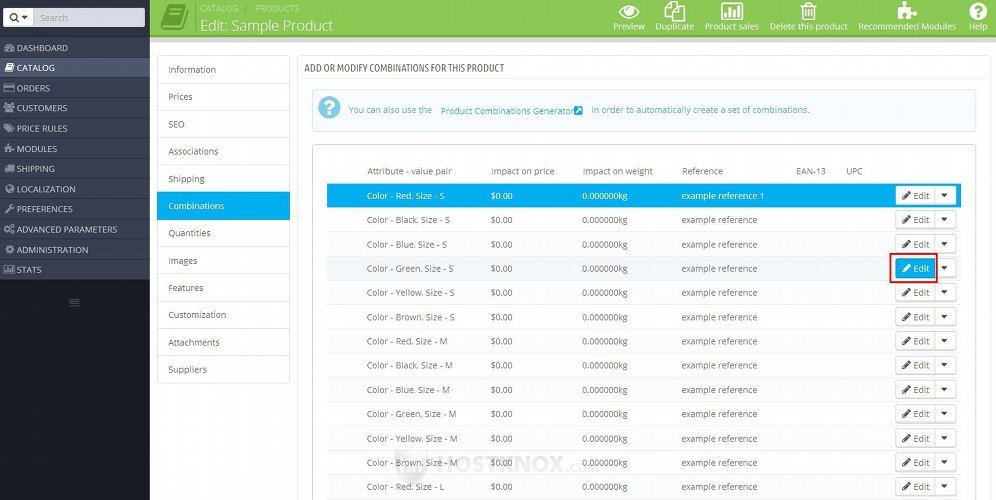
The settings that appear are the same as those that can be configured when adding a combination manually. For a review of the settings read the section in this tutorial on how to add product combinations manually.
In PrestaShop 1.5 the edit button is not labeled. It's just an icon that looks like a pencil.
To delete a combination click on the arrow that's next to its edit button in the table and from the drop-down menu that appears select Delete:
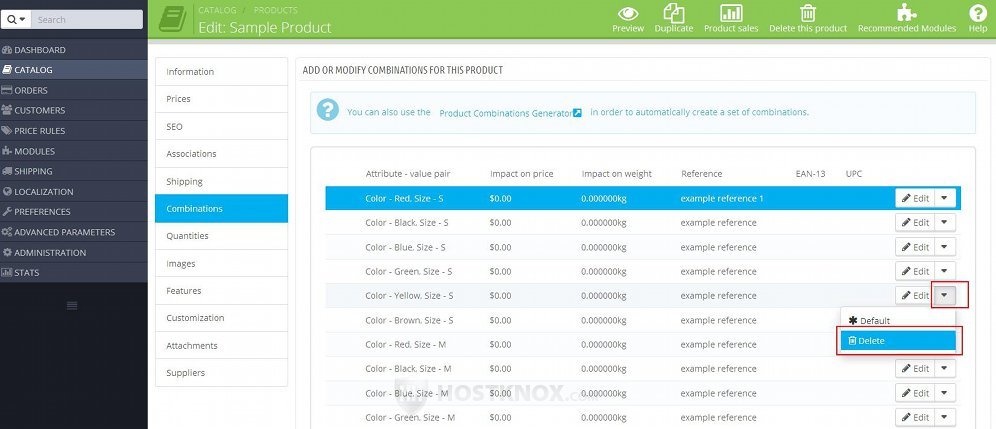
If you want to make a combination the default one, you can either edit it and configure the respective option, or just click on the arrow next to its Edit button in the table with the existing combinations and from the drop-down menu select Default.
In PrestaShop 1.5 there's no such drop-down menu. The buttons for deleting and making a combination the default one are in the last column of the table and look respectively like a trash can and a star.
Product Combinations Quantities
All the options for product combinations are managed from the Combinations tab on the form for adding/editing products. The exception is the option for the quantity of each of the combinations. When you add product combinations manually there's no option for quantity. When you add combinations automatically with the combinations generator you can set a default quantity that's applied to all combinations.
You can set and change the quantity for each combination from the Quantities tab that's on the left side of the form for adding/editing products. On the page that's displayed after you click on it there's a field for the quantity of each combination:
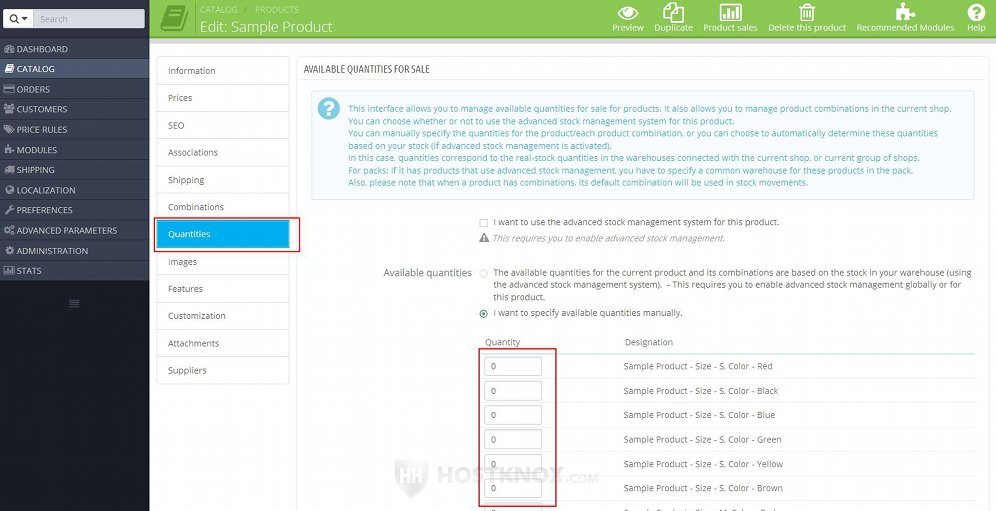
If you make changes don't forget to click on the Save and stay or on the Save button.
Links to Tutorials and Articles on Managing Products
In addition to the general tutorial on adding and managing products we also have tutorials discussing the other settings available on the form for adding/editing products, as well as some other tutorials related to products:
- how to add and edit products in PrestaShop
- how to add and manage product features in PrestaShop
- how to add and manage product customizations in PrestaShop
- how to add and manage product attachments in PrestaShop
- how to create product packs in PrestaShop
- how to add virtual products in PrestaShop
- how to add and manage product attributes in PrestaShop
- how to add and manage product manufacturers in PrestaShop
- how to add and manage product suppliers in PrestaShop
- how to add and manage product tags in PrestaShop
- how to configure and manage the options for the general product preferences in PrestaShop
In our knowledgebase there are some shorter separate articles on various things concerning products:
- how to change the number of products shown on category pages in PrestaShop
- how to disable the product comparison function in PrestaShop
- how to hide stock quantities from being displayed on the frontend in PrestaShop
- how to increase the allowed length of product names in PrestaShop
- how to remove the "Add to cart" button from category pages for products with attributes in PrestaShop
- how to remove the "New" text indicating newly added products in PrestaShop
- how to remove the "Sort by" menu from product category pages in PrestaShop
- how to use phpMyAdmin to move products from one category to another in PrestaShop