File Permissions Tutorial
What are file permissions and how to change them
File permissions describe and control to what extent a user of a file/directory can view, change or manipulate it. Here we'll show you how file permissions are formed, what each permission means and how to change the permissions of files and directories on your hosting account.
File permissions consist of three classes: owner (user), group, and others. The owner is you, group stands for people to whom you have given some access to your account, and others stands for all the visitors/users of your site. The permissions themselves are divided into three categories: read, write, execute. Each class can have all or none of the categories.
Visually file permissions are displayed in two different ways. One is a combination of letters and hyphens. The second way is with numbers.
In the first way for displaying file permissions "r" stands for read, "w" for write, "x" for execute, and "-" for no permission. Since each class (owner, group, others) can have all three permissions or none, a file permission is displayed as a string of nine characters. For example:
rwxr-xr-x
The first three symbols are for the owner, the second three for the group, and the third set of three symbols is for the other users. So, in the example above the owner has rights to read, write and execute; the group can read and execute; the other users can read and execute.
When it comes to files, the read permission means that the user can read the file, while for directories it means that he/she can only read the names of the files inside that directory. With write permission files can be changed/modified, while for directories it gives the permission to create, delete, rename files inside the directory. Execute grants the permission to execute a file (applies to scripts, e.g. Perl), with directories it allows to browse the subdirectories and files inside the directory.
When the above representation of file permissions is used there is a hyphen ("-") in front of the permissions for regular files: -rwxr-xr-x; directories have a "d" in front: drwxr-xr-x.
The second way for displaying file permissions is with numbers: 1 is for execute permission, 2 is for write permission, 4 stands for read only permission and you can have them in various combinations - 5 is for read and execute, 6 is for read and write, 7 is for all three (read,write, execute), and 0 is for none. So the above example represented with numbers looks like this: 755 (rwxr-xr-x is the same as 755).
To summarize both representations:
--- (0) no permissions
--x (1) execute permission
-w- (2) write permission
r-- (4) read permission
r-x (5) read and execute permissions
rw- (6) read and write permissions
rwx (7) read, write and execute permissions
There are some things that are useful to remember. The file permissions a directory has are not indicative of the permissions the files in that directory have. Directories usually have permissions of 755; files in the directory can have different permissions (e.g. 664, 600, etc.). HTML pages, PHP scripts, media files should be readable and writable by the owner, and readable by the visitor (e.g. 644, 664). It's also good to remember that the visitor should never have a write permission, so the last number shouldn't be 6 or 7. You shouldn't have permissions such as 666 or 777.
You can change file permissions from the HostKnox control panel, through SSH or with an FTP client. Here we'll show you how to do it with an FTP client, which is a rather convenient and fast way to do it. In this example we'll do it using FileZilla. When you log in to your account, in the panel where the files and directories are displayed you can see their permissions in the Permissions column (in other FTP clients it might be labeled Rights, Attributes):
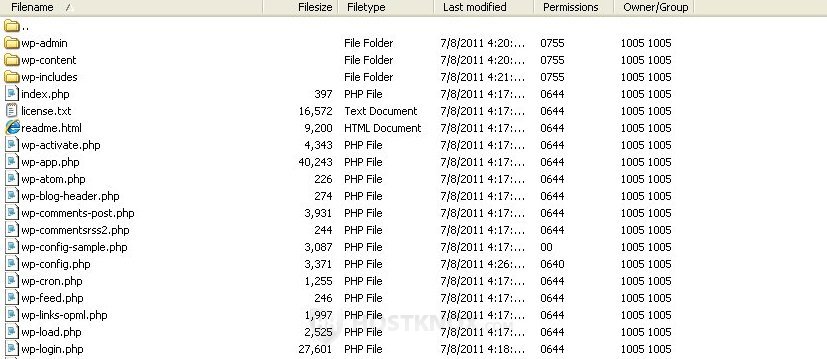
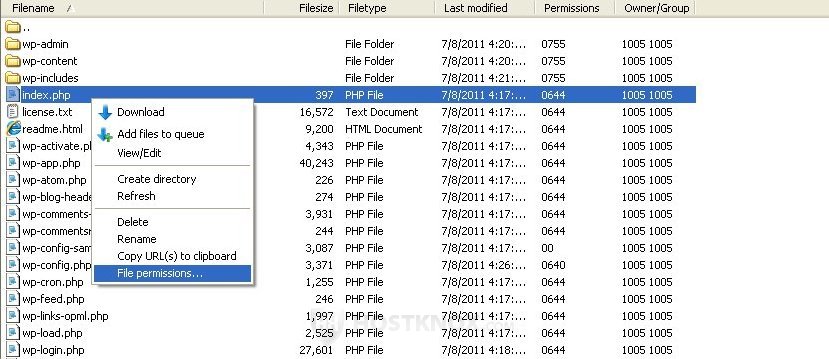
In the case with FileZilla the permissions are displayed with numbers. Other FTP clients, such as CoreFTP, CuteFTP, WinSCP, use letters (e.g. rw-rw-r--). To change the permissions of a file/directory click on it with the right mouse button and select File permissions...:
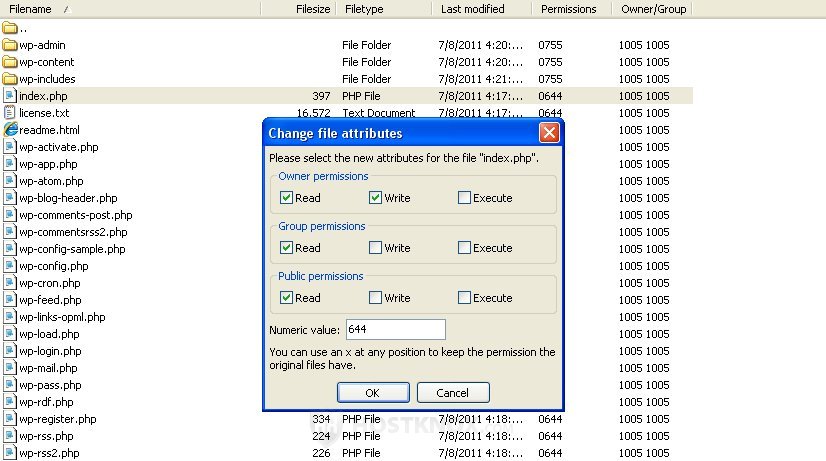
After you click on File permissions with the left mouse button, a window will open where you can set the permissions for the three classes (owner, group, visitor) by either marking the corresponding checkboxes, or by typing the desired number. Then just click on OK:
On other FTP clients (CoreFTP, CuteFTP, SmartFTP, WinSCP) after you click with the right mouse button on a file/directory you'll have to go to Properties (or Attributes) to change the permissions.