SmartFTP Tutorial
How to set SmartFTP to connect to your hosting account
SmartFTP is an FTP client for Windows users which allows you to connect to your account through FTP (also supports FTPS, SFTP, etc.). It's not free: there's a 30-day evaluation period after which you have to pay to continue using it. The price depends on the edition you want to use.
You can download SmartFTP from the official site and read more about its features. After you download and install it, before connecting to your account, make sure you have created an FTP user. If you are a HostKnox client, you can do this from the FTP Usernames section of the HostKnox control panel. Just click on the link Add FTP Username, type a name and password of your choice and, if you want to, you can also restrict the access to a specific directory within your account.
Once you've done these things, start SmartFTP, click on the File menu and select New Remote Browser (or just press Ctrl+N on your keyboard):

In the New Remote Browser panel type your domain in the Host field (e.g. yourdomain.com), and in the Username and Password fields type the name and password for the FTP user:

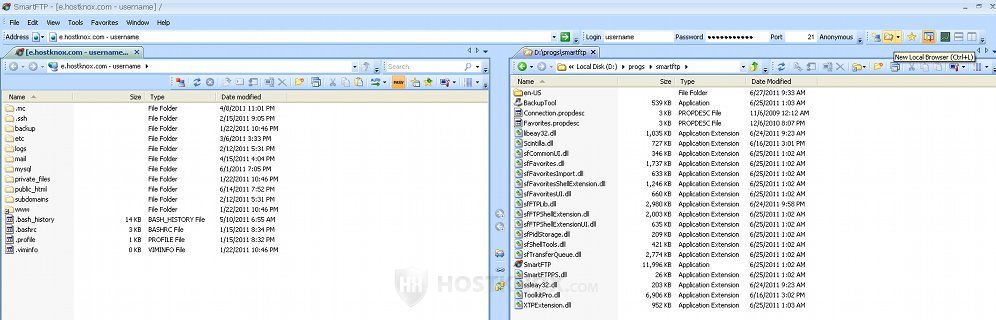
Once you click on OK SmartFTP will connect to your account and its folders will be displayed on the left part of the screen. If you want to see the files on your local computer go to the File menu and click on New Local Browser, or click on the New Local Browser button in the right upper corner. The local files will be displayed on the right side of the screen:
Once you have filled the information in the New Remote Browser, every time you start SmartFTP you'll see the address, login and password information already filled in the quick connect bar just below the menus. You only have to click on the green arrow button to connect. If you want to connect to another address or through a different FTP user you can change them, of course.
When you are connected to your account you can download/upload files and folders by marking them with the left mouse button and then clicking on the upload or download arrow buttons in the middle, between the panels for your local and remote files. You can also mark the particular file, hold the left mouse button pressed and drag and drop it in the desired location. When you mark a file/folder and then press the right mouse button you'll also see a number of actions which you can perform.
The application has many other functions and settings but these are just the basic things you need to use it.