Joomla Media Manager Tutorial
How to use the Media Manager and insert images and links in articles
Creating new pages and articles with images and links in them is easily accomplished through the backend (admin panel) of your Joomla site. The backend has its own Media Manager which you can use to upload different media files on your account.
To access the Media Manager, log in to your site's backend, then either click on the button Media Manager on the backend's homepage or go to the Content menu and select Media Manager. When you open the Media Manager you'll see the content of the images folder which is itself located in the root Joomla directory on your account (e.g. public_html/joomla/images). With the sample data installed the default installation package comes with several Joomla logos and two subfolders in the images folder: banners and sampledata.
The images folder is the default folder in which you can upload images and other media files through the Media Manager. You can organize the content inside the images folder by creating subfolders. To do this just type the name of the folder in the field next to the Create Folder button and then click on the button. To upload files click on the Browse button to locate the file on your local computer, after that click on the Start Upload button:
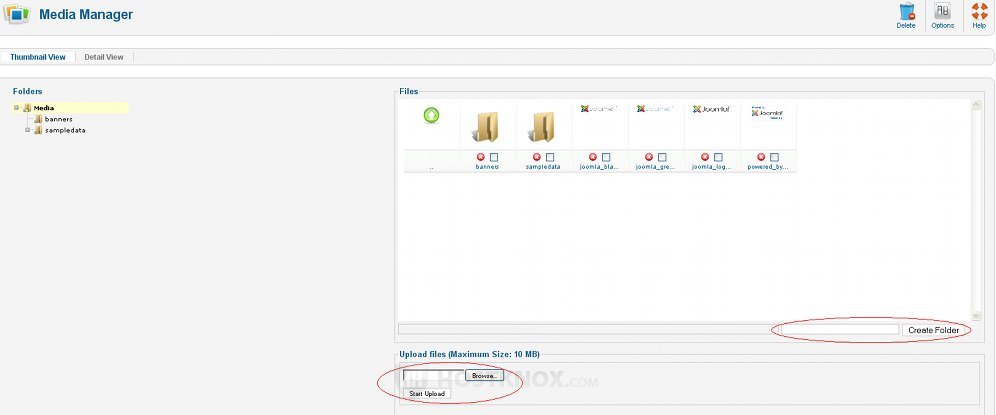
The default maximum size of the file to be uploaded is set to 10 MB which should be more than enough for images and text files and documents. If you want to upload larger files it's better to do it through FTP with an FTP client (e.g. FileZilla). You can delete any file or folder in the images directory by marking its checkbox and then clicking on the Delete button in the upper right corner.
You can configure the options of the Media Manager by clicking on the Options button in the upper right corner:
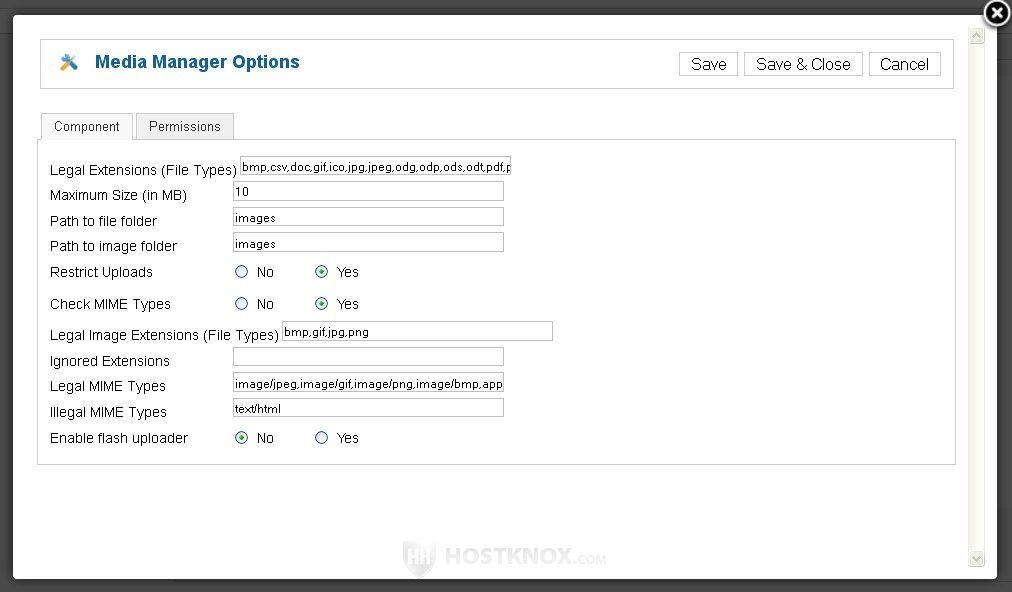
In the field for Legal Extensions, for example, you can add or remove file types. The file types included are the major image types (e.g. jpeg, png, gif, etc.) and text files (txt, doc, pdf, odt, etc.).
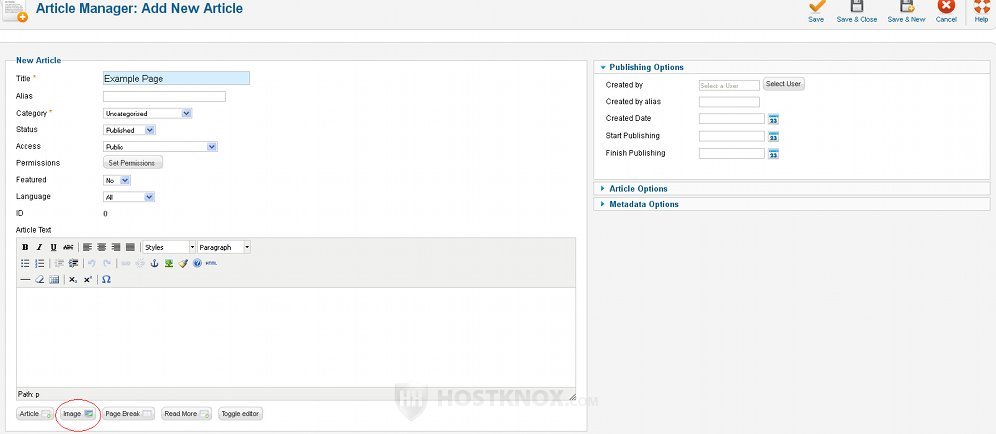
To insert images or links in an article/page, go to your backend's Article Manager (Content>Article Manager) and either open an existing article to edit it or create a new one, depending on what you want to do. In our example we'll create a new article with an image and a link to a document. So we go to the Article Manager and click on the New button in the upper right corner.
On the Add New Article/Edit Article page click on the Image button under the textarea of the built-in text editor:
After you click on the Image button a new window will open from which you have to select the image you want to insert from the Media Manager and you can also configure a few options:
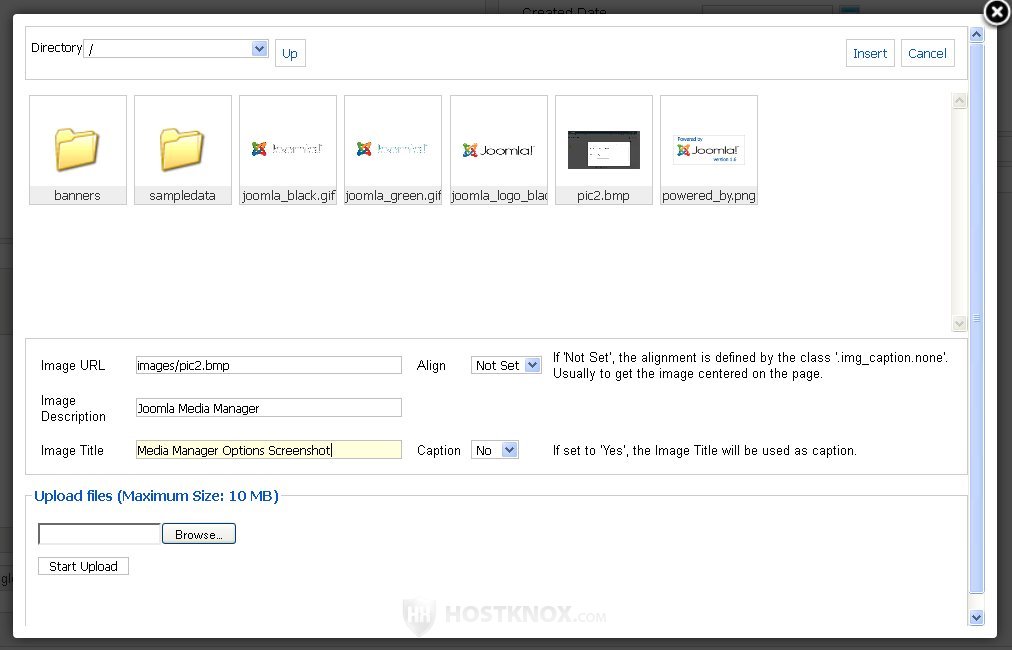
The text, if you put any, in the Image Description field is shown if a visitor's browser doesn't display images. The image title is seen when a visitor hovers the mouse pointer over the image on your site's frontend. From the Align drop-down menu you can choose whether the image should be on the left or right side. If you leave it to Not Set it will be displayed in the center. When you're done click on the Insert button in the upper right corner of the window.
Once you insert the image in the text editor you can also resize it by clicking on the image itself and then clicking on one of the corners of the image and dragging the mouse to make the image bigger or smaller. You can also click on the image and then on the Edit Image icon; it's above the textarea of the text editor. Then from the new window that opens you can set the desired dimensions and also edit some of the other image options.
To insert a link in the article, type some text, then use the mouse pointer to highlight/mark it. After that click on the Insert/edit link icon above the textarea; it looks like a chain:
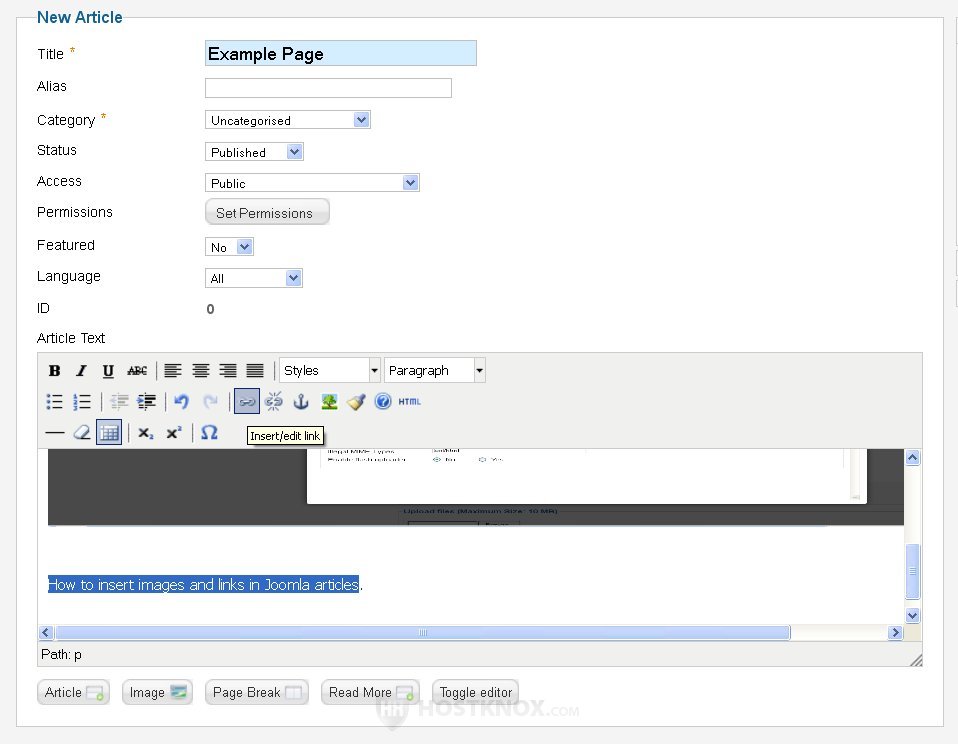
After you click on the Insert/edit link button a new window will open. There you have to specify the URL address of the link. It can point to an image or document that you have previously uploaded in the Media Manager or to any part of your site, for example, or it can be a link to another site.
For example, you want to create a link from which visitors can download or open a document and the document is stored in the Media Manager. All the files in the Media Manager are stored in the images folder which itself is located in the root Joomla folder on your account. If your Joomla files are installed in a folder called joomla on your hosting account (public_html/joomla) then you have to type an URL address for the link that looks something like this: http://yoursite.com/joomla/images/filename (don't forget to add the file extension to the file, e.g. .doc, .odt). Once you're done click on the Insert button in the lower left corner of the window.
This is all provided you use the default built-in editor TinyMCE. The editor can be changed from the backend's Global Configuration (Site>Global Configuration>Site tab). There are a couple of editors that come prepackaged with Joomla.
After you're done editing/creating the article click on the Save & Close button in the upper right corner. Then you can add it as a separate menu item or as an item in a category. If you don't know how to do this read the respective tutorials available on the right.
Finally, you can refresh the frontend of your site to see the results. In our example we created a new article with an image and a link to a text document (stored in the Media Manager), and we added the article as a menu item in the main menu:
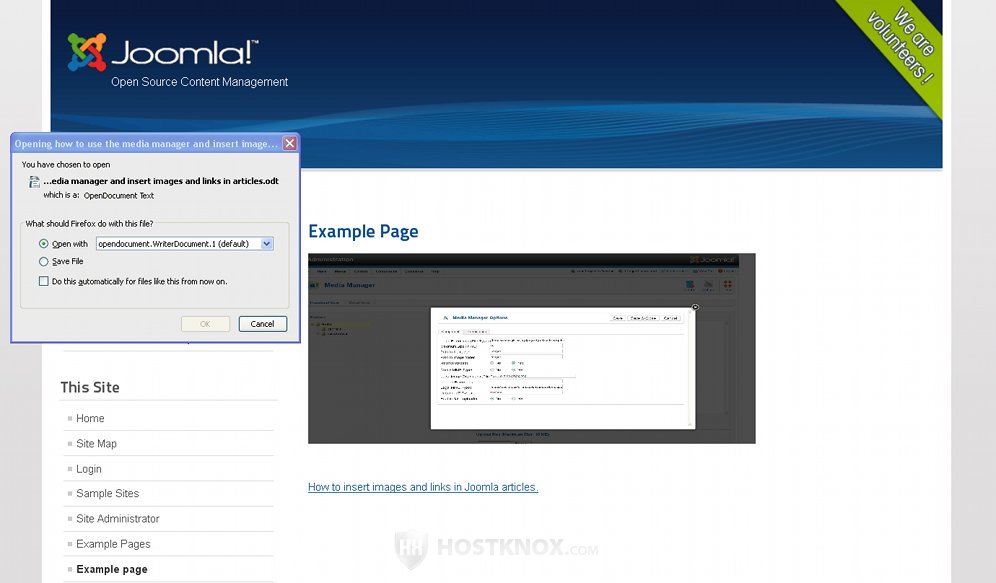
Notice that when we click on the link a window opens prompting the visitor to save or open the text document.