Magento Bundle Products Tutorial
How to create and manage bundle products in Magento
One of the several available product types in Magento is the bundle product type. As the name suggests this is a bundle of products. The bundle product is a separate, single entry into the catalog but it consists of many products. The bundle product actually contains a few, or as many as you want, groups of products from which the customer can select. You can put into the bundle any of the simple or virtual products that you have added to your catalog.
A typical example of a bundle product is a computer which can be modified by the customer who can select the parts of the computer. For instance, you have a bundle product called Personal Computer. When customers open its product detail page on the frontend they can select the processor, the hard drive, the RAM, etc. The processor, the hard drive and the other parts that can be chosen are groups of products from which the customer can select (e.g. different hard drive sizes and models, etc.).
As with other product types, most of the basic options are configured in the same way as configuring a simple product. For more information on adding simple products and on these basic settings check out the Magento products tutorial. If you need more information on other product types, you may find useful the Magento configurable products tutorial and the Magento grouped products tutorial.
In this tutorial we'll concentrate on bundle products. We'll describe the options that are specific to this product type and that differ from the settings of the simple product type.
Before you create the bundle product itself you should add the simple products that you want to include in the bundle.
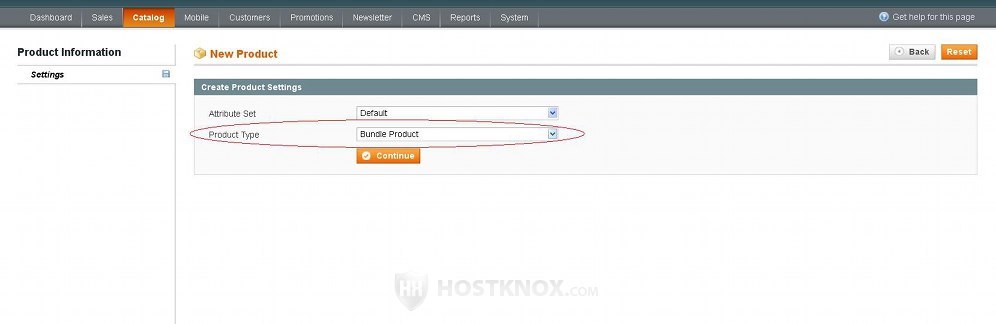
To add the bundle product log in to the admin panel of your Magento, go to Catalog menu>Manage Products, click on the Add Product button, on the page that opens select the attribute set that you want and from the Product Type drop-down menu choose Bundle Product. After that click on the Continue button to access the product settings:
When you do that the settings displayed by the General tab on the left will be shown by default. On the General tab page there are a couple of differences as compared to simple products. These involve the SKU and Weight options. For each option there's a drop-down menu from which you can select Dynamic or Fixed:
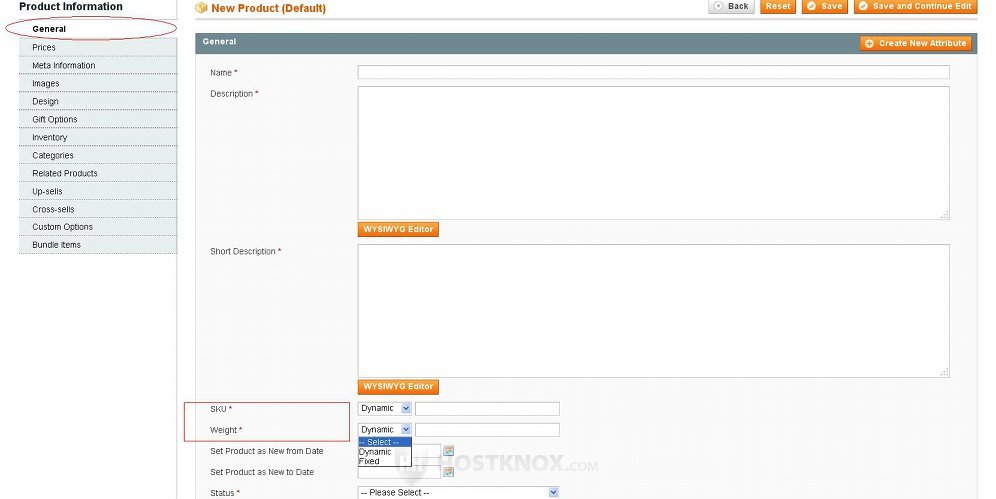
You can set the SKU option to Fixed and put its value in the field. Even if you leave it to Dynamic you'll have to type a value in the field. On the other hand, if you leave the weight to the default Dynamic, you can leave the field empty. The weight will be calculated from the weight of the bundle items that the customer selects. Of course, you can select Fixed and put a fixed weight in the field; it will be applied no matter what items the customer selects on the frontend.
The Price options are also a bit different from those for simple products. The setting for price also has a drop-down menu from which you can select Dynamic or Fixed (Dynamic is the default option). There's also a new option called Price View from which you can select Price Range or As Low As (Price Range is the default value):
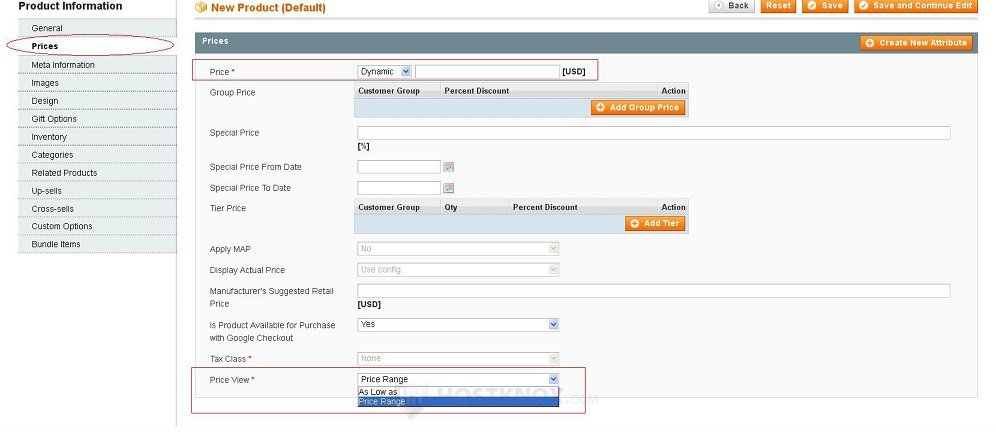
If you want the final price to be calculated from the price of the items that the customer selects, leave the drop-down menu for Price to Dynamic. If you want a fixed price, choose Fixed from the drop-down menu and type the price in the field next to it. Note that even if you put a fixed price, when you add the bundle items you'll be able to increase the final price in case the customer selects particular products from the bundle. We'll come to this later in the tutorial. The Price View option determines how the price will be displayed on the product list page and on the product details page on the frontend. If you leave the drop-down menu to Price Range, the lowest and the highest prices will be displayed. The final price of course depends on the selected items. If you set the option to As Low As, and, for example, the lowest possible price of the bundle is 500 dollars, the text As Low As: $500 will be shown on the frontend.
When you click on the Inventory tab on the left you'll notice that most of the quantity options as compared to the simple product type are not there:

The quantities and stock options are managed by the products that are within the bundle. Don't forget to set the Stock Availability option to In Stock. Otherwise the bundle product will not be visible on the frontend.
After you're done with all the basic settings it's time to add the products within the bundle. To do this click on the Bundle Items tab on the left. On the page that opens you'll see sections labeled Shipment and Bundle Items:
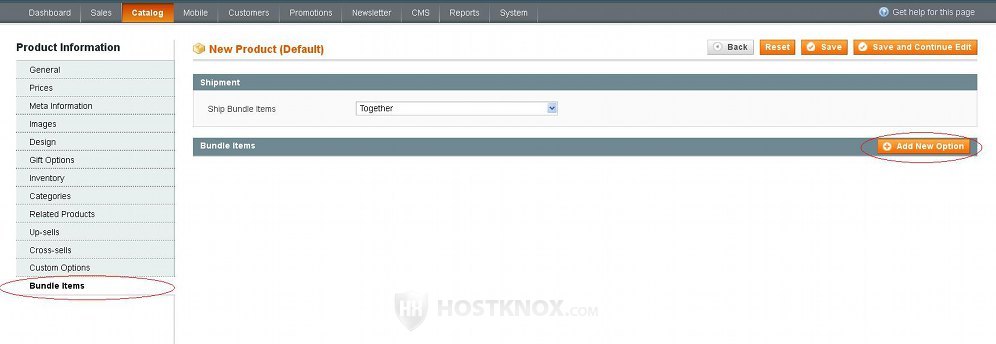
In the Shipment section there's a drop-down menu from which you can select whether the products in the bundle should be shipped together or separately. To add a new option, that is to add a group of products from which the customer will be able to select on the frontend, click on the Add New Option button that's in the Bundle Items section. After you click on the button a form with a few options will appear:
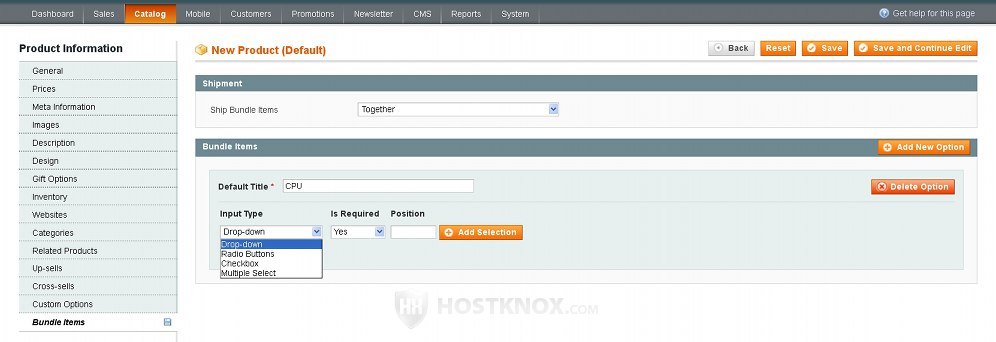
In the field for Default Title type the title for this option. In our example we want to add as a bundle product a computer which the customer can assemble by choosing the various parts. So our first option (e.g. CPU) is for the processor. From the Input Type drop-down menu you can select the way in which the customer will be able to choose an item; the available options are Drop-down, Radio Buttons, Checkbox, and Multiple Select. From the Is Required drop-down menu you can select whether the customer will be required to select an item/product from the option that you're configuring. Optionally, you can set a position for the option on the product details page on the frontend. The position, of course, is set in relation to the other options that you add. For instance, in our example, if we set the position for CPU to 2, and then we add an option Hard Drive and we set its position to 1, on the product details page on the frontend the Hard Drive option will be display before the CPU option. When you're done with these settings click on the Add Selection button.
After you click on the button a form will appear under the settings. Click on the Reset Filter button:
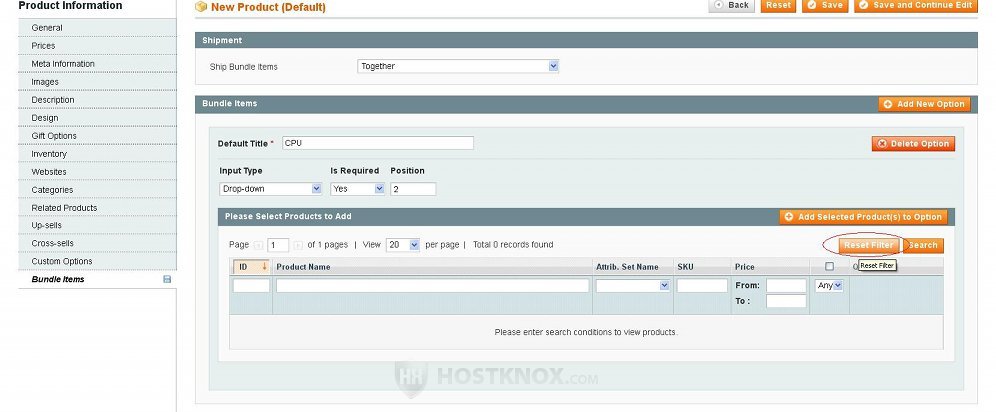
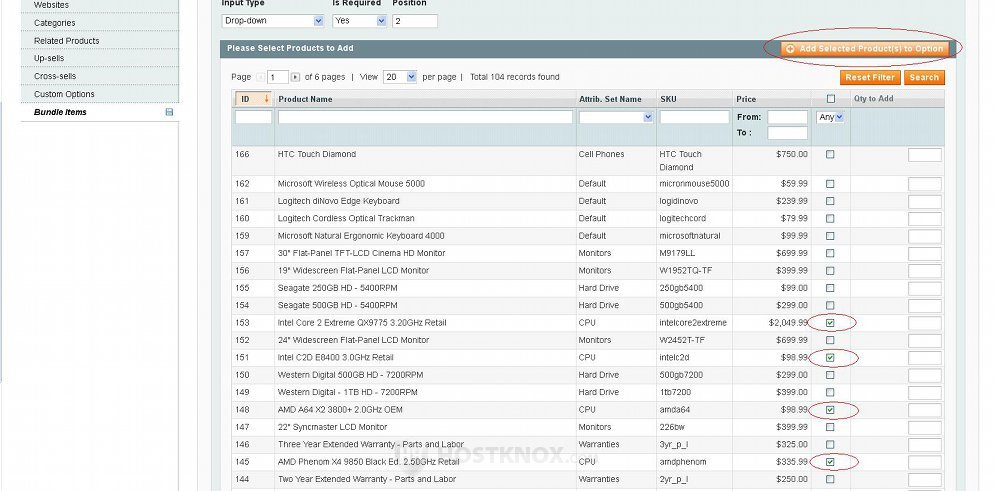
When you do it the products that you have added to the catalog will be displayed in the table under the button. Mark the checkboxes for the products that you want to include in this option and click on the button Add Selected Product(s) to Option:
Once you do that the selected products will be listed in another table with a few additional options:
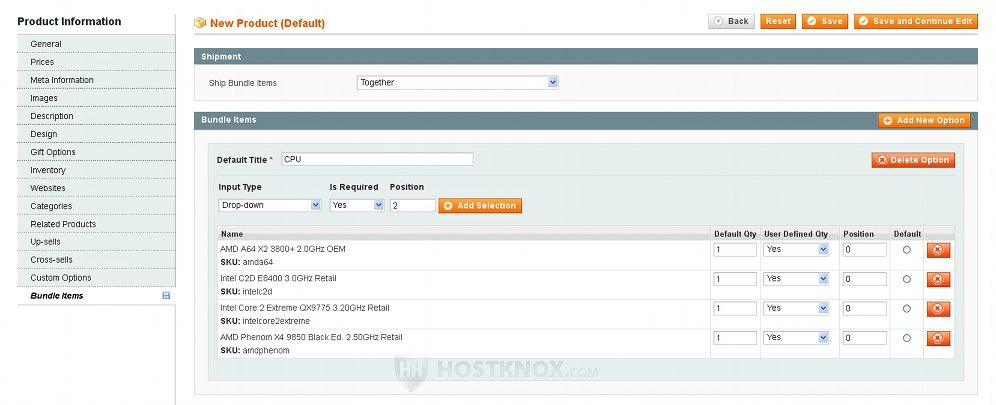
In our example the products in the CPU option are, of course, a few CPUs. Next to the name of each product there are a few settings. In the field for Default Qty you can type the units from that product that will be added to the shopping cart if the customer doesn't specifically change the quantity; it's set to 1 by default. There's also a drop-down menu labeled User Defined Qty from which you can select whether the customer can actually change the quantity before ordering the product. There's a field Position in which you can type the position in which the product will appear in this menu (e.g. CPU) on the frontend. You can mark the button Default for a particular product if you want that product to be pre-selected when the customer opens the product details page of the bundle product. For each product there's also a delete button that you can use to remove the product from the option.
You can add many such items/options to the bundle and each of them can contain a list of products from which the customer can select, or if you want to, you can add just a single product to an option. So in our example Computer bundle product we can have options such as CPU, Hard Drive, Video Card, RAM, etc. We can add several products to each of these options so that the customer can choose the configuration that they like.
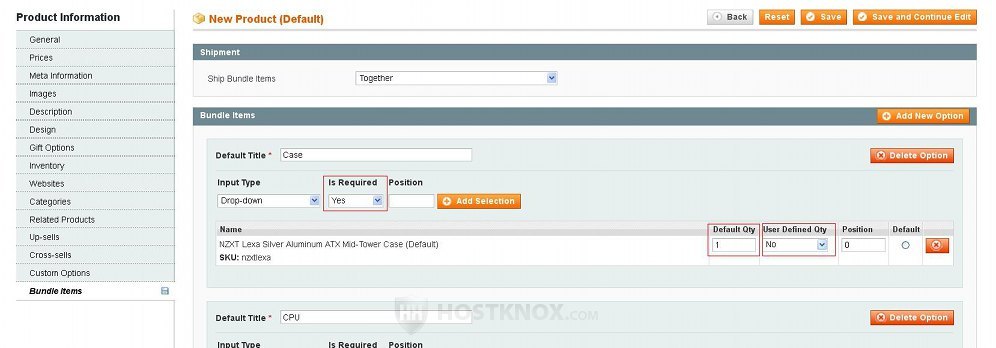
As we mentioned, you don't have to include many products in an option. For example, you may want to make an item in the bundle compulsory, meaning that the customer won't be able to select another product from that option, that the customer won't be able to change its quantity, and that the item will be added to the bundle regardless of the other products that the customer chooses to order with the bundle. In this case you can simply add a single product to the option, make the option required, disable the setting that allows the customer to change the quantity and set the default quantity to 1, for example. If we use our sample Computer bundle product, and we want to include a case to the bundle that cannot be excluded and that doesn't offer any choice in terms of different cases, then the settings of the option will look something like this:
Another thing worth mentioning is that if from the Price tab on the left you have set the Price drop-down menu to Fixed, there will be a price field next to each product that you select in the Bundle Items section:
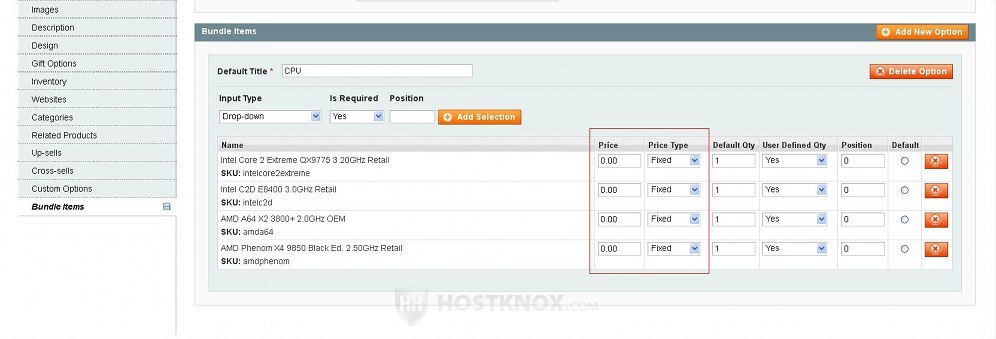
By default, the price of each product is set to zero, meaning that when the customer adds this product to the bundle the fixed price will not be affected. However, you can change the number in the price field of a product, so that when a customer selects that product the sum will be added to the fixed price. For each product there's also a Price Type drop-down menu from which you can select whether the number should be added to the price as a fixed sum or as percentage from the fixed price.
When you're done with all the settings don't forget to click on the Save or on the Save and Continue Edit button.