Magento Sample Data Installation Tutorial
How to install Magento with sample data
Many people find it easier to get used to Magento when there is some preinstalled data to begin with. This way people can see how exactly their categories and products are organized, how their store is configured, how their frontend would look like with some products on it, etc. Fortunately, Magento has a sample data package that can be installed and used with every new installation.
The Magento sample data package contains a MySQL dump with some sample products and CMS pages and a media folder containing the images for the sample products. The MySQL dump has to be imported into an empty database and the contents of the media should be uploaded to the media folder of your Magento installation.
Important: Sample data can be imported only into an empty database, you cannot import it into an existing Magento database because you will break your store! In other words, installing Magento sample data can be done only for new Magento installations, not for existing ones!
To install the sample data, you need to create a new MySQL database and add a user to it. HostKnox clients can do this from the Databases section of the HostKnox control panel. Note that this database will be later used for the whole Magento installation.
Next you need to download the Sample Data archive. You can do this from the download section of the Magento website.
Once you download the archive, extract it on your computer. All files from the Sample Data archive will be extracted to a folder called magento-sample-data-<version>, where <version> will be the latest sample data version, e.g. magento-sample-data-1.2.0. This folder will contain a MySQL dump called magento_sample_data_for_1.2.0.sql (the version will depend on the Sample Data version you downloaded) and a folder called media.
Let's import the MySQL dump into the newly-created database. For this purpose you need to open phpMyAdmin and click on the database you just created. In our case the database is called demo_magento:

To import the MySQL dump, you need to go to the Import section of phpMyAdmin by clicking the Import tab:
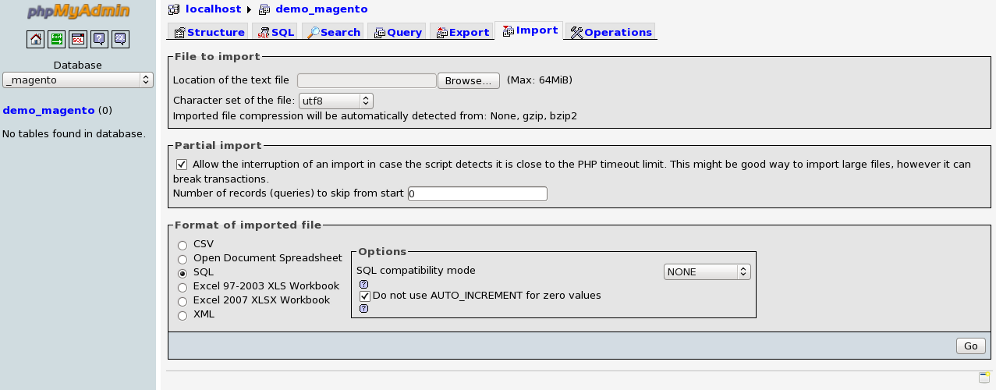
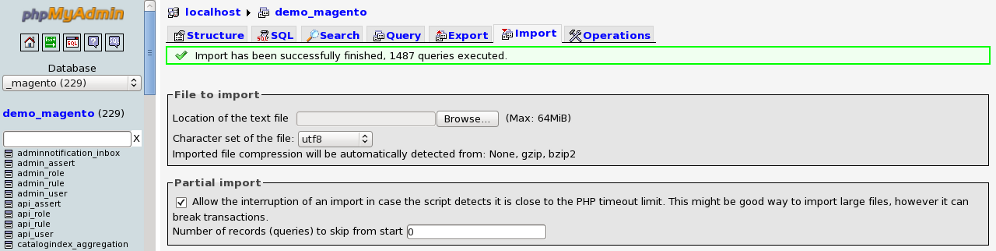
Once there, click the Browse button and locate the magento_sample_data_for_1.2.0.sql file on your computer. Double-click it to set it for importing and then click the Go button on the bottom right part of the page to import it. Once the import completes, you will see a confirmation message and lots of tables in your database:
Now that the sample MySQL dump has been imported, the only thing left is to copy the contents of the sample media folder to the media folder located in your Magento installation directory and proceed with the Magento installation. For detailed instructions on how to install Magento, please check our Magento installation tutorial
Note that in order for your sample products to show properly on your store's frontend, you need to reindex your data through the Magento Index Management section in your admin area.