Magento Upgrade with Connect Manager Tutorial
How to upgrade Magento with Magento Connect Manager
There are different ways to upgrade Magento to a newer version. One way to do this is through SSH. For more information on this check out the tutorial on upgrading Magento via SSH.
In this tutorial we'll go over the process of updating Magento using the built-in Connect Manager.
Before you begin any upgrade always make sure that you have a recent backup of the Magento files and of the database used by the application.
If you need more information on how to perform a backup of your site, check out the tutorial on backing up your site.
We'll go over the upgrade step by step:
- Before you start the upgrade log in to the admin panel of your Magento, go to System menu>Cache Management and flush the cache. After that disable the cache. To do this mark the checkboxes for all the cache types, select Disable from the Actions menu in the upper right corner of the table and click on the Submit button that's next to it:
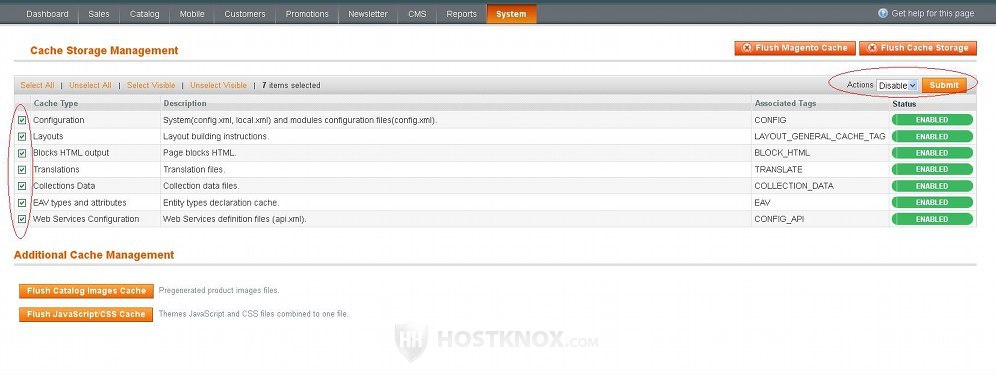
You should enable the cache again after the upgrade is complete.
- In case you have enabled the built-in compiler it's a good idea to disable that as well. You can do this from System menu>Tools>Compilation.
- The next thing to do is to access the Connect Manager. To do this, in the admin panel go to System menu>Magento Connect>Magento Connect Manager:
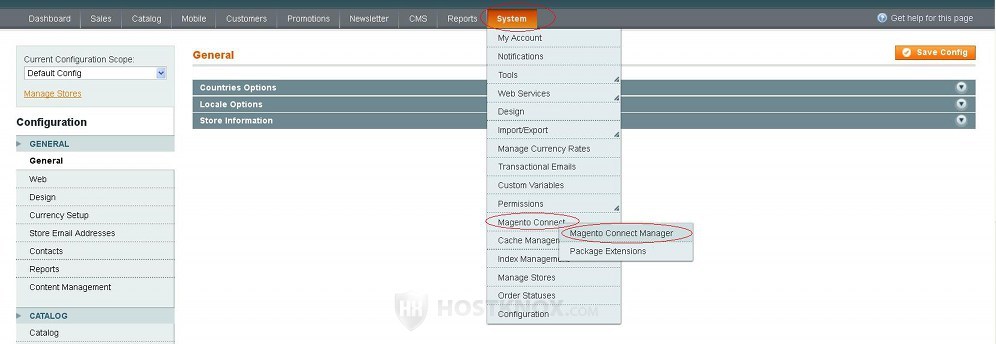
On the page that opens type your admin username and password to access the Connect Manager.
The Connect Manager is also know as Magento downloader and it can also be accessed directly without the need to log in to the admin panel first by using the URL yourdomain.com/downloader (assuming the frontend is accessible at yourdomain.com).
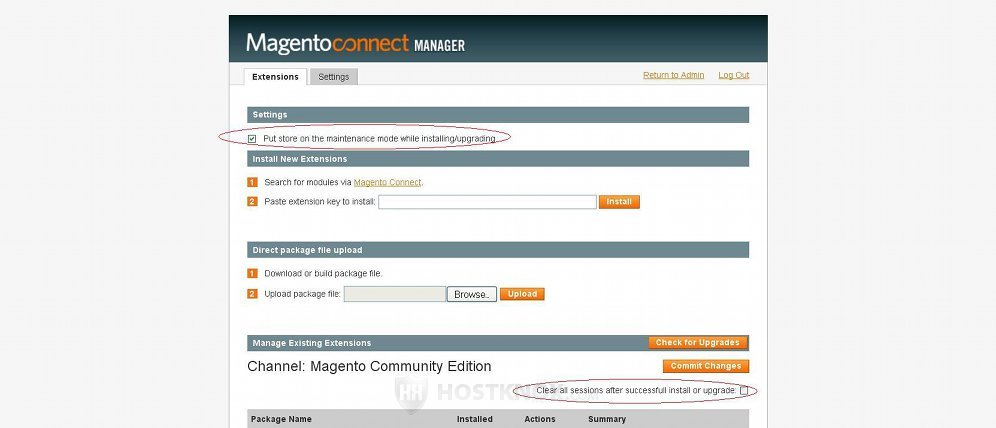
- Inside the Connect Manager make sure that the checkbox for Put store on the maintenance mode while installing/upgrading (at the top of the page) is marked, and then mark the checkbox Clear all sessions after successful install or upgrade:
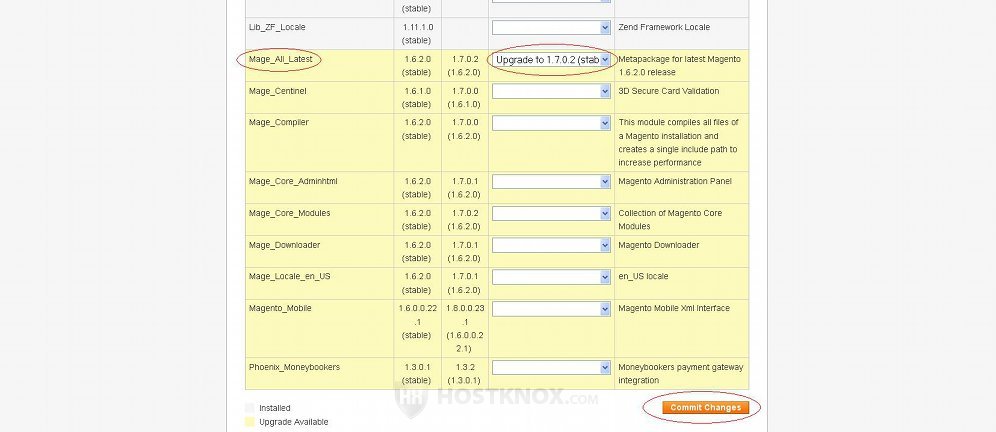
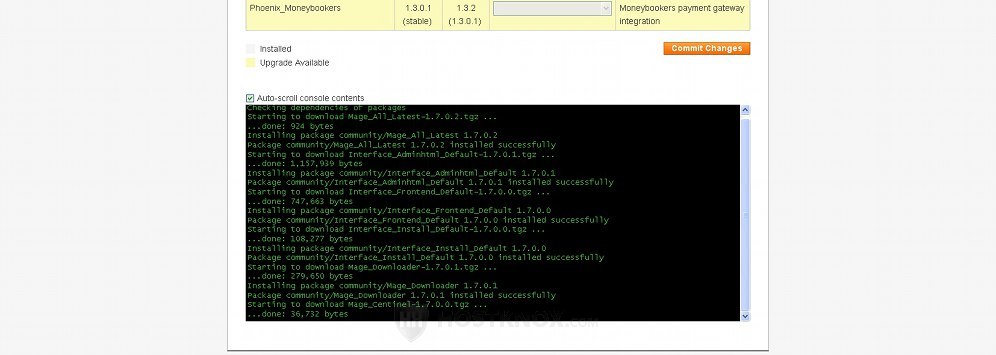
- Next, click on the Check for Upgrades button. The list with the extensions will be updated and those which have a newer version will be colored in yellow. In that list find Mage_All_Latest and from its drop-down menu select the newest stable package. Then click on the Commit Changes button at the bottom of the page:
Note that if for some reason the core modules including Mage_All_Latest do not appear after you click on the Check for Upgrades button, then paste the extension key http://connect20.magentocommerce.com/community/Mage_All_Latest in the extension key text field that's on the same page and click on the Install button (you can also use the shorter version of the extension key: community/Mage_All_Latest). When you do that the new versions of the core modules will be listed; just click on the Proceed button that's under the list.
After you start the upgrade the command-line window will appear. In that window you can see the operations that are performed during the upgrade:
- Wait several minutes until the upgrade is complete. When this happens a Refresh button will appear under the command-line window. Just click on it:
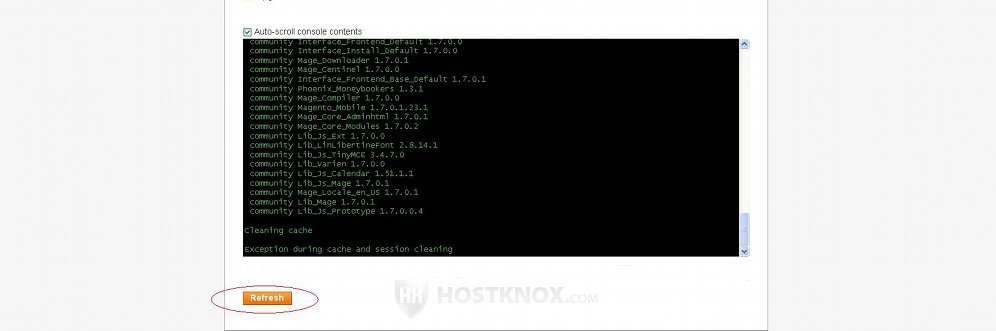
After you click on the Refresh button it's possible that you may get an Internal Server Error. This shouldn't alarm you and it doesn't mean that the upgrade was unsuccessful. On the contrary, it probably is successful. The usual reason for this error is incorrect folder and file permissions of the Magento files on your hosting account. During the upgrade it may happen that the file permissions get all messed up. The correct permissions for files are 644 or 664 and for folders 775 or 755. After an upgrade many of the files might haver permissions of 666 and the permissions of folders may be changed to 777. What you need to do is to change the permissions to the correct ones. For more information on how to fix this problem check the next section in this tutorial; it's about fixing an Internal Server Error after an upgrade.
After the upgrade process itself is finished you need to do a few more things:
- You need to delete a file labeled maintenance.flag from the root Magento directory on your hosting account. So, for example, if the application is installed directly in the public_html directory on your Magento hosting account, meaning the site is accessible at yourdomain.com, then you need to go to public_html and delete the file maintenance.flag. You can do this from the Files section of the HostKnox control panel, or you can use an FTP client. While the file is present in the root Magento directory, people who open the frontend of your site (and the backend as well) will get the error Service Temporarily Unavailable.
- After you delete the maintenance.flag file log in to the admin panel and reindex the data from System menu>Index Management.
- You should also enable the cache from System menu>Cache Management. In case you use the compiler you can enable that as well from System>Tools>Compilation.
To make sure that everything is up to date you can log in to the Connect Manager again and click on the Check for Upgrades button.
Fixing an Internal Server Error After an Upgrade
As we mentioned, after the upgrade is complete and you click on the Refresh button in the Connect Manger you may get an internal server error. The most likely reason for this is wrong file permissions. During the upgrade many of the file and folder permissions of your Magento may be changed to 666 for files and 777 for folders. The important thing is to fix the world-writable bit of the permissions (the last of the three digits). Files should have permissions of 664 or 644 and folders should be configured to 775 or 755.
There are a few ways to change the file permissions back to normal and so fix this problem. Considering the number of files and folders for which you have to change the permissions and that files should have different permissions than folders (meaning that a simple recursive change will not do the job because it will set the same permissions for both files and folders) some of these methods will be too time-consuming.
- HostKnox clients have the privilege to take advantage of the easiest way to fix file and folder permissions. The HostKnox control panel has a feature called Fix Incorrect Permissions that's intended exactly for the purpose of fixing quickly and easily the incorrect permissions of all files and folders on your account. Just log in to your account, access the Files section of the control panel an click on the link Fix Incorrect Permissions that's in the black area on the right. This will automatically change all 666 permissions of files to 664 and the 777 permissions of folders to 775.
Otherwise, there are two general ways for changing file and folder permissions:
- One way to change permissions is with an FTP client (e.g. FileZilla). For information on how to do this and also for some general information on file permissions check out the tutorial on file and folder permissions.
- Another way to change file and folder permissions is through SSH. You can find information on how to do this in the article on changing file and folder permissions via SSH. In this particular case where you have to change the permissions of many files and folders and where files have to be with different permissions than folders, a simple chmod command will take too long to fix the permissions of all files and folders (because you have to execute it many times). A more complex command is required in this situation so that you can do this fix quickly. You can find those commands in the above mentioned article as well. With a couple of commands you can fix the permissions of all your Magento files and folders.
For this particular problem where you have to fix the permissions of all your Magento files and folders there's another quick solution:
- When it comes to fixing the permissions of your Magento files and folders another option that is more suitable for the mass user is to download and use a tool called Magento cleanup. It can be downloaded from a page in the wiki section of the official Magento site. It's a PHP script that you have to upload and execute. So after you download the ZIP archive to your local computer unzip it and in it you'll find a file called magento-cleanup.php. Upload that file to the root Magento directory on your hosting account and execute it by opening with a web browser the URL address of the file. Assuming your Magento is installed directly in the public_html folder on your hosting account, then you need to upload the file in that folder and with the web browser open the URL yourdomain.com/magento-cleanup.php.
After the permissions are fixed you should be able to access the frontend and backend of your Magento site. As we mentioned, for more information on what the numbers of the permissions mean and for general information about file and folder permissions read the tutorial on file permissions.