phpBB3 AutoMOD Tutorial
How to install and use AutoMOD
AutoMOD is a phpBB3 modification for installing MODs. As the name suggests, AutoMOD installs modifications automatically. Without AutoMOD, in order to install MODs you have to perform various tasks manually. AutoMOD simplifies the installation process by performing the required tasks instead of you. If you don't feel comfortable or you don't want to be bothered with things such as editing template and/or core phpBB3 files, you should use AutoMOD to install new MODs.
If you want to learn more about MODs and how to install them manually, read the tutorial on phpBB3 MODs and how to install them.
In this tutorial we'll show you how to install AutoMOD and how to use it to install other MODs.
Before you begin, create a backup copy of your phpBB3 files and of the database used by the application, so that you can restore it if something goes wrong.
First, you have to download the AutoMOD archive from the official phpBB site to your local computer. Then you have to unpack the archive. It contains a couple of folders: docs and upload. The upload folder contains several other folders (adm, includes, install, etc.) that you have to upload to the root phpBB3 directory on your hosting account.
For example, if your phpBB3 is installed in a folder called phpbb3 in the root public_html directory on your account, the path where you have to upload the folders would be public_html/phpbb3.
Upload only the folders that are inside the upload folder of the AutoMOD archive, don't upload the upload folder itself. You can upload the folders using an FTP client. When asked during the upload whether you want to overwrite the old files on your account with the new ones you're uploading, just confirm that you do.
After you upload the folders you have to point your internet browser to the URL address of the install folder you just uploaded. If we use the above example, the path to the install folder would be public_html/phpbb3/install, which means that the URL address should look like this: yourdomain.com/phpbb3/install. Of course, you have to change it to your actual URL address. After you open the URL address with your browser, you'll see a screen with a few options. The only thing you have to do is to click on the Submit button:
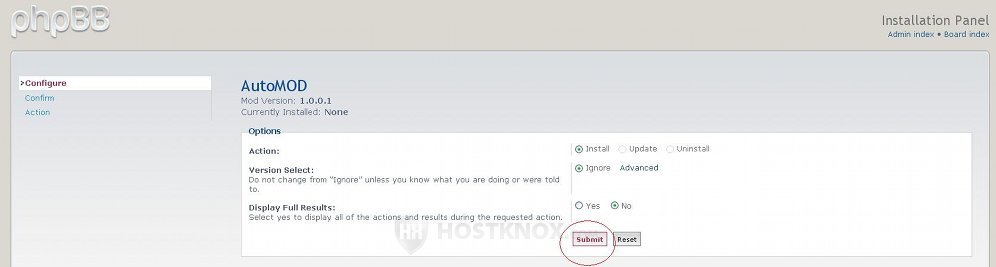
On the next page you have to confirm that you want to perform the installation. On the last page, if everything went smoothly, you'll see a message that the installation was successful. Don't worry if you receive a warning that new permissions have been added.
After the installation is successfully completed you have to delete the install folder from the root phpBB3 directory on your account. Otherwise, your board won't be accessible. You can delete the folder with an FTP client or through the Files section of the HostKnox control panel.
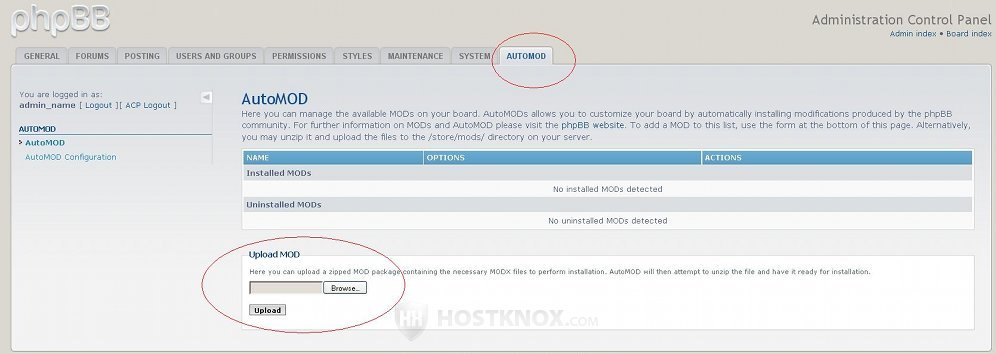
With AutoMOD installed, when you access the administration control panel of your phpBB3 you'll see that there is a new tab added (AutoMOD). On the AutoMOD tab page you'll see a table with the installed and uploaded MODs (if there are any).
You can find and download MODs from the Modification Database of the official phpBB site. After you download the archive to your local computer, you have to upload the new MOD to your hosting account. You have a couple of options on how to do it. One is to unpack the archive on your local computer and upload the folder that's inside to the /store/mods folder on your account.
The store folder is in the root phpBB3 directory, so if your phpBB3 is installed in a folder called phpbb3 in the root public_html directory on your account, the path where you have to upload the unpacked MOD would be public_html/phpbb3/store/mods. You can upload the MOD with an FTP client (e.g. FileZilla).
The other way to upload the MOD to your account is to use the Upload MOD function of AutoMOD. You may find this way more convenient. To use this method log in to the administration panel, click on the AutoMOD tab and you'll see a Browse button with which you can locate the MOD archive on your local computer. With this method, after you download the MOD archive from the phpBB site to your computer, you don't have to unpack it. AutoMOD will upload and unpack it automatically. After you find the MOD archive on your local computer you only have to click on Upload:
Once the MOD is uploaded you'll see it added in the table on the AutoMOD page of the admin panel. The MOD will be listed under Uninstalled MODs. In our example we've uploaded a MOD called Topic Prefix MOD:
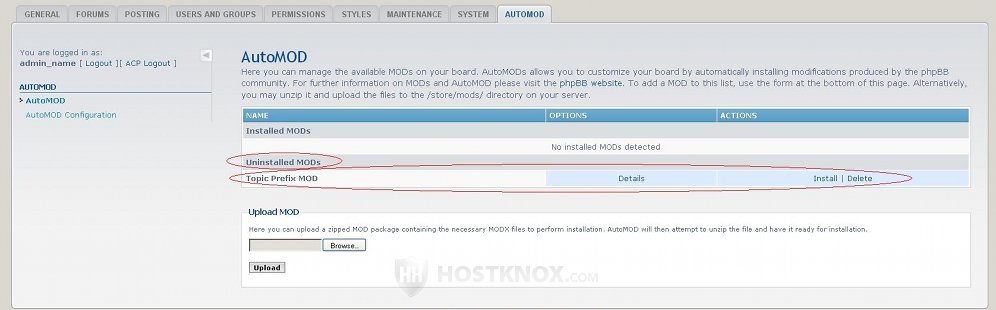
To install the MOD simply click on the Install button for the particular MOD. A new page called Preparing to Install will open. If you have enabled the Preview Changes option you'll see all the changes that AutoMOD is about to make. In any case, click on the Install button to continue. After you do it AutoMOD will make the required changes to the phpBB3 files, and it will also perform any SQL queries, if necessary.
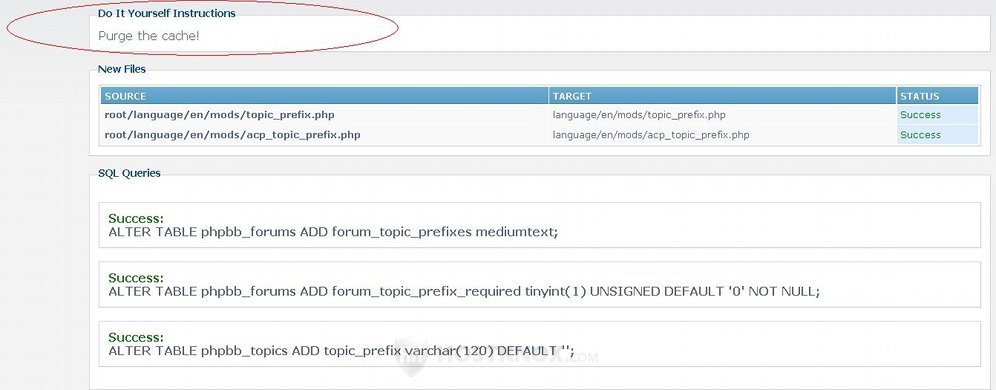
If everything goes smoothly, you'll see a message on a green background that the install was successful. If AutoMOD couldn't perform all the tasks, you'll see a message on a red background that one or more install actions failed. Whatever the message, you'll also see a list of all the changes made by AutoMOD and whether they were successful or not:
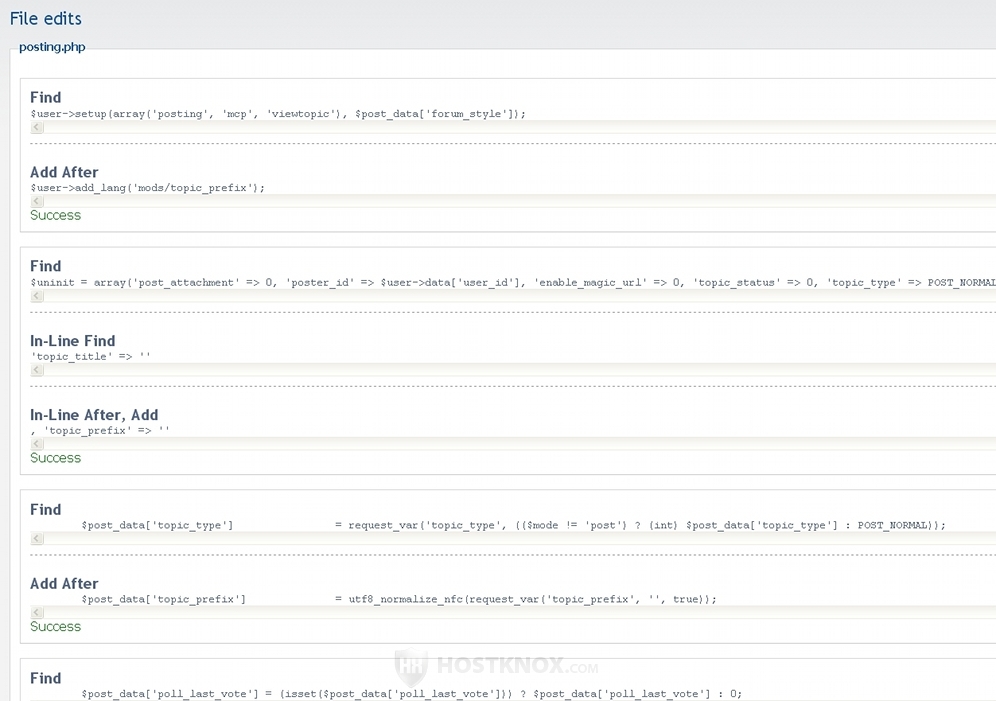
If an action could not be performed by AutoMOD, you can make the change manually. You'll see in the list which change could not be performed, and you can also use the install XML file that's in every MOD folder for instructions on all the changes that have to be made. Find the one that could not be performed by AutoMOD and do it yourself. You can find more information on how to perform manual changes in the tutorial on installing phpBB3 MODs manually. After you make the change click on the Retry or Force Install button on the AutoMOD page of the administration control panel.
Hopefully, all the changes will be successful and you won't have to do anything manually. MODs that are released in the Modification Database of the official phpBB site are also tested with AutoMOD.
After the MOD is installed at the top of the same page where all the performed actions are listed, check whether there are some DIY instructions. These usually include something simple that you have to do, such as purging the phpBB3 cache or configuring some settings. In our example, the DIY action is to purge the cache:
When you return to the home AutoMOD page of the admin panel you'll see the new MOD added to the Installed MODs section. If at some point you want to remove the MOD, click on the Uninstall button for the particular MOD.
Keep in mind that depending on the MOD, you might also need to change some settings in the administration control panel to enable the MOD, or users might have to change settings in their user control panels to enable whatever function the MOD offers.
AutoMOD itself also has several options that you can configure. To access them, after you click on the AutoMOD tab of the administration panel, click on the AutoMOD configuration link on the left:
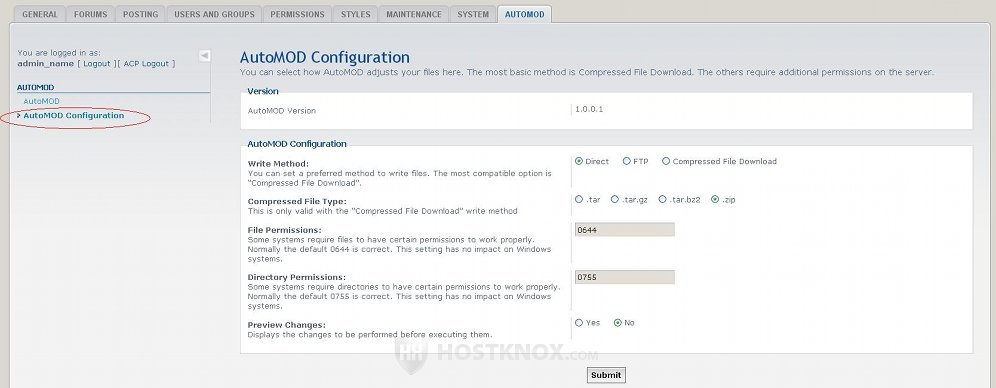
The Write Method option is configured to Direct by default. If you experience any problems with that, you can try one of the other two. If you choose FTP, a few other settings will appear. You'll have to provide the server name and the FTP user credentials.
You shouldn't have any problems with file and folder permissions; you can also change them with an FTP client or from the Files section of the HostKnox control panel. The last option is Preview Changes. It's disabled by default. If you enable it, before you start the installation you will be able to see the changes that AutoMOD will make.
All HostKnox clients can request a free phpBB3 AutoMOD installation.