Microsoft Outlook Express Tutorial
How to configure Microsoft Outlook Express to connect to your email account
Outlook Express is an email client included in Windows 98, Windows 2000, Windows XP, Windows Server 2003. A Macintosh version is also included in Mac OS 9; Microsoft Entourage is the successor of the Macintosh version as part of Microsoft Office for Mac. Outlook Express is succeeded by Windows Mail in Windows Vista and by Windows Live Mail in Windows 7.
Outlook Express is often confused with or thought to be the same as Microsoft Outlook. In fact, they are two different email clients.
Because it comes prepackaged with Windows, Outlook Express is one of the widely used email clients. In this tutorial we'll show you how to set it to connect to your email account. As an example we'll use Outlook Express 6 which comes with Windows XP (the older versions are outdated and rarely used). However, they are all configured in a similar way.
Before you set Outlook Express to connect to your email account, you need to create one from the Email section of the HostKnox control panel. If you're not sure how to do it, read the tutorial on creating an email account.
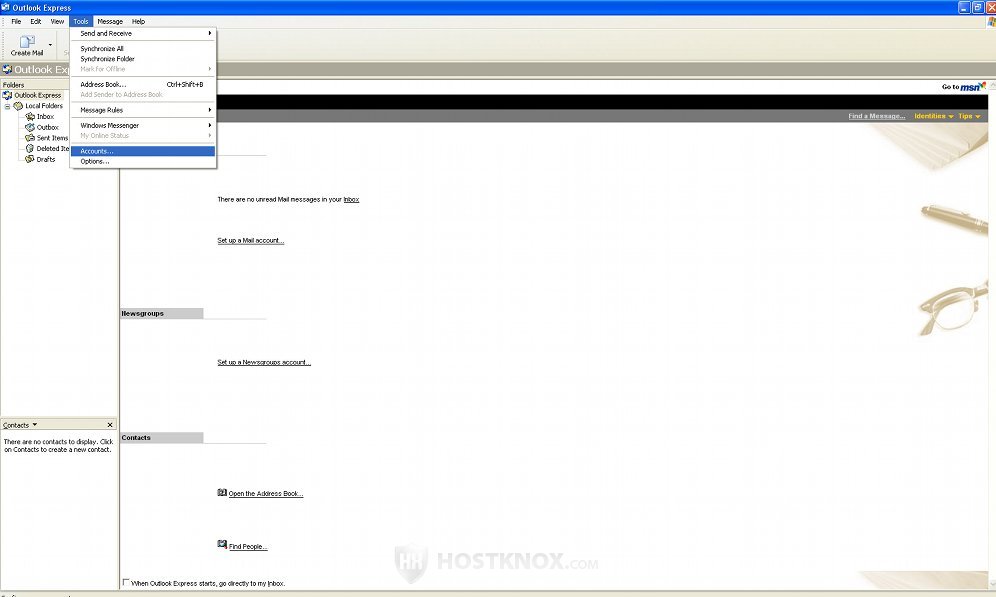
To add a new email account, after you open Outlook Express click on the Tools menu and then on Accounts:
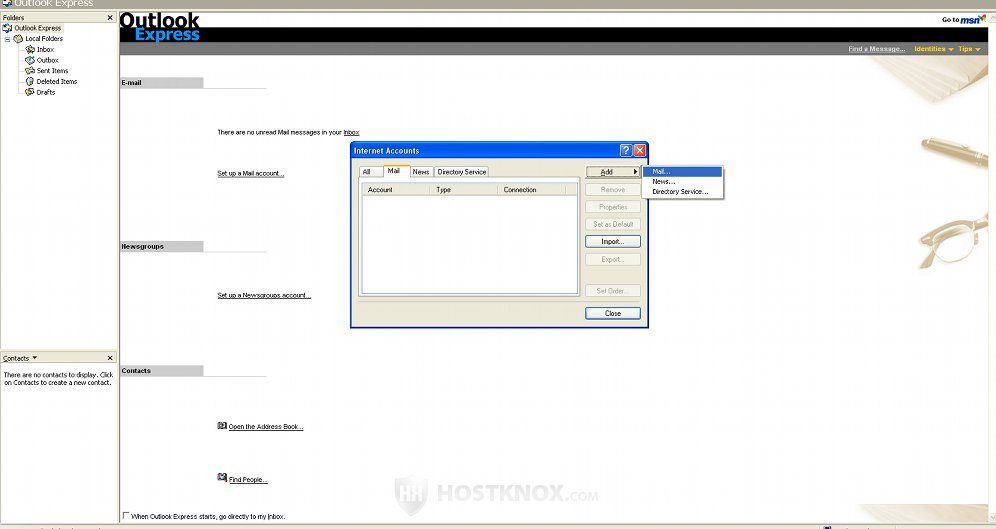
On the new window that opens click on Add and then on Mail:
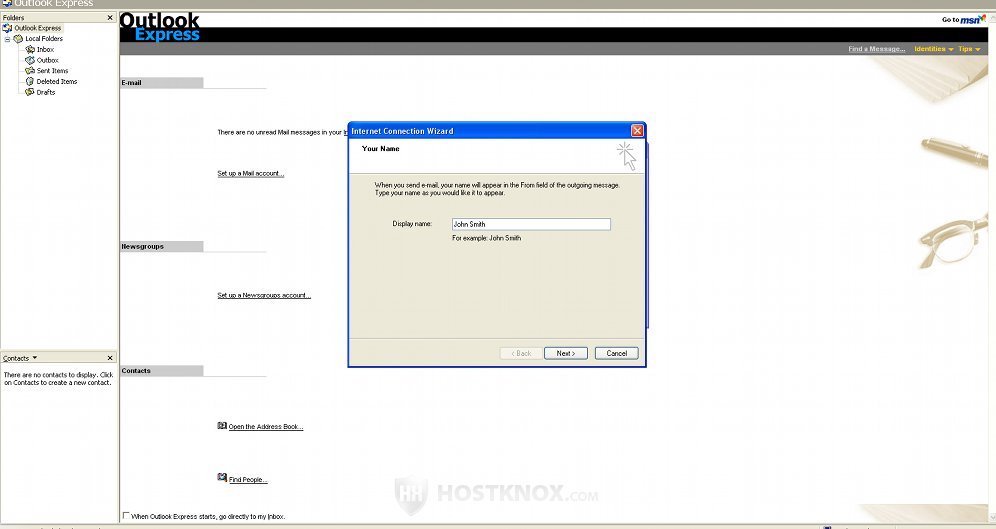
After you do that, on the next window (Your Name) you have to type the name that you want to use (e.g. John Smith). It can be any name. That's not your email address but the name that people receiving mail from you will see in the From field:
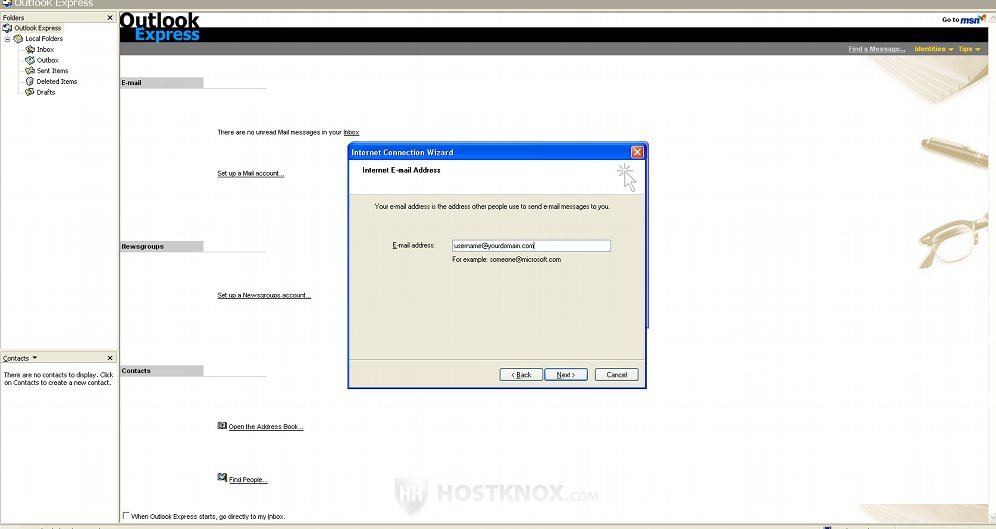
After you type your name click on Next. On the next window (Internet E-mail Address) type your full email address (e.g. username@yourdomain.com):
After you type your email address and click on Next, on the next window (E-mail Server Names) you have to select from the drop-down menu whether you want to use IMAP (Internet Message Access Protocol) or POP3 (Post Office Protocol), and you also have to type the names of the incoming mail server and the outgoing mail server.
The main difference between POP and IMAP is that with POP the email messages that you receive are downloaded on your local computer (otherwise you can't read them), and with IMAP you can read the messages directly on the server without downloading them. This means that with IMAP your messages are stored and managed directly on the server; you can read and manage them from different computers. In our example we'll use IMAP.
For incoming and outgoing mail servers you can use mail.yourdomain.com or just yourdomain.com, as long as your domain points to our servers. You can also use directly the name or IP address of the HostKnox server hosting your account. If you want to encrypt the data transfer for your email account, use the name or IP address of the server hosting your account.

Click on Next to continue. On the next window (Internet Mail Logon) you have to type your full email address in the Account Name field and the password for the email account:
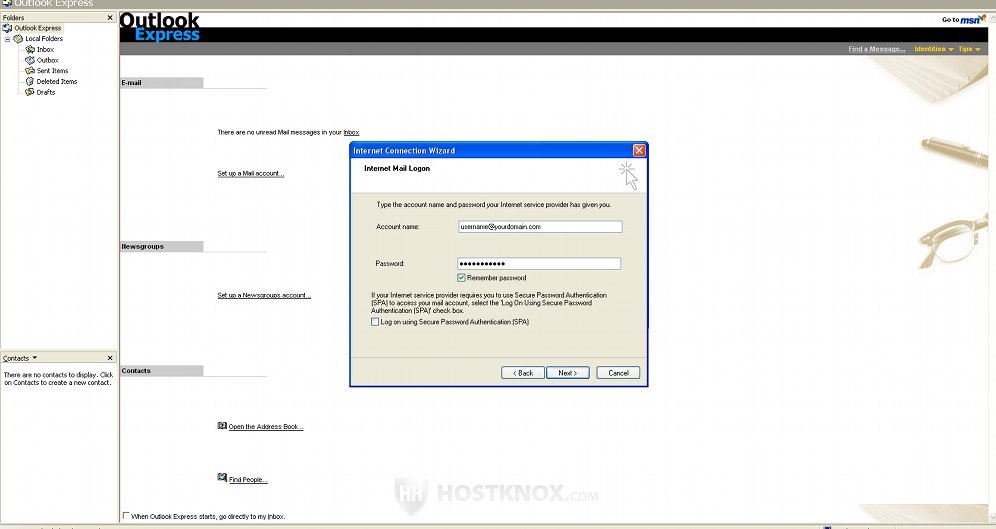
The email address has to be of an existing account that you have created from the Email section of the HostKnox control panel.
Click on Next to proceed to the last window where you only have to click on Finish.
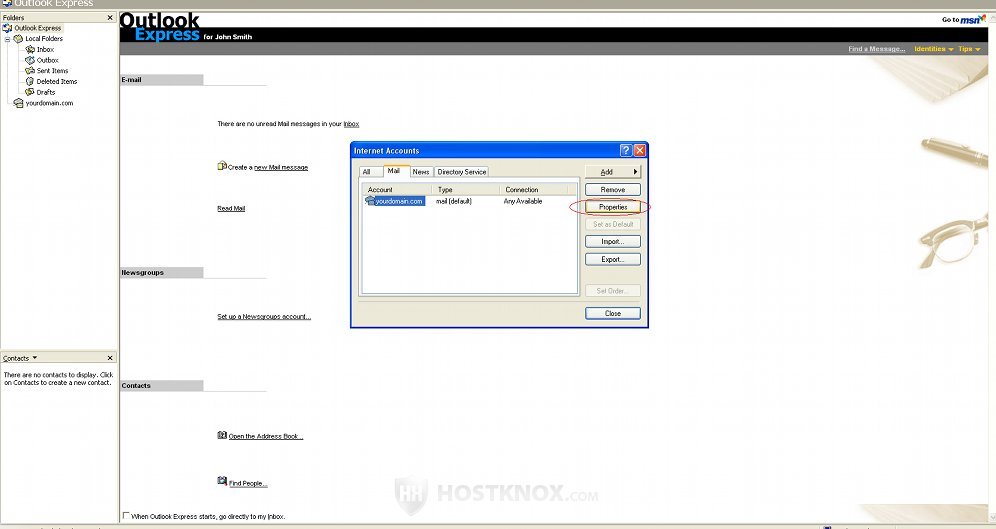
Now you have to configure a few other options before you can connect to your email account. After the account is added click on the Mail tab (on the Internet Accounts window, Tools>Accounts), select the account and click on the Properties button:
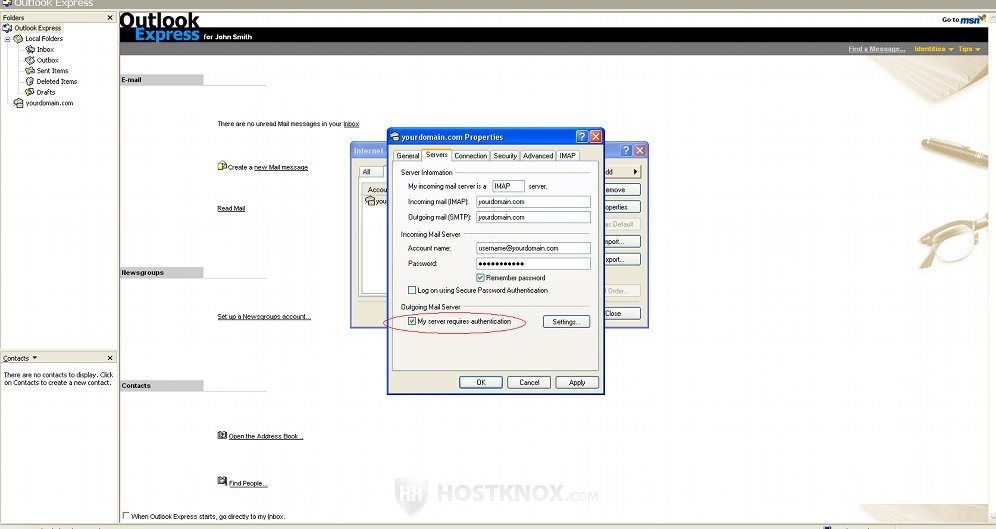
After you click on Properties click on the Servers tab and mark the checkbox for the option labeled My server requires authentication:
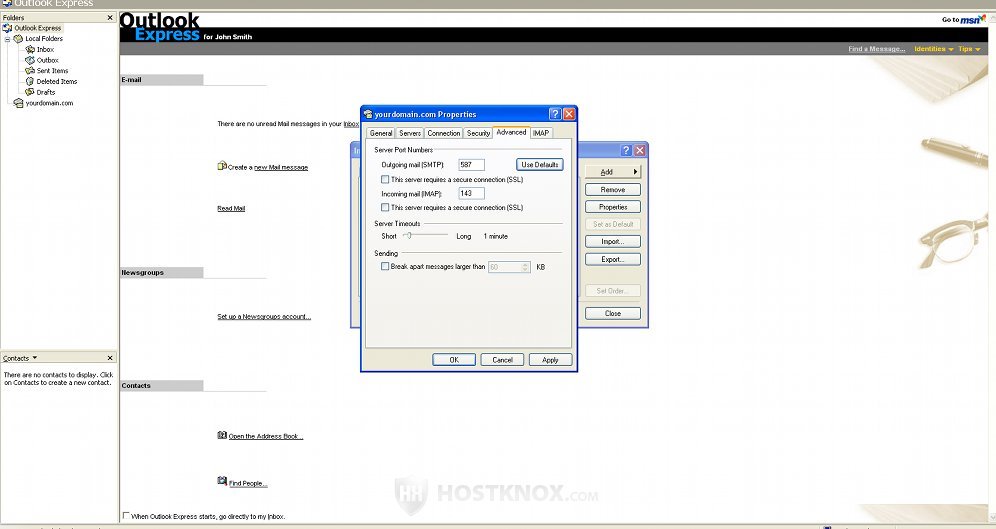
Then click on the Advanced tab. There you have to change the port number for Outgoing mail (SMTP). The default one is 25. It's, however, often blocked for security reasons. If you want to use your mail without encryption set the port number to 587. If you want the data transfer to be encrypted and thus more secure, mark the checkbox for This server requires a secure connection (SSL) and set the port number for SMTP to 465.
By default the port number for Incoming mail will be set to either 143 (IMAP) or 110 (POP3), depending on whether you've chosen to use IMAP or POP. These are the correct port numbers and you don't have to change them. If you want to use encryption for the incoming mail too, just mark the checkbox labeled This server requires a secure connection (SSL). It's located right under the port number for Incoming mail. When you mark the checkbox the port number will be changed automatically to 993 for IMAP and 995 for POP. These are the correct port numbers, so you don't need to do anything except mark the checkbox.
You don't need to have an SSL certificate to have SSL/TLS enabled for your email account. The one for the server will be used, so you don't really have to do anything additional to use SSL/TLS. You only need to use for incoming and outgoing mail server the name or IP address of the HostKnox server hosting your account. If you have forgotten to do this during the set up process and you have used your domain name instead, just click on the Servers tab of the same window (Tools>Account>Properties>Servers) and make the changes there.
In our example we'll set the email account to work without encryption, so we just change the outgoing mail port number to 587:
After you make all the necessary changes click on OK. If you set your incoming protocol to IMAP, you'll be asked whether you want to download folders from the mail server you added. Click on Yes.
That's it. Now Outlook Express is configured to use your email account.
If you want to, you can also configure Outlook Express to connect to your accounts in Yahoo, Gmail, Hotmail. To learn what you need to do to make this work read the article on configuring email clients to connect to your mail accounts in Yahoo, Gmail and Hotmail.