Pixie - Files Manager Tutorial
How to use the Files Manager of the HostKnox control panel
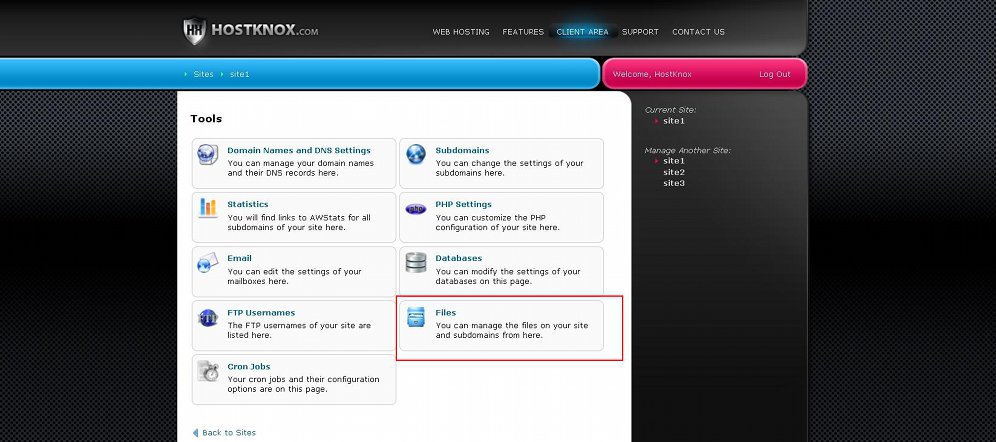
In this tutorial we'll review the Files Manager of the HostKnox control panel. You can use it to do different things with your site's files and folders. To access it, log into the HostKnox control panel, then click on the Manage button for the site that you want to manage and on the following page select the Files section:
For a general overview of the HostKnox control panel check out the tutorial on how to access and manage the HostKnox control panel.
When you access the Files Manager it automatically shows you the content of the public_html directory. This is the root web-accessible folder on your account. If, for example, your site is uploaded directly in that folder, it's URL will be yourdomain.com. If, on the other hand, you upload it in subfolder (e.g. public_html/site), then the URL of the site will consist of the domain name plus the subfolder path added to it (e.g. yourdomain.com/site).
Now let's review the functions of the Files section of the HostKnox control panel.
Browse and Open Folders
To open a folder and list its content just click on the name of the folder. To go one level up to the folder that holds the currently shown files and folders click on the folder at the top of the list (the one with the two dots):

Above the list of files and folders you'll see the full path on your account to the currently opened folder:

Each folder in the path is also a link that will redirect you straight to that folder.
View and Edit Files
A very useful function is the one that allows you to edit files on your hosting account. This means that when you have to edit a file you don't have to download it on your local computer, edit it there and upload it back. You can edit it directly on the hosting account. To view the content of a file and optionally edit it click on the name of the file:

This will open a new page with the content of the file:
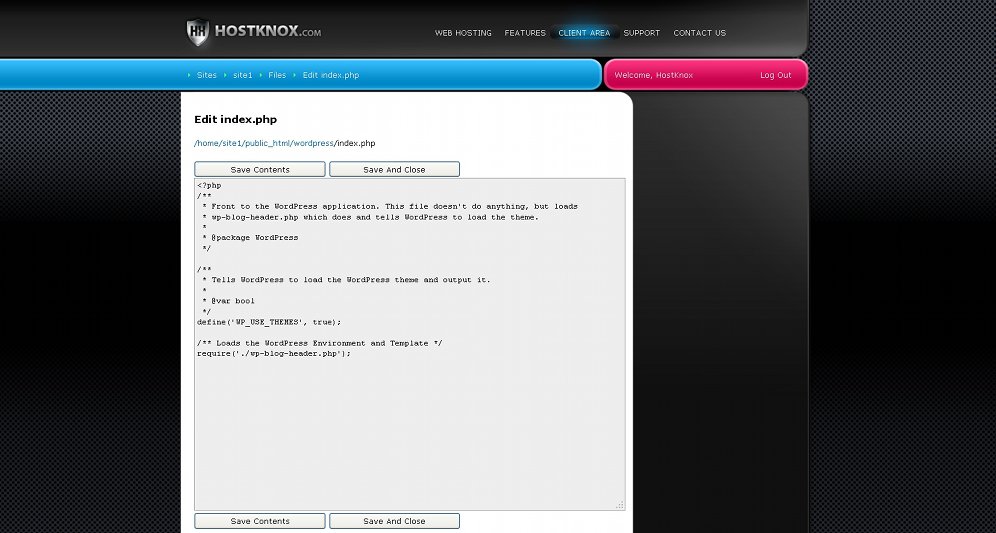
If you want to, you can edit the content. If you make any changes and you want to keep them, click either on the Save and Close button to save the changes and go back to the file and folder list, or on the Save Contents button to save the changes and stay on the same page.
Create Directories and Files
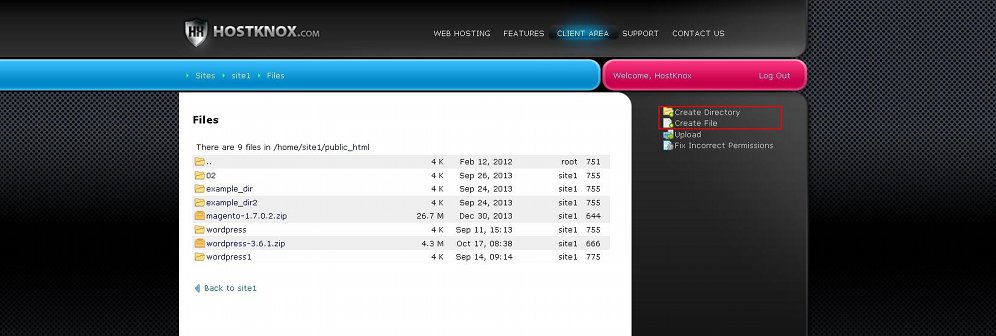
You can use the File Manager to create new directories and files. To do this, use the buttons Create Directory and Create File in the black area on the right:
When you click on the button a new page will open. Type the name of the directory or file in the text field that's provided on the page and click on the button Create Directory/Create File that's under the text field to save the directory/file.
If you're creating a new file, once you save it you'll be automatically redirected to the content page of the file. If you're creating a new directory, once you save it you'll be automatically redirected to that directory.
Upload and Download Files
From the File Manager of the HostKnox control panel you can upload files from your local computer to your hosting account, and you can download files from the hosting account to your local computer.
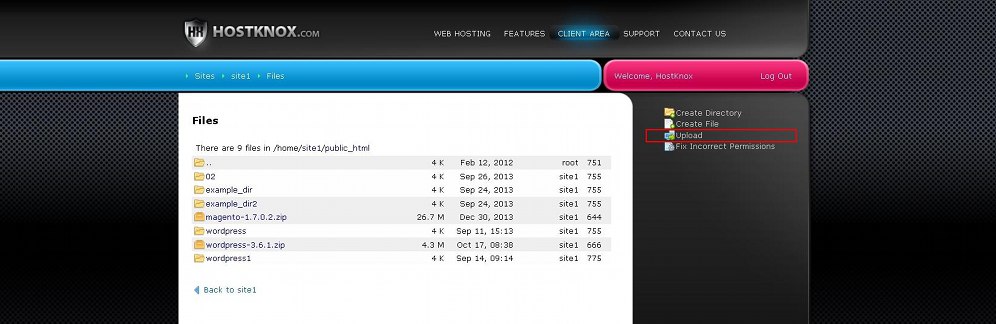
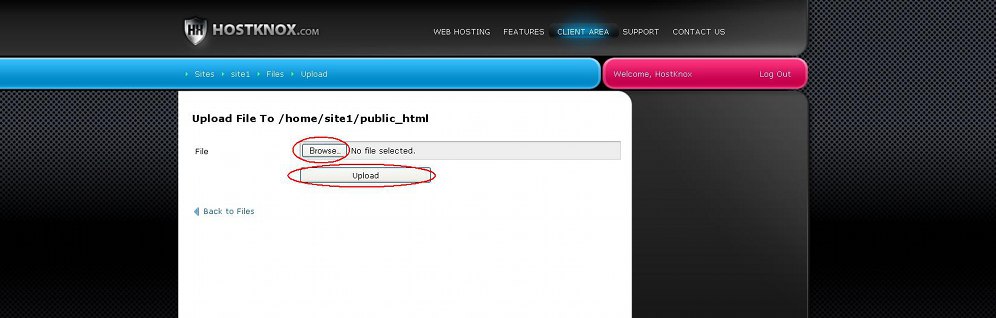
To upload a file click on the Upload button in the black area on the right:
On the page that opens click on the Browse button. Then use the window that pops out to locate the file on your local computer. After that click on the Upload button:
To download a file, first highlight it by clicking next to its name. Don't click on the name of the file itself because this will open the file and show its content; simply click in the row of the file. This will display several buttons in the black area on the right. Click on the Download button:
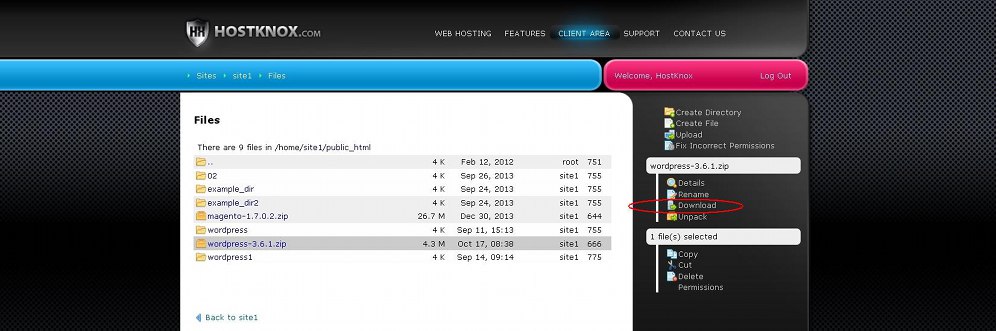
After you click on the button a small window will pop out with which you can save the file on your local computer.
Note that you can upload and download only one file at a time. You can't upload/download many files simultaneously, nor can you upload/download folders. It's not recommended to use the File Manager to upload/download large files (e.g. bigger than 30-40 megabytes); you may get a time out. If you want to upload/download many files and folders regardless of their size, you should do it via FTP (File Transfer Protocol). You can do this with an FTP client (e.g. FileZilla). For more information on configuring and using some of the most popular FTP clients check out our FTP tutorials.
Change File Permissions
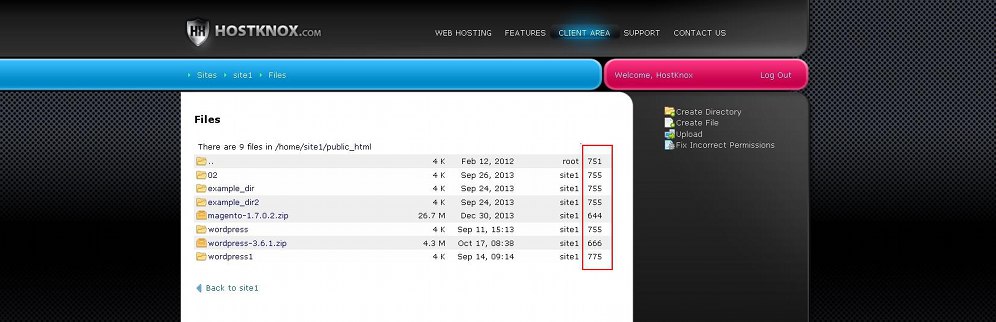
Another useful thing that you can do from the Files section of the HostKnox control panel is to change the permissions of your files and folders. The permissions are represented with numbers in the right most column of the file/folder list:
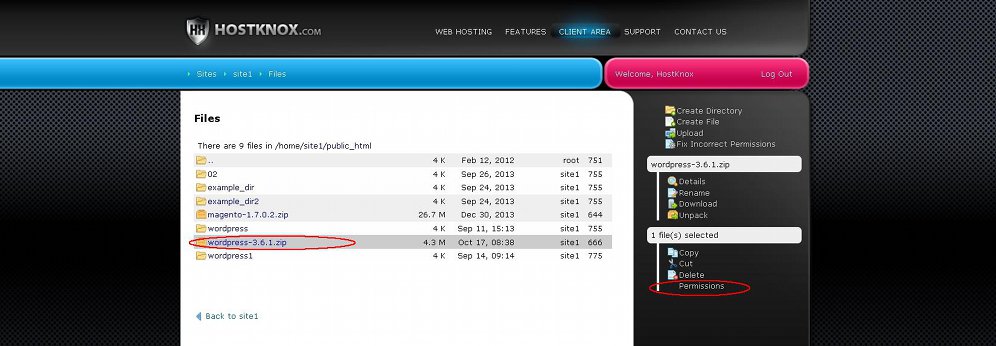
To change the permissions of a file or folder, highlight it by clicking next to its name with the left mouse button. This will display some buttons on the right. Click on the Permissions button:
After you do that a new page will open. On that page there's a drop-down menu from which you can select some preconfigured permissions. Then click on the Change Permissions button to save the change:
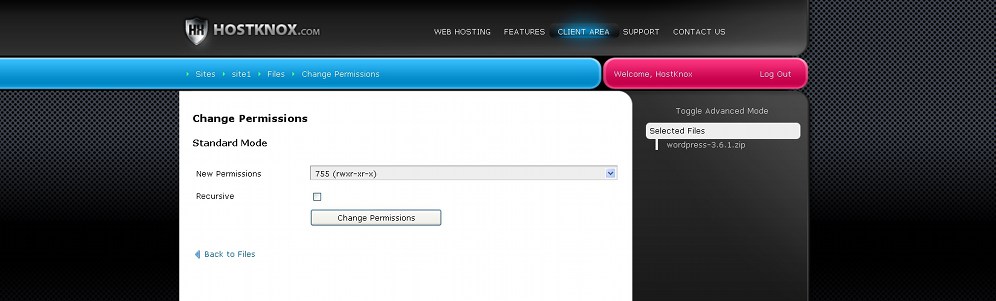
If you're changing the permissions of a folder and you want the same permissions to be applied to all files and folders in that folder, then mark the Recursive checkbox before you click on the Change Permissions button.
As we mentioned, from the drop-down menu you can select only a few preconfigured combinations of permissions. If you want to be more precise and set the permissions to a different combination that can't be selected from this drop-down menu, you can do this from the Advanced Mode page. You can toggle between the Standard Mode and the Advanced Mode by using the Toggle Advanced Mode button in the black area on the right. If you click on it once, the Advanced Mode will be displayed:
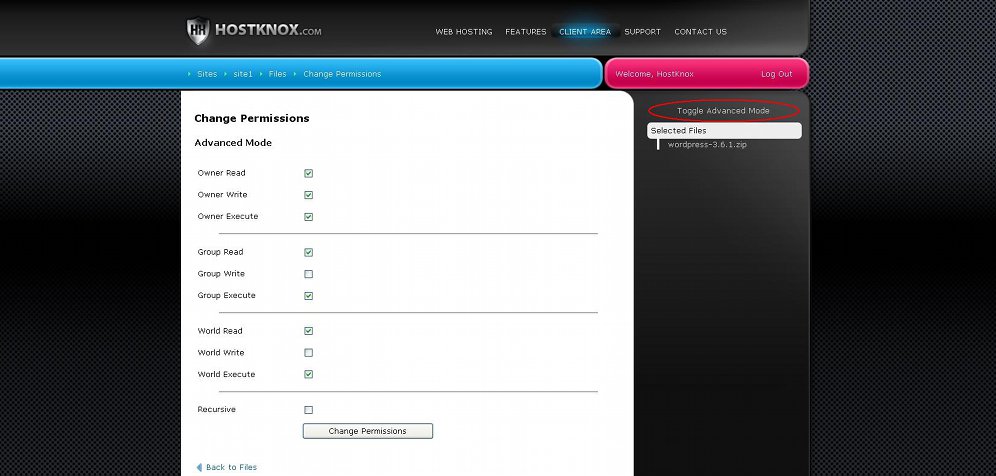
On that page you can change the permissions by marking/unmarking the respective checkboxes. To go back to the Standard Mode click on the button Toggle Advanced Mode again.
Another way to configure permissions is with an FTP client (e.g. FileZilla). For more information on what permissions are and how to configure them with an FTP client check out the tutorial on what are file permissions and how to configure them. You can also change file and folder permissions via SSH. This is for more advanced users. For more information on how to do it check out the article on how to change file and folder permissions via SSH.
In the Files section of the HostKnox control panel there's also a very useful tool for fixing incorrect permissions. To use it just click on the button Fix Incorrect Permissions that's in the black area on the right:
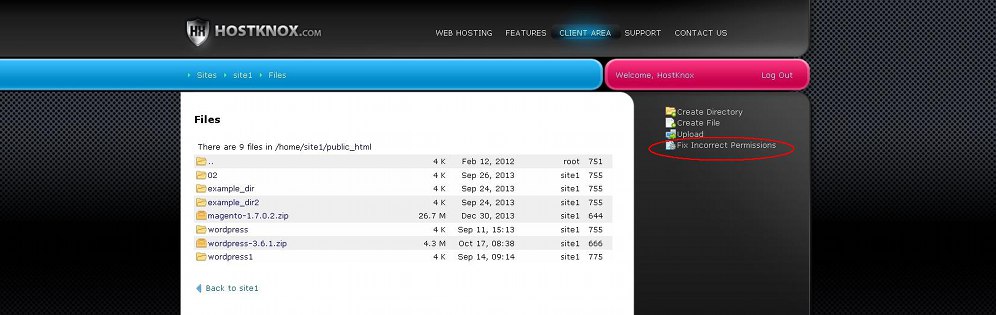
It will fix the world-writable bit of the permissions of all files and folders on your account. For example, if you have files that have permissions 666 or folders with permissions 777, the tool will change them respectively to 664 and 775.
Rename Folders and Files
Renaming directories and files with the File Manager is quite easy. Mark the folder or file by clicking next to its name with the left mouse button. Then from the buttons that appear in the black area on the right click on the Rename one:
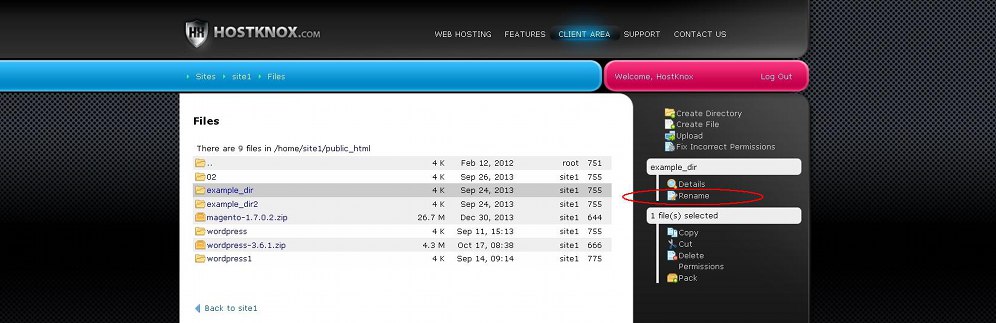
On the page that opens after you click on the button type the new name in the text field that's provided, then click on the Rename button that's under the field to save the change.
Copy, Cut and Paste Folders and Files
With the File Manager of the HostKnox control panel you can copy/paste or cut/paste directories and files from one location on your hosting account to another. To do this, mark one or more files and folders by clicking next to their names. Some buttons will appear in the black area on the right. Two of these buttons are Copy and Cut:
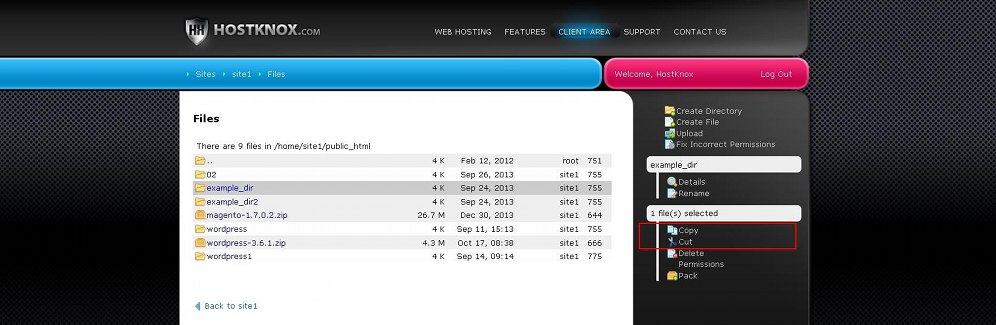
If you want to copy files/folders from one directory to another without deleting them in the old directory, click on the Copy button. To move the files/folders from the source directory to a different one and delete those in the source directory, click on the Cut button. After you click on one of the two buttons a Paste here button will appear. Navigate to the directory in which you want to paste the copied files/folders and click on the Paste here button:

You can copy/paste more than one file and/or folder at the same time. To do this, before you click on the Copy or Cut button you have to mark the respective files and folders. To mark/unmark more than one file/folder, press and hold the Ctrl button on your keyboard and then click with the left mouse button next to the names of the files and/or folders that you want to mark.
Delete Folders and Files
The File Manager can be used to delete directories and files on your hosting account. To do this, mark the file/folder that you want to delete by clicking with the left mouse button next to its name, then click on the Delete button that appears in the black area on the right:
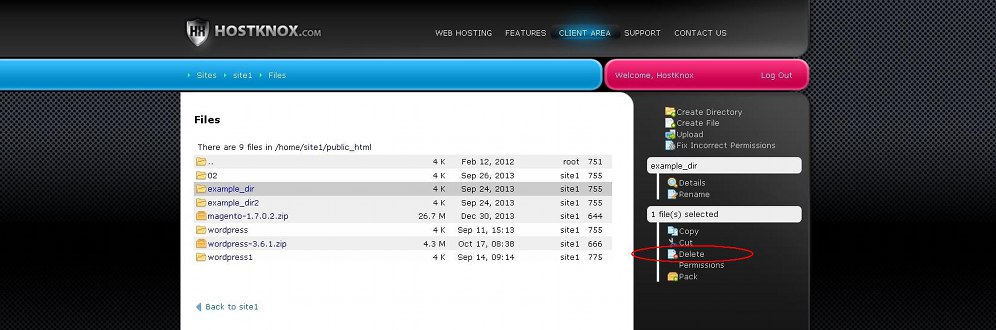
After you click on the Delete button a small window will pop out asking you for confirmation. Just click on the Yes button to proceed and delete the selected files/folders.
You can delete more than one folder/file at the same time. To select more than one file/folder, hold the Ctrl button on your keyboard and mark the files/folders by clicking next to their names with the left mouse button.
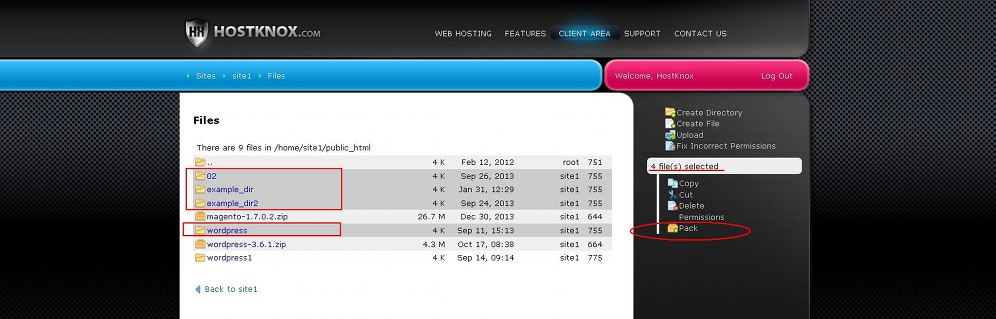
Pack and Unpack Files and Folders
Another useful function of the File Manager is the one that allows you to pack/unpack content. You can pack files and folders into an archive. You can also unpack/unzip an archive no matter whether it's a ZIP, GZIP or BZIP archive. To extract an archive, select it by clicking with the left mouse button next to its name and then click on the Unpack button that appears in the black area on the right:

To pack one or more files and folders into an archive, select them by clicking next to their names with the left mouse button. To be able to select more than one file/folder, press and hold the Ctrl button on your keyboard and then mark the files and folders. After that click on the Pack button that's displayed on the right:
After you click on the Pack button a new page will open on which you can specify the name of the archive in the text field that's provided. Then click on the Pack button that's under the field.