MediaWiki User Preferences Tutorial - Learn How to Manage User Preferences in MediaWiki
How to manage user preferences in MediaWiki
In MediaWiki registered users have some options that they can configure from their accounts. When a user modifies the options for the preferences for their account, these changes will apply only to that particular user and only when the user is logged in.
MediaWiki comes with a set of user options that are configured in the same default way for all users. Some of the options are disabled by default and so they are not visible and available on the frontend of the site, and respectively users can't configure them. You and other people to whom you've given access to your MediaWiki hosting account can enable such options and they can also disable options that are enabled by default by modifying the LocalSettings.php file of your MediaWiki.
The user options are preconfigured with default values that apply to all users, both registered and unregistered. Registered users can overwrite these values from the user preferences of their account; as we mentioned, such changes will apply only to the account of the particular user. It's also possible to change these default values with other values globally for the whole site. This is again done by modifying LocalSettings.php. The changes will affect all unregistered users and those registered users who haven't edited these options from their user preferences.
Note that when you install extensions these may add more options to the user preferences. In this tutorial we'll review the core user options that come with MediaWiki and that are enabled by default (i.e. that are available by default on the frontend). The options are grouped into sections that can be viewed by selecting the respective tab/button.
We'll go over:
- how to access and toggle between the different user options
- user profile options
- appearance options
- editing options
- recent changes options
- watchlist options
Access User Preferences
After you log into your account click on the Preferences button to view and edit the user options of your account. The exact location of the button depends on the skin, but usually it's in the top right corner. As an example we'll use the Vector skin that comes prepackaged with MediaWiki. On the page that opens after you click on the button there are tabs with which you can view and edit different user options:
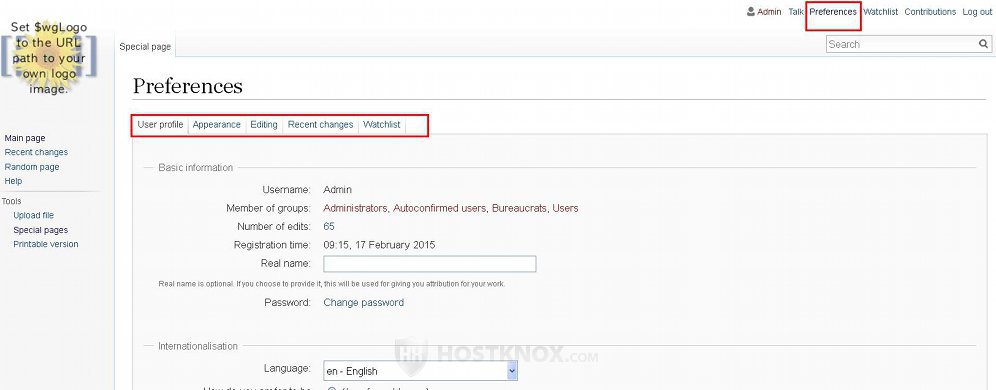
By default, the User profile tab is selected. Clicking on a tab will display a new page with user options.
Now let's go over the options on each of these pages.
User Profile
After you access the user preferences the tab User profile is selected by default. It displays some basic options and information related to the user, the language of the interface, the signature and the email. The options are divided into sections. The first one is Basic information:
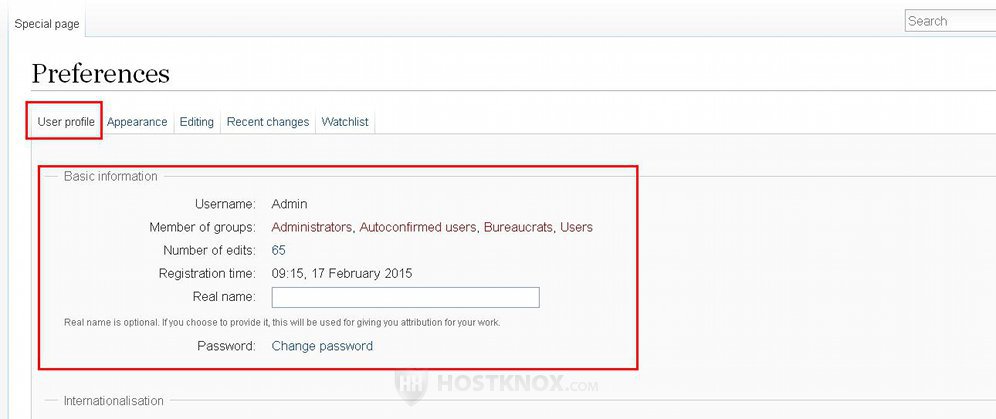
It contains the following information and options:
- Username - this is the username that the user specified during the registration. Users can't change the username.
- Member of groups - a list of the user groups to which you belong. The name of each group is also a link to the page (if there's one created) of that group.
- Number of edits - the total number of edits that the user has made so far. The number is also a link to a page that lists all the edits.
You can view the contributions/edits of any user by going to Tools menu on the left>Special pages button>Users and rights section on the following page>User contributions button; on the page that opens you can search for the edits of a user based on the username or IP address. - Registration time - the date and time the account was created.
- Real name - this is an optional setting.
- Password - this will not actually show your password. Instead, next to this option there's a button Change password with which you can set a new password. Clicking on the button will take you to a form with a field for the current password and a couple of fields for the new password that you want to set.
For more information on changing and resetting user passwords you can also check out the article on how to change and reset user passwords in MediaWiki.
The next a couple of sections on the User profile page are Internationalisation and Signature:
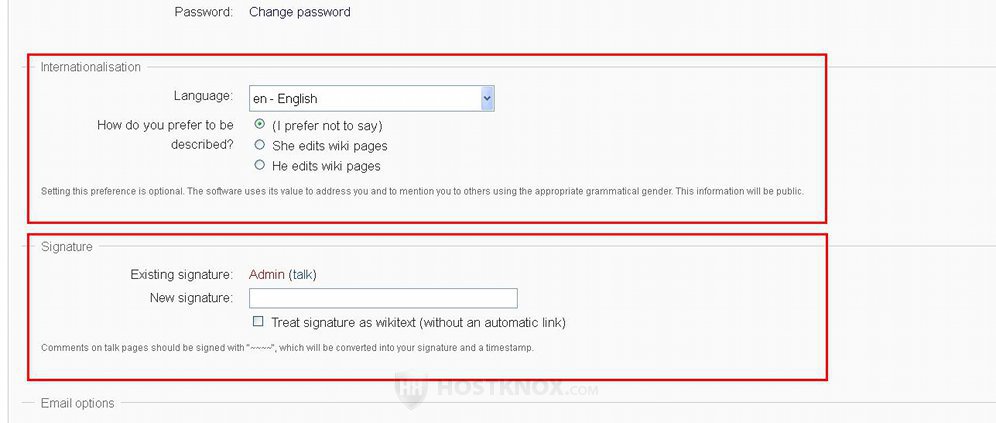
In the Internationalisation section there are a few options:
- Language - from this drop-down menu the user can select the language in which the interface will be displayed when the user is logged in. Note that this will not affect the language in which the content of the articles is written. It will affect the names of the default options and links (e.g. Log in/Log out, the links in the Tools menu, the options in the user preferences, etc.).
- How do you prefer to be described? - from this option the user can select, if they want to, their sex (i.e. whether the user is male or female). If the user prefers not to disclose this information, they can leave the option to the default radio button I prefer not to say.
The Signature section also contains a couple of options. The signature is usually used on discussion/talk pages. When you type ~~~~ (that's four times the symbol ~) in the content of the page, after you save the change the symbols are automatically replaced with your signature and the date and time of the change. The signature is also automatically turned into a link to the personal user page associated with the user. In brackets behind the signature MediaWiki automatically puts a link to the discussion page associated with the page of the user. The user preferences related to the signature are:
- Existing signature - this is not really an option, but it simply lists your current signature. By default, the username is also the signature.
- New signature - if you want the signature to be different than the username, type it in this field. Note that if you have already put the old signature on pages and you set a new signature, the existing occurrences of the signature will not be changed.
- Treat signature as wikitext (without an automatic link) - by default, this checkbox is unmarked. This means that each time you put a signature, MediaWiki automatically makes it a link to your user page. If you don't want the signature to be a link, mark this checkbox. This change will not affect the existing occurrences of the signature on pages.
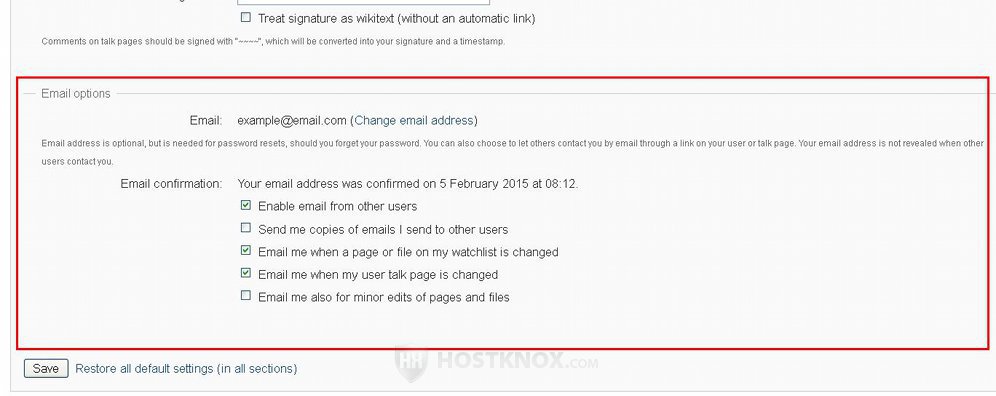
At the bottom of the User profile page are the Email options:
Note that by default users are not required to provide an email address in order to create an account. If the user wants to take advantage of the email feature and all the related options, they have to provide an email address. By default, email authentication is required which means that in order for users to be able to configure and use the email feature and options, they have to authenticate their email address. MediaWiki sends an email message with a link; the user has to click on the link to confirm the email address.
So if currently you're not allowed to configure the email options, you have to confirm the email address first. Initially the email options can be enabled/disabled globally for the whole site during the installation of the application. After that this can be done by modifying the LocalSettings.php file. Note that some of the options are disabled by default for the whole site which means that they are not available in the user preferences. But here we'll go over them as well.
- Email - this is the email address that you provided for the account. Next to the email address there's a button Change email address with which you can set a new email address. Clicking on the button will open a form with a couple of fields. You have to type the new email address and the password for the account. An email message with a confirmation link (provided email confirmation is enabled) will be sent to the new email address. Each time you change your email address you have to confirm it.
If you haven't provided an email address there will be a button Set an email address. It opens a form with a text field for typing the email address and another field for the password of the account. - Email confirmation - if the email address is confirmed, here you'll simply see the date and time the address was confirmed. If the address is not confirmed, there will be a message notifying you about that and a button Confirm your email address. It will open a form on which there's a button for sending a message with a confirmation link to the email address.
- Enable email from other users - by default, this option is enabled for all users. This means that other users can send you emails through the MediaWiki interface. If you disable the option, this means that other users will not be able to send you emails from the MediaWiki form for sending emails. Of course, they will be able to send you emails with an email client.
- Send me copies of emails I send to other users - this option is available by default (provided the email function and user-to-user emails are enabled), however it's disabled for all users. It's pretty much self-explanatory. In case you want to receive on your email address copies of the messages that you send to other users through the MediaWiki interface, mark this checkbox.
- Email me when a page or a file on my watchlist is changed - by default, watchlist notification is disabled globally, which means that this option is not available in the user preferences. If watchlist notification is enabled, then this option will be available and it will be enabled for all users. If you keep it enabled, then each time someone edits a page that's on your watchlist you will receive an email message notifying you about the change. If you don't want to receive such notifications, unmark this checkbox.
For detailed information about the watchlist read the tutorial on how to manage a page watchlist in MediaWiki. - Email me when my user talk page is changed - as with watchlist notification, user talk page notification is globally disabled by default. This means that the option is not available as part of the user account options. If user talk page notification is enabled for the site, then this option will be available and it will be enabled for every user. If you leave this checkbox marked, then when somebody posts a comment on your user talk page, you'll receive an email message informing you about the edit. In case you don't want to receive such notifications about changes on your talk page, unmark this checkbox.
This option concerns only your talk page. As you know each registered user can create a personal page on the wiki site and also an associated talk/discussion page on which other users can write comments. - Email me also for minor edits of pages and files - this option is available if watchlist and/or user talk page notifications are enabled. If the option is available, it's disabled by default.
As you know, when you edit a page there's an option on the edit form for marking the change as a minor one. When watchlist and/or user talk page notifications are enabled and the option Email me also for minor edits is disabled, then you will not be notified via email for minor changes; you will receive notifications only for edits that are not marked as minor. If you mark the checkbox Email me also for minor edits, then you'll be also notified for edits that are marked as minor.
If you make any changes to the options on the User profile page, don't forget to click on the Save button at the bottom.
When it comes to the email options and the rest of the settings on the User profile page, you may find useful the following articles related to the subject in our knowledge base:
- How to disable and enable the email function in MediaWiki
- How to enable and disable email authentication in MediaWiki
- How to change the expiration time of links for email address authentication in MediaWiki
- How to enable and disable user talk page notification in MediaWiki
- How to require users to confirm their email address before being allowed to edit pages in MediaWiki
- How to automatically notify users via email for all changes in MediaWiki
- How to change the minimal password length for users in MediaWiki
- How to change the expiration time of temporary user passwords in MediaWiki
- How to disable password resets in MediaWiki
Appearance
The next tab on the page with the user account preferences is Appearance. Clicking on it will display options for changing the skin, date and time format, time zone and some other settings related to the appearance of the site. The options are again grouped into sections. The ones at the top are Skin, Date format and Time offset:
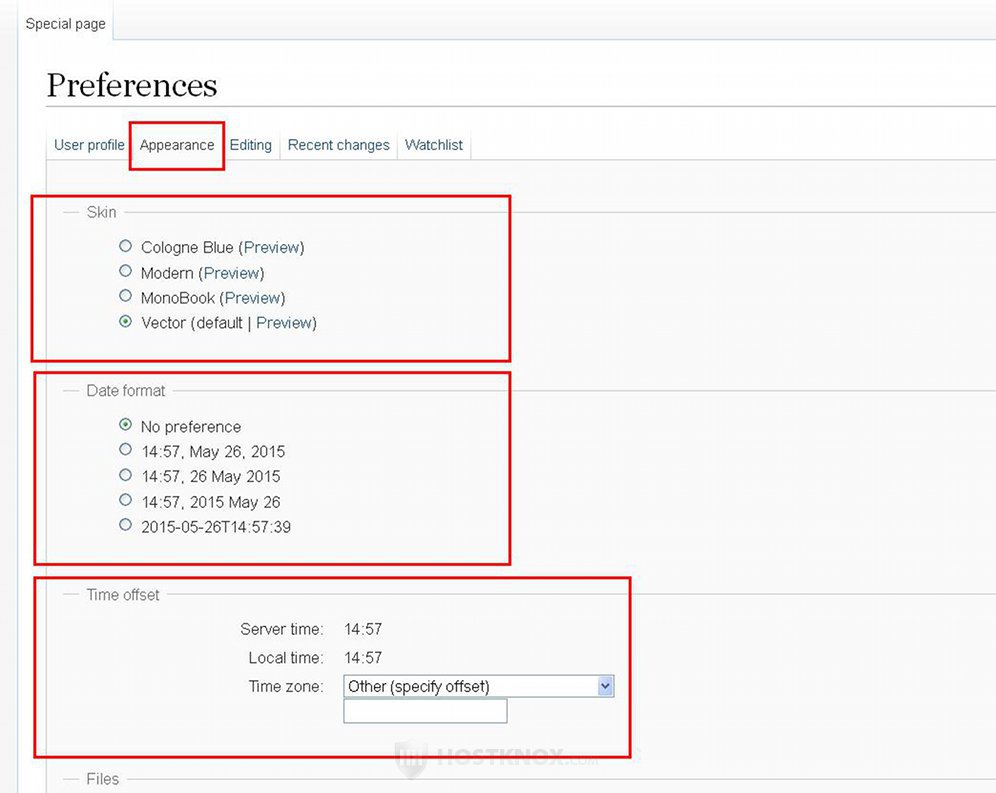
In the Skin section you'll see a radio button for each of the installed skins. MediaWiki comes prepackaged with a few skins. Every new installed one will be listed here. To change the default skin used for displaying the site mark its radio button. If before that you want to see what the skin looks like, click on its Preview button. For more information on skins check out the tutorial on how to install and manage skins in MediaWiki.
From the Date format section you can change the format used for displaying the date and time. Simply mark the corresponding radio button.
From the Time offset section you can change the time zone. By default the server time is used. To change the time zone select it from the Time zone drop-down menu. The time used in that zone will be shown for Local time just above the drop-down menu. That's the time that will be shown throughout the site (e.g. for edits on the Recent changes page).
The next two sections with options are Files and Diffs:
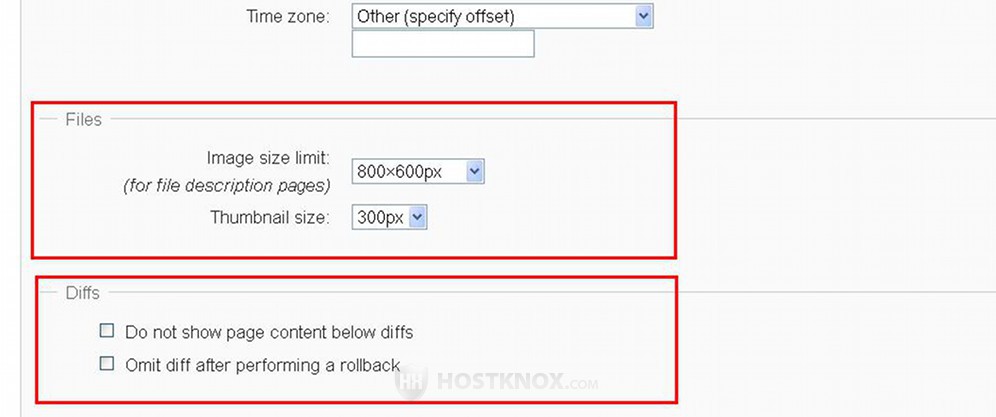
The Files section contains the options:
- Image size limit - for each uploaded image there's a page that's automatically created on the site. It displays a resized preview of the image, as well as a thumbnail size of the image and some additional information about it. From there you can also view the image in its original dimensions. With the drop-down menu Image size limit you can select the dimensions which will be used to resize the preview of the image. By default, it's set to 800 x 600 pixels (width x height). Note that depending on the ratio between the dimensions of the original image, the resized preview copy might not have both the width and the height matching exactly the specified dimensions. For instance, the resized copy may be 800 x 400 pixels instead of 800 x 600.
- Thumbnail size - this option is similar to the previous one but it concerns the thumbnail size of the image. You can change the size to be used by MediaWiki when automatically creating a resized thumbnail of the uploaded image.
As we mentioned, each uploaded image has its page. It can be accessed by adding to the main URL of the site File: followed by the name of the image file. For instance, if the homepage of your MediaWiki site is yourdomain.com and the name of the image is Example.jpg, then you can open the page of that image with the URL yourdomain.com/index.php/File:Example.jpg.
Note that file uploads are disabled by default.
The Diffs section contains options related to the feature with which the differences between the edits of a page can be compared:
- Do not show page content below diffs - this option is disabled by default. This means that when you compare two revisions of a page, below the list of the parts of the content that are different in each revision there will be shown the whole content of the more recent of the selected revisions of the page. In case you don't want the content to be shown but just the differences, mark this checkbox.
On each page there's a button View history with which all the revisions of the page can be compared. On the Recent changes page there are also options for comparing the revisions of a page. - Omit diff after performing a rollback - for page edits listed on the Recent changes page, as well as on the Revision history form for a page, there's a Rollback edit button. It's available to users belonging to the admin/sysop group and with it you can undo the last one or more revisions performed by a user to the page. If the same user made more than one successive edits one after the other, the Rollback button reverts all these edits by that user.
After clicking the Rollback button a page opens informing you that the action is complete. When the option Omit diff after performing a rollback is disabled, then on that page you'll see listed the content changes that are reverted with the rollback. When the option Omit diff after performing a rollback is enabled (i.e. the checkbox is marked), then on that page you won't see listed the changes performed to the content with the rollback, just a message that the action has been performed successfully.
The section at the bottom of the Appearance page is Advanced options:

There you'll find the options:
- Link underlining - this option concerns the links/buttons on the frontend of your site. By default, it's set to Skin or browser default which means that whether links should be underlined depends on the particular skin and/or the configurations of the browser. If you prefer links to be underlined regardless of the skin or browser, set this drop-down to Always. If you don't want underlining to be used, set it to Never.
- Threshold for stub link formatting (bytes) - this option affects the links to articles. By default, it's set to Disabled which means that only links to pages that haven't been created yet are formatted as stub links. The formatting depends on the skin but usually such links are colored in red. There are some preconfigured values that you can select from the drop-down menu. If an article is smaller in size than the selected value, then links to that article will be formatted as stub links. For example, if you set the drop-down menu to 50, then links to all articles that are smaller in size than 50 bytes will be displayed with the stub link formatting (i.e. colored in red).
- Show hidden categories - this checkbox is unmarked by default. It's related to page categories. As you know, pages can be assigned to categories. At the bottom of an article are listed the categories to which it's assigned. However, in MediaWiki you can also create hidden categories. If a page is assigned to a hidden category, that category is not listed at the bottom of the page. If you mark the checkbox Show hidden categories, then the hidden categories to which the page belongs will also be listed.
- Auto-number headings - this option affects the sub-headings of pages. By default, it's disabled which means that sub-headings of pages are not numbered. If you enable this option, when you're logged in you'll see the sub-headings of each page shown with numbers. For example, if a page has three sub-headings, they'll be shown with the numbers from 1 to 3, starting from the top and going down the page.
If you make any changes to the options don't forget to click on the Save button at the bottom.
Editing
By clicking on the Editing tab of the user preferences you'll be able to configure some options related to page editing. On the Editing page the options are divided into the sections General options, Editor and Preview:
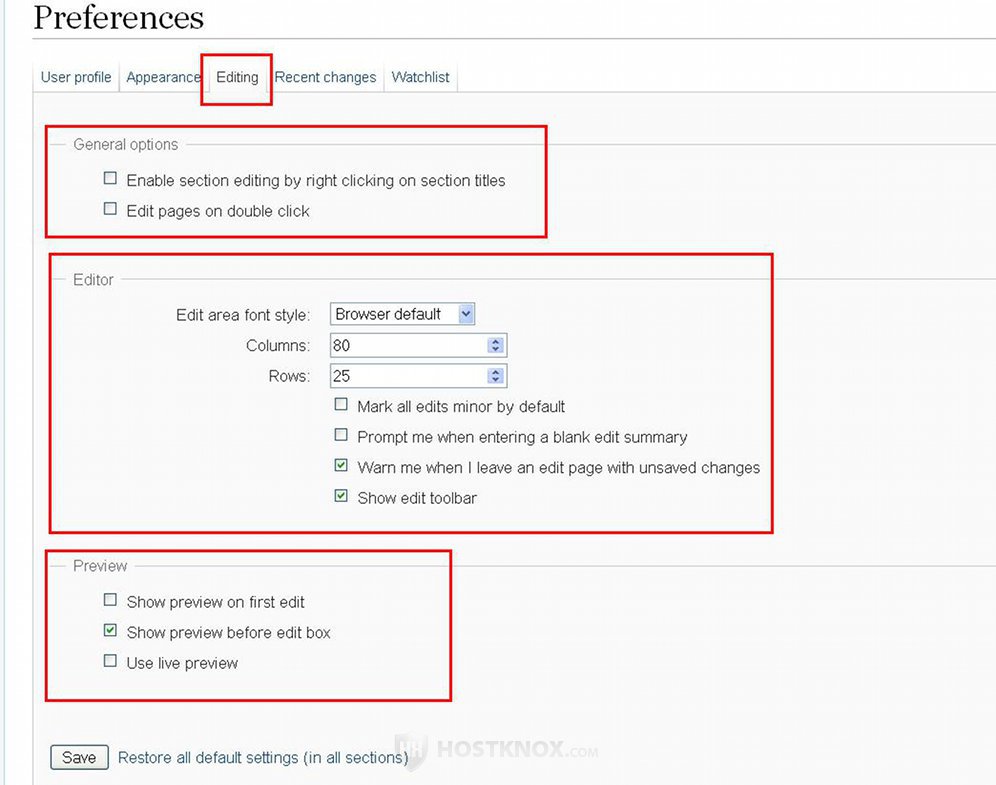
In the General options section you'll find a few checkboxes:
- Enable section editing by right clicking on section titles - this option is disabled. If you enable it, you can edit the section of a page by clicking with the right mouse button on the title of that section.
An article can be divided into sections by inserting sub-headings. When this option is enabled and you click with the right mouse button on a sub-heading, this will automatically open the edit form on which you can edit the content of the section.
Note that in any case there's an edit button next to each sub-heading with which you can edit the section, regardless of whether the option for editing a section by right-clicking on its title is enabled or disabled. - Edit pages on double click - this option is disabled by default. If you enabled it, you can access the edit form of a page by double clicking with the left mouse button on the title of the page (or also on any of its sub-headings, if it has any).
In the Editor section on the Editing page of the user preferences you can configure options related to the built-in text editor available on the form for editing/creating pages:
- Edit area font style - this option is for the font style in which the text in the text area of the editor is to be displayed. Note that this option doesn't affect the font with which the pages are displayed, it only affects the font used for the text editor.
The option is set to use the default style of the web browser. If you want to, you can select from a few available fonts (e.g. Serif, Sans-serif, Monospace). - Columns and Rows - with these two options you can change the size of the text area of the editor.
Note that in the bottom right corner of the text area on the edit form there's a small arrow. This provides you with a way for temporarily changing the size of the text area for the current edit. When you hover the mouse pointer over it, the cursor will turn into an arrow and you can expand and narrow the text area by clicking and holding the left mouse button, and moving the mouse. This however will not be saved, the new size of the text area will be used only until you close the edit form. - Mark all edits minor by default - on the form for editing pages there's a checkbox for marking the edit as a minor one. By default, that checkbox is unmarked, and so if you leave it like that, the edit will not be considered a minor one. If you want the checkbox for minor edits to be marked by default, enable the option Mark all edits minor by default. In this way each time that you access the page edit form the checkbox for labeling the edit as minor will be marked.
Note that regardless of how you configure the option Mark all edits minor by default, on the actual edit form you can always mark or unmark the checkbox for minor edits. The option only sets the default behavior of the checkbox for minor edits on the edit form. - Prompt me when entering a blank edit summary - this option is disabled. This means that if you save a page edit without providing an edit summary in the respective field, the edit will be saved immediately. When this option is enabled and you save a page edit without providing an edit summary, a message will be displayed above the text area of the editor informing you that you've left the Summary field blank; if you click on the Save button again, the edit will be saved without a summary.
- Warn me when I leave an edit page with unsaved changes - this option is enabled by default. In this way when you go to the edit form of a page and change its content, and then you try to leave the edit form by clicking on some other link/button without saving the changes, a window will pop out informing you that you haven't saved the changes. The window has a button for staying on the page so that you can save the edit, and another button for confirming that you want to leave the page without saving the changes.
If you disable the option, then this warning window will not pop out when you leave an edit form with unsaved changes. - Show edit toolbar - the toolbar is enabled by default. On the edit form the toolbar contains buttons that you can use when creating/editing the content of the page; it has buttons for making text bold and italicized, for inserting links to images and files, for adding links to external and internal URLs, etc. If you don't want the toolbar to be available on the edit form, unmark this checkbox.
In the Preview section you'll find a few options for previews. Before you save a page edit you can preview the page to see how it looks with the changes. The options in this section are related to that preview function:
- Show preview on first edit - this option is disabled by default. If you enable it, the current content of the page will be displayed on the edit form above the text editor.
- Show preview before edit box - this setting is enabled by default. As the name of the option implies, when you are on the edit form and you click on the button for previewing the changes, the content of the page with the new changes will be shown above the text editor. If you disable the option, the preview will be displayed under the text editor.
- Use live preview - this option is disabled by default. It has to do with how the preview is loaded. If you enable the live preview, each time that you click on the Show preview button on the edit form this won't reload the whole page but just the content for the preview. When the live preview is disabled, clicking on the button for the preview will reload the whole page.
If you make any changes don't forget to click on the Save button.
Recent changes
The Recent changes tab on the user preferences page displays some options that affect the Recent changes page. The Recent changes page shows the changes made on the site (e.g. page edits, account creations, etc. ). It can be accessed by using the respective link in the menu on the left. At the top of that page there are some filtering options that are configured to default values. These values can be changed by modifying the user preferences related to the Recent changes page, so that each time that you visit the page while logged in, the filtering options will be preconfigured to the selected default values.
Note that every time that you visit the Recent changes page you can edit the filtering options, but the selected values will apply only for the current session. The next time that you visit the site and you go to the page it will again be preconfigured with the default values that you've selected from the user preferences.
The user options related to the Recent changes page are grouped into a couple of sections:
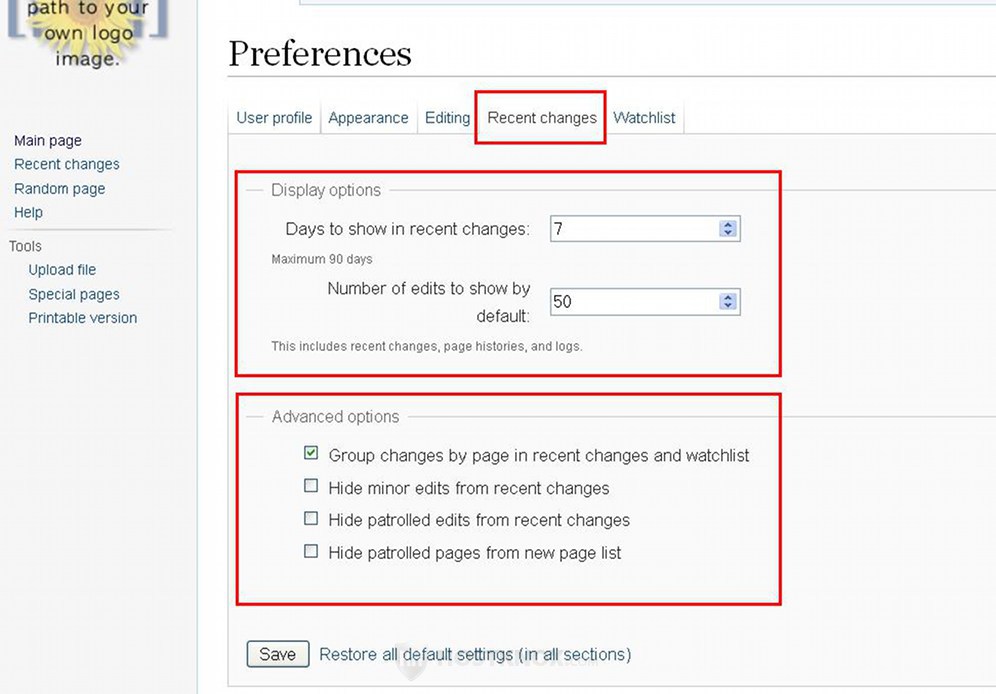
In the Display options section there are a couple of settings:
- Days to show in recent changes - this is set to 7 days by default. What this means is that when you go to the Recent changes page, this will automatically display on the page the changes that were performed during the last 7 days. If you want to, you can change that period. The maximum number of days that you can set is specified under the options.
Note however that older changes made before the specified period by this option are not removed completely from the list with the recent changes (unless you have set the maximum number of days). On the Recent changes page you can select a longer (or shorter) period from the filtering options available at the top of the page. - Number of edits to show by default - similar to the previous option, but this one is for the number of edits that are shown by default when you visit the Recent changes page. The two options work together. For example, the number of edits is set to 50 and the days to 7. So if during the last 7 days there were 20 changes, this means that only 20 edits will be show on the page, even thought the number is set to 50. On the other hand, if there were 60 edits during the last 7 days, then only 50 will be displayed when you visit the Recent changes page.
As with the option for the days, this is only the default value that's used automatically when you go to the Recent changes page. There are other available options for the number that you can select at the top of the page, but they will apply only for the current session.
The section Advanced options contains the settings:
- Group changes by page in recent changes and watchlist - this option affects both the Recent changes page and your watchlist page. If the option is enabled and a page has been edited more than one time during a single day, then instead of listing each edit of the page as a separate entry, the page is listed only once with an arrow in front of it. When you click on the arrow a list with the edits of the page will expand under the title.
- Hide minor edits from recent changes - when you edit a page you can mark that revision as a minor one. If the option for hiding minor edits is disabled, revisions that are marked as minor will also be listed on the Recent changes page. If you enable this option, minor edits will not be listed.
Note that this will be the default behavior of the option on the Recent changes page. With the corresponding filtering option on that page you can view/hide the minor edits. The next time you visit the site the filtering option for the minor edits on the Recent changes page will be again configured with the default value. - Hide patrolled edits from recent changes - this option is only available to users who belong to a user group with the permission to patrol edits. By default, only admins/sysops have that permission. The feature for patrolling edits is used to indicate which page edits have been viewed and marked as patrolled by a user that's allowed to patrol edits. So in this way such users know which page revisions made by the rest of the users have been checked by trusted users. If the option Hide patrolled edits from recent changes is disabled, then on the Recent changes page all page edits are listed, both those that have been patrolled and those that haven't. If the option is enabled, then on the Recent changes page only edits that haven't been patrolled will be listed.
As with other options, this will set the default behavior of the corresponding filtering option on the Recent changes page. Once you open the page you can explicitly view/hide patrolled edits and override the default value. - Hide patrolled pages from new page list - this is similar to the previous option but it affects the page that lists newly created pages (Tools menu on the left>Special pages>Recent changes and logs section>New pages button). When this option is disabled all new pages will be listed on the New pages page. If the option is enabled, only pages that haven't been marked as patrolled will be listed.
As with the previous option, this setting is available to and affects only those users with the right to patrol pages. Whether you disable or enable this option, this will be the default value that will be automatically used when you open New pages. With the filtering options at the top of that page you can view/hide patrolled pages no matter what the default value is.
On the subject of patrolling edits and the Recent changes page you may find useful our detailed tutorial on how to track and patrol changes in MediaWiki.
You may also find helpful the following articles from our knowledge base:
- how to change the default number of edits on the Recent changes page in MediaWiki
- how to change the options for the number of entries on the Recent changes page in MediaWiki
- how to change the options for the period for which entries can be listed on the Recent changes page in MediaWiki
- how to change the period for which changes are kept on the Recent changes list in MediaWiki
- how to rebuild the Recent changes list in MediaWiki
Watchlist
In MediaWiki you can have a watchlist of pages. This is used for tracking changes to particular pages. The watchlist shows all the changes performed to the pages that are on the list. It's also possible to receive notifications via email for changes to pages on the watchlist; this is done from the email options, provided that the function is enabled globally for the site.
The Watchlist tab of the user preferences displays some settings related to the watchlist:
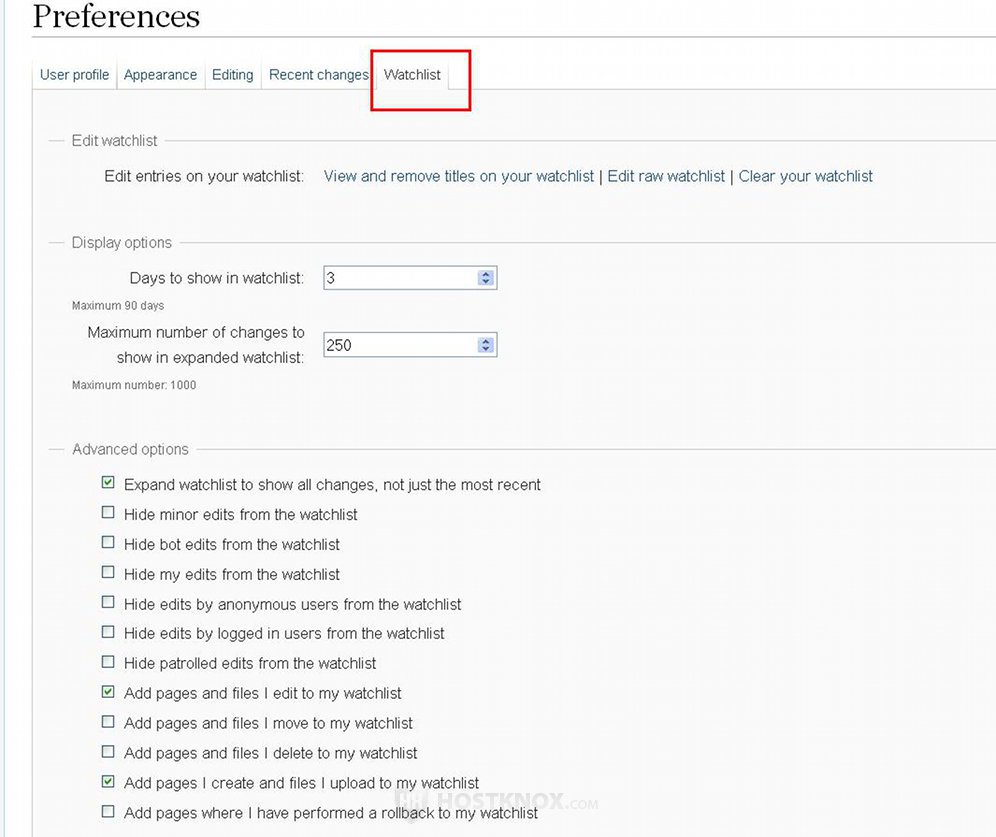
In the section Edit watchlist you'll find a few buttons:
- View and remove titles on your watchlist - this will display a list of the pages on your watchlist grouped according to the namespace to which the pages belong. On that page you can also remove pages from the list.
- Edit raw watchlist - this will also display a list of the pages on the watchlist, but on that page you can both remove and add pages to the list. However, to add pages there you have to know the exact names of the pages.
- Clear your watchlist - with this button you can remove all the pages from the watchlist.
These three buttons are also available on the main Watchlist page. You can access it by clicking on the corresponding button; it's usually in the top right corner of the screen, but this depends on the skin.
The Display options section contains a few settings:
- Days to show in watchlist - from this option you can select for how many days back you want changes to be listed on the watchlist. For example, if it's set to 3 and you open the watchlist, the site changes from the last three days will be listed. This is the default value that will be used each time you visit the site and you open the watchlist. On the watchlist page itself there are a filtering options at the top with which you can expand the list to display the changes for a longer period (e.g. for 90 days back).
- Maximum number of changes to show in expanded watchlist - with this option you can set the maximum number of entries that can be shown on the watchlist. This option works together with the previous one. For the selected time period there may be more changes, but if they exceed in number the selected maximum number, they won't be shown. For instance, let's say that you select to view the changes made during the last 90 days and that during that period 500 changes were performed. If, however, the option for the maximum number of changes is set to 250, then only the more recent 250 changes will be shown, not all 500 changes made during the selected period.
Not that unlike the option for the time period, for this option there's no corresponding filtering setting at the top of the watchlist page with which you can override the default value.
The section Advanced options has a bunch of checkboxes. Most of them apply to the filtering options on the Watchlist page, or to options related to the watchlist on the various forms for editing and managing pages.
- Expand watchlist to show all changes, not just the most recent - if this option is enabled and a page that's on your watchlist has been edited more than once within a single day, then on the watchlist you'll see listed one after the other all the edits made to that page. In the same situation if the option is disabled, then only the most recent change to the page from that day will be listed on the watchlist.
- Hide minor edits, Hide bot edits, Hide my edits, Hide edits by anonymous users, Hide edits by logged in users, Hide patrolled edits - for each of these options there's a corresponding option on the watchlist with which you can filter what should be shown and hidden on the list. These user preferences specify the default values for the corresponding filtering options on the watchlist. For example, if you mark Hide minor edits, then when you open the watchlist page the option for hiding minor edits there will be automatically enabled.
- Add pages and files I edit to my watchlist - on the edit form for regular pages/articles and for pages of uploaded files there's a checkbox for adding the page to your watchlist. With the option Add pages and files I edit to my watchlist you can set whether that checkbox should be marked or unmarked by default.
- Add pages and files I move to my watchlist - similar to the previous option, but this one controls the default behavior of the checkbox for adding the page to the watchlist on the form for moving pages.
- Add pages and files I delete to my watchlist - sets the behavior of the option for adding the page to the watchlist on the form for deleting pages.
- Add pages I create and files I upload to my watchlist - if you enable this option, then every time you create a page or upload a file, the checkbox there for adding the page to your watchlist will be marked by default.
- Add pages where I have performed a rollback to my watchlist - if you want pages for which you perform a rollback to be automatically added to your watchlist, enable this option.
The rollback button is available on the Recent changes page and in the revision history of a page. With it you can undo one or more edits (made one after the other by the same user).
If you make changes to the options don't forget to click on the Save button.
For detailed information about everything related to your watchlist check out our tutorial on how to create and manage a page watchlist in MediaWiki.