WordPress Access from Another Folder Tutorial
How to make your WordPress blog accessible at the root URL for your site but still keep the WordPress files in a separate subfolder?
Here we will show you how to store your WordPress files in a separate subfolder on your HostKnox account, but view your blog using the root address of your site.
When you install WordPress, if you upload the whole unzipped wordpress folder as it is to your hosting account, your blog will be accessible at www.yourdomain.com/wordpress. If you upload only the files and folders inside the wordpress folder (not the folder itself) to the public_html directory of your account, the blog will be accessible at www.yourdomain.com, but all the WordPress files and folders will be scattered around in the public_html directory. However, if you want to, it's possible to keep all the files and folders in a subfolder and still use your main URL to access your WordPress blog.
You have to remember though that you cannot have more than one WordPress installation or other Content Management Systems (e.g. Joomla, Magento, WordPress, etc.) uploaded directly in your public_html directory so as to be accessible through your root URL. You can however have many CMS (Content Management System) applications installed in different subfolders inside public_html (e.g. public_html/wordpress; public_html/joomla, etc.).
So back to our WordPress issue. As an example let's say that you upload the whole folder wordpress, without renaming it, to the public_html directory of your HostKnox account, so that your site is accessible at www.yourdomain.com/wordpress and the path to your WordPress folders and files is public_html/wordpress. By making a few changes and copying a couple of files you can still keep everything inside the wordpress subfolder but open your blog using www.yourdomain.com.
First, log in to your Dashboard, go to the Settings section from the menu on the left and from the submenu click on General. On the General Settings page in the field for WordPress address (URL) type the address where your WordPress files are stored. In our case it would be www.yourdomain.com/wordpress. In the box just below it for Site address (URL) type your root URL address that you want to use in the browser when accessing your blog (www.yourdomain.com):
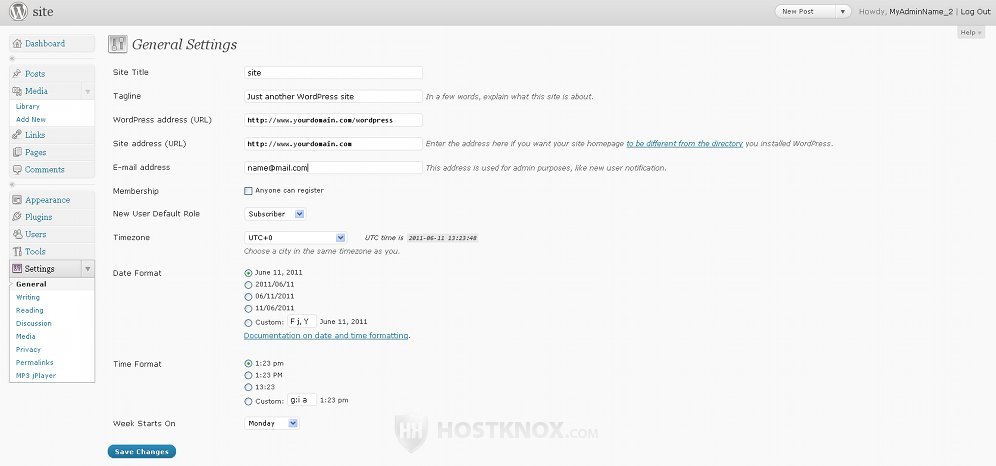
After you are done click on Save Changes.
What you need to do next is to copy the files index.php and .htaccess from the wordpress folder on your hosting account (public_html/wordpress) to the main directory of your account (public_html). It's possible that you don't have an .htaccess file at all (if you're not using pretty permalinks), just index.php.
You can copy the files using the HostKnox control panel or an FTP client (e.g. FileZilla).
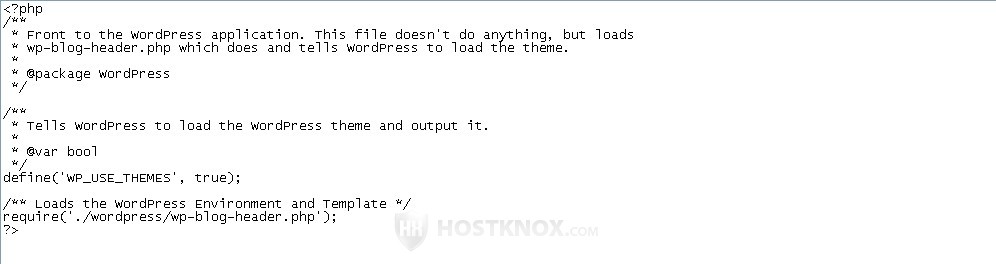
After that you have to make a change to one of the lines in the index.php file that you copied in the public_html directory. You need to change the following line, so that it points to the path of your core WordPress files:
require('./wp-blog-header.php');
In our example, where you have your WordPress files and folders stored in a folder called wordpress as a subfolder of the main public_html directory, you need to make it look like this:
require('./wordpress/wp-blog-header.php');
You can open the file through the HostKnox control panel by just clicking on it, then make the change and click on the Save and Close button, or you can download it via FTP, open it with a text-editor (e.g. Notepad), make the change, save the file and upload it back. Remember to upload it to the main public_html directory, not in the subfolder with the other WordPress files.
That's pretty much all you have to do.
If you already have all the WordPress files and folders uploaded directly in the public_html directory, but you want them in a subfolder and resolving to your root URL, you just have to create a new folder (e.g. wordpress), move all the WordPress folders and files in it and then follow the steps as described above.