WordPress Pages Tutorial
How to manage pages in WordPress
In WordPress you can use posts and/or pages to publish content on the frontend of your site. Posts are published automatically on the homepage of your site; it displays your newest posts, while older ones can be viewed on the pages with the older posts. The pages that display posts are different than those that we'll discuss in this tutorial. What's meant here by a page is a static page with any content of your choice. That's usually content that doesn't change much (e.g. an About Us page). You can use such pages to display any information on your blog, or if you decide to create a regular website and not a blog, you can use only pages instead of posts.
Unlike posts, pages can't be assigned to tags and cannot be grouped into categories. However, you can create subpages, so one parent page can serve in a way as a category that groups other pages. The menus on the frontend in which the links to the pages are automatically included depends on your theme, the widgets and plugins that you use. With the default theme that comes prepackaged with WordPress and with no changes to the widgets a link to every page that you add is included automatically in the top navigation menu. If you want to include page links in a sidebar menu, you can add a widget for a custom menu. There are also many plugins for managing menus.
You can create and manage pages from the admin panel of your WordPress. In the menu on the left there's a link Pages which will display the general section in the admin panel from which you can manage your pages. In this tutorial we'll describe the things you can do with your pages from this Pages section of the admin panel.
The form for adding and editing pages is on a separate page in the admin panel. We have covered this and all the settings on the add/edit page form in the tutorial on how to manage the blocks and settings on the add/edit page form in WordPress.
Pages Section in the Admin Panel, Overview of the Table with the Existing Pages, Screen Options
To manage pages, after you log in to the admin panel go to Pages menu>All Pages submenu. On the page that opens you'll see a table listing all the static pages. The table itself is divided into four columns: Title, Author, Comments, Date.
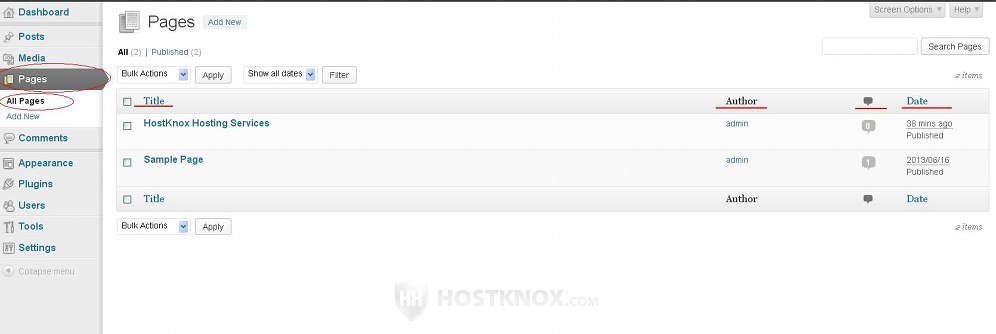
Each column displays the corresponding information for each page. The pages are ordered according to the publishing date; the newest one is at the top. You can change this by clicking on the small arrow that appears next to the Date column when you hover the mouse pointer over the name of the column. The title of each page is a link to its edit form. Clicking on a name in the Author column will filter the pages listing those added by the particular author. Clicking on a number in the column that shows the number of comments for the page will redirect you to the Comments section of the admin panel with the table there listing the comments submitted for the particular page.
As with other tables in the admin panel, you can control which columns are shown in the table with the existing pages. You can hide and display all the columns except for Title. To do this click on the Screen Options button in the upper right corner. A panel with some checkboxes will appear. To hide or display a column unmark/mark the corresponding checkbox:
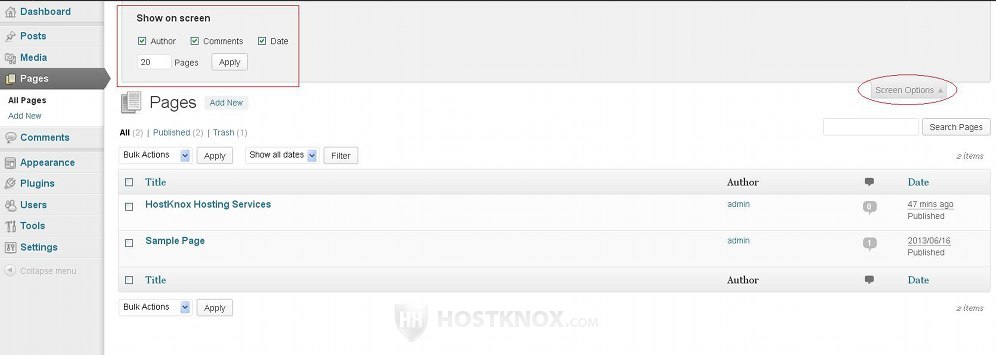
The panel also contains an option from which you can change the number of pages that are listed in the table per page.
Bulk Actions
Using the Bulk Actions drop-down menu you can either move to trash many pages at the same time, or you can edit some of the page options of many pages simultaneously. To do this, first mark the checkbox that's next to the title of each page that you want to delete or edit, then select the action from the drop-down menu and click on the Apply button next to it:

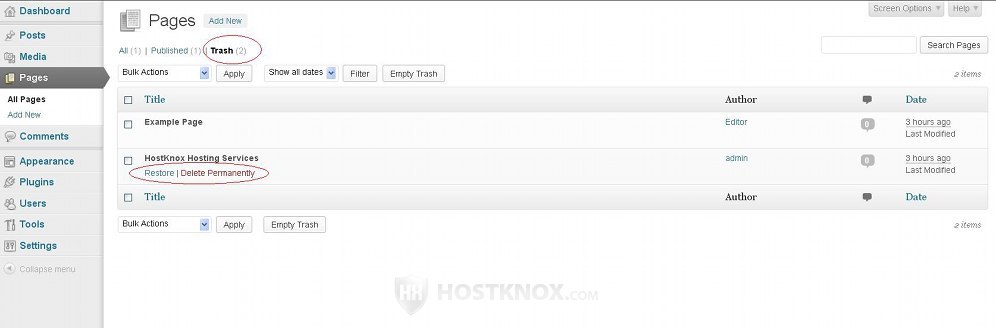
If you move some of the pages to the trash this will not delete them permanently. You can still restore them. If there are any pages in the trash, you'll see a link labeled Trash just above the table. Clicking on it will list all the pages in the trash. You can delete a page permanently or restore it by clicking on one of the respective buttons that appear under the name of the page when you hove the mouse pointer over it:
You can also restore or delete permanently more than one page at the same time by using the Bulk Actions drop-down menu.
When you edit more than one of the published pages by selecting Edit from the Bulk Actions drop-down menu a panel with some options will expand:
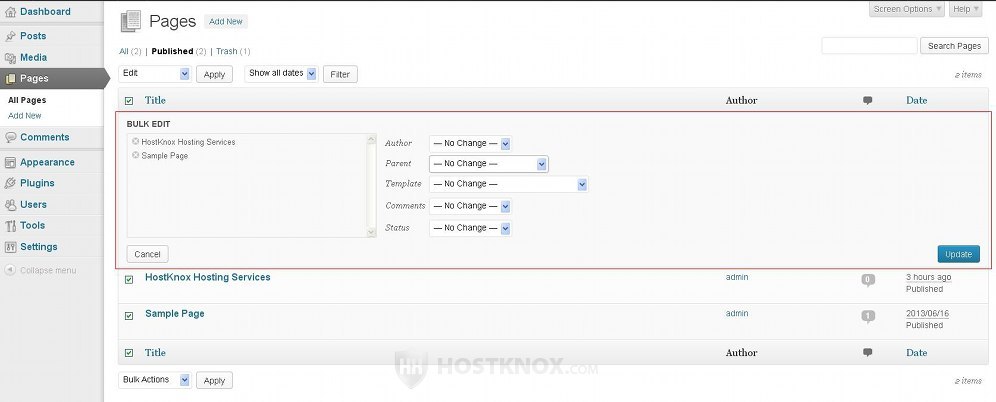
You can change the author of the pages, you can select a parent page, change the template, disable/enable comments and change the status. These are just some of the page options. To be able to change all of them you have to edit each page individually. For more information on that and on the different page options check out the tutorial on managing the blocks and options on the form for adding/editing pages in WordPress.
Actions Per Page
In the Pages section of the WordPress admin panel where all the existing pages are displayed in a table you can perform not only bulk actions with many pages but also different actions with each individual page. When you hover the mouse pointer over a row in the table some buttons will appear under the title of the page:
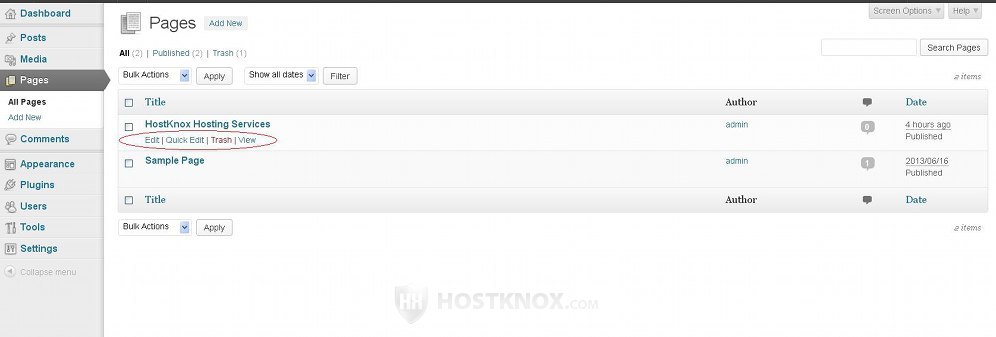
Clicking on the Trash button will send the page to the trash. As we already described, when you go to the trash you can restore or delete permanently the pages that are there. The View button will redirect you to the page as it exists on the frontend. The Edit button will send you to the edit form where you can configure all the settings related to the page. The Quick Edit button will expand a small panel in the table from which you can change some of the page settings for the particular page:
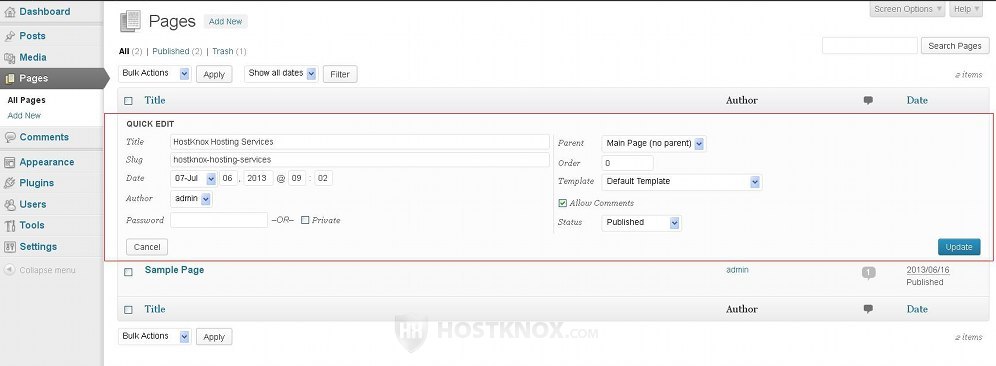
You can edit the title, slug, date, author, template and status of the page. You can change its visibility (e.g. from public to private, or to password-protected). You can also make it a subpage of another one and disable/enable comments. If you make any changes using the quick edit form don't forget to click on the Update button under the settings.
Adding and Editing Pages
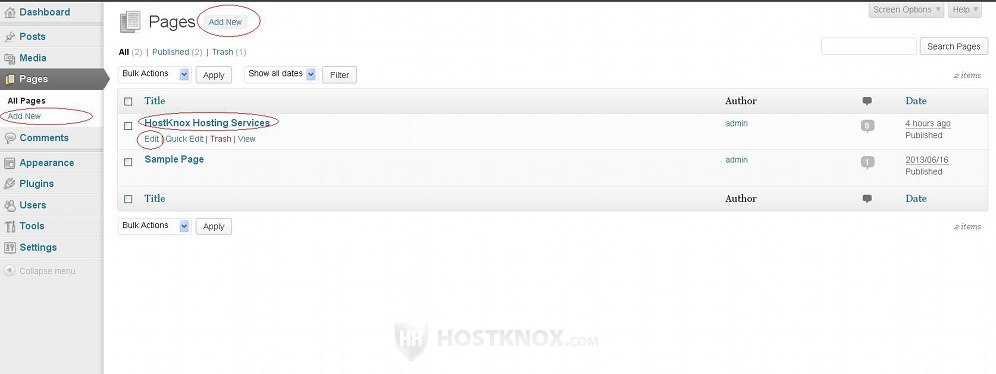
The add and the edit page forms are actually the same. The only difference is that by default after you add a page a couple of blocks with settings will be automatically included on the edit form. To add a new page go to the Pages menu in the admin panel and either click on the Add New sub-menu or on the Add New button in the upper left corner. To edit an existing page, click either on the title of the page in the table or on the Edit button that appears when you hover the mouse pointer over its row in the table:
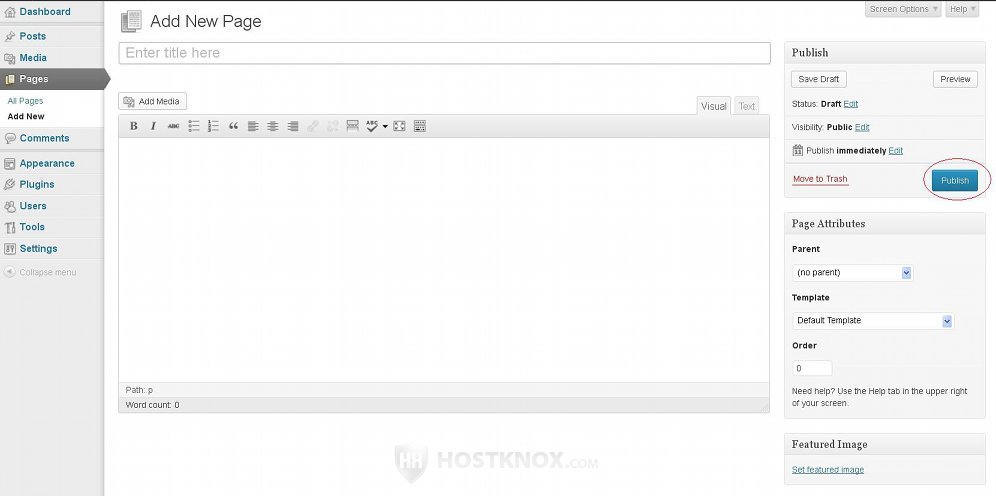
On the add page form the only thing that you need to do to add a page is type its title in the text field at the top, use the built-in text editor to type and format the content, and click on the Publish button:
There are some additional settings that you can configure. Some of the blocks displaying such settings are actually hidden by default. For more information on these blocks and settings check out the tutorial on how to manage the blocks and settings on the add/edit page form in WordPress.