WordPress Comments Tutorial
How to manage WordPress comments
WordPress is used to create blogs (as well as sites) and one of the major features of a blog is the possibility for viewers of the blog to make comments and discuss the posts there. Through the administration panel of your blog you can edit, delete, moderate comments and do all sorts of things.
There are a couple of places in your admin panel where you can do different things with the comments or configure comments options. The first one is in the Comments section, the other one is in Settings>Discussion.
The administration panel has a separate section for viewing and editing all the comments on your blog. To go there log in to your Dashboard and click on the Comments menu on the left side of the screen. The Comments page will open where you can see a table with all the comments to all the posts on your blog. In this example there is only the default comment to the example post which comes with every WordPress installation package:
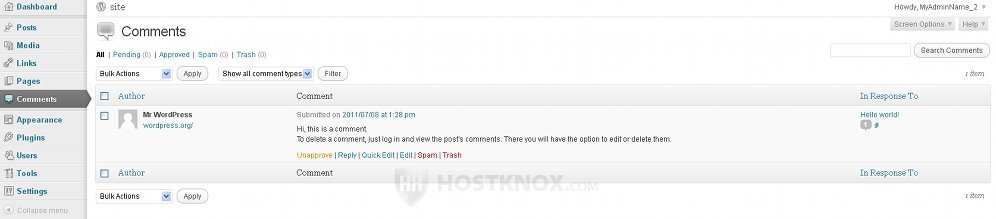
The comments are arranged in a table with three columns: Author, Comment, In Response To. In the Author column you can see the author's name, avatar, site (if there's any), and IP address. In the example here there's no IP address, just the name and site (Mr WordPress, wordpress.org). But otherwise you'll be able to see the IP address of the person, and if you click on it you'll see all the comments written by him/her.
In the middle column of the comments table you can see when the comment was submitted and its actual content. In the last column (In Response To) you can see the name of the commented post and the number of comments submitted for the particular post.
When you hover the mouse pointer over a comment you will see several options on which you can click. You can approve the comment so that it can be seen on your blog (that's if you have set rules for submitting a comment; we'll come to that later), you can reply to the comment, edit it or mark it as spam or trash. You can view and delete all the comments you've marked as spam or trash by clicking on the Spam and Trash links in the upper left corner, just above the table for the comments. There you can also click on the Pending link to see all the comments waiting for approval.
You can approve, move to spam/trash many comments at a time by marking the checkboxes in front of them, then selecting the desired action from the Bulk Actions drop-down menu (upper left corner) and then clicking on the Apply button next to it.
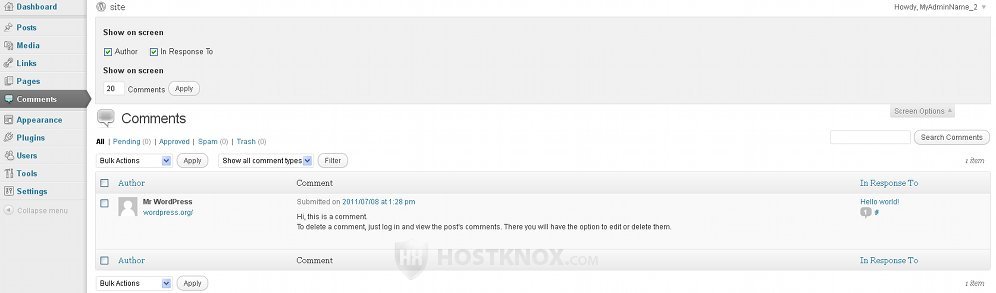
In the upper right corner there's a Screen Options button. If you click on it you'll be able to select which columns of the table to be displayed and the number of comments per page (in the same table in the administration panel, not on your blog):
When you want to edit a comment you can click on the Edit link under it and you'll be taken to the following screen:
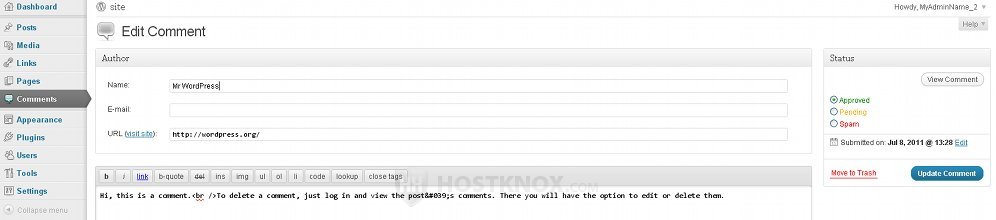
There you can pretty much do anything you want: change the name, content, mark it as spam or trash, etc. Don't forget to click on the Update Comment button after you make any change.
The other place where you can configure various options connected with the comments on your blog is in the Settings section of the administration panel. After you log in to your Dashboard click on the Settings menu on the left, and then on the Discussion submenu:
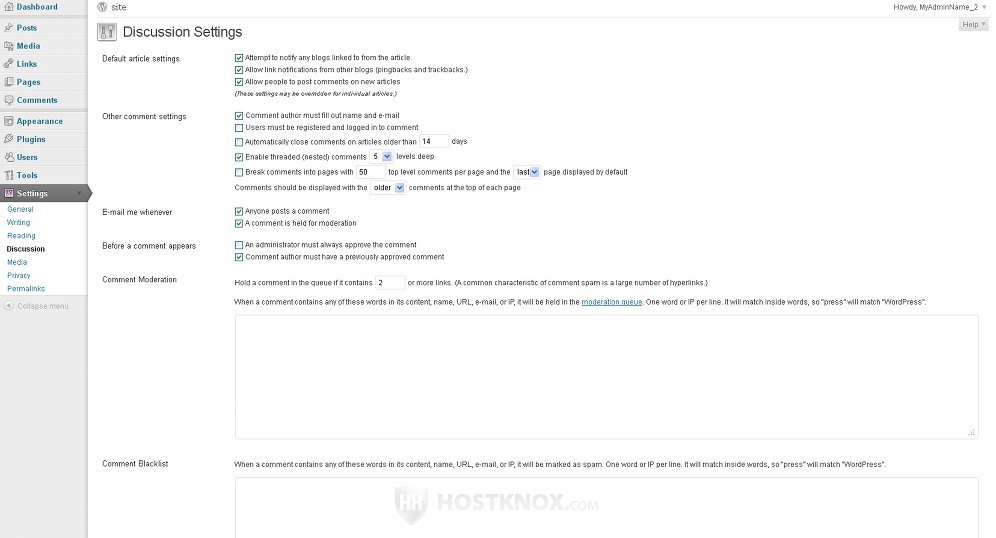
On the Discussion Settings page there are options divided into four groups of checkboxes: Default article settings, Other comment settings, E-mail me whenever, Before a comment appears.
In the first group (Default article settings) all three checkboxes are marked by default. From these options you can disable the automatic notification to other blogs when you use a link to their articles; you can disable pingbacks and trackbacks, and you can also disable all the comments to new posts. To learn how to disable all the comments to old and new posts check the disabling WordPress comments tutorial. Pingbacks and trackbacks are a way of informing another author of a blog that you have written an article commenting on one of his/her posts. The option has to be enabled on both blogs. This is a way of commenting on somebody's post without writing a comment on their blog. With pingbacks a link to your article is sent to the other blog as a comment, while trackbacks send a small portion of the article.
From the second group of checkboxes (Other comment settings) you can choose whether viewers of your blog have to fill out their name and e-mail address before they submit a comment, or whether they have to be registered and logged in order to do it. You can also set WordPress to automatically close old comments after a certain period of time, to disable threaded comments, and also to break comments into pages with a specific number of comments per page.
In the third group (E-mail me whenever) you can choose whether you want to be emailed when there is a new comment, or when there is a comment in the moderation queue.
In the fourth group (Before a comment appears) you can choose whether to approve each comment submitted to your blog, or you can choose to disable/enable just the option for approving the first comment of a person (after that he/she will be able to write comments without waiting for approval).
Under the checkboxes there are a couple of comment moderation boxes (Comment Moderation, Comment Blacklist) which are useful for preventing spam comments being displayed on your blog. In the Comment Moderation you can set the number of permitted links in a comment (spam comments often have many links) and in the box you can also type words, URLs, emails, IP addresses. If any of these are found in the comment it is held for approval by the administrator. It can be spam or it can be a perfectly normal comment.
Comment Blacklist is very similar. The difference is that if a comment is received matching any of the words, URLs, etc. that you have typed in the Comment Blacklist box, it will be automatically deleted without being held in the moderation queue for your approval. It will be sent to the spam folder in the Comments section of your Dashboard where, if you want to, you can restore it and then approve it as a regular comment.
At the bottom of the Discussion Settings page there are also some options concerning avatars:
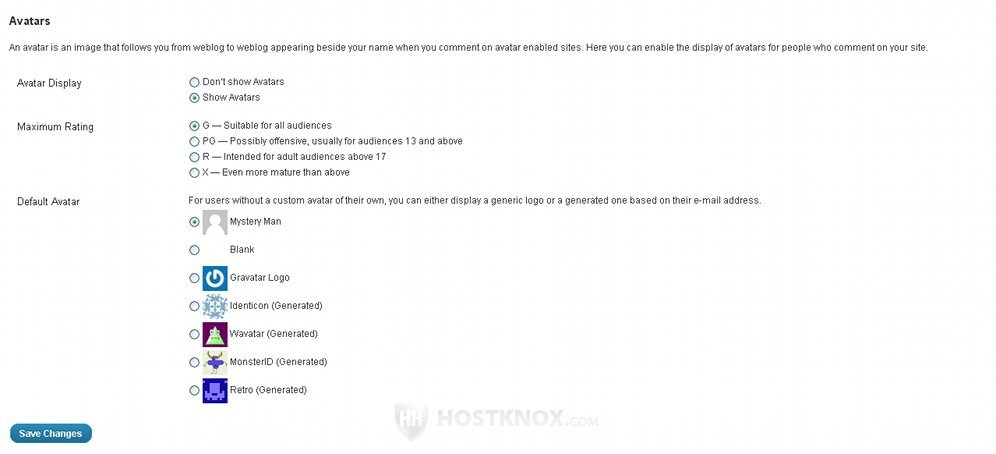
Don't forget after you make any changes on the Discussion Settings page to click on the Save Changes button at the bottom of the page.
Have fun and long live the administrator.