WordPress Plugins Tutorial
How to install WordPress plugins
Plugins are used to add something extra to your WordPress site/blog. It might be something very small or something more significant. They add more functions to your site. There are thousands of plugins for a vast number of different functions.
There are a couple of ways to install new plugins. One is to use the built-in automatic installer from the Dashboard and the other is to upload the plugin on your account manually.
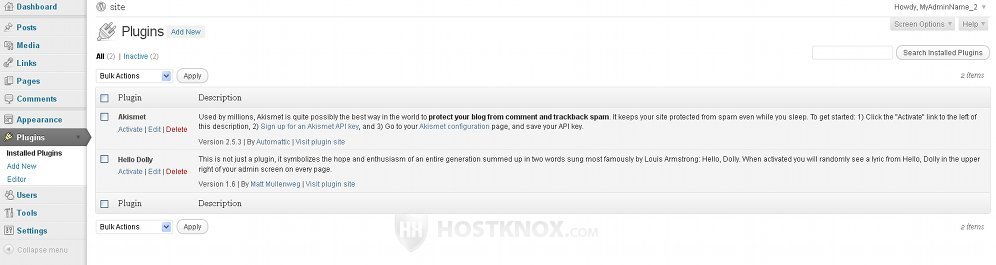
To install a plugin from the administration panel, log in to your Dashboard, click on the Plugins menu on the left, then you'll be able to see the installed plugins on your site. If you haven't installed any new plugins, you will only see the two default plugins (Akismet, Hello Dolly) which come with every WordPress installation package:
Then from the Plugins menu on the left click on Add New to go to the automatic installer where you can search for plugins. In this example we'll install an mp3 player plugin, so in the search box we just type mp3 player to see the available mp3 player plugins:
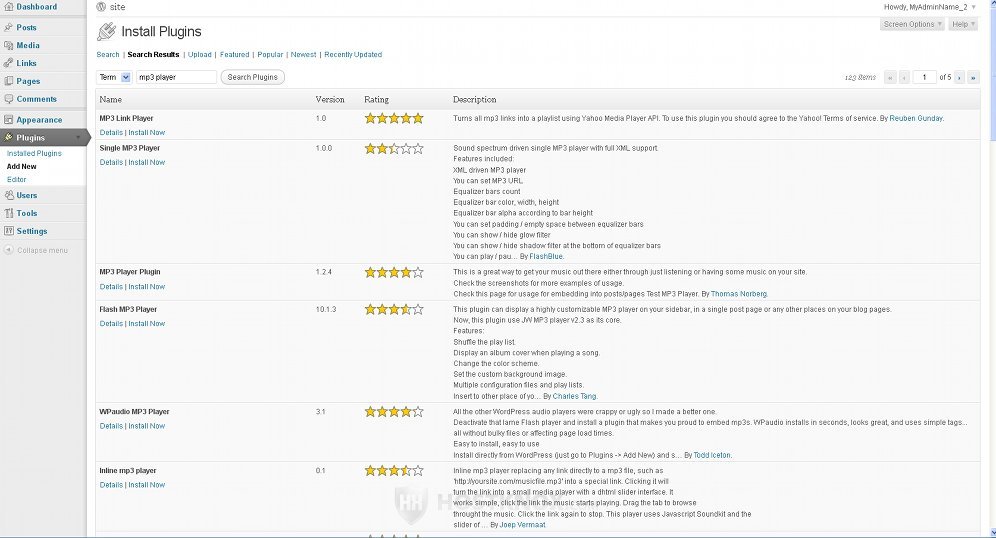
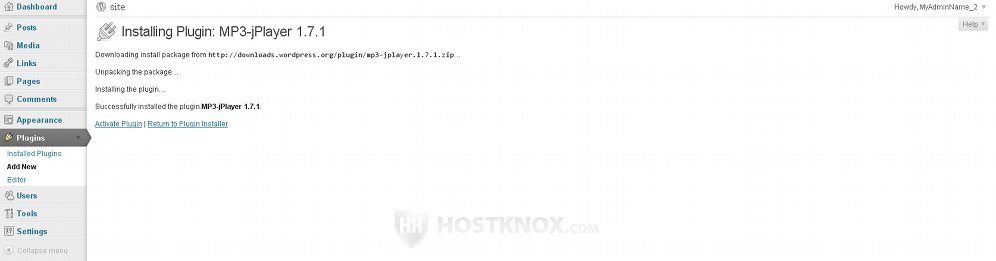
You can see a short description of the plugin on the right, and you can also read more details if you click on the Details link just below the name of the plugin. The same information is also available in the plugin section of the official WordPress site. Read the information to see whether the plugin is compatible with your version of WordPress, if there are any special requirements for the installation and activation of the plugin, and not least to check the rating and comments of other people about the particular plugin. After you decide which plugin you want to try, simply click on the Install Now link under its name. The plugin will be downloaded and unzipped and you will see a confirmation message. In this case we'll install MP3-jPlayer:
In order for the plugin to function on your site you have to activate it first. You can activate (and deactivate) plugins from the Installed Plugins section of the Plugins menu on your Dashboard. For some plugins you may have to add some code to your template files, others can be added as widgets (Appearance>Widgets), or there might be something else you have to do. That's why you have to read the information about the particular plugin to learn how to make it fully operational on your site. If you have to add some code to the template files, it's good to remember where you have added it because if you decide to delete/uninstall the plugin you might have to remove the code too.
In our example, the mp3-jplayer, among the few other possibilities, can be added as a widget and be set to play a list of mp3's uploaded in Media>Library (or in any folder on your account or on some other site).
The other way to install a WordPress plugin is manually. You can visit the plugins section of the official WordPress site, find the plugin you need, then download it on your local computer and unzip the archive. Next, using your favorite FTP client (e.g. FileZilla) or through SSH, you have to upload the unzipped plugin folder in the WordPress folder on your hosting account. Not to any folder but in the plugins folder which is a subfolder of wp-content. Let's say, for example, that the WordPress files on your account are in a folder called wordpress, then the path where you have to upload the new plugin would be public_html/wordpress/wp-content/plugins. Once it's uploaded you can activate it from your Dashboard>Plugins>Installed Plugins. Remember that for each plugin there might be something else you need to do to make it functional. It might be something specific for the particular plugin, so, again, it's advisable to read the information about the plugin.
It's also a good idea to create a backup of the WordPress files on your account and the database used by your WordPress site before installing a plugin. This is especially more important for plugins which require greater modifications in order to be activated. Another useful thing to remember is to deactivate your plugins before upgrading WordPress because some might not be compatible with the new version of WordPress. You can activate them after the upgrade. You can also check through the Dashboard for newer versions of the plugins themselves.
All HostKnox clients can take advantage of our WordPress hosting services and request a free WordPress plugin installation at any time.