WordPress Menus Tutorial
How to manage menus in WordPress
The default menus that are displayed on the frontend of your WordPress site depend on the theme that you use, as well as on the active widgets. Most themes usually have at least one main menu that's displayed as a top navigation bar; this top navigation bar is not a widget. The menus in the sidebar(s) are typically widgets. For information on widgets read the tutorial on managing widgets in WordPress.
In this tutorial we'll concentrate on creating custom menus. A custom menu can contain links to any content on your site as well as links to external sites. You can replace the default menu(s) that come with your theme (e.g. the top navigation bar) with a custom menu, or you can also use a widget to display a custom menu in a sidebar. Note that if you want to add a custom menu to a sidebar, before that you should check whether there isn't a widget that adds the menu that you need. For example, if all you want to do is add a menu with links to all the static pages that you create, you can use the Pages widget that comes prepackaged with WordPress; there's no need to create a custom menu for that.
To add and manage custom menus, log in to the admin panel of your WordPress and go to Appearance menu>Menus sub-menu. On the page that opens you'll see some blocks on the left side and a bigger one on the right. The one on the right is for adding and managing the actual custom menus, while the blocks on the left are for adding items/links to the custom menus.
Creating Custom Menus
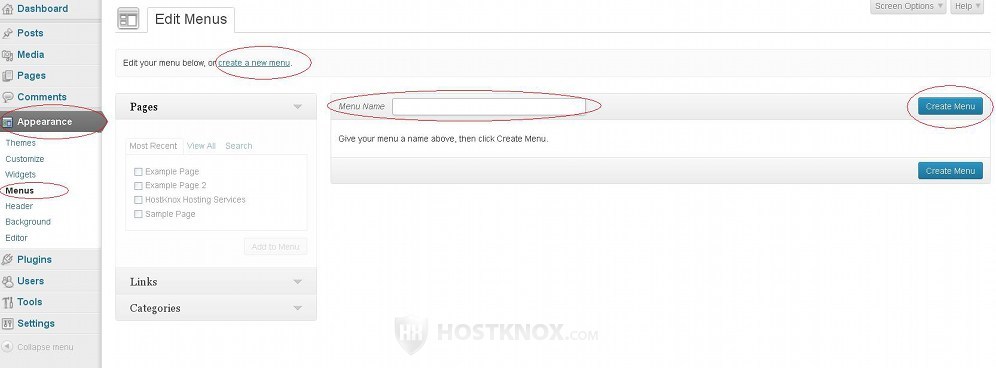
After you go to Appearance menu>Menus sub-menu, the block on the right side shows the sturcture of your custom menu(s). If you haven't created any and the theme that you use comes with a default menu, the menu items of that menu will be listed in the block. You can modify the default menu but you can't delete it. To create a new one, first click on the create a new menu link at the top of the page, then type the name of the menu in the respective field in the right block and click on the Create Menu button that's in the same block:
You can create many custom menus no matter whether you actually use them on the frontend. To do this just click on the link create a new menu at the top of the page and repeat the procedure.
Adding Items to a Custom Menu
After the custom menu is created you can use the blocks on the left to add menu items/links. By default, in the Menus section of the admin panel there are blocks for adding custom links, for adding links to the static pages that you've created and to the the categories:

To use any of these blocks to add a menu link, first click on the arrow next to its name to expand it and use its settings. To add a custom link, type the URL address in the URL field of the Links block, type a name in the Link Text field (that's the name that will appear in the menu itself), and click on the Add to Menu button. To add a page or a category just mark the checkbox of the respective page(s) or category/categories and click on the Add to Menu button:
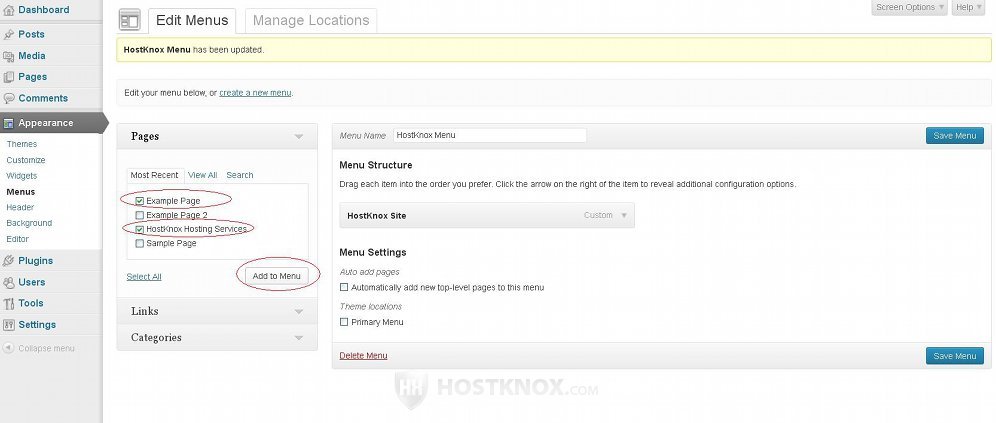
The custom link, the chosen pages and categories will be added as items in the custom menu.
Note that all blocks except the one for adding custom links have some tabs at the top which control the pages, categories, etc. that are displayed in the block. By default, the tab Most Used (or Most Recent, depending on the block) is clicked which means the the most used/most recent items of the respective type are shown in the block:
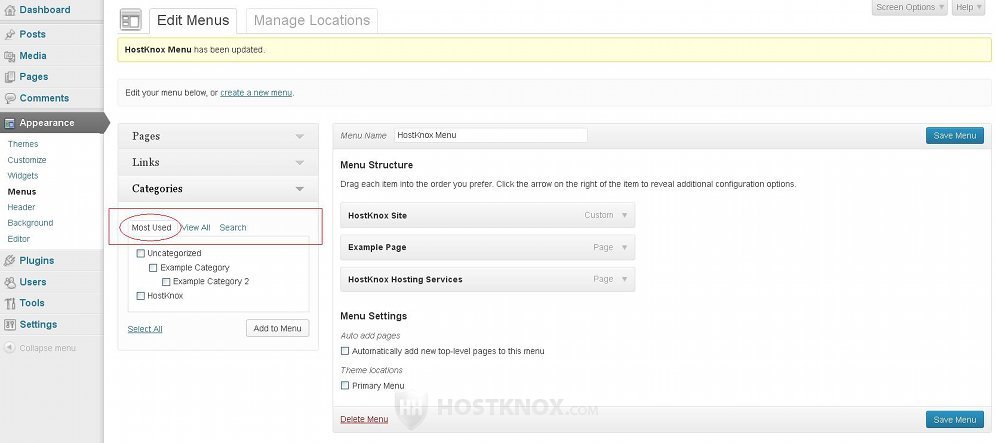
If you want all items to be shown click on the View All tab. If you have trouble finding the particular page, category, etc., click on the Search button in the respective block and type the name in the search field that appears.
Once the items are added to the menu click on the Save Menu button that's in the block on the right to preserve the changes.
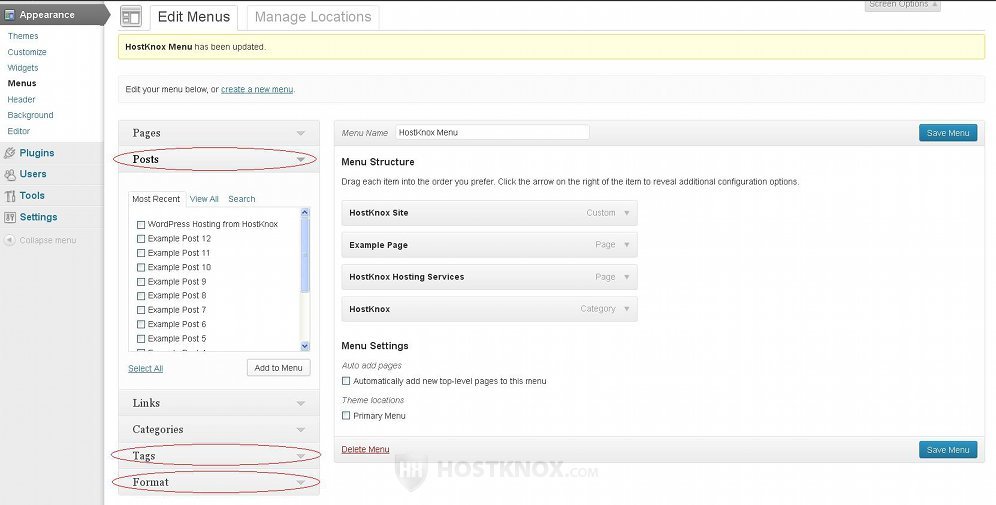
In addition to the blocks for custom links and the ones for pages and categories there are some that are hidden by default. These include ones for the posts, tags and post formats. You can hide/show blocks for adding items to the custom menus from the screen options of the Menus section in the admin panel.
Screen Options
To remove some of the default blocks or to show others that a hidden click on the Screen Options button in the upper right corner of the page. This will expand a panel with some checkboxes. To show/hide a block mark/unmark the respective checkbox:
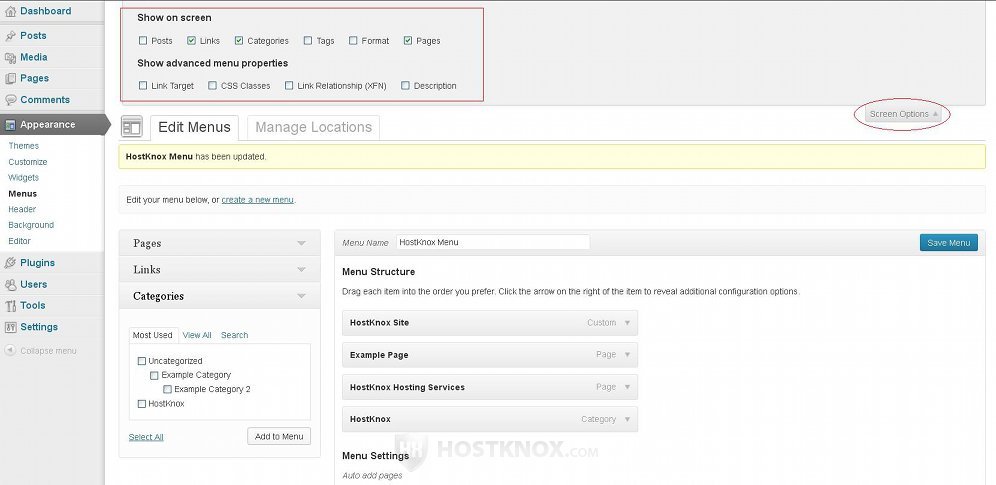
There are also some checkboxes for advanced menu properties. They are all unmarked by default. These add some additional options to the ones that can be configured for each menu item. We'll come to the menu settings a bit further down in this tutorial.
The blocks for adding menu items that are hidden by default are Posts and Tags. The Format block is also hidden if you haven't added any posts different than the Standard post type. If you have added other post types the Format block will be visible on the screen without the need to edit the screen options.
These blocks function in the same way as the ones for static pages and categories. To add a post, tag, or a post format as a link in the menu, mark its checkbox in the block and click on the Add to Menu button. Clicking on a tag link in the menu on the frontend will list all the posts associated with the tag. A format link will display all posts that belong to the particular post type (e.g. quote, link, image, etc.). The type of a post can be configured from the add/edit post form. For more information on this check out the tutorial on the settings and blocks on the form for adding and editing posts in WordPress.
Rearranging the Menu Items and Creating a Hierarchical Menu
After you add menu items by using the respective blocks on the left the items will be listed in the menu block on the right:
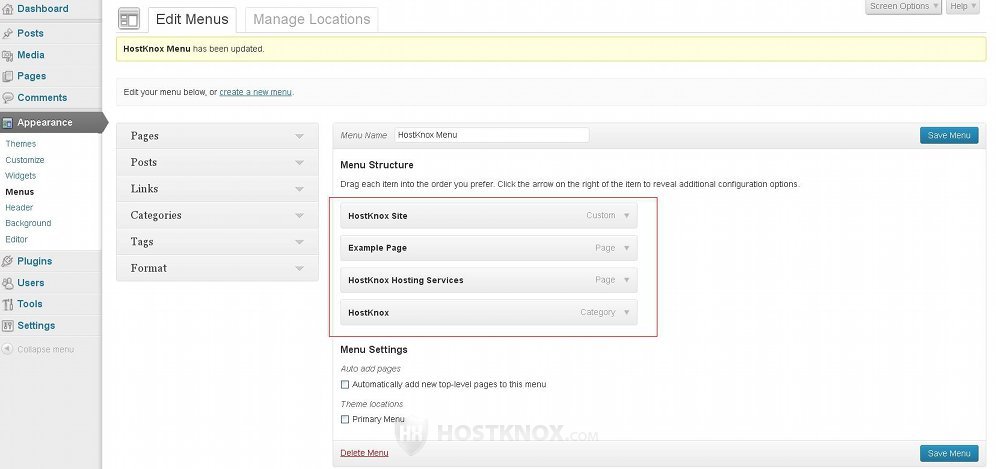
The order in which they are listed is the order in which they appear on the frontend. You can rearrange them in whatever order you want. To do this, hover the mouse pointer over the menu item until it turns into a four-arrow cursor, click and hold the left mouse button and drag and drop the menu item in the desired position:
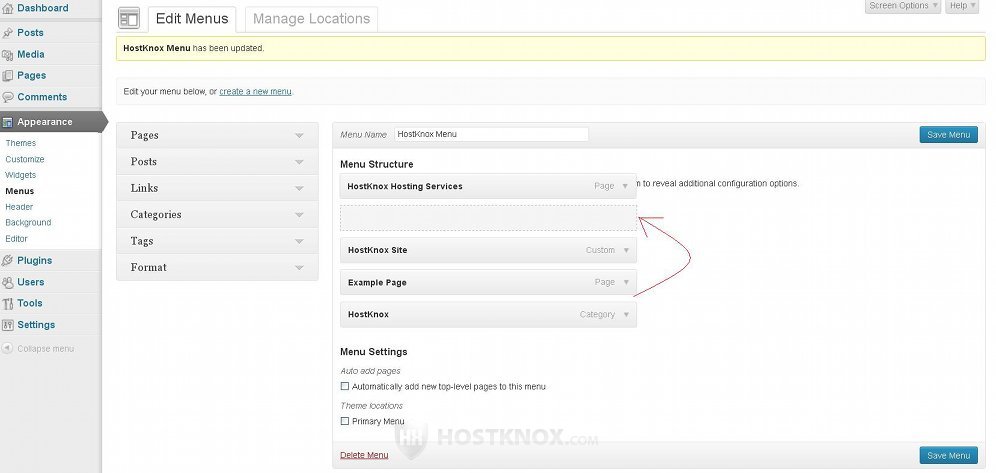
You can make one or more menu items subordinate to another and thus create a sub-menu. This is done in the same drag-and-drop way, but instead of moving it to a different position just move it slightly to the right. If you want to, you can create sub-menus within other sub-menus:
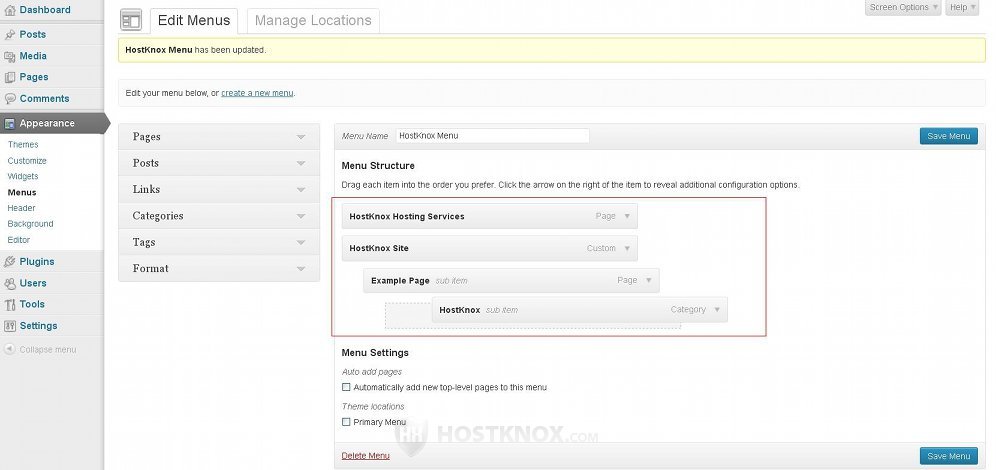
After you make any changes don't forget to click on the Save Menu button.
Menu Options and Deleting Menus
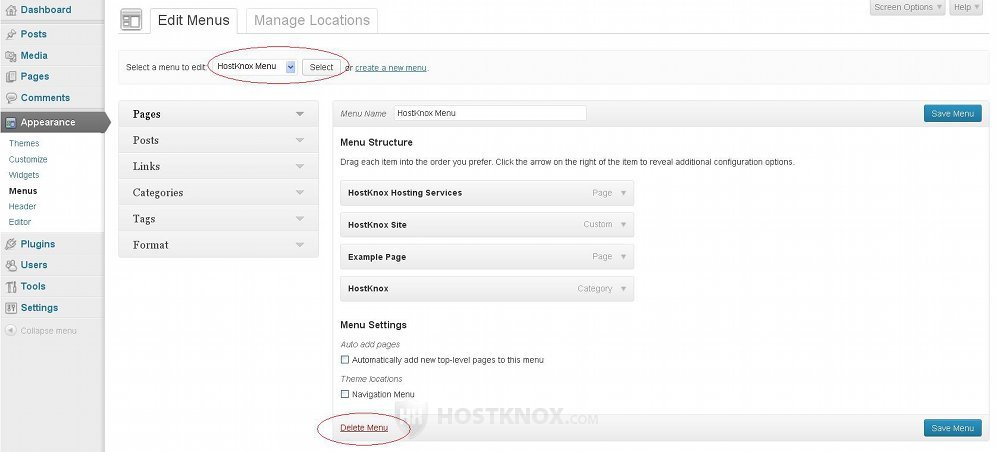
To delete a custom menu go to Appearance menu>Menus sub-menu in the admin panel, select the menu from the drop-down menu at the top of the page and click on the Select button next to it. After that click on the Delete Menu button that's at the bottom of the block for managing the menu items:
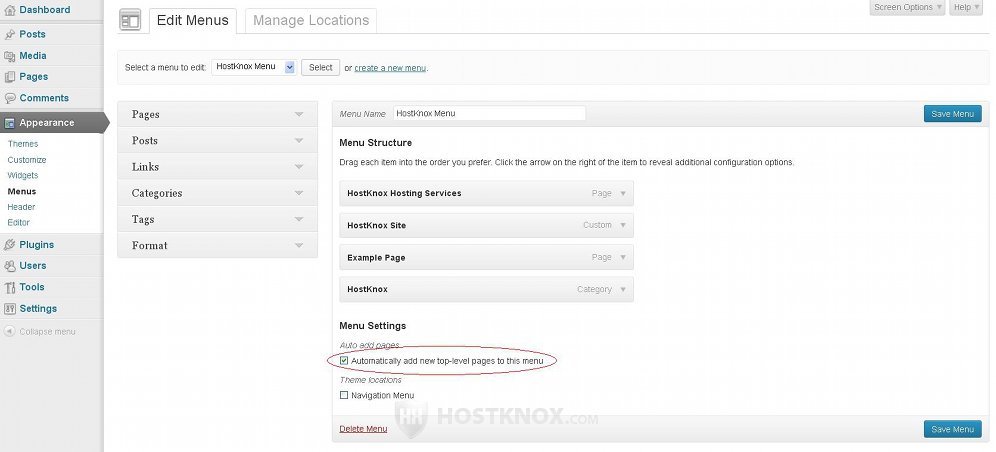
There are also some menu settings that you can configure. Most of them are configured per menu item. There's one setting that affects the whole menu. At the bottom of the block for managing the menu there's a checkbox labeled Automatically add new top-level pages. By default, it's unmarked. If you want links to new static pages to be added automatically to the menu, mark the checkbox:
Under it you'll see listed checkboxes for all the default menus that your current theme supports. If you want a particular default menu to be replaced with the custom menu, mark the checkbox corresponding to the default menu and click on the Save Menu button.
To configure the settings of a menu item click on the arrow that's on the right side of the name of the menu item. The panel will expand showing some options:
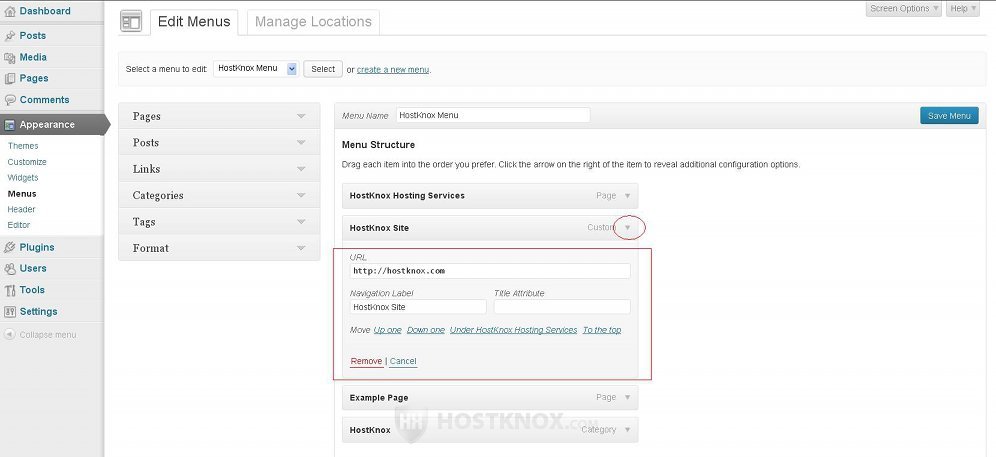
The default settings that can be configured for menu items that are pages, posts, categories, tags or post types are Navigation Label and Title Attribute, while if the menu item is a custom link you can also change the URL. The Navigation Label is the name that's displayed for the item in the menu on the frontend. By default, the name of the particular post, category, page, etc. is used but you can change it to anything you want. The field for Title Attribute is blank by default. If you type anything in it, that's the text that's going to appear when a visitor hovers the mouse pointer over the link in the menu. To remove the menu item from the menu just click on the Remove button that's at the bottom of the panel.
As we already described in the section on Screen Options in this tutorial, you can include some additional menu item settings. To do this click on the Screen Options button in the upper right corner of the page and mark the checkboxes that are under Show advanced menu properties. These properties include Link Target and Description. The Link Target option will add a checkbox to the menu item settings. If you mark this checkbox, when a visitor clicks on the particular link in the menu the information (e.g. post, page, etc.) will be displayed in a new window. The Description option can be used to type some short description; whether it will be shown on the frontend depends on the theme.
Showing a Custom Menu on the Frontend
Once you have your custom menu ready you can display it on the frontend. There are a couple of ways you can do that. One is directly to replace one of the default theme menus with your custom menu. The number of these default menus depends on the particular theme. Most themes have at least a top navigation bar. The default theme that comes prepackaged with WordPress, for example, has only one menu and that's precisely the top navigation bar.
When you go to Appearance menu>Menus sub-menu in the admin panel click on the Manage Locations tab that's at the top of the page. On the page that opens you'll see a list of the default menus supported by the theme. For each menu there's a drop-down menu from which you can choose one of the custom menus that you've created, and thus replace the particular default menu with a custom one:
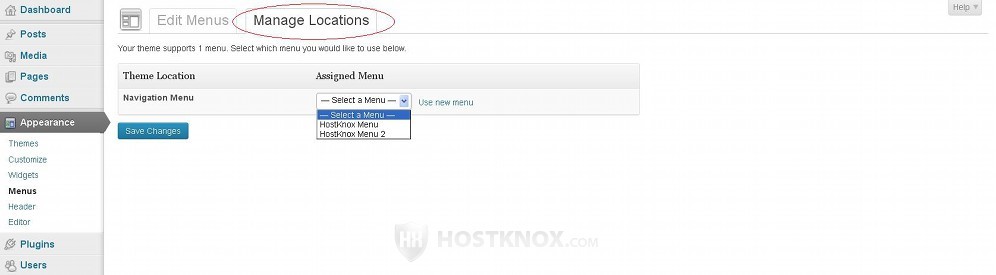
After that don't forget to click on the Save Changes button. In our example the theme supports only one menu. It's called Navigation Menu and it's the top navigation bar on the frontend. So we can replace it with one of our custom menus (e.g. HostKnox Menu, HostKnox Menu 2).
Another way to add your custom menu on the frontend is to use a widget called Custom Menu. It's one of the widget types that comes prepackaged with WordPress. To do this go to Appearance menu>Widgets sub-menu in the admin panel, then add the Custom Menu widget to one of the sidebars (or to any widget area supported by the theme) and from the widget settings use the respective drop-down menu to select one of the custom menus that you've created:
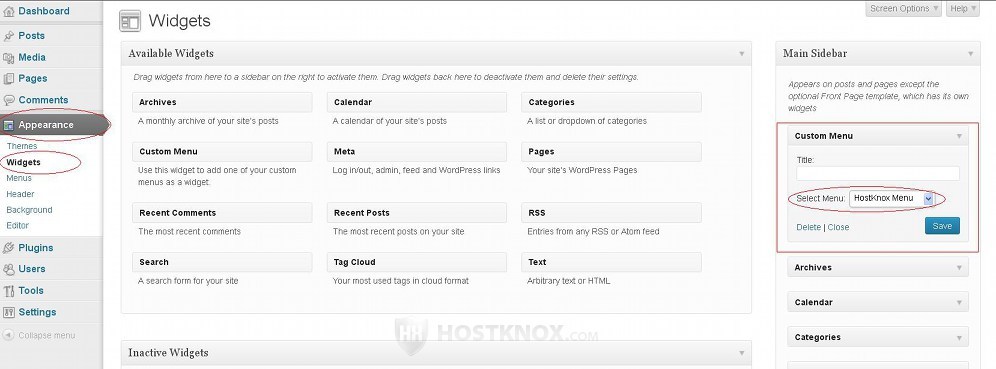
After that don't forget to click on the Save button that's under the drop-down menu. For more information on widgets read the tutorial on how to manage widgets in WordPress.