WordPress Widgets Tutorial
How to manage widgets in WordPress
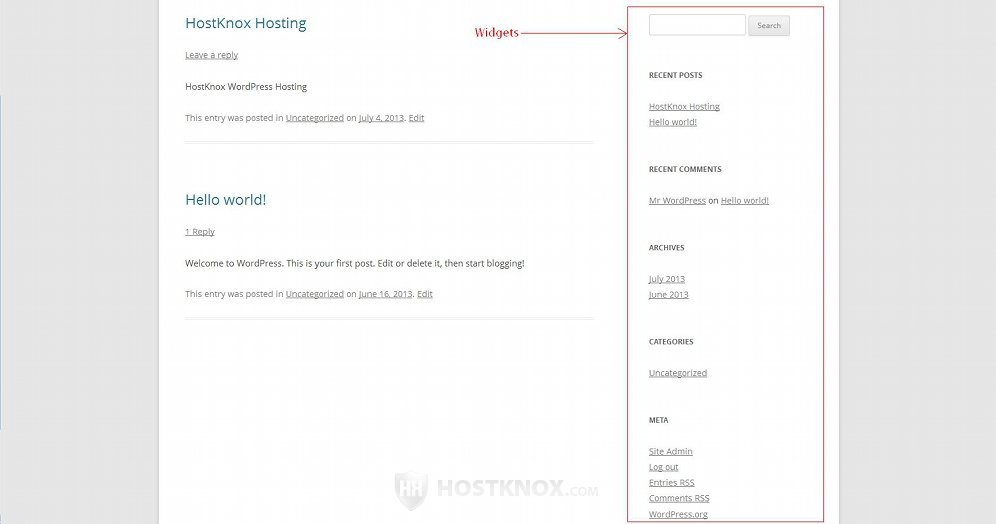
In WordPress you can add, remove and customize the menus, functions and text that appear in the sidebars on the frontend by managing widgets. Depending on the theme, widgets can be displayed not only in the sidebar(s) of your site but also in the footer or in any other area that allows widgets. Different themes have different areas that are configured to use widgets. Widgets are typically menus that display links to various information (e.g. posts, static pages, comments, categories, custom links, etc.) but they can also be used for some function, or just to show some text. For example, the search field and the default menus in the sidebar on the frontend that show links to the most recent posts and comments, the monthly archive, the categories and the meta links are all displayed using widgets:
WordPress comes prepackaged with some default widgets. Some are used in the sidebar by default while others are inactive. Some third party plugins add their own widgets, and there are hundreds of plugins that are specifically design to add new widgets. You can find those in the plugin section of the official WordPress site.
In this tutorial we'll go over the process of adding and removing widgets and we'll review the default widgets that come prepackaged with WordPress and the options that can be configured for each of those widgets.
Adding, Removing and Rearranging Widgets
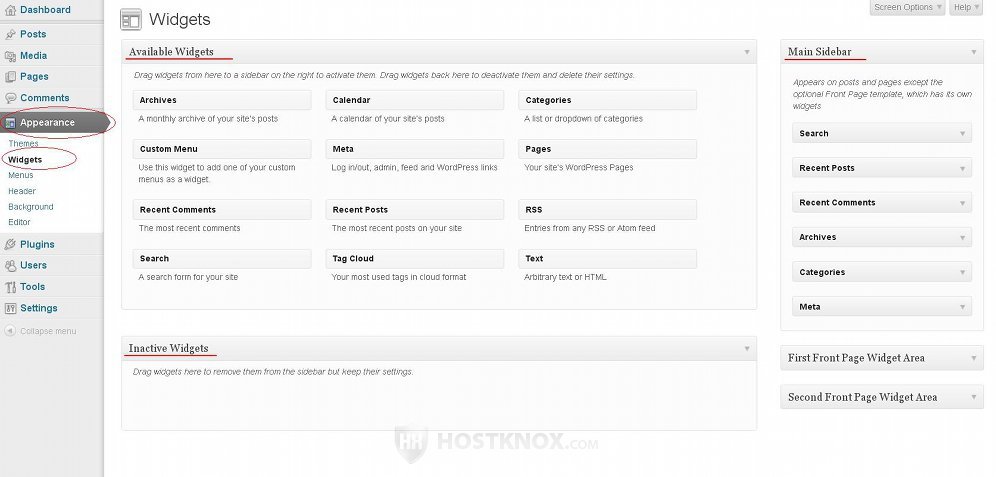
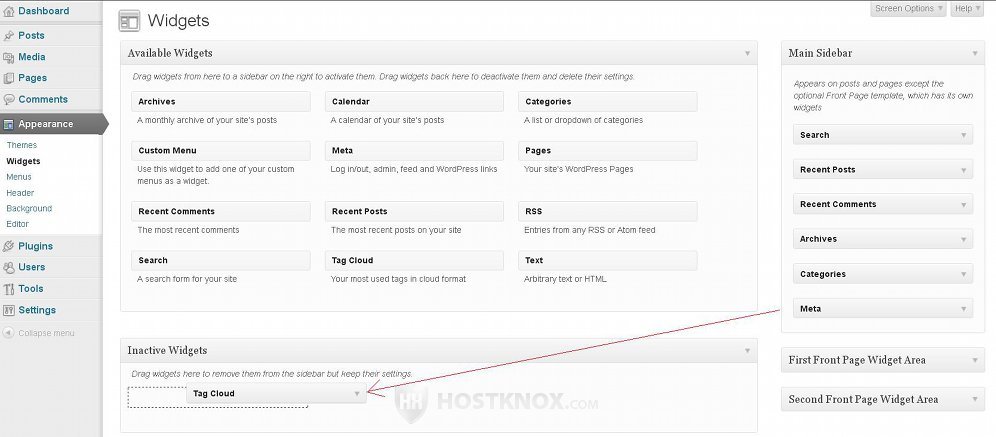
To manage the widgets, log in to the admin panel of your WordPress and go to Appearance menu>Widgets sub-menu. On the left side of the page that opens you'll see an area labeled Available Widgets; it lists all the widgets that can be included on the frontend. Under it is an area for the Inactive Widgets. On the right side you'll see all the areas on the frontend to which you can add widgets. As we mentioned, these depend on the theme that you use, but there should be at least one panel corresponding to a sidebar/column on the frontend:
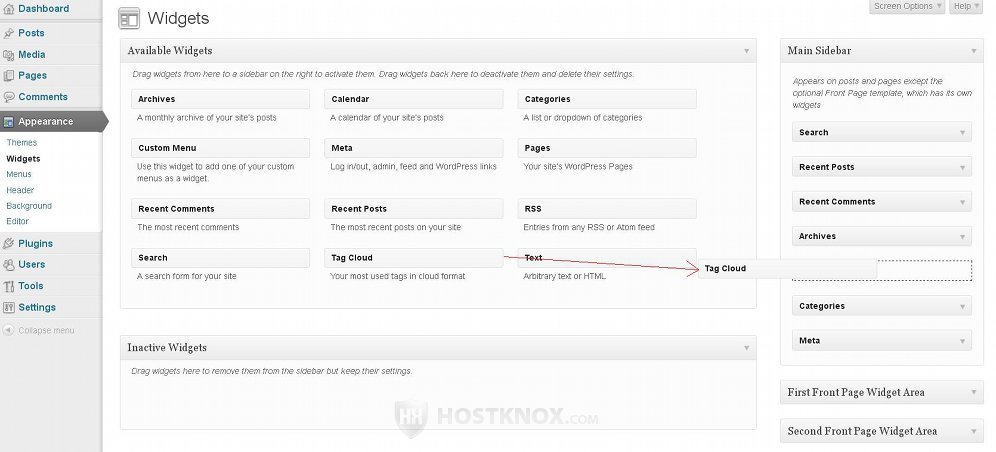
To add a widget so that it's shown on the frontend, hover the mouse pointer over its name in the Available Widgets area, then click and hold the left mouse button, and drag and drop it into the area on the right that corresponds to the sidebar or area on the frontend where you want it to be displayed (e.g. Main Sidebar):
Although you can configure the settings of the particular widget, you don't need to do anything additional or even click on any Save button. Once you put the widget in one of the sidebars it will automatically be added and shown on the frontend. So after you do that you can refresh the frontend of your site to see the result.
The order in which the widgets are listed in the particular sidebar (or any other area) is the order in which they are displayed on the frontend. You can rearrange them in whatever order you want. Just hover the mouse pointer over the name of the widget, click and hold the left mouse button and drag and drop the widget into the desired position.
To remove a widget from a sidebar, click on the arrow next to its name. A panel will expand. Just click on the Delete button that's there:
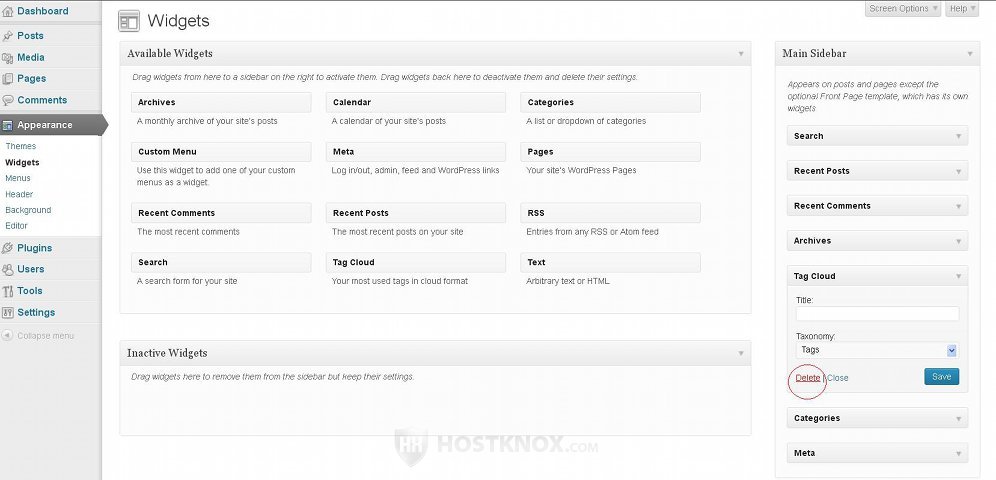
Note that this will only remove the widget from the area (e.g. sidebar), the same widget type will still be available and you can add it to any area at any time.
If you want to remove the widget from the particular area but you have made specific changes to its settings and you want to keep them so that you can add the same widget with exactly the same configuration at any time, you can move the widget to the Inactive Widgets section. To do this drag and drop the widget from the sidebar (or any other area) into the panel Inactive Widgets:
Then if you want to you can move it from the inactive widgets to one of the sidebars.
Each of the active widgets has an arrow next to its name. When you click on it a panel with some options will expand. The options that can be configured depend on the particular widget type. Now we'll go over the available widgets that come prepackaged with WordPress and the options provided for each widget.
Archives Widget
The Archives widget displays a menu with the monthly archive. Each item in the menu is a link that displays all the posts published in the particular month. The Archives widget has a few options:
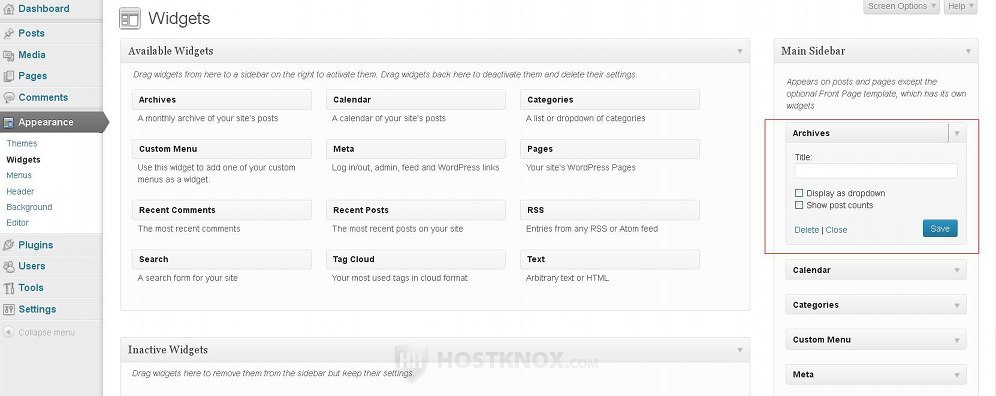
The different widgets have different options but the Title option is one that's common for all of them. It's not a required option so you can leave it blank. Whatever you type in the field will appear on the frontend as the name of the widget. If you don't type anything, the default name of the widget will be used. With some widget types leaving this option blank means that no title will be shown on the frontend. In this case if you leave the field for Title empty, Archives will be the title shown on the frontend above the links with the monthly archives.
If you want the menu to be a drop-down menu, just mark the checkbox Display as drop-down. If you want the number of posts per month to be shown next to the link for each month, mark the checkbox for Show post counts. If you make any changes to any of these options don't forget to click on the Save button that's under them.
Calendar Widget
This widget also comes prepackaged with WordPress, but it's not included in the sidebar by default. If you add it, it displays on the frontend a calender of the current month. If one or more posts were published during a particular day, that day in the calender is also a link that displays all the posts published on that day.
The only option that you can configure for this widget is the title:

Unlike other widgets, if you leave the field for the title blank, no name will be shown on the frontend above the calender (except for the name of the current month).
Categories Widget
This widget is added by default. It shows on the frontend a list of all the categories that you've created. New categories are automatically added to the menu. Each category in the menu is a link that displays all the posts belonging to that category.
The Categories widget has a few options:
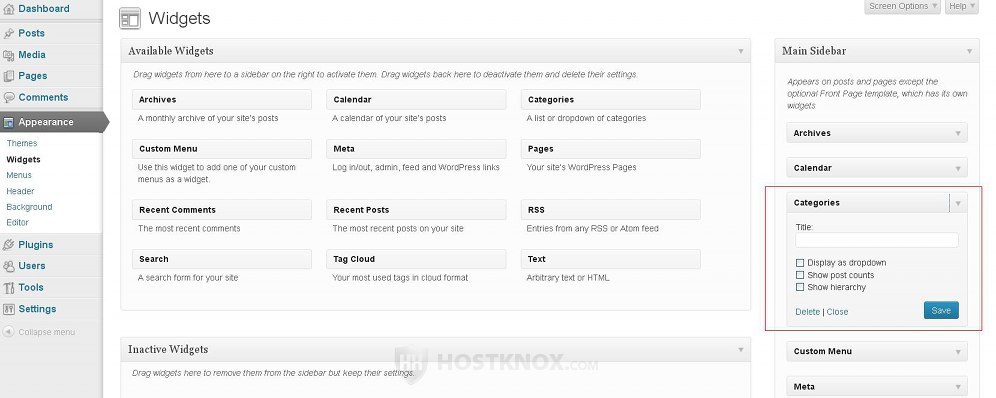
If you leave the Title field empty, Categories will be used as the title shown above the category links. In case you prefer the links to be grouped in a drop-down menu, mark the checkbox for Display as dropdown. If you want the number of posts in each category to be shown in brackets next to the name of each category link, mark the checkbox Show post counts. By default, the menu doesn't indicate whether a category is a subcategory of another one. If you want subcategories to be listed in the menu under their parent category and slightly to the right to show they are subordinate, mark the checkbox Show hierarchy.
If you need information on categories, check out the tutorial on managing categories in WordPress.
Custom Menu Widget
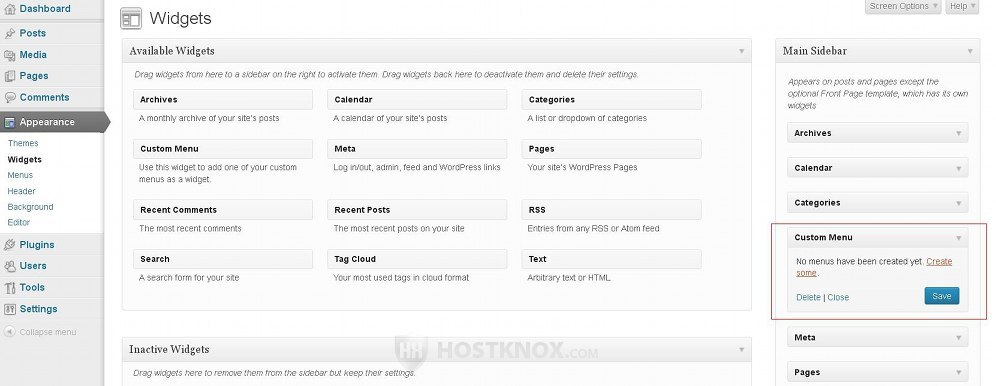
As the name suggests with the widget Custom Menu you can display a custom menu on the frontend. To be able to do that, however, you also need to create a custom menu. You can do that from the admin panel by going to Appearance menu>Menus sub-menu. For more information check out the tutorial on managing custom menus in WordPress.
If you haven't added any custom menus, the widget will not have any options that can be configured. Instead the panel will display a link that will redirect you to Appearance menu>Menus sub-menu in the admin panel:
If you have some custom menus, the widget options will contain a drop-down menu from which you can choose the custom menu to be shown by the widget on the frontend:
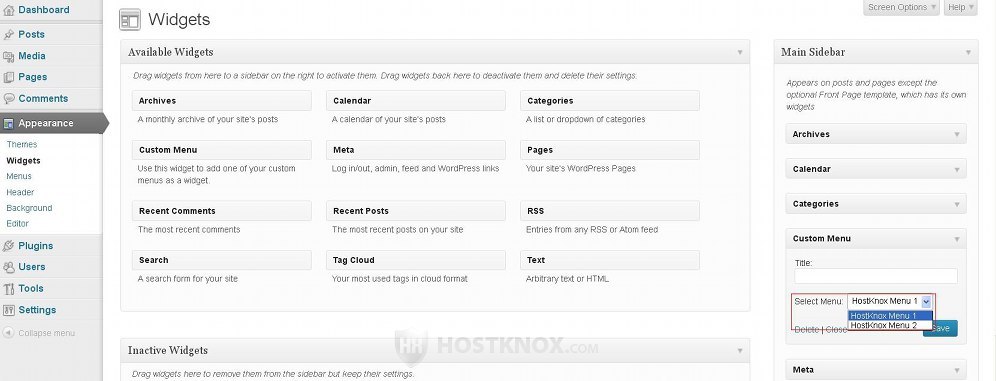
As usual there's also a field for Title in which you can type a name for the menu to be shown on the frontend above the links in the menu.
Meta Widget
The widget Meta displays on the frontend a menu with several links such as Log in/Log out, Entries RSS, Comments RSS and a link to the official WordPress site. By default, it's included in the sidebar. The widget itself has only an option for specifying the title to be shown above the links on the frontend:
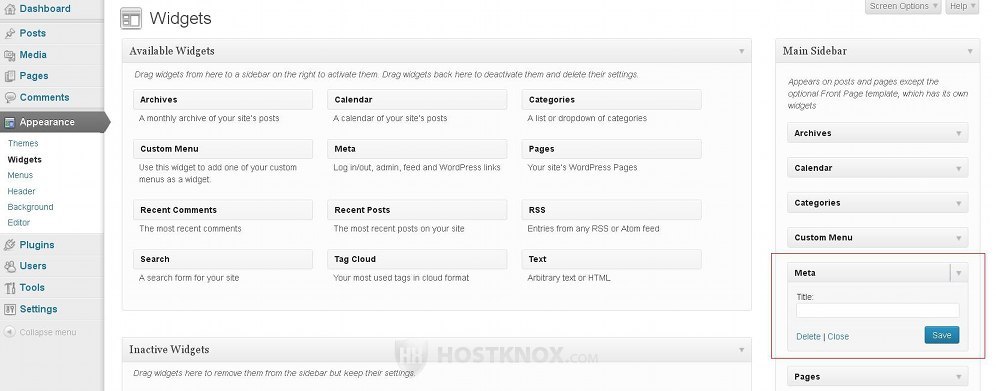
If you leave the field for title empty, Meta will be the default title used on the frontend.
Pages Widget
The widget Pages shows on the frontend a menu that includes links to all the static pages that you create. The menu is automatically updated when you add a new page. By default, this widget is not included in the sidebar. There are a few options that you can configure for this widget:
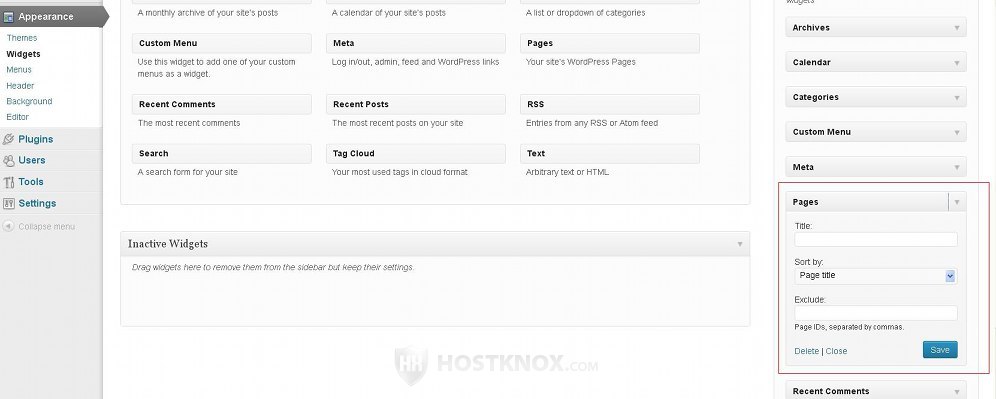
If you leave the field for Title blank, the default title displayed on the frontend will be Pages. From the Sort by drop-down menu you can select how the links to the pages should be ordered in the menu. By default, they are ordered alphabetically based on the names of the pages. The other choices are Page order and Page ID. If you select Page order, the links will be ordered based on the order of the pages in the Pages section in the admin panel. To go there just click on the Pages menu on the left side of the admin panel. If you select Page ID, the links in the menu will be listed based on the ID of each page (those with lower numbers are listed first).
As we mentioned, all static pages are automatically included in the menu. If you want to exclude some of them, list their IDs in the field for Exclude. Put a comma between the IDs.
If you need information on static pages, check out the tutorial on managing static pages in WordPress.
Recent Comments Widget
The widget Recent Comments shows a list of the most recently published comments. Each item in the list shows the name of the author of the comment and the name of the post for which the comment was submitted. The name of the post is also a link to the comment itself. This widget is added to the sidebar by default.
In addition to the title the widget also has an option with which you can change the number of comments included in the list:
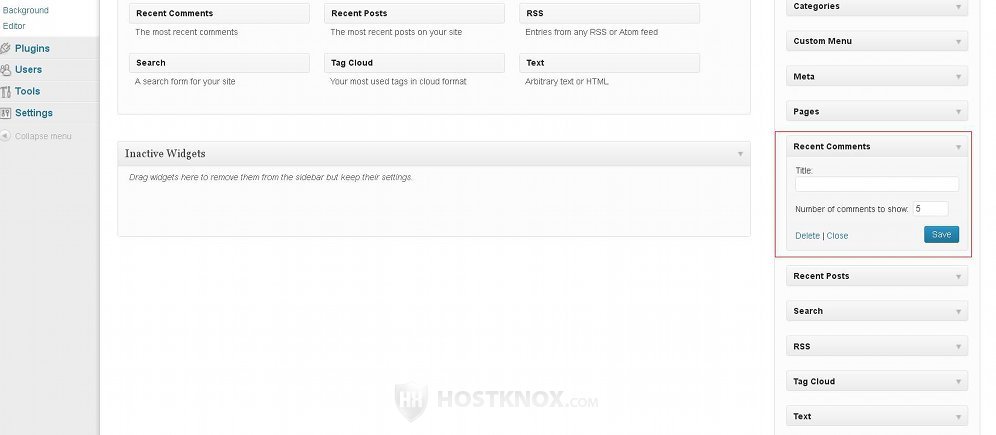
By default, five comments are listed in the menu. If you leave the Title field empty, Recent Comments will be shown as title on the frontend.
Recent Posts Widget
Similar to the previous widget, but this one shows a list with the most recent posts. By default, only the name of the post is displayed in the menu. It's also a link to the post itself. From the options of the widget you can change the title as well as a couple of other options:
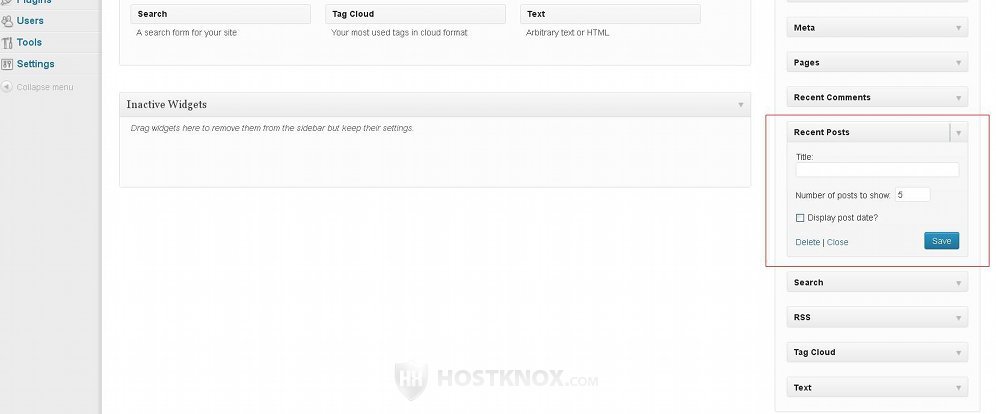
If you leave the Title field blank, the default title will be Recent Posts. In the field next to Number of posts to show you can type the number of posts that you want to be shown in the menu. By default, the last five posts are listed in the menu. If you mark the checkbox for Display post date, the date of publication will be shown next to the name of the post in the menu.
Search Widget
Unlike other of the prepackaged available widgets, the Search widget does not add a menu on the frontend. It adds a search function that visitors can use to look for information on your site. By default, it's added to the sidebar. The search widget adds on the frontend a text field in which visitor can type words/phrases and a Search button next to it. The only thing that can be configured from the widget options is the title:
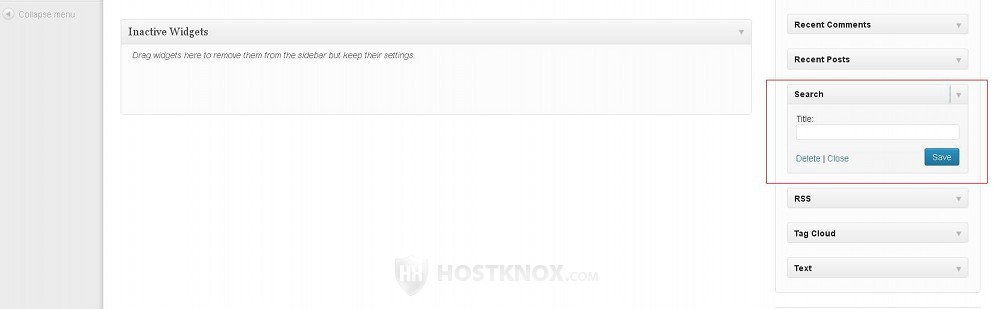
If you don't type anything in the Title field (it's blank by default), no title will be shown on the frontend above the search field and the button.
RSS Widget
With the RSS widget you can display an RSS feed on the frontend. To do this in addition to adding the widget to a widget area you also have to add a feed URL address from the options of the widget:
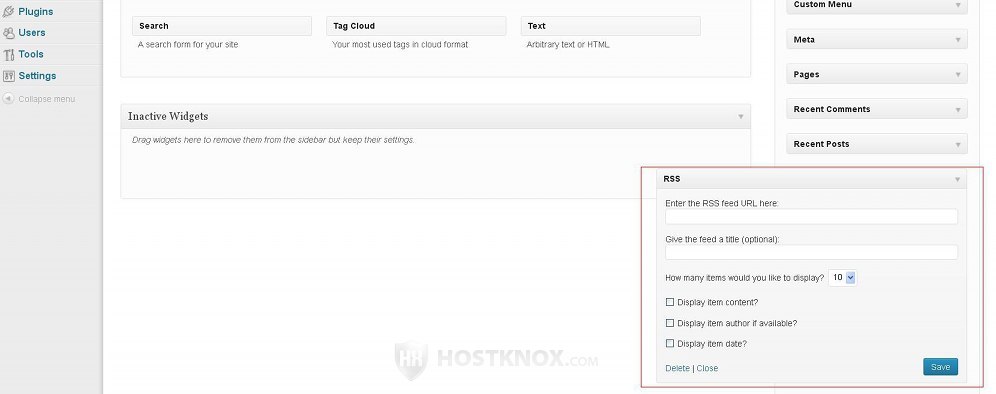
Just put the URL address in the field labeled Enter the RSS feed URL here. If you want a title to appear over the list with the feed items, type it in the respective field. You can also choose the number of feed items to be shown from the drop-down menu that's provided. By default, it's set to 10. You can set it to a number between 1 and 20. If in addition to the title of each feed item you want an excerpt from the content to be shown, mark the checkbox Display item content. To show the author mark the checkbox Display item author if available. You can also display the date by marking the checkbox labeled Display item date. Don't forget to click on the Save button.
Tag Cloud Widget
This is one of the available widget that's not included in the sidebar by default. The tag cloud shows the most popular tags on your site. Those that are more popular are shown with bigger letters than those that are less popular. The more popular ones are those that are assigned to more posts. Each tag name in the cloud is also a link; clicking on it will list all posts to which the tag is assigned.
The widget has a couple of options:
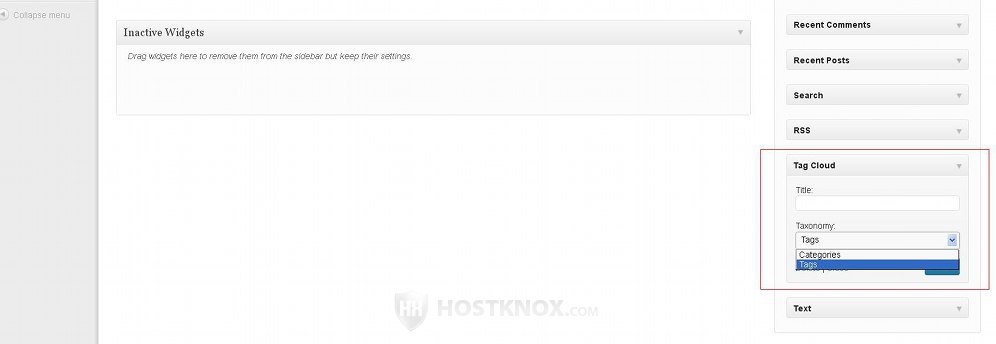
The Title field as usual is optional, so you can leave it empty. If you don't type anything in it, the default title shown on the frontend is Tags. Although the widget is intended for showing the most popular tags, you can actually use it as a category cloud that shows the most popular categories. To do this from the Taxonomy drop-down menu select Categories.
Text Widget
As the name suggests with the widget Text you can include some text in any of the areas on the frontend that allow widgets. To do this add the widget to any of the widget areas (e.g. sidebar, footer, etc.) as described in the section on adding and removing widgets in this tutorial. After that click on the arrow next to the name of the widget to configure its settings. There's a Title field and a text field in which you can type the desired text:
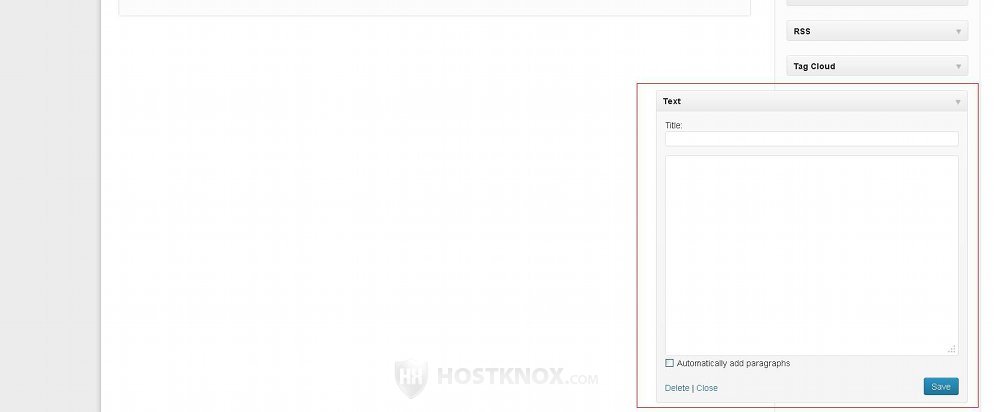
If you leave the title field blank, no title will be shown above the text on the frontend. In the text area you can type the text either by using plain text, or you can use HTML tags to format the text. In case you use plain text and you type more than one paragraph and you want those paragraphs be preserved on the frontend, mark the checkbox labeled Automatically add paragraphs (it's right under the text area). Don't forget to click on the Save button.