WordPress Discussion Settings Tutorial
How to manage the discussion settings in WordPress
In this tutorial we'll concentrate on the discussion settings that can be configured in the admin panel of your WordPress. To access the settings, in the admin panel go to Settings menu>Discussion sub-menu:
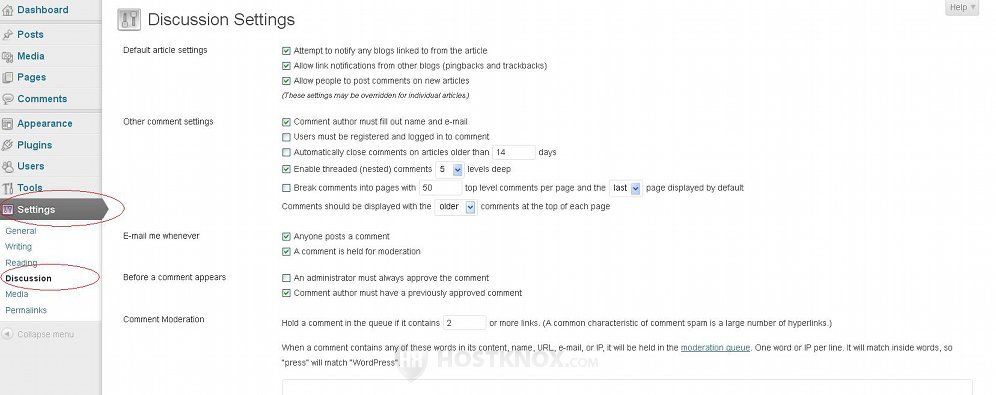
The settings on that page are mainly related to comments and to moderating comments. There are also some options related to posts and also to user avatars.
Now we'll review all the options on the Discussion Settings screen.
Default Article Settings
The group of options labeled Default article settings consists of a few checkboxes:
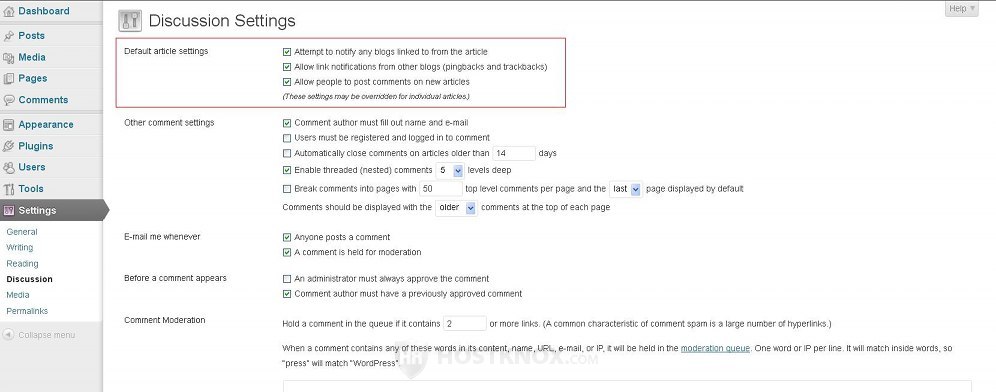
With these options you can disable/enable comments to posts and disable/enable pings and trackbacks.
- Attempt to notify any blogs linked to from the article - this checkbox is marked by default. This means that when you put a link in one of your posts to a post on some other blog, that blog will be notified. A comment is sent to the post on the other blog. By default, this is done automatically (provided this checkbox is marked) with the help of pingbacks. The content of the comment that is sent consists of a link to your post (the one that contains the link to the article on the other blog). Trackbacks send an excerpt of the post's content but pingbacks are considered a more secure alternative. If you don't want other blogs to be notified when you put links to them in your posts, unmark this checkbox.
- Allow link notifications from other blogs (pingbacks and trackbacks) - this option is also enabled by default. Other blogs also take advantage of the function described in the previous setting. So when a post on another site contains a link to a post on your blog, that blog will send a ping to your site. This will add a comment to your post and the comment will contain a link to the article on the other blog. If you want to accept such notifications, keep this checkbox marked. If you want to stop them, unmark this checkbox. Note that changing this option will affect new posts, ones that you'll publish after the change. Existing posts will not be affected.
- Allow people to post comments on new articles - by default, this checkbox is marked. This means that new posts are open to comments. If you want to disable comments, unmark this checkbox. Note that this will affect all posts that will be published in the future. It will not affect existing posts. They will still be open to comments. You can disable comments for existing posts by going to the Posts section of the admin panel and editing the settings of those posts. For more information check out the tutorial on how to disable comments in WordPress.
These options affect all posts. As we already mentioned, the ones for allowing link notifications from other blocks and for disabling/enabling comments affect new posts that will be publish after the change. To change the corresponding option of older (existing) posts you have to edit that particular post(s). You can do this by clicking on the Posts menu in the admin panel and then quick editing the post. If you want to edit more than one post, you can use the bulk actions function. For more information check out the tutorial on how to manage posts in WordPress. Of course, you can also edit these options by going to the edit form of the particular post. The Discussion block on that form contains the respective options. Keep in mind that this block is not displayed by default on the edit form; to show it you have to edit the Screen Options. For more information on all that visit the tutorial on how to manage the settings on the add/edit post form in WordPress.
The fact that you can change each of these options per post means that you can override the global settings described above. So each post can have a different value for the respective option.
Other Comment Settings
The next group with settings on the Discussion Settings screen is Other comment settings:
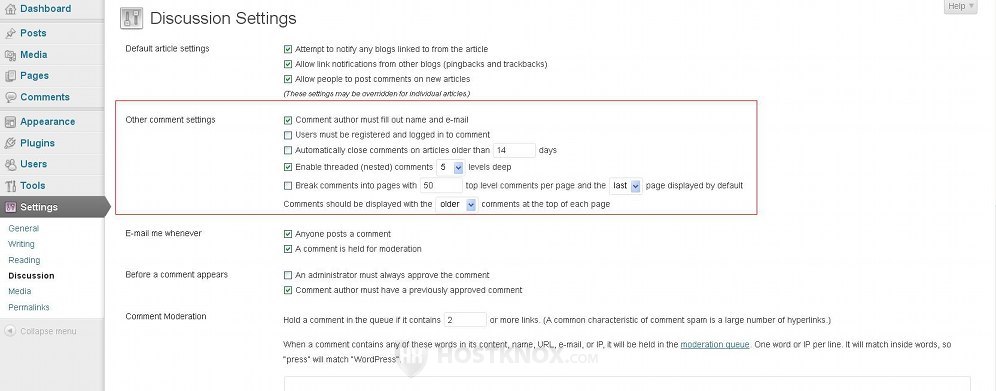
With these options you can control who can submit comments, the number of days that a post stays open to comments and the number of comments per page:
- Comment author must fill out name and e-mail - this checkbox is marked by default. This means that guest visitors have to type their email address and name in the respective fields on the frontend in order to be allowed to submit a comment. If you unmark this checkbox, the name and email fields on the comment form on the frontend will not be required. Note that this option only concerns visitors. When registered users submit comments from the frontend, they are not required to type their name and email address even when this option is enabled.
- Users must be registered and logged in to comment - by default, this is disabled. This means that every visitor on the frontend can submit comments. If you want only registered users to be allowed to post comments, mark this checkbox. For more information on registered users read the tutorial on how to manage users and user roles in WordPress.
- Automatically close comments on articles older than - this option is disabled by default. This means that no matter how old an article/post is, comments can be submitted. If you mark this checkbox, after a specified period of time comments will be closed and people will not be able to submit comments for those older articles. By default, articles are considered old after 14 days. You can change that by typing the desired number in the corresponding field. Note that after comments are closed people can't submit comments but they can read those submitted within the allowed period of time.
- Enable threaded (nested) comments - this option is enabled by default, and it's set to 5 levels deep. When threaded (nested) comments are enabled people can post replies to other comments. On the frontend there's a Reply link under each comment. The comment that is a reply to another comment is slightly indented to the right to indicate that's it's a response to another comment. You can set how many levels deep can these threaded comments go. By default, it's set to 5. This means that people can post a reply to a comment that's a reply to another one. That second reply will be positioned still more to the right, and so on until the set limit is reached:
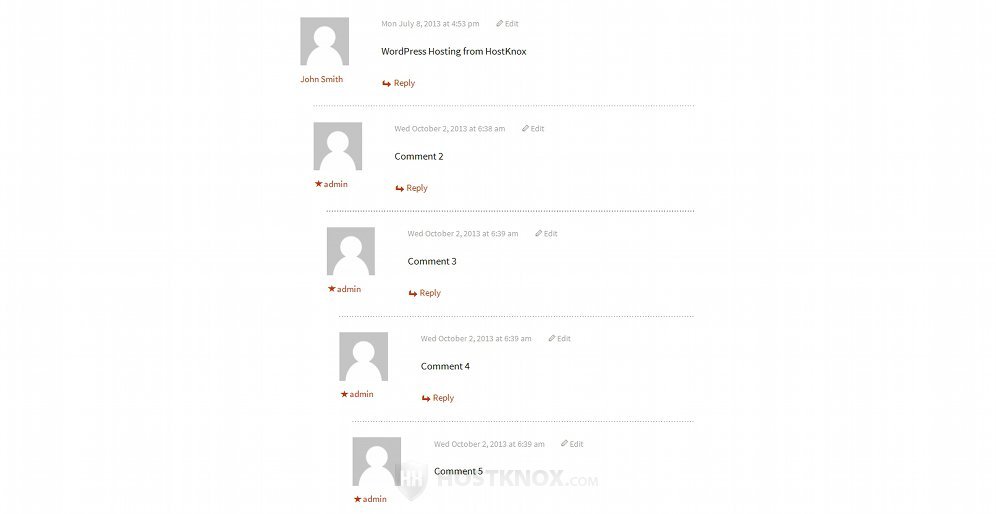
You can set the depth levels from 2 to 10 by using the respective drop-down menu.
If you don't want threaded comments to be used, just unmark the checkbox.
Now let's go back to the other comment settings:
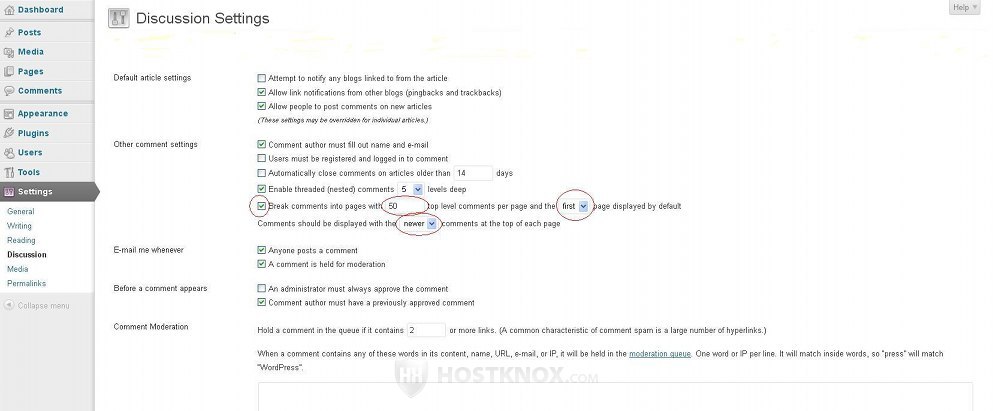
- Break comments into pages ... - this option actually consists of one text field and two drop-down menus that can be configured. The checkbox itself is unmarked by default which means that comments are not broken into pages, and so all comments are displayed on the same page. If you mark the checkbox, comments will be grouped into pages. From the text field and the drop-down menus you can configure the parameters. By default, each page consists of 50 top level comments. You can change that number by typing a new one in the text field. Note that top level comments are taken into account when breaking the comments into pages. If there are threaded comments they are not included in this count. So, for example, if there are 50 top level comments and 10 other threaded comments, all comments will be displayed on the same page.
When comments are broken into pages, by default the last page is shown under the content of the post. That's the comment page with the newest comments. If you want the first page to be shown (the oldest comments) by default, set the respective drop-down menu to first. By default, the comments are ordered from old to new. The older comments are at the top of the page. If you want the newer ones to be shown at the top, select newer from the corresponding drop-down menu:
When comments are broken into pages at the bottom of each comment page on the frontend there's a link for the previous page and another one for the next page.
E-mail Me Whenever
The E-mail me whenever section consists of a couple of checkboxes:
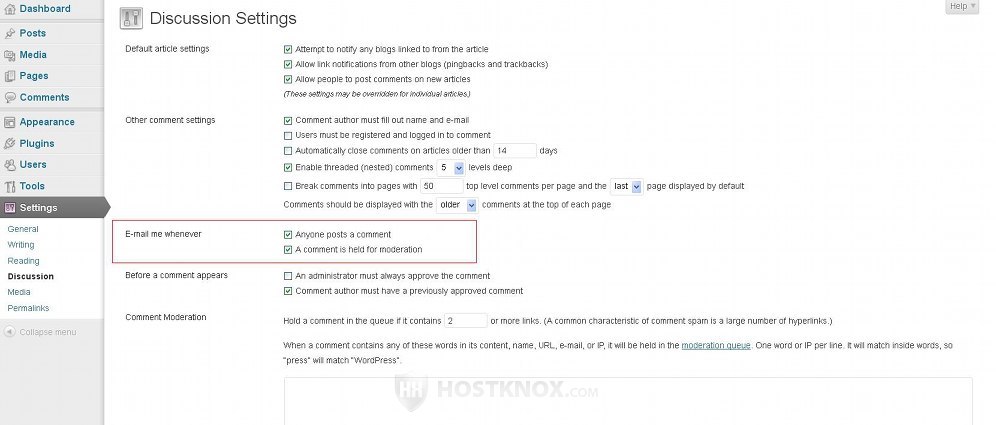
With these options you can choose when you should be informed via email about new comments:
- Anyone posts a comment - this checkbox is marked by default. This means that when somebody submits a comment to a post, the post author receives an email. The email is sent only to the email address of the post author; no email is sent to the general email address of the site. The email message itself contains the name, IP address and email address of the person who submitted the comment, as well as the content of the comment and some links for viewing the comment on the frontend of the site, and for managing the comment.
- A comment is held for moderation - this option is also enabled by default. When a new comment is posted and it's held for moderation an email is sent to the email address of the site. That's the address that can be changed by going to Settings menu>General sub-menu in the admin panel. For more information on the general settings read the tutorial on how to manage the general settings in WordPress.
Before a Comment Appears
The next group of checkboxes is labeled Before a comment appears:
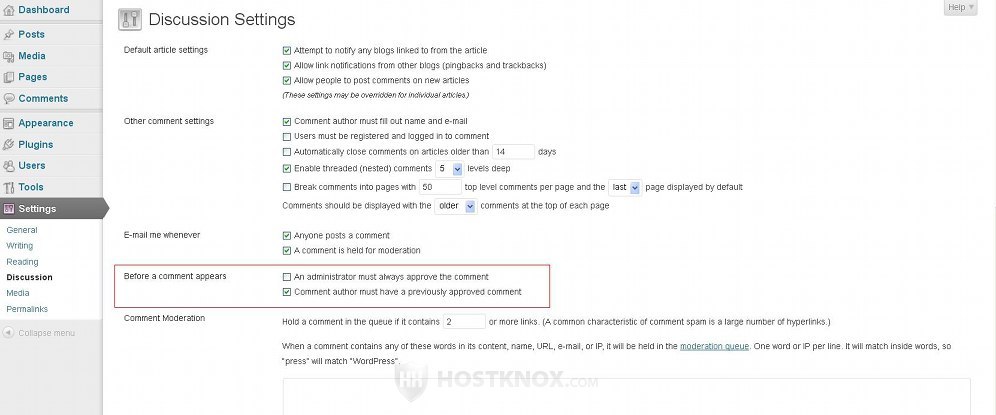
The available options are:
- An administrator must always approve the comment - this checkbox is unmarked by default. This means that not all comments are held for moderation. Just those that don't meet some criteria (controlled with the settings under this one) are held for moderation. If you want all comments to be approved before they are shown on the frontend, mark this checkbox. When this option is enabled only the comments of registered users who have the permissions to manage comments (admins, editors) are directly shown on the frontend without any approval. The comments of registered users who don't have the permissions to manage comments are held for moderation.
- Comment author must have a previously approved comment - this option is enabled by default. This means that when a visitor/guest user posts a comment for the first time, this comment is held for moderation. Once it's approved the comments of that user are not held for moderation provided they don't violate some of the other comment moderation rules. Such spam protection rules can be inserted using the Comment Moderation options and the Comment Blacklist options on the same page (check the next sections of this tutorial). A guest user is considered the same person if both the name and email address match those of the previously posted comment.
By default, visitors are allowed to post comments. If visitors are not allowed to post comments, this option is irrelevant. You can disable/enable comments from unregistered users from the option Users must be registered and logged in to comment in the Other comment settings section on the same page.
Comment Moderation
This section consists of one text field in which you can type the allowed links per comment, and a text area in which you can list words, IPs, email addresses and URLs:
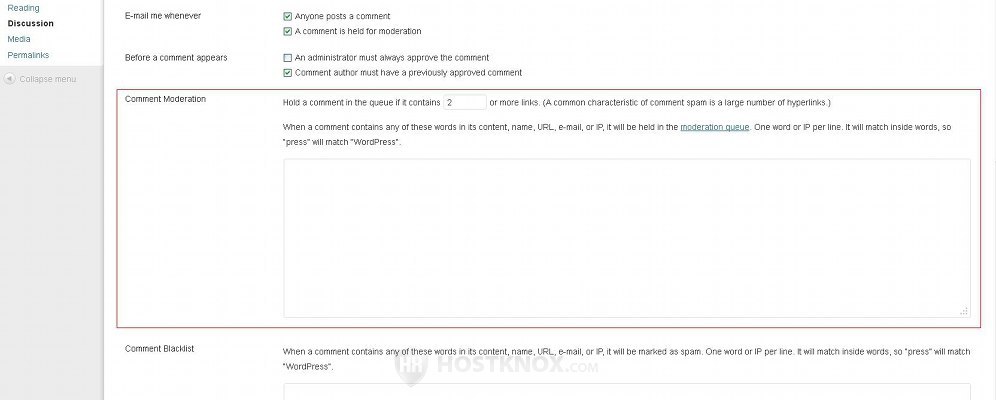
These are useful for controlling which comments are held for moderation. Don't forget that if you want to hold all comments for moderation just mark the checkbox An administrator must always approve the comment that's on the same page.
By default, one hyperlink is allowed in a comment. If a comment contains two or more hyperlinks it's put in the moderation queue. This is useful in stopping spam comments which often contain many links. If you want to change the number of allowed links per comment, just type the number in the respective text field.
In the text area you can list words, names, IP addresses, email addresses and URLs. Put one word, name, etc. per line in the text area. Don't leave blank lines between the items in the list. If a word in the list matches the same word in a comment, that comment is held for moderation. Matches are case insensitive. So, for example, if you put page in the text area this will match page, Page, PAGE, pAge, etc. Partial matches are also considered. For example, if you put host in the text area, this will match not only host but words such as HostKnox, hosting, hosted, etc. If the email address of the user, his/her name, or the URL of their site (if any) matches any of those listed in the text area for comment moderation, then the comment will be put in the moderation queue. The same will happen if such an email address, name or URL is present in the content of the comment.
You can also list IP addresses in the text area. If the IP address of the sender of the comment matches the listed IP, the comment will be held for moderation. You can put the whole IP address or just a part of it. In this way you can hold for moderation comments sent from a whole range of IP addresses. For example, if you put 72.157 in the Comment Moderation text area, all comments sent from IPs that begin with 72.157 will be put in the moderation queue.
Keep in mind that the comments of users belonging to a user role which has permission to moderate comments (admins, editors) are not held for moderation even if the comment matches any of the listed items in the text area for comment moderation. The comments of registered users who are not allowed to manage comments (e.g. authors, contributers, subscribers) are held for moderation if the comment matches any of the items in the comment moderation list.
Comment Blacklist
The Comment Blacklist section consists of a text area:

It functions in exactly the same way as the text area for Comment Moderation. You can list words, IP addresses, email addresses, URLs. The same rules apply. The difference is that comments that match any of the listed items are marked as spam and are sent to the spam folder. You can check the spam comments in the admin panel by going to the Comments menu and then clicking on the Spam link that's above the table with the comments. You can then delete or restore the spam comments.
Note that if a comment matches a word, IP address, URL, etc., that's listed both in the text areas for comment moderation and in the comment blacklist, then the comment will be marked as spam. So the comment blacklist takes precedence.
For some more information on protecting your blog from spam check out the tutorial on how to prevent spam in WordPress.
Avatars
This section on the Discussion Settings screen contains a few options:
As the name suggests these are related to managing avatars (pictures that appear next to the comments of users). To be more precise, WordPress uses Gravatars (globally recognized avatars). On the Gravatar site people can register an account and upload an image which is to be their avatar. When a person submits a comment to a post on a WordPress site, WordPress automatically checks the email address of that user. If the email address is associated with an account on the Gravatar site, then the avatar uploaded there will be used as the avatar shown next to the comment on the WordPress site.
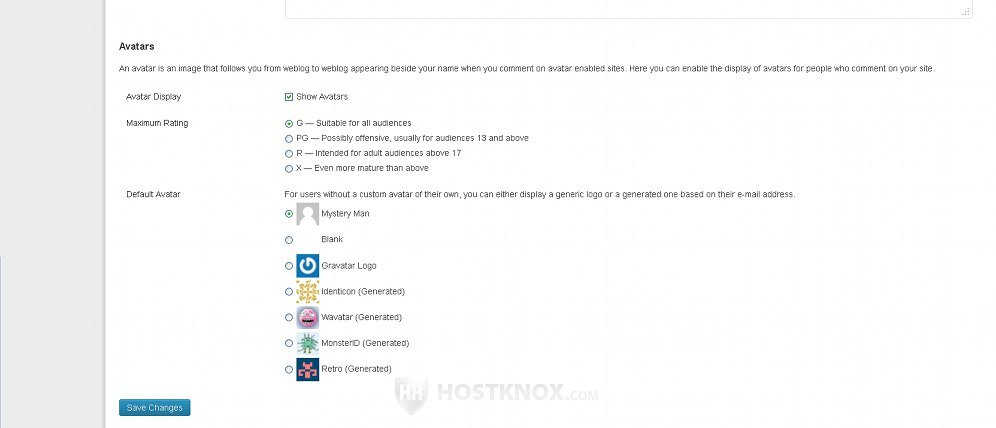
Now let's review the WordPress avatar settings:
- Avatar Display - this part consists of a checkbox labeled Show Avatars. The checkbox is marked by default. If you don't want avatars to be displayed on the frontend, unmark this checkbox.
- Maximum Rating - here you'll find several radio buttons (e.g. G, PG, R, X). By default, the radio button G-suitable for all audiences is marked. With this option you can determine what gravatar images are allowed on your site. In their accounts on the gravatar site users can rate the image they upload. If the rating of that image is higher than the setting on your site, then the image will not be displayed. For example, images that are rated R will not be displayed when the Maximum Rating option is set to G.
- Default Avatar - here you'll find a list of several avatars. If the user doesn't have an avatar/gravatar, then the default avatar is used. By default, the Mystery Man avatar is used.
If you make any changes don't forget to click on the Save Changes button at the bottom of the screen.