Drupal Blocks Tutorial
How to manage blocks in Drupal
The layout of your Drupal site is divided into regions. The number and positions of these regions depend on the theme of your site. These regions are occupied by various blocks. The blocks are boxes displaying information or providing different functions. For example, some of the default blocks displayed on a Drupal site are the User login block, the Search form block, Main page content, etc. Blocks are added by some of the modules (both core and third party modules). With a standard Drupal installation there are many preconfigured blocks. Some are enabled by default, while others are disabled. Disabled blocks are not shown on the frontend of your site.
You can enable/disable blocks, you can change the settings of existing blocks, you can add new custom blocks, you can move blocks from one region to another, and you can reorder the positions of blocks within a region. To do any of these things, log in to the admin panel of your Drupal, click on the Structure tab in the top navigation bar, and on the page that opens click on Blocks.
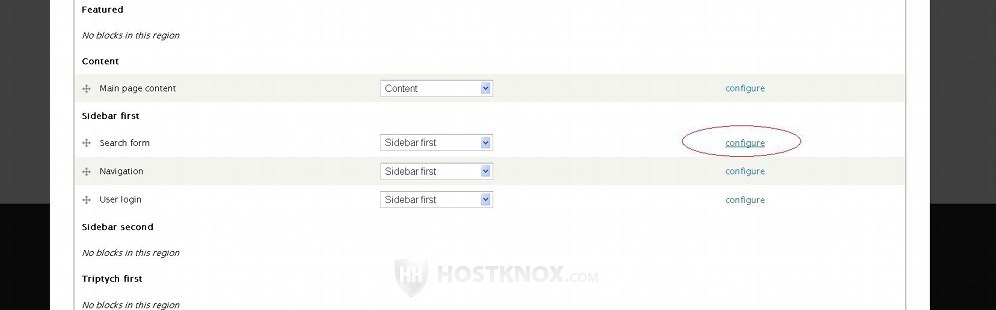
On the page that opens you'll see a table with the regions of the default theme that you're using. The name of the region is in bold letters, and under each region you'll see listed the blocks enabled in that region (if any):
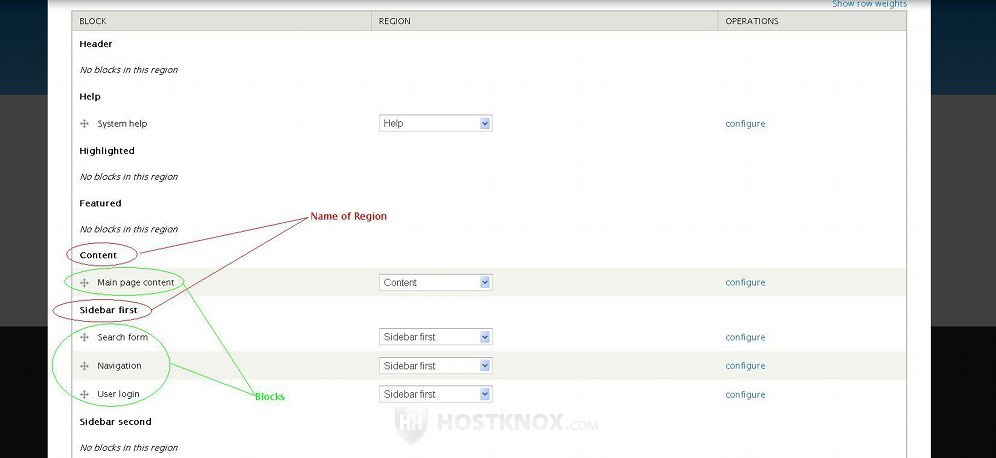
Next to each block there's a drop-down menu. To disable a block just select None from its drop-down menu and click on the Save blocks button.
At the bottom of the table you'll find all the disabled blocks. To enable a block either use its drop-down menu to select the region in which you want the block to appear, or hover the mouse pointer over the four-arrow button in front of the block's name, then press and hold the left mouse button, and drag and drop the block under the name of the desired region listed in the table:
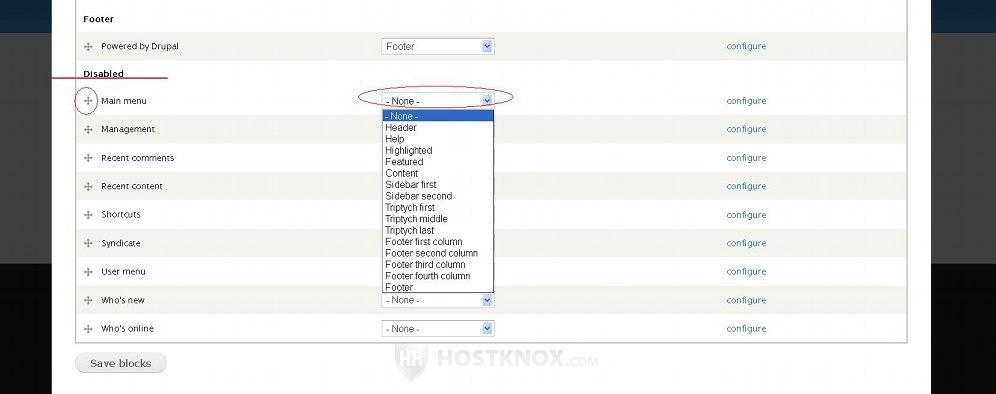
After that don't forget to click on the button Save blocks at the bottom of the page.
You can also use one of these two methods to move an enabled block from one region to another. To change the positions of blocks within a region use the four-arrow buttons in front of their names; you can also move blocks within a region by changing the row weights. To do this click on the Show row weights button that's above the top right corner of the table to view the weights:
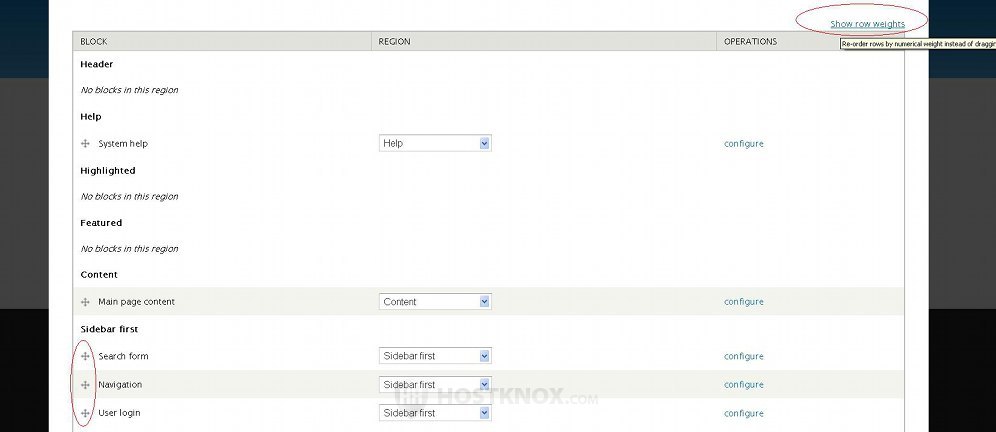
Rows with smaller weight are displayed above those with bigger. When you're done click on the Save blocks button. This will change the order of the blocks in the particular region on the frontend of the site.
You can manipulate the blocks of any of the enabled themes, not just of the default one. To do this use the tabs in the top right corner of the page. In our example, there are only the default theme (Bartik) and the theme for the admin panel. You can also view the layout of the theme and the position of each region on the frontend. To do this click on the Demonstrate block regions button; it's above the top left corner of the table:
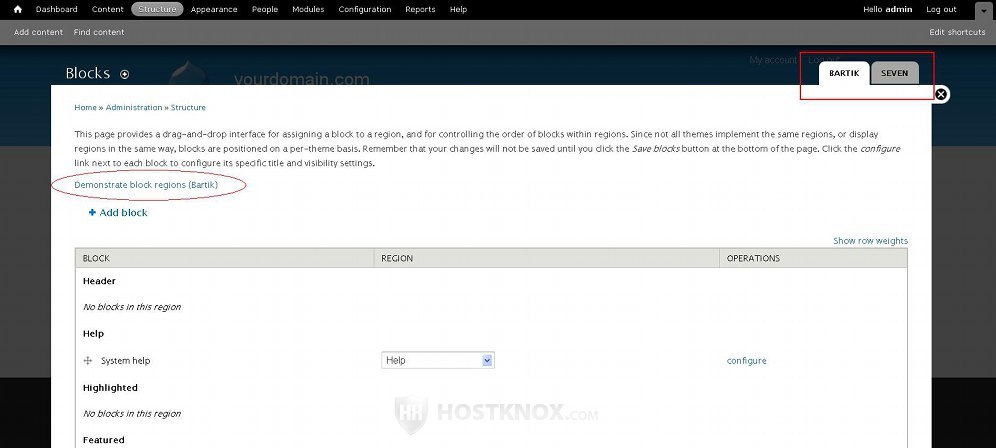
Clicking on the Demonstrate block regions button will show the frontend with all that theme's regions marked:
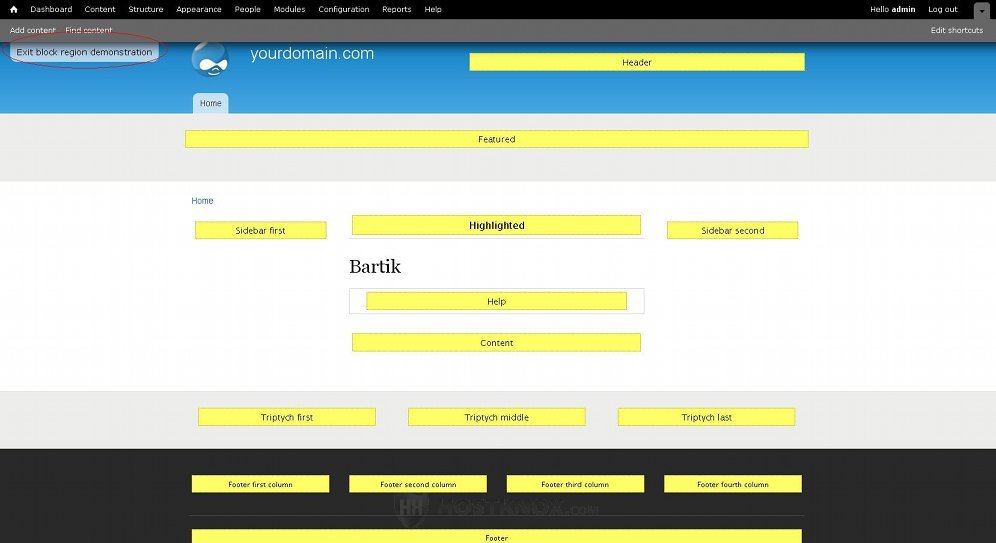
To go back to the Blocks page of the admin panel, click on the button Exit block region demonstration in the upper left corner.
You can change the settings of a block by clicking on its configure button in the table:
On the page with the settings in the field for Block title you can override the default title. From the drop-down menus in the Region Settings section you can change the region in which the block is displayed (there's a drop-down menu for each enabled theme):
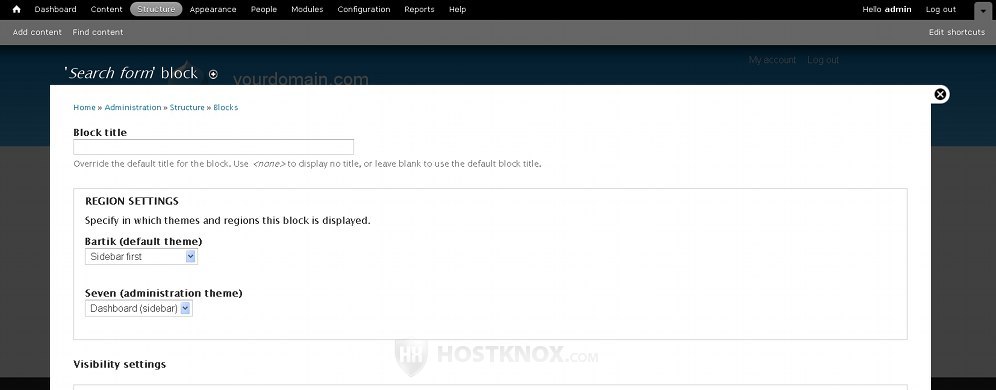
On the left side at the bottom of the page there are several buttons for visibility settings: Pages, Content types, Roles, Users.
With the Pages button you can specify on which pages of your site the block should be displayed and on which it shouldn't be visible:
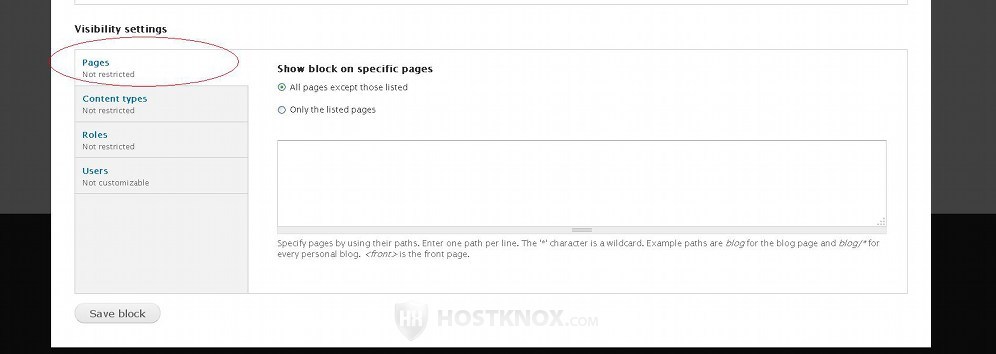
You can list pages in the text area that's provided and mark one of the two available buttons. If you mark the first one, the block will be visible on all pages except the listed ones. And if you mark the second button, the block will be hidden on all pages except the listed ones. In the text area list only the paths to the pages relative to the base URL address of your Drupal site. For example, if Drupal is installed directly in the root public_html directory on your Drupal hosting account, meaning that the site is accessible at yourdomain.com, and you want to list the page yourdomain.com/about-us, then you only need to type about-us in the text area.
You can use the Content types button to impose restrictions in terms of content types:
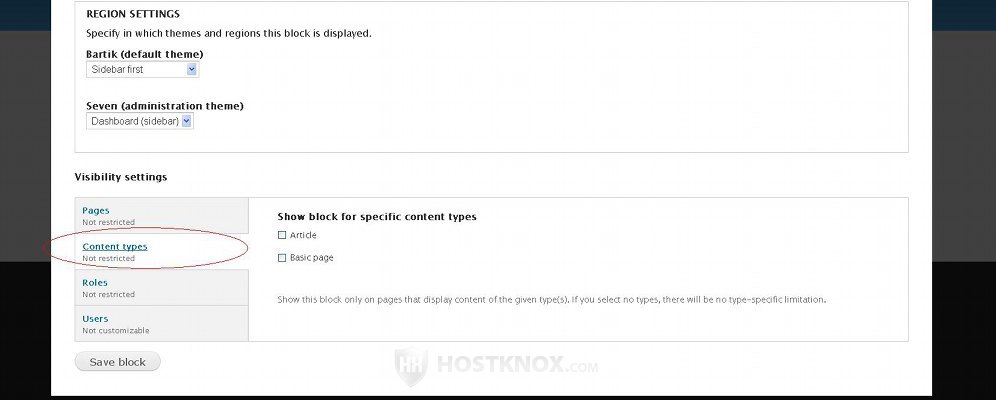
For example, if you mark the checkbox for Article, the particular block will be shown only on pages displaying an article. You can mark the checkboxes for more than one content type. If none of the checkboxes is marked, there will be no content type restrictions.
The Roles button is for restrictions for the different user roles:
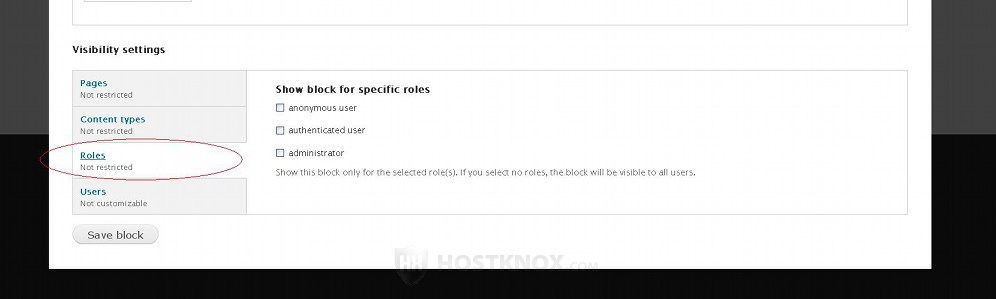
If you mark the checkbox for a user role (e.g. administrator), the block will be visible only to users who belong to that role. In this case you also have to keep in mind the general user role permissions. For example, only the administrator role has the permission to use the search function. If we edit the Search form block, it would be pointless to mark the checkbox for administrator because by default the other user roles don't have the permissions to use the search function, meaning that users from those roles are not able to see the search form block anyway. For more information on user roles and permissions check out the tutorial on managing user roles and permissions in Drupal.
The last button for the visibility settings of a block is labeled Users:
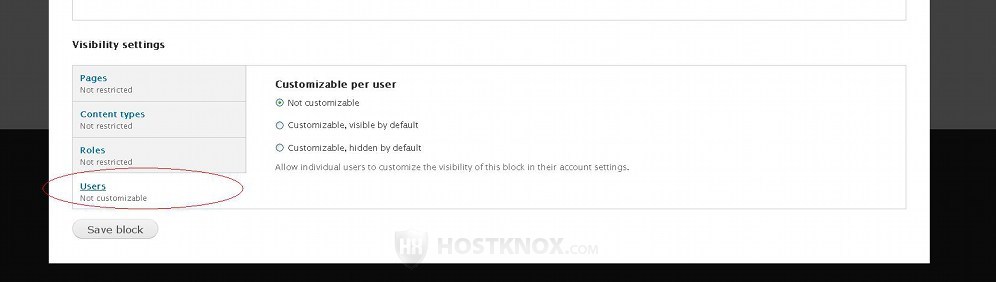
By marking the appropriate buttons you can allow individual users to edit the visibility settings of that block themselves. If they change the visibility settings for that block, the changes will apply only to their account. You can choose for the block to be hidden by default, and users to be able to customize it, or you can make it visible and allow users to customize the visibility settings. The only customization that the user can make is to hide and show the block. Of course, you can just leave the default Not customizable button marked.
If you make any changes to the settings don't forget to click on the Save block button.
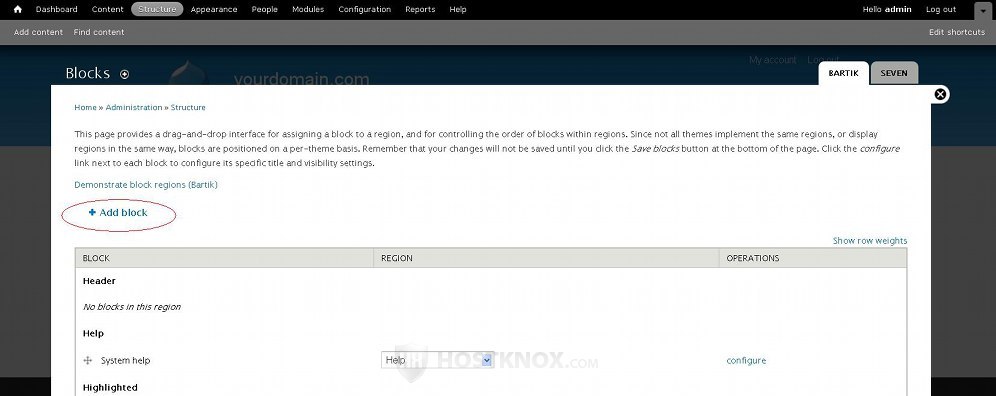
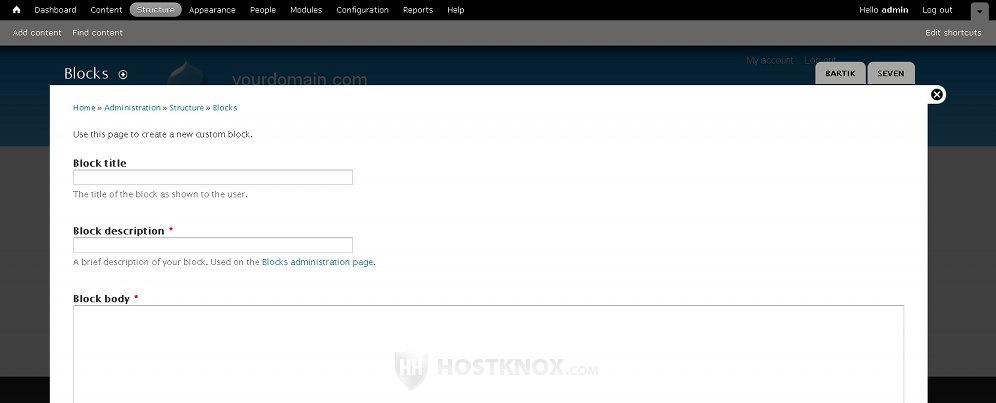
You can also add custom blocks. To do this click on the Add block button that's above the top left corner of the table with the existing blocks:
On the following page type a title for the block in the corresponding field (optional). The title is shown on the frontend (e.g. Navigation, User login, etc.). Type a description in the field for Block description. This description will be shown on the Blocks page of the admin panel and not on the frontend. You also have to specify a body in the text area for Block body.
The rest of the settings are the same as when editing an existing block: regional settings from which you can choose in which region the block should be displayed, and visibility settings.
Don't forget that when you install and enable some modules, they may automatically add a new block.