Drupal Themes Tutorial
How to install Drupal themes
Drupal comes prepackaged with a few themes. You can install many more. You can either do this from the administration panel of your Drupal installation using the built-in automatic installer, or you can do it manually.
Installing Themes Automatically
First you have to download to your local computer the theme archive. You can find many free themes in the themes section of the official Drupal site. There are themes with different layouts: number of columns, number of regions, etc. Make sure that the theme that you want to install is compatible with the version of your Drupal.
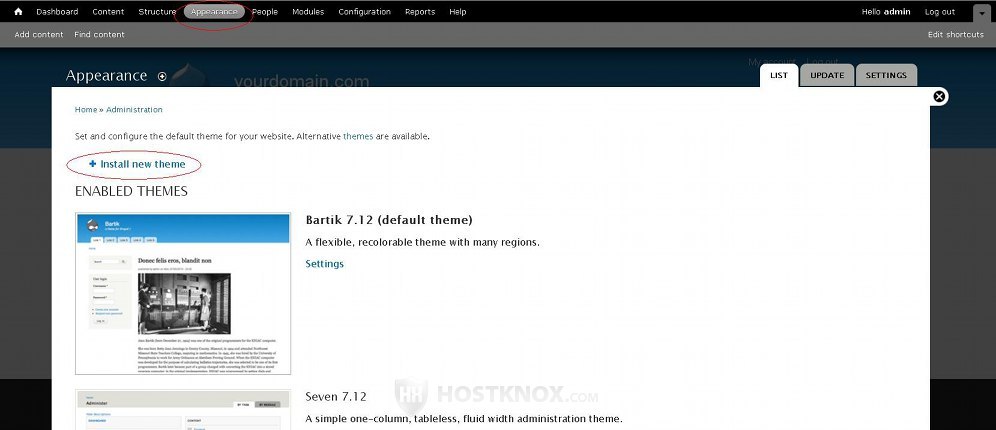
Log in to your Drupal application as an administrator, click on the Appearance tab of the admin panel's navigation bar, and on the page that opens click on the Install new theme button:
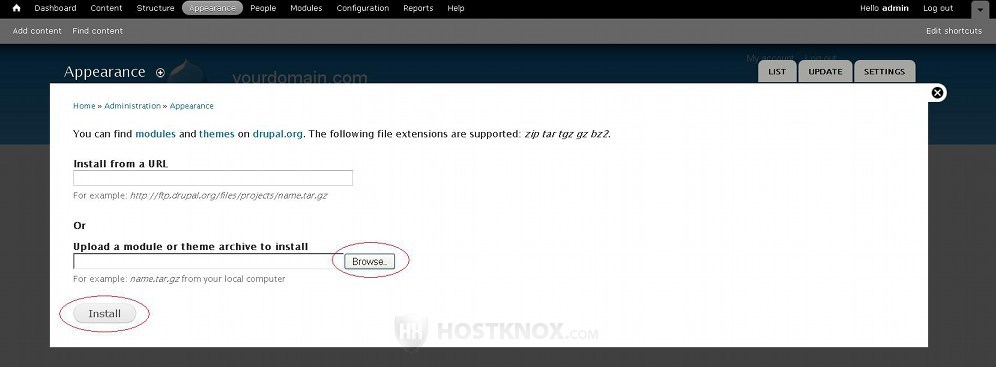
On the next page click on the Browse button to find the theme archive that you downloaded on your local computer, and then click on the Install button:
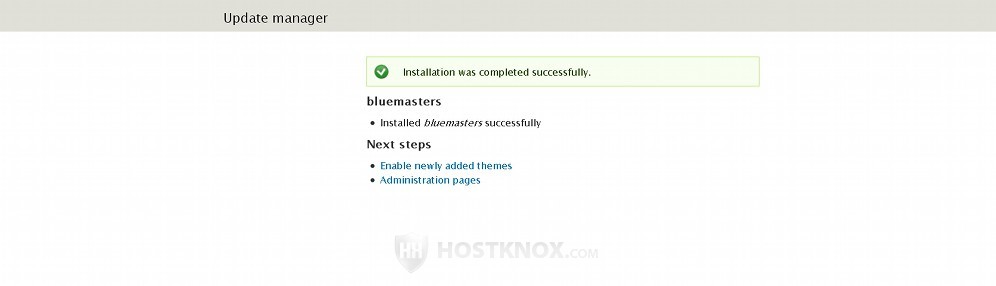
After you click on the Install button the theme will be installed automatically in /sites/all/themes in the root Drupal directory on your hosting account. For example, if your Drupal is installed in a folder called drupal in the public_html directory on your Drupal hosting account, all themes that you install through the admin panel's automatic installer will be installed in public_html/drupal/sites/all/themes (this is the correct folder for third party themes). Once the theme is installed, the next page is just a confirmation that the installation was successful; in our example we've installed a theme called blue masters:
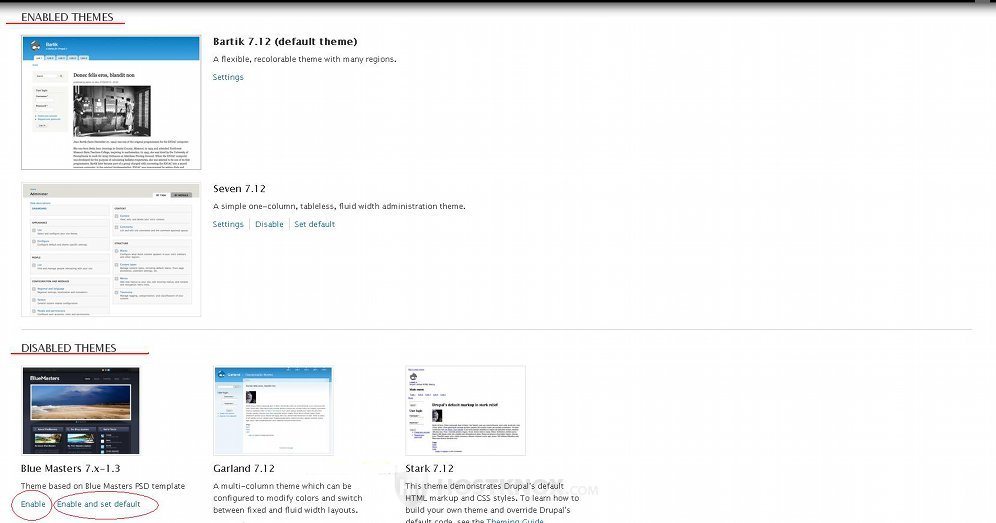
On the confirmation page there are two buttons. Click on the button Enable newly added themes to enable the theme and return to the admin panel of your Drupal, or click on the Administration pages button just to go back to the admin panel. Whichever button you click you'll be brought back to the Appearance tab of the admin panel. On that page you'll see first listed the enabled themes, and under them the disabled themes. You can have more than one enabled theme, but only one of them is the default theme that visitors see when they open your site. If the theme you just installed is not enabled, you can enable it by clicking on its Enable button, or you can enable it and make it the default theme by clicking the respective button:
You can use just the default theme or you can enable several themes (one being the default), so that each registered user can choose which theme to use when he/she logs in to their account. There are some modules which will help you to manage this functionality (allowing users to choose from enabled themes). Some such modules, for example, are Switch Theme and Theme Key.
Inside the theme archive that you downloaded on your computer there's a readme.txt file (or install.txt). You can also find that file in the theme's folder on your account (e.g. public_html/drupal/sites/all/themes/name_of_theme). It's not a bad idea to read that file to see if there's anything specific about the particular theme. Some themes, for example, require a particular module(s) to be enabled, so that they can be used.
Installing Themes Manually
As with the automatic installation, first you have to download the theme archive from the themes section of the official Drupal site to your local computer. Again, make sure it can be used with the version of your Drupal application. After that uncompress the archive. The uncompressed archive should contain a directory labeled with the name of the theme; inside that directory should be the files and subfolders of the theme. Using an FTP client upload that directory to your Drupal hosting account. For example, if your Drupal is installed in a folder called drupal in the public_html directory on your account, you should upload the unpacked theme in public_html/drupal/sites/all/themes. Then log in to the admin panel of your Drupal, click on the Appearance tab in the top navigation bar and from the page that opens you can enable the theme, and, if you want to, set it to be the default one by clicking on the corresponding buttons.
You can also upload the theme on your hosting account from the Files section of the HostKnox control panel. In this case you don't have to uncompress the theme archive on your local computer. Just use the HostKnox control panel's file manager to navigate to the Drupal folder for third party themes (e.g. public_html/drupal/sites/all/themes). Then click on the Upload button that's on the right side, locate the archive on your local computer and upload it. After that highlight the uploaded archive by clicking with the left mouse next to its name. Click on the Unpack button that appears in the black area on the right, and that's it. Now you can enable the theme from the admin panel of your Drupal.
Don't forget to check the readme.txt file that's in the theme archive to see if there's something else that you have to do for that particular theme to function without any problems.