Drupal Clean URLs and URL Aliases Tutorial
How to set and manage URL aliases and friendly URLs in Drupal
You can make the links to your Drupal site easier to remember and improve search engine page ranking by using URL aliases and friendly URLs, or to use the Drupal terminology and to avoid confusion we'll distinguish between URL aliases and clean URLs.
Clean URLs
All HostKnox servers provide a suitable environment and meet all the requirements for using clean URLs. This means that when you install Drupal on your Drupal hosting account, clean URLs will be automatically enabled; you won't have to configure anything. Assuming that your Drupal is installed directly in the public_html directory on your hosting account, meaning that the homepage is accessible at yourdomain.com, then with clean URLs enabled a page on your site will have an URL address that looks something like yourdomain.com/node/2. Without clean URLs the URL address of the same page would be yourdomain.com/?q=node/2.
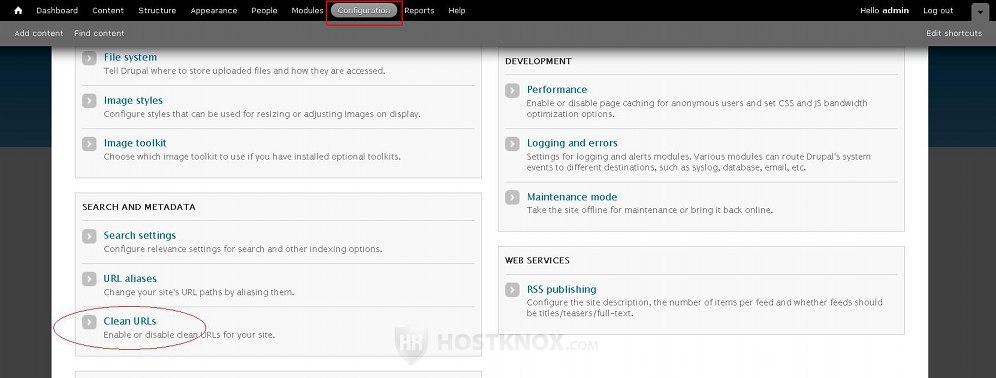
You can find the clean URLs option in the admin panel. After you log in click on the Configuration tab in the top navigation bar. On the page that is displayed scroll down to the section labeled Search and Metadata and click on the Clean URLs button:
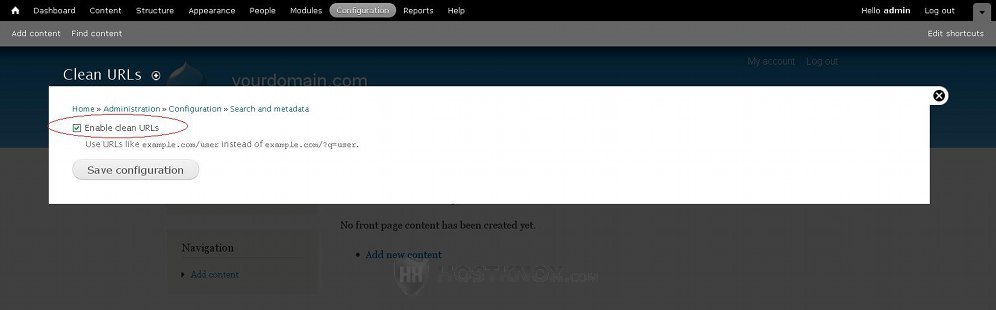
After you do it the page with the settings will be shown. In fact, there's only one option. It's a checkbox labeled Enable clean URLs, and it should be marked by default:
URL Aliases
You can use URL aliases so that you can make the URL addresses to pages on your site even more search engine and user friendly. For example, if you have a page on your site with an URL address yourdomain.com/node/2 and that's an about us page, you might want to set an URL alias so that the address would be yourdomain.com/about-us. This can be achieved thanks to the Path module that comes prepackaged with Drupal and is enabled automatically if you install Drupal with the standard profile.
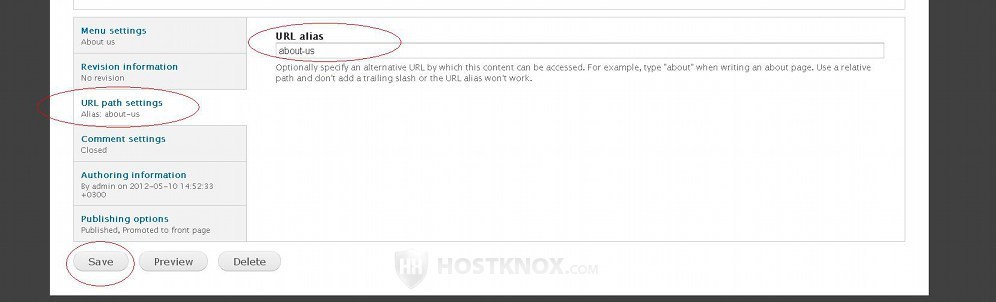
You can set URL aliases when you create or edit the particular page. In our example, that would be a content item (node) from the basic page content type. So in our case, if the page is already created, to edit it we click on the Content tab in the navigation bar of the admin panel and on the page that opens we click on the edit button for the particular node. This will display its settings. We scroll down the page, we click on the URL path settings button on the left, and we type the alias in the field that's provided:
When you type the URL alias type the path relative to the base URL address. If we use our example, we don't have to type the full URL address (e.g. http://yourdomain.com/about-us), but just the about-us part. In case the alias consists of more than one word, separate the words with hyphens. Keep in mind that it's recommended to set the alias when you're creating the node, and not to add it later. It's also recommended once you add the alias not to change it. Otherwise, all these things may have a negative effect on page ranking in search engine results. Another thing worth mentioning is that if a page has an URL alias, it can be accessed by using both the URL alias and the original URL address (e.g. yourdomain.com/about-us and yourdomain.com/node/2). But the links to that page will show the URL alias.
There's also another way to set URL aliases for existing pages on your site. Click on the Configuration tab in the top navigation bar of the Drupal admin panel. On the page that opens scroll down to the section Search and Metadata and click on the button URL aliases:
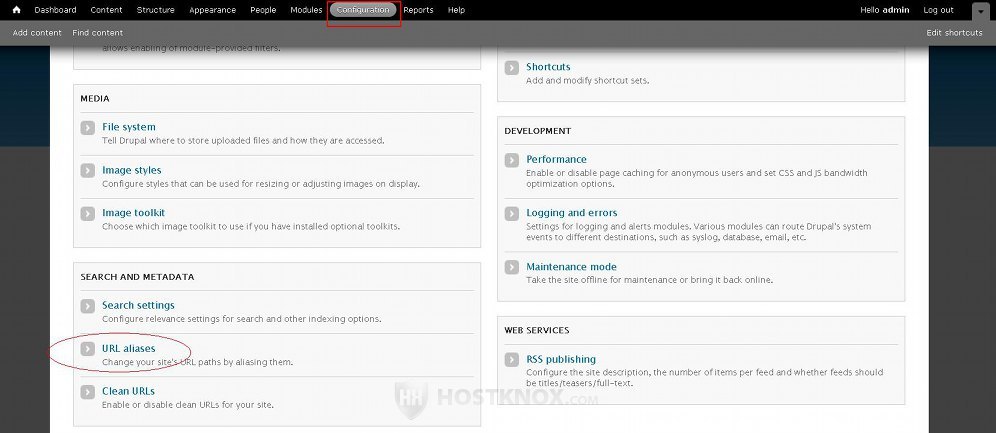
This will open a page from which you can manage all existing URL aliases, and you can also add new ones. You'll see a table with all the aliases that you have added. Under the column Alias you'll see the actual alias as it exists at the moment, and in the column System you'll see the corresponding original URL address of that page; both paths are relative to the base URL address of the site (e.g. yourdomain.com). You can edit or delete any of the aliases that you have already created by clicking on the respective buttons in the table:
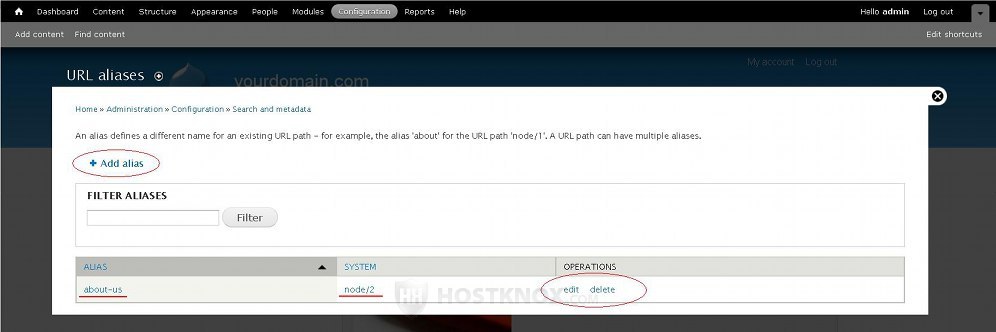
To add an alias to an existing page on your site click on the Add alias button that's above the top left corner of the table. This will open a new panel with two fields. In the first one you have to specify the existing original URL address for which you want to generate an alias, and in the second field you have to type the alias:
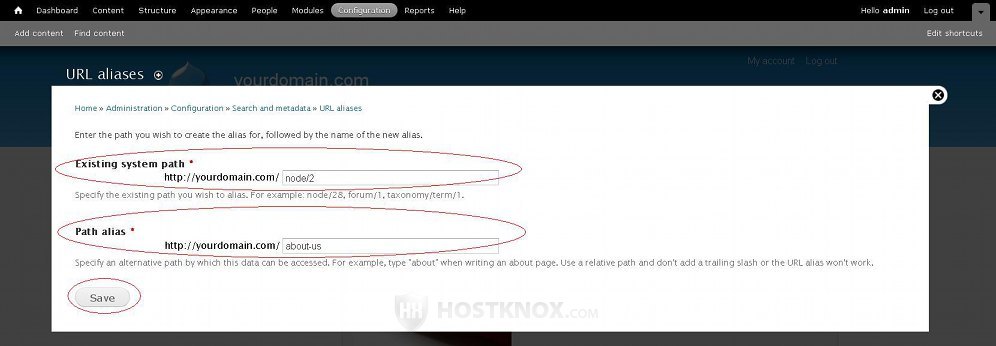
In both fields you just have to add the path to the base URL (e.g. node/2 and about-us in our example). Don't forget to click on the Save button.
From the permission settings of your Drupal's admin panel you can change the permissions for adding and managing URL aliases. By default, only the administrator user role has the permissions to administer and create URL aliases. If you want to give these permissions to another user role, click on the People tab in the top navigation bar of the admin panel and on the page that opens click on the Permissions sub-tab. Then scroll down to the section labeled Path and configure the two permissions for the desired role(s):
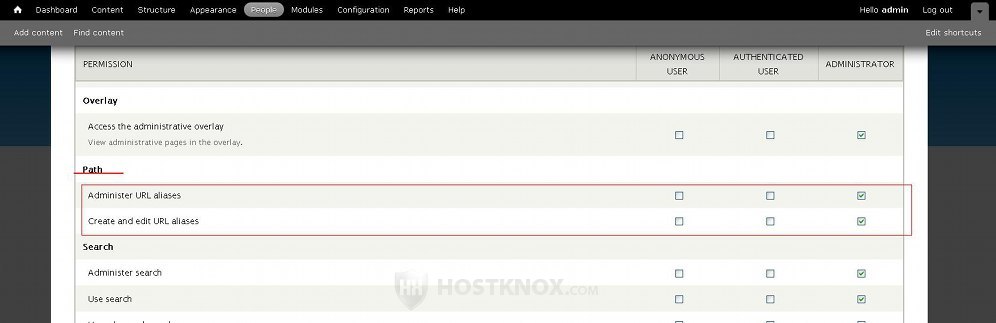
If you enable these permissions for another user role, that role should also have all the other necessary permissions. For example, if you want another user role to be able to set and manage URL aliases of articles, that role should also have the permissions to create and edit articles.
Generating URL Aliases Automatically
It's also possible to configure Drupal to set URL aliases automatically when you add content. This can be achieved with a contributed module called Pathauto. In order to be able to enable this module, however, you also need to install and enable a third party module called Token. For more information on installing modules check out the tutorial on how to install Drupal modules.
After you install and enable the Pathauto module, when you add new content, users, etc., it will automatically generate an URL alias for the particular item. It will do this according to a pattern. There are default patterns that will be used. For example, for all content types the name of the node will be used as the alias. You can change these patterns if you want. To do this, as well as to change the alias settings and perform mass updates, click on the Configuration tab in the navigation bar of the admin panel. Then on the page that opens click on the URL aliases button that's in the Search and Metadata section. On the next page you'll see that the Pathauto module has added several sub-tabs to the page: Patterns, Settings, Bulk Update, Delete Aliases. Click on the Patterns sub-tab to see, and if necessary, change the default alias patterns:
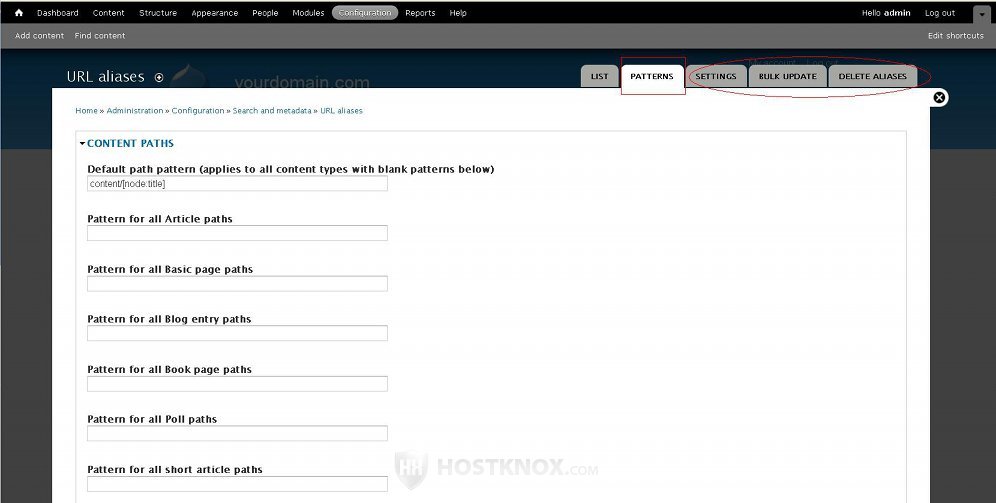
You can change the alias patterns for content types, users, etc.
You can use the Settings sub-tab to configure various options which apply to the automatically generated aliases. The Bulk Update sub-tab allows you to generate many aliases at the same time. For example, you can generate aliases for all content items. This is very useful, if for instance you have many articles that don't have URL aliases and you don't want to edit each one individually. The Delete Aliases sub-tab can be used to delete all aliases simultaneously, or just the aliases for all content types, users, or any other group of items.
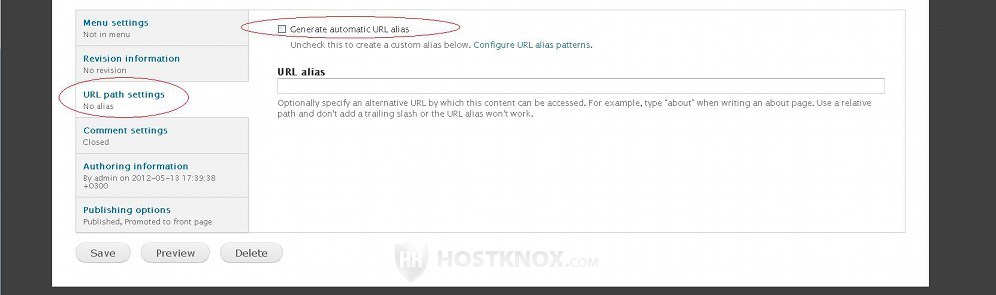
Even with the Pathauto module enabled, if you wish to, you can set aliases manually. When you create/edit an article (or a node from any other content type), for example, the URL path settings have the necessary options, so that you can specify the alias yourself. Just unmark the checkbox for Generate automatic URL alias, and type the alias in the corresponding field: