Drupal Users Tutorial
How to manage users in Drupal
By default, visitors on your Drupal site can register and become authenticated users. Visitors are only allowed to view the content on your site. Once a visitor registers, they can log in using their credentials and thus become authenticated users; this is the default role which is assigned to all newly registered users. This would give them some additional rights such as the permission to post comments, for example. Drupal comes preconfigured with a few user roles. You can assign users to user roles and thus give them more rights, you can edit the permissions of each user role, etc. For more details on roles and permissions check out the tutorial on user roles and permissions in Drupal.
You can change the registration rules, the available settings of user accounts; you can add more fields to the registration form and/or to the user accounts. Once a user is registered you can assign them to different user roles, you can block/unblock their account, and you can edit the accounts of all registered users.
Managing User Accounts
To manage users, log in to the admin panel of your Drupal and click on the People tab in the top navigation bar. On the page that opens there's a table with all the registered users. To block/unblock users, to cancel user accounts, or to assign a role to a user(s), mark the checkbox for the particular user(s), select the desired action from the Update Options drop-down menu and click on the Update button:
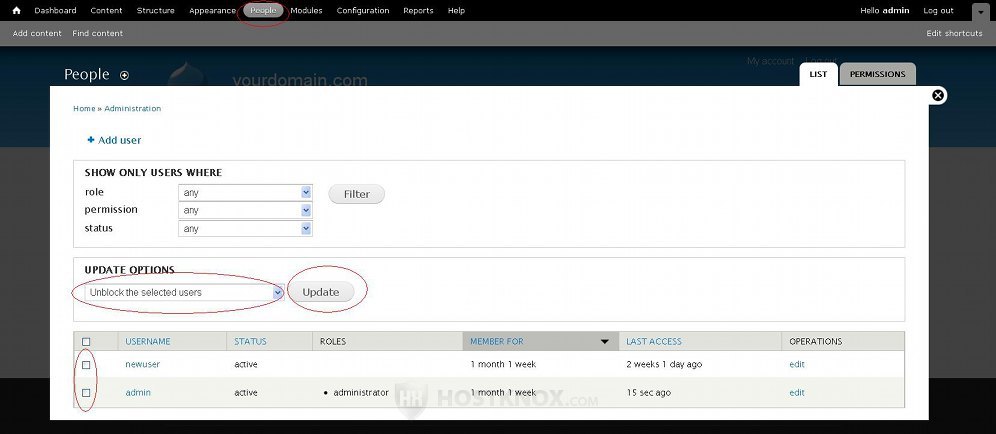
You can select many users and update their accounts at the same time.
If you want to see displayed in the table only users that meet certain criteria, you can use the filtering options:
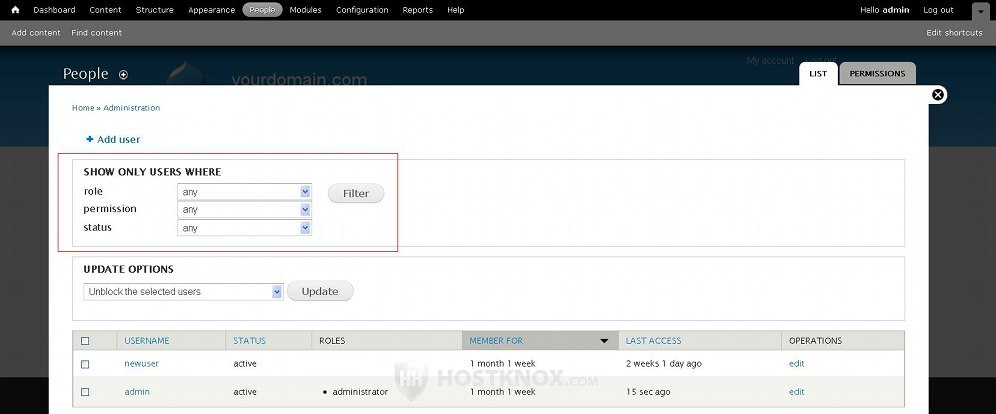
You can filter users according to their role, permissions and status (active/blocked). To do this just select the desired values from the three drop-down menus and click on the Filter button.
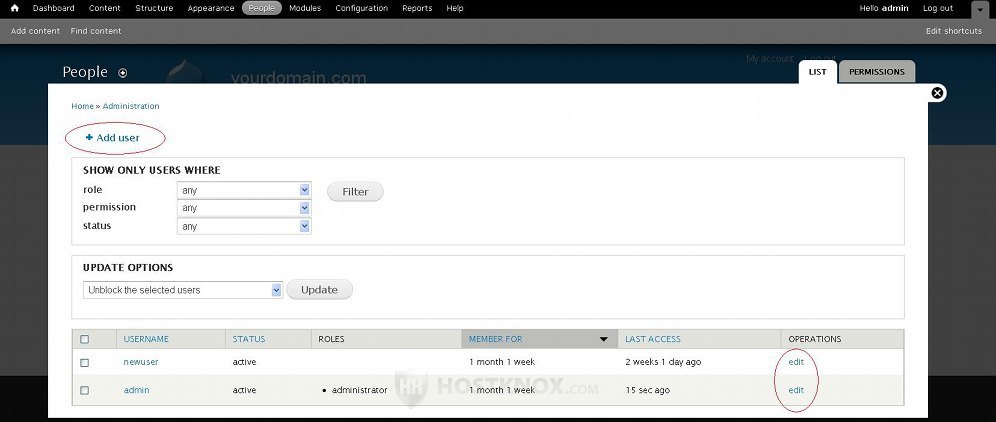
You can add new users yourself, and you can edit the settings of any of the registered users. To add a new user manually click on the Add user button that's at the top left corner of the page, and to edit an account just click on its edit button in the table:
A registered user can change the basic settings of their own account: password, email address, time zone settings, etc. Of course, you can give users belonging to a particular user role the permission to administer user accounts.
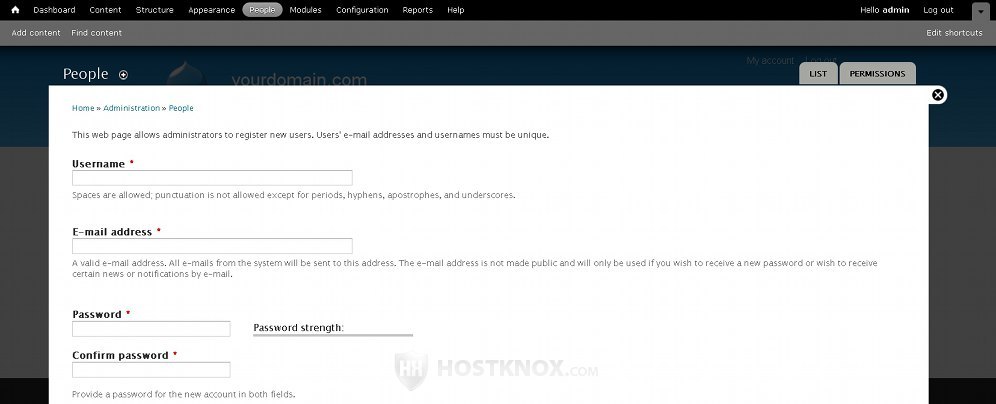
The settings when adding a new user or editing an existing account are basically the same, so we'll go over them by adding a new user. The basic and required settings include the username, the password and the email address:
Further down the page there are settings for the status and the user role:
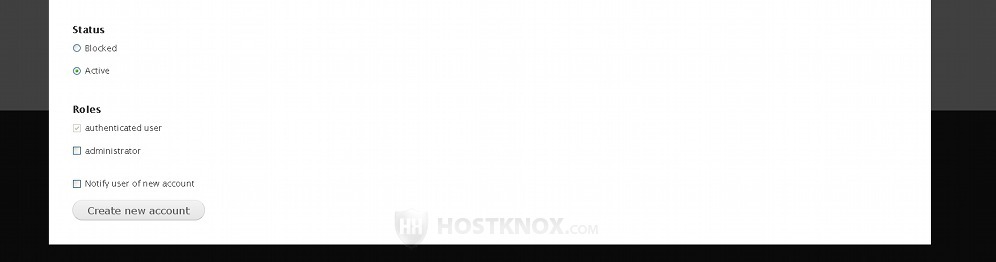
By default the status is set to Active no matter whether the account is created by an administrator (you) manually from the admin panel, or by the user from the frontend of the site. As we mentioned, newly registered users are assigned to the authenticated user role by default. If you want to, you can assign the user to another role by marking the respective checkbox. When you create a user account manually, you can also mark the checkbox labeled Notify user of new account, so that the user is informed with an email message that there's an account created for them on your site. When you're done with the settings click on the Create new account button (or on Save if you're editing an account).
When editing an existing user account there are also a couple of other default settings: for the picture/avatar and for the time zone.
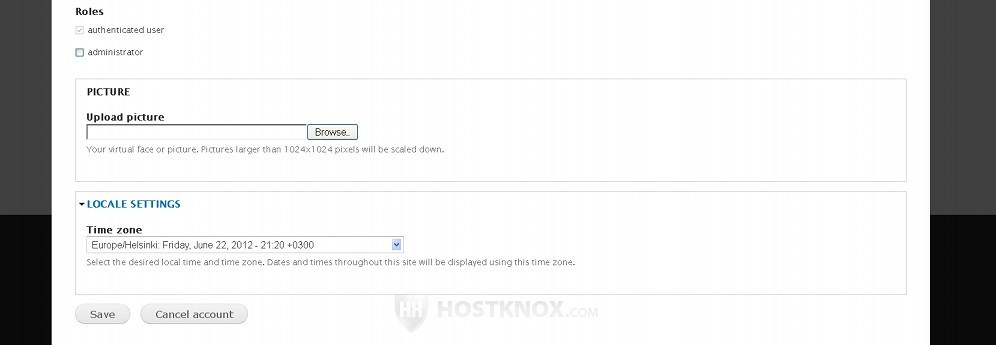
By default, users are allowed to upload an avatar image. The dimensions of the image to be uploaded shouldn't be larger than 1024x1024 (width x height), and it shouldn't be bigger than 800 kilobytes in size. Whatever the dimensions of the uploaded image a copy will also be created with the dimensions of the thumbnail image style. These options can be changed and you can also disable/enable avatars. However, these options are changed from the global account settings. We'll come to this further down in this tutorial.
More fields can be added to these default ones. They can be visible only when the user edits their account (or when the administrator does it), or they can also be included on the registration form. If there's a block on the frontend of your site that can be customized by users, that will automatically add a field to the user account page. Some modules may also add fields to the account page.
Managing Account Settings
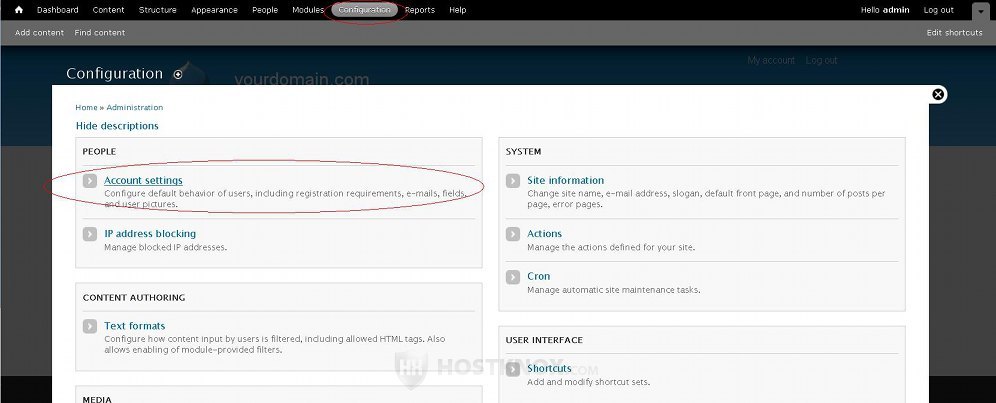
To manage the registration rules, to change the settings of the fields that appear on the account create/edit form, and to add new fields, click on the Configuration tab in the top navigation bar of the admin panel, and on the page that opens click on Account Settings:
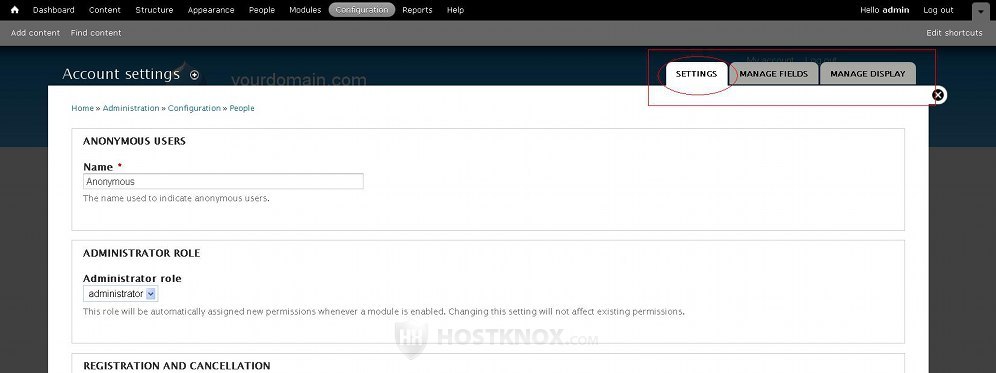
At the top right corner of the page that opens there are a few sub-tabs: Settings, Manage Fields, Manage Display. The Settings tab page is displayed by default; it is used to manage the registration rules and various account settings. The Manage Fields and Manage Display tabs are for adding and managing the fields that appear on the account and registration forms. For detailed information on how to add and manage fields read the tutorial on managing fields in Drupal. It's written for content types in particular, but account fields are added and managed in exactly the same way.
The fist two sections on the Settings sub-tab page let you change the name used to indicate anonymous users (visitors) on your site, and the administrator role:
By default, all unregistered users/visitors are referred to as Anonymous. To change that simply type the desired name in the field that's in the Anonymous Users section.
Drupal comes preconfigured with an administrator user role which is by default the highest ranking user role. If you want to, you can create another role to be used as the top role, and you can set the Administrator role drop-down menu to that user role. This is the role that will be assigned all the necessary permissions when a new module is installed, so that it has all the possible permissions to do anything.
Further down the page there are some Registration and Cancellation options. By default, visitors are allowed to register themselves but their account has to be activated by an administrator, and their email has to be verified:
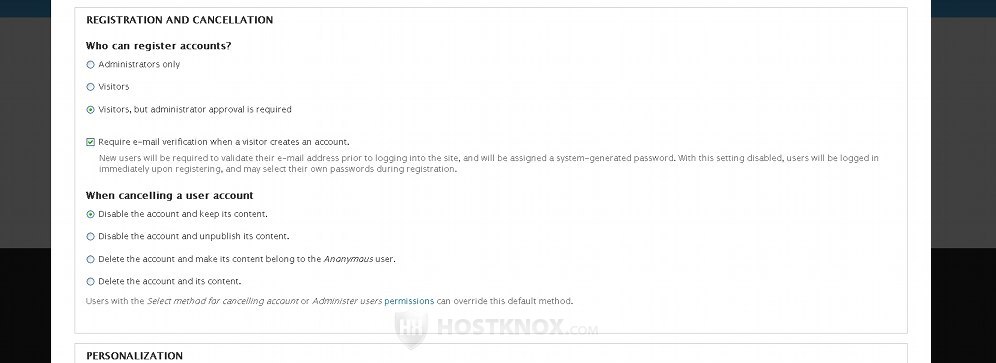
This means that after a visitor registers, they have to be approved by an administrator. Then the user will receive an email with a temporary password with which the user will be able to log in and set their own password. If you want to disable email verification, just unmark the checkbox for Require e-mail verification when a visitor creates an account. If you do it, the user will be able to register right after the account is approved and activated by an administrator. You can also let visitors register without admin approval, or you can allow only administrators to create user accounts. To do this simply mark the button for the respective option.
There are also some cancellation options that can be changed. These settings determine what happens to an account and to the content (if any) posted by the user of that account after the account is canceled. By default, when an account is canceled it's simply disabled (not deleted) and the content published by the user of that account is kept on the frontend. There are various other options: the account can be disabled and its content unpublished, it can be deleted together with the content, etc.
On the Account settings page of the admin panel there are also some Personalization options. By default, signatures are disabled and user pictures (avatars) are enabled:
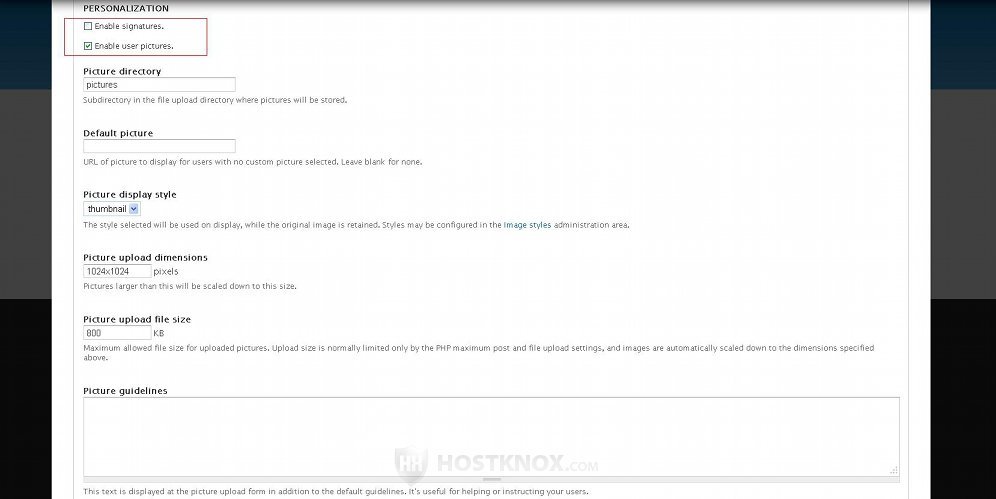
When the picture option is enabled there are some additional settings related to the directory in which the pictures are saved and to the style, dimensions and size of the uploaded pictures. The folder where the pictures are uploaded is automatically set to the pictures directory; the path to it on your Drupal hosting account is sites/default/files/pictures. The sites folder itself is a direct sub-directory of the root Drupal directory on your account. If you type the name of a directory that doesn't exit, it will be automatically created in the same location. For example, if you type avatars in the field for Picture directory and you click on Save configuration at the bottom of the page, the folder will be created in sites/default/files on your hosting account, meaning that all pictures will be uploaded in sites/default/files/avatars.
The field for Default picture is empty by default. This means that no avatar is displayed for those users who haven't uploaded a picture.
From the rest of the picture settings you can specify the maximum allowed size and dimensions of the uploaded picture, and the image style that will be used to actually display the picture on the frontend. The original image is kept, but it's resized according to the assigned image style, and the resized picture is shown on the frontend. By default, the preconfigured thumbnail image style is used for user avatars.
In the text area for Picture guidelines you can include some useful explanations. Users will be able to see these guidelines when they edit their account (under the field for uploading pictures).
At the bottom of the Account settings page you can edit the preconfigured email templates:
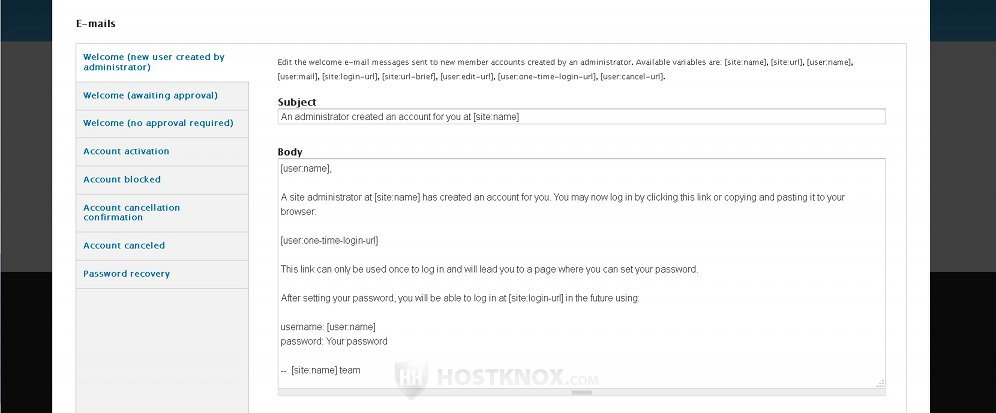
When a certain action concerning an account is performed Drupal sends and email to the particular user automatically using the template assigned for that action. For example, emails are sent automatically when an account is activated, a password recovery is requested, etc. Select the email template using the buttons on the left side, and then you can edit the subject and body of that template.
If you make changes to any of the account settings, don't forget to click on the Save configuration button at the bottom of the page.