Magento Catalog Price Rules and Promotions Tutorial
How to set up and manage catalog price rules and promotions in Magento
The admin panel of your Magento has options with which you can add and manage all sorts of promotions. You can set various conditions which have to be met in order for the promotion to be applied; this allows you to create more or less complex promotional rules depending on your preferences and needs. In Magento you can add catalog price rules and shopping cart price rules. The catalog price rules are applied to the products in your catalog, while the shopping cart rules concern only the products that the customer puts in the shopping cart. For more information on the shopping cart price rules check out the tutorial on setting up and managing shopping cart price rules in Magento.
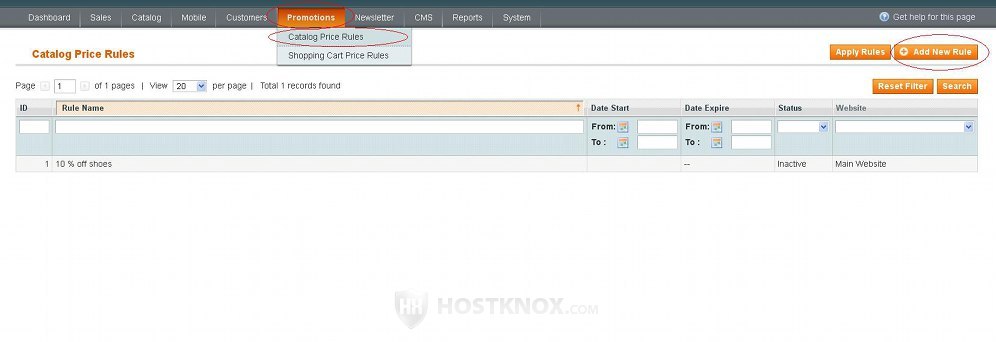
In this tutorial we'll examine how to add catalog price rules. After you log in to the admin panel of your Magento go to Promotions menu>Catalog Price Rules. On the page that opens you'll see a table with the existing catalog price rules (both active and inactive). By default, if you installed Magento without sample data there won't be any price rules, while Magento with sample data comes with several example price rules. To edit an existing rule click on its row in the table; to add a new one click on the Add New Rule button in the upper right corner:
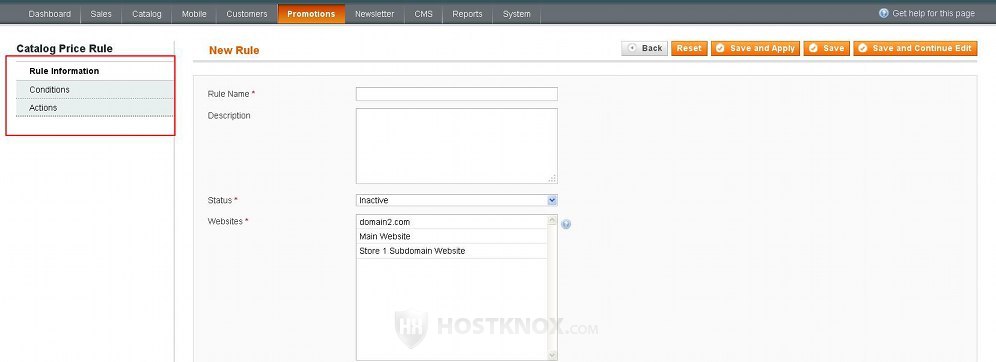
On the page that opens you'll see the rule information settings. Setting up a catalog price rule can be divided into three steps:
There are options associated with each of these sections. You can access and modify the settings for each of them by clicking on the respective button that's on the left side of the page:
We'll go over each of the three sections.
Catalog Price Rule Information
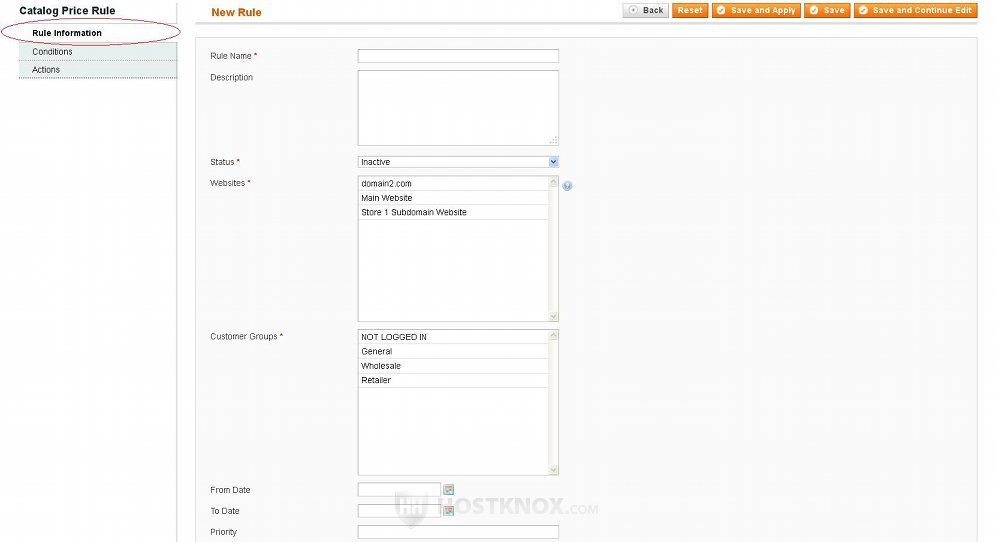
When you add or edit a catalog price rule the Rule Information options are displayed by default. Otherwise, you can access them by clicking on the Rule Information button on the left. On this page you can configure general options such as the name of the rule, the website(s) and customer group(s) to which the rule will apply:
Let's go over the settings:
- Rule Name - type a name for the rule. You can type any name that will remind you what the rule is about. It's only for internal use and is not displayed on the frontend.
- Description - this field is optional. You can use it to type some information related to the price rule. It can be anything that's helpful to you. It's not shown on the frontend and you can view and change it when you edit the price rule.
- Status - you can use this drop-down menu to specify whether the catalog price rule should be active or not. By default, it's set to Inactive. If you want the rule to apply, set the drop-down menu to Active.
- Websites - this option lists all the websites that you've created from System menu>Manage Stores. You can select the websites on which the price rule will apply. To mark/unmark more than one website in the list press and hold the Ctrl button on your keyboard and click on the name(s) with the left mouse button.
- Customer Groups - this option lists all the customer groups that you've created from Customers menu>Customer Groups. You can use it to select the customer groups to which the price rule should apply. For example, if you want it to apply only to the registered customers from all groups, mark all groups in the list except NOT LOGGED IN. As with the previous option you can mark/unmark more than one group by pressing and holding the Ctrl button on your keyboard and clicking on the name(s) with the left mouse button.
- From Date and To Date - You can use these two options to specify a period for which the price rule will be valid. Just click on the small button next to each of the fields and select a date from the calendar that appears. If you leave them blank, the price rule will apply immediately and for as long as the Status option is set to Active.
- Priority - you can add many catalog price rules and depending on their conditions in certain cases more than one rule may apply. The priority determines which rule should be applied first and the order in which the matching rules should be applied. Those that have a lower number for priority are applied before those with higher numbers. So a rule that has 0 for priority will be applied before another one that has 1 for priority.
After you're done with these settings if you want to, you can click on the Save and Continue Edit button and proceed to the other settings, or you can directly go to the settings in the other sections.
Catalog Price Rule Conditions
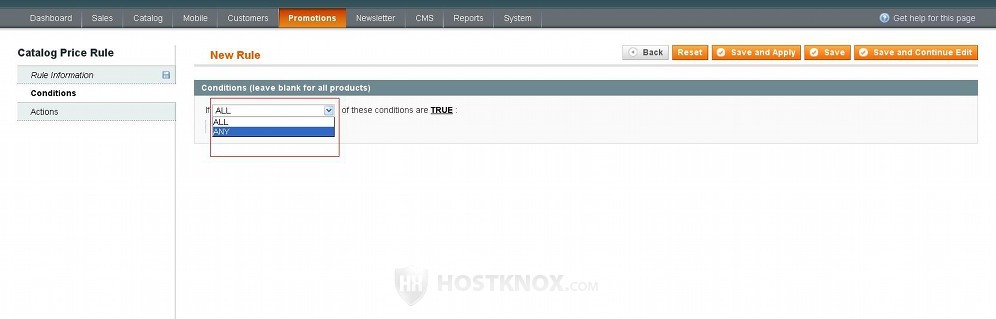
Click on the Conditions button on the left to configure the conditions that have to be fulfilled in order for the price rule to be applied. On the right you'll see a text specifying that all of the conditions that you add have to be true so that the rule is applied:
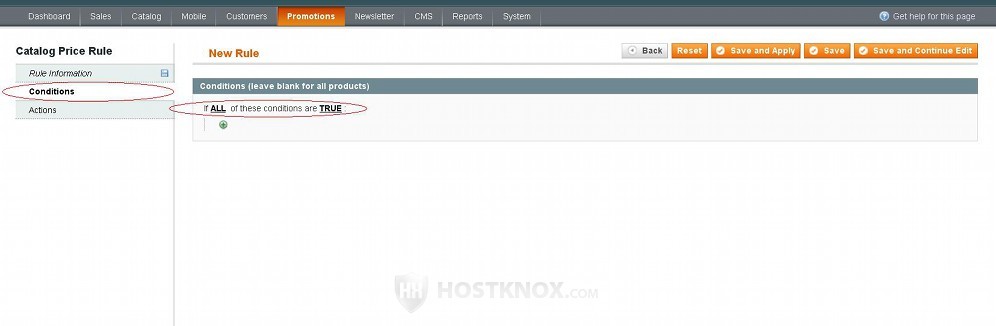
However, by clicking on ALL and TRUE you can change the way the conditions are fulfilled. For example, if you add a few conditions and you want the rule to be applied if any of them is matched instead of all, you can click on ALL and use the drop-down menu that appears to set it to ANY:
In the same way you can set the price rule to be applied if the specified conditions are false instead of true. Just click on TRUE and use the drop-down menu that appears.
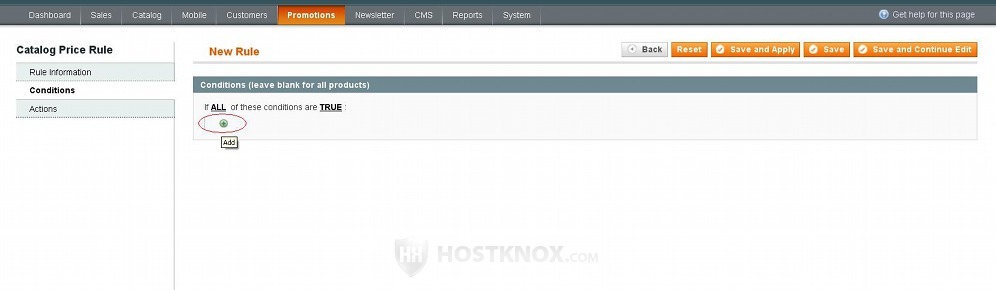
To add an actual condition click on the green plus button:
When you do that a drop-down menu will appear. From that menu you can select whether the condition should be a category, a whole attribute set, or a single attribute. You can also select the option which allows you to create a complex combination of conditions, if, for example, you want some of the conditions to be true and others to be false in order for the price rule to be applied:
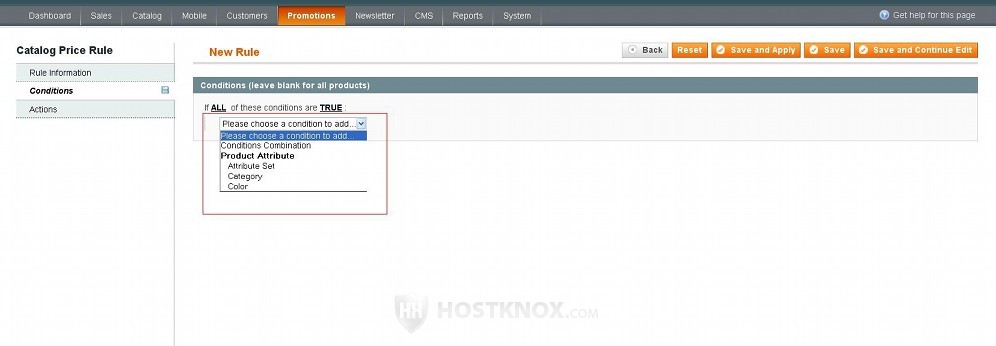
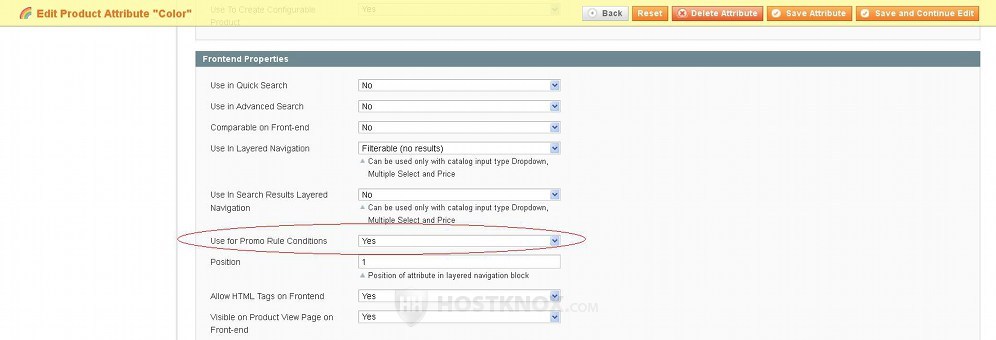
Note that to be able to select an attribute to be used as a condition in a price rule you need to set its Use for Promo Rule Conditions option to Yes. In our example screenshot above, for instance, only the attribute Color is available because only it is enabled for price rules. To allow an attribute to be used for promo rule conditions, in the admin panel go to Catalog menu>Attributes>Manage Attributes, on the page that opens find and click on the attribute that you want to edit, and on the edit page find the Use for Promo Rule Conditions option and set it to Yes:
In a Magento installation without sample data this option is disabled for all the default attributes that come preconfigured with the install pack. So if, for example, you want to use such attributes as price, manufacturer, SKU etc. as conditions in price rules, you need to edit them and enable the respective option. Magento with sample data installed comes with more preconfigured attributes and many of them are set to be used with price rules by default. One useful tip if you want a catalog promotion to apply to one or some products and not to a whole category is to enable the attribute SKU to be used for promo conditions, and then select the SKU attribute as a condition when adding the rule.
Let's go back to the price rule conditions. After you click on the small green button and you select from the drop-down menu whether the condition should be an attribute, a category, etc. you need to configure the condition itself. There are two things that you need to configure: the value of the particular condition that you selected (e.g. a particular category, value for an attribute, etc.) and the relation between the condition and the selected value. We'll illustrate it with an example to make it clearer. Let's assume that you selected Category as the condition. This will automatically add is ... after the condition:
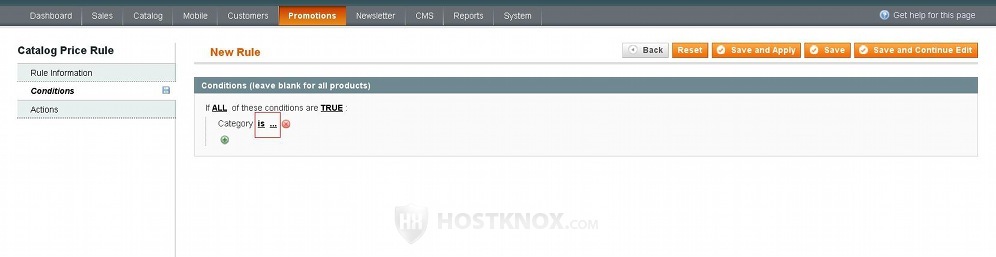
Actually whether you select the condition to be a category, an attribute set or an attribute this is what is going to be added automatically after it. You can click both on is and on the three dots. To select a value(s) click on the three dots. The value or values that you can select depend on what you chose the condition to be. In our example it's a category so when you click on ... a field will appear in which you can type the ID(s) of the category (or categories, if more than one). Instead of typing IDs you can just click on the small window button next to the field and a list of all the categories that you have created will appear:
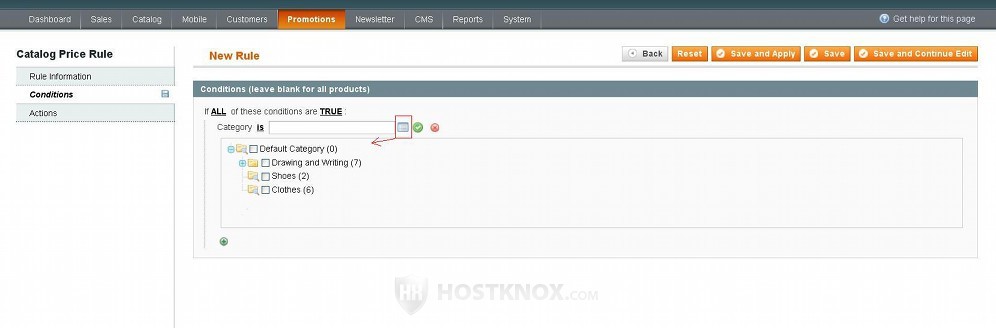
So just mark the checkbox(es) of the category or categories that you want to select and click on the small green button that's on the right side of the condition to add the selected categories. To remove the condition just click on the small red x on the right side.
If you leave the default is the price rule will apply to the category or categories that you selected. You can change that by clicking on is. When you do this a drop-down menu with various choices will appear:
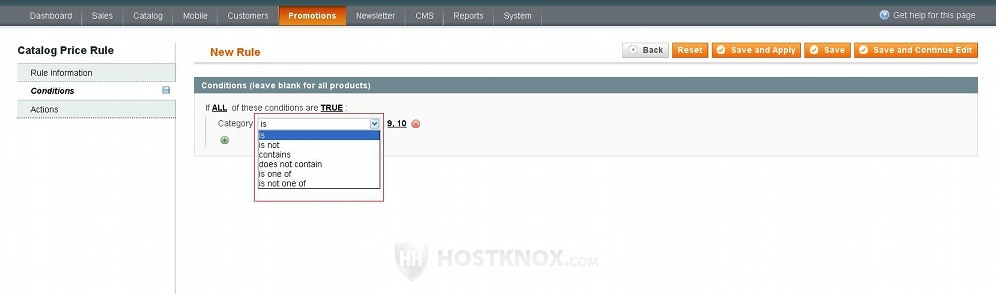
The available choices depend on whether the condition is a category, an attribute set, or an attribute (and on the exact attribute, if it's an attribute). If, for example, you select is not instead of is, the price rule will be applied if the values are not matched. In our example, we've selected Category as a condition and we've selected the categories with IDs 9 and 10 (which in our case are the categories for shoes and clothes); if we leave the condition with is and we don't add any other conditions, the promotion will apply to all products that are in the two categories.
Note that if you want the promotion to apply only to particular products (more than one) and for this purpose you select the SKU attribute as a condition, then in order for the rule to apply to all the selected products you need to select is one of instead of is.
Depending on the promotions that you want to create you can add many conditions within a rule and create all sorts of combinations.
Catalog Price Rule Actions
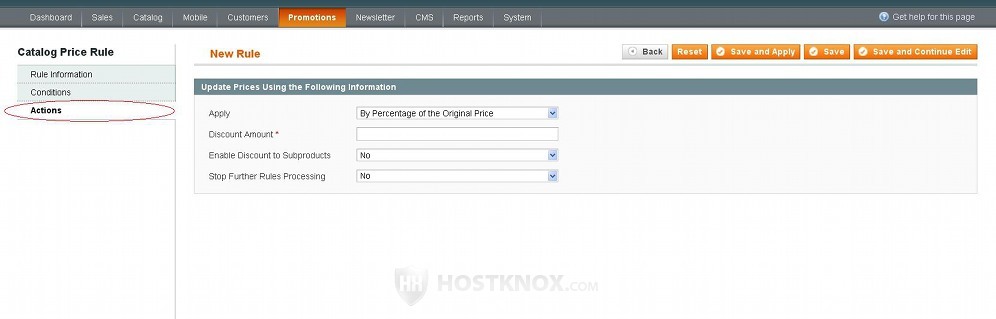
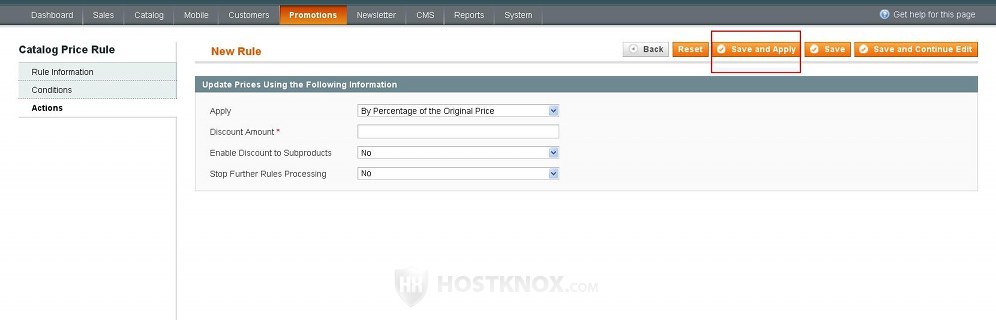
Click on the Actions button on the left to manage the settings related to price rule actions:
These settings are:
- Apply - from this option you can select how the discount should be applied. By default, it's set to By Percentage of the Original Price which means that the discount amount is calculated as a percentage of the original price that's subtracted from the price. For example, if the product costs $80 and the specified discount amount is 10, then the final price will be $72 ($80 original price - $8 (10 % off $80) = $72 final price).
If you select By Fixed Amount, then the specified discount amount is a fixed sum that's subtracted from the original price no matter what the original price is. For example, if the original price is $80 and the specified discount is 10, then the final price will be $70 ($80 - $10 fixed discount = $70).
If you select To Percentage of the Original Price, the specified discount will be the actual final price calculated as a percentage of the original price. For example, if you put 10 in the field for Discount Amount and the original price is $80, then the final price will be $8 (the final price is calculated as 10 % of the original price).
If you select To Fixed Amount, the number that you put in the field for Discount Amount will be the final price as a fixed sum no matter what the original price of the product is. For example, if you put 10 in the field for Discount Amount, the final price will be $10 no matter whether the original price is $80 or $800. - Discount Amount - in this field put the number for the discount amount. Whether that will be a fixed sum or a percentage and how exactly it's going to be calculated in relation to the original price depends on what you select from the Apply option.
- Enable Discount to Subproducts - by default, this is set to No. If you want to enable it, simply set it to Yes.
- Stop Further Rules Processing - by default, this is set to No. If you have more than one price rule set up, and in a particular situation all the conditions of more than one rule are fulfilled, then all the rules that meet the requirements will be applied. If you don't want other rules that meet the conditions (except this particular rule) to be applied, set this option to Yes. Of course, the priorities of the rules are also important. We already discussed the Priority setting; it's configured in the Rule Information section. If you set the Stop Further Rules Processing option to Yes, this will stop the processing only of those rules that have a lower priority than this particular one (meaning they haven't been processed yet).
After you're done with all the settings click on the Save and Apply button in the upper right corner:
The price rule will be saved and it will be immediately applied. If you click only on the Save button, the rule will be saved but it will not be applied on the frontend even though it's Status option is set to Active.