Magento PayPal Tutorial
How to configure PayPal for your Magento store
One of the easiest solutions for your Magento store in terms of payment methods is to use the PayPal payment system. PayPal is integrated into Magento and your Magento admin panel has all the PayPal options you need to configure to establish a working store.
In order to be able to use PayPal with your store, you need a PayPal merchant/business account. You can create such an account on PayPal's official site. Once you go to the site you'll see an account login panel on the left, click on the link Sign up at the bottom of the panel. Then click on the Get Started button for the business PayPal account and choose a payment method (read a bit further down in the tutorial for short descriptions of the different payment methods). Provide all the necessary information to complete the process of creating your merchant account.
In your PayPal account there are some settings that might be worth configuring, such as enabling Instant Payment Notification (Profile>Instant Payment Notification Preferences). For some more information on this read the tutorial on setting up a PayPal sandbox account. After you create the account you can go to your Magento admin panel, select the payment method you chose while creating the PayPal account and configure its options.
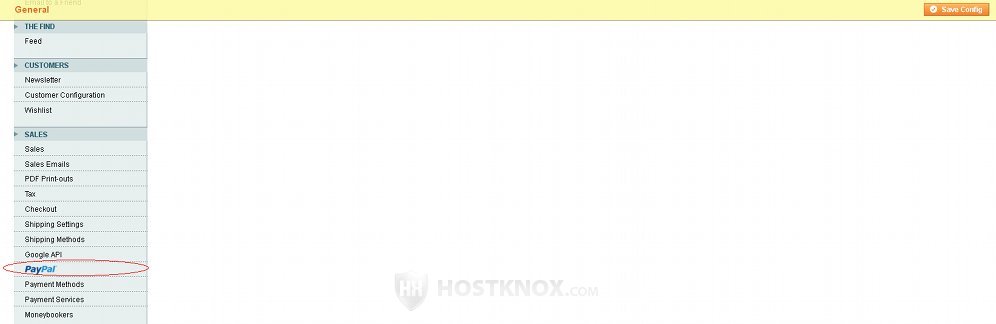
To configure the PayPal options for your store, log in to your site's admin panel, go to the System menu and select Configuration. On the left side find the Sales section and click on PayPal:
After you click on PayPal you'll see different options, including the various PayPal payment methods:
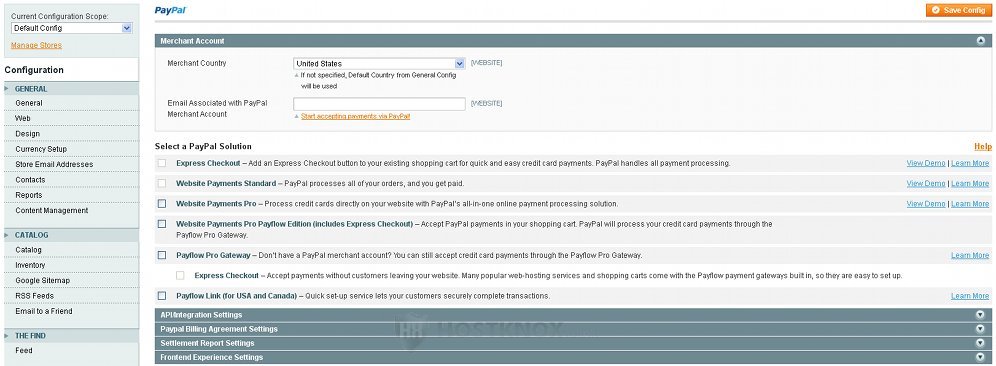
From the first panel (Merchant Account) you can set the country (e.g. United States) and in the email field you have to type the email for your PayPal account. That is, of course, if you have created in advance a merchant account on the PayPal site. If you haven't done this so far just click on the link Start accepting payments via PayPal!. You'll be taken to a PayPal section of Magento's site, there just click on the blue PayPal banner to go to PayPal's official site. Of course, you can go to PayPal's site directly, not through the admin panel of your site.
Notice how when you type your email address in the email field the first two PayPal payment methods become available (Express Checkout, Website Payments Standard). Otherwise you can't mark their checkboxes. After you mark the checkbox of any of the payment methods an additional panel will appear with options for that particular method.
Let's have a brief look over the different payment methods.
With Express Checkout additional buttons are available on the product view page and in the shopping cart. Customers need to have a PayPal account in order to use this method. After a customer clicks on the express checkout button on your site they are automatically sent to PayPal's site where they have to log in to their account. After the customer logs in, he/she only needs to review the billing and shipping information. With this method customers don't need to fill all the shipping and billing information. It's provided by their PayPal account. They only have to confirm the order. Then you get your money and the information you need to fulfill the order. If you decide, you can use only this method on your site. This method is also included by default if you select Website Payments Pro. If you select Website Payments Pro Payflow Edition the Express Checkout is automatically disabled. There are no monthly fees with the Express Checkout method, only the fees that PayPal charges for the transfer per order (e.g. 2.9 % + $0.30).
Website Payments Standard doesn't have monthly fees either. The transaction is again done securely through PayPal's site. With this method customers don't need a PayPal account. During the checkout process they can pay with a credit card, or if they have a PayPal account they can choose to pay through their account. After they place the order they are returned to your site and they'll also receive a confirmation message and email. You'll also receive a confirmation email (and your money, of course). The Website Payments Standard method can't be used together with Website Payments Pro and Website Payments Pro Payflow Edition.
With Website Payments Pro you can process credit cards directly on your site. Customers don't need to have a PayPal account and they are not redirected to PayPal's site during the checkout. The transfer, of course, is done through PayPal. If the customer has a PayPal account they can choose to use it. The Express Checkout method is automatically enabled if you choose Website Payments Pro. In addition to the transaction fee per order, Website Payments Pro has a monthly fee of $30. It's only available in the United States, Canada and the United Kingdom.
Website Payments Pro Payflow Edition is available in the United States and the United Kingdom. With this method customers don't need a PayPal account. They can enter their credit card information directly on your site during the checkout process. The Express Checkout is automatically enabled with this method, you'll also need the API credentials.
With Payflow Pro Gateway customers don't need a PayPal account, as with the previous method they can enter their credit card information directly on your site. You'll need to add the API credentials in Magento's admin panel.
Payflow Link is available only for the United States and Canada. Customers don't need to have a PayPal account (if they have one they can use it). Once the customers decide to check out, the checkout process is carried out on PayPal's site. For some more information on how to set the Payflow Link method just mark the checkbox for the method in the PayPal section of your Magento admin panel and read the information in the Payflow Link panel that appears.
We recommend that for smaller businesses you use the Website Payments Standard method and/or Express Checkout. The Payflow solutions are more expensive and more suitable for larger stores and businesses. But, of course, it's up to you.
After you select the payment method and, if needed, configure its options, you also have to add the API credentials. We haven't mentioned them in each payment method, but you should add them regardless of the method you've chosen. You can do this from the PayPal options of your Magento's admin panel (System>Configuration>PayPal). Click on the panel API/Integration Settings, right under the payment methods:
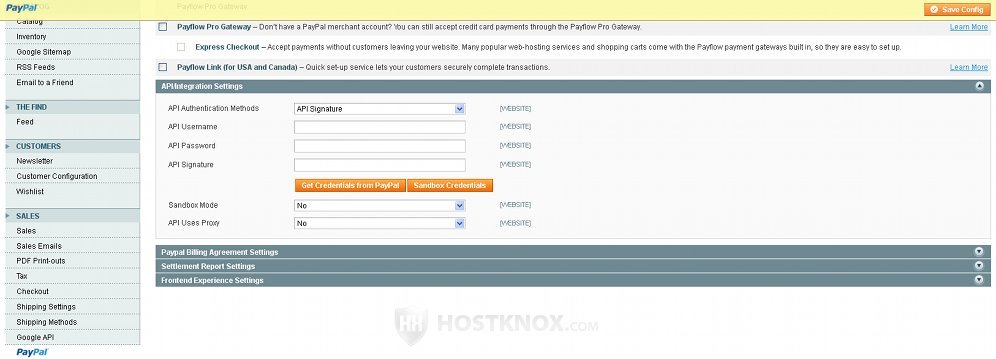
If you haven't obtained the API credentials during the registration process on PayPal's site, just click on the button Get Credentials from PayPal. A new window will open, you have to log in to your PayPal account and you can get your API credentials (username, password, signature) from there. Then copy them in the respective fields of your admin panel's API/Integration Settings panel.
By clicking on the Sandbox Credentials button in the API/Integration Settings panel you can get credentials for testing purposes only. In this case you also have to set the Sandbox Mode drop-down menu to Yes. Some payment methods, such as Website Payments Standard, have in their options panel a specific Sandbox Mode option which you can set to Yes to test whether the transactions and the connection with PayPal is working. Other methods you can test by using just the sandbox API credentials and enabling the sandbox mode in the API/Integration Settings panel. These sandbox transactions are only for testing and don't involve any real money.
For more details on creating a test account read the tutorial on setting up a PayPal sandbox account for Magento.
After you're done configuring the PayPal options don't forget to click on the Save Config button in the upper right corner of your admin panel.