Magento Newsletter Tutorial
How to manage newsletters in Magento
You can send your customers newsletters to inform them about different things connected with your store (e.g. new products, special prices, promotions, etc.). Magento has built-in options with which you can subscribe/unsubscribe customers and manage various things related to your newsletter. In this tutorial we'll examine the process of newsletter subscription, how to send newsletters, manage the subscribers and the settings connected with the newsletter.
Subscribing to and Unsubscribing from the Newsletter
By default, there are several ways in which customers can be subscribed to the newsletter. This can be done both on the frontend by the customers themselves, or it can be done from the admin panel.
- One way for customers to subscribe to the newsletter is when they create an account. When a user creates a new account on the frontend there's a checkbox for signing up for the newsletter:
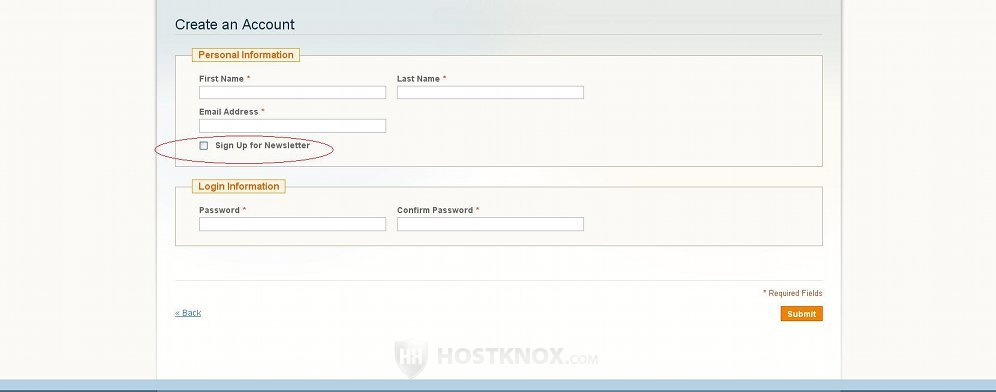
By default, the checkbox is unmarked.
- Customers who have an account can sign up for the newsletter from their account settings. In the Newsletter Subscriptions section there should be a checkbox for subscribing:
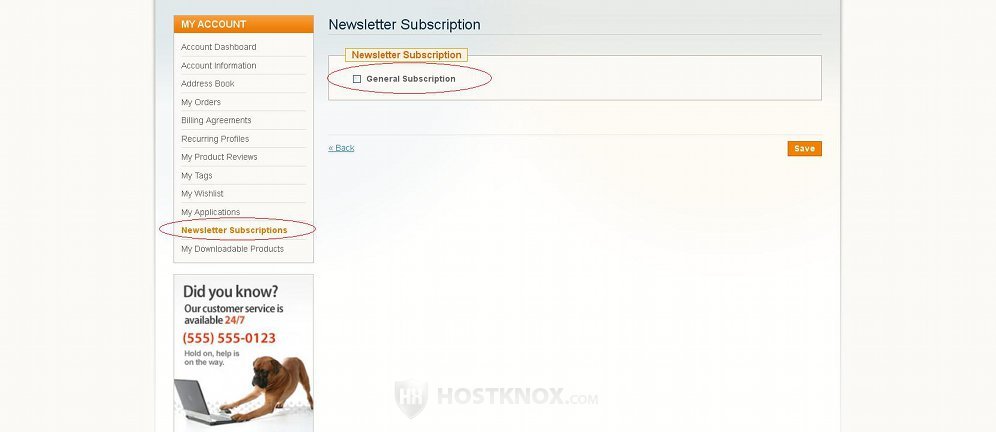
The customer only has to mark the checkbox and click on the Save button.
- There's also a Newsletter block on the frontend that can be used by guests to subscribe to the newsletter. By default, guest subscription is enabled. If you want to, you can disable guests subscription for the newsletter. For more information read the section on the newsletter configuration settings further down in this tutorial. With the default theme that comes prepackaged with Magento the Newsletter block is displayed in the left column:
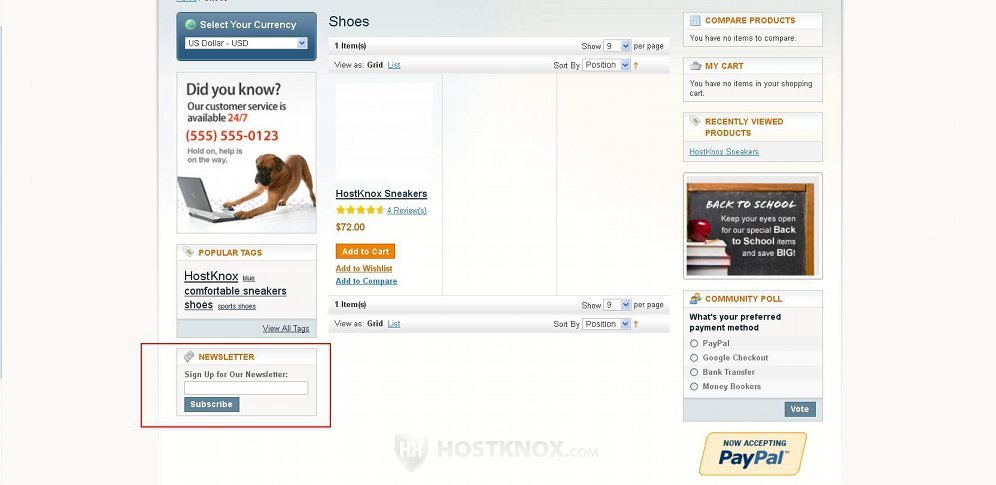
The user has to type the email address in the field and click on the Subscribe button.
Note that if a logged in customer uses this block to subscribe instead of the account settings, and types the email associated with the account (the email used by the customer to register), then the subscription is automatically associated with that customer. If, however, the logged in customer uses the block to subscribe with an email that's not associated with the account, then in the list with the subscribers in the admin panel the user will be listed as a guest.
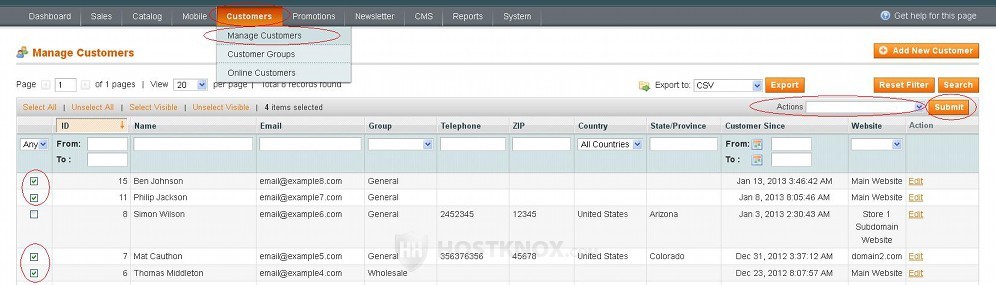
- You can subscribe customers to the newsletter, as well as unsubscribe them, from the admin panel of your Magento. You can subscribe/unsubscribe many customers at the same time. To do this, after you log in to the admin panel go to Customers menu>Manage Customers. On the page with the registered customers mark the checkbox for the customers that you want to subscribe/unsubscribe, then select the action from the Actions drop-down menu in the top right corner of the table and click on the Submit button:
Newsletter System Configuration Settings
In the system settings of the Magento admin panel there are some settings related to the newsletter. These include mainly the email template and sender options that are used when informing customers for successfully subscribing to or unsubscribing from the newsletter. To access them go to System menu>Configuration>Newsletter button in the Customers section on the left. This will display on the right a panel labeled Subscription Options. Expand it to view and edit the settings:
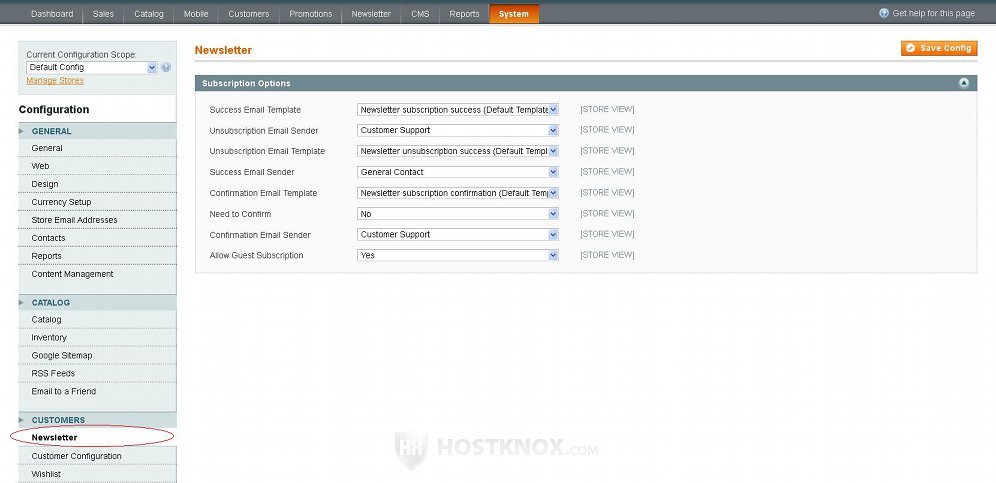
Let's review the settings:
- Success Email Template from this drop-down menu you can change the email template that's used when informing the customer that they have successfully subscribed to the newsletter. Such a message is automatically sent when a customer signs up for the newsletter. For information on how to add and manage email templates check out the tutorial on managing email templates in Magento.
- Unsubscription Email Sender from this option you can change the sender that will appear in the From field of transactional messages that are sent automatically when a customer is unsubscribed from the newsletter. By default, this is set to Customer Support. You can change it with one of the other store email addresses. For more information on email addresses read the tutorial on managing the store email addresses in Magento.
- Unsubscription Email Template you can use this setting to change the email template used when sending usubscription emails to customers. If a customer is unsubscribed from the newsletter Magento automatically sends a message to the email addresses of the customer. From this option you can change the template used to display that message. For more information on how to change these transactional templates read the Magento tutorial on how to manage email templates.
- Success Email Sender by default, this is set to General Contact. This is the sender and the email address that's shown in the From field of messages sent to customers after successfully subscribing to the newsletter. In case you need more information related to the store email addresses check out the tutorial on managing the store email addresses in Magento.
- Confirmation Email Template by default, confirmation is not required when customers sign up for the newsletter. If you have enabled confirmation for newsletter subscription, this will be the email template that will be used to display the message sent to the customer. It's the default template that comes prepackaged with Magento. Of course, if you have added a new one, you can select it from this drop-down menu.
- Need to Confirm by default, this is set to No. If you want to enable confirmation, just set it to Yes. Note that this confirmation when signing up for the newsletter applies only to guests. Even if this option is enabled, registered customers will not have to confirm. When this option is enabled and a guest customer subscribes to the newsletter, they will be sent a message to the email address that they have provided. This message will contain a link. After the user clicks on the link the subscription will be activated.
- Allow Guest Subscription as the name suggests this option is for allowing guests to subscribe to the newsletter. By default, it's enabled. If you don't want guests to be able to subscribe, simply set the drop-down menu to No.
If you make any changes to the options don't forget to click on the Save Config button in the upper right corner.
Managing Newsletter Templates, Queues and Subscribers
The admin panel of your Magento has a section specifically dedicated to your newsletter. You can use the options in that section to actually type the content of the newsletter and send it to the subscribers, to manage the subscribers and check for any problems connected with sending the newsletter.
The top navigation bar of the admin panel has a menu labeled Newsletter which contains a few submenus. You can use them to access and configure the newsletter options. Let's go over them and the whole process of sending the newsletter to your subscribers.
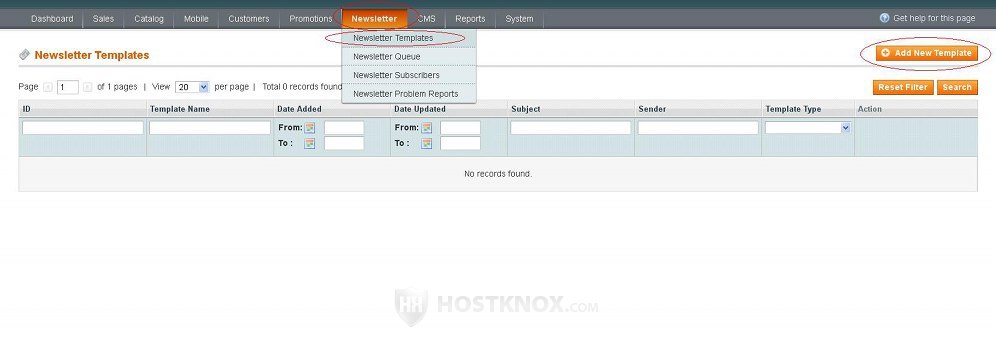
First, you need to create a newsletter template which will be used when sending the newsletter to the subscribed customers. Note that from the settings in System>Configuration>Newsletter that we discussed in the newsletter system configuration settings section, you can only select the templates that are used for automatic email transactions informing customers about their successful subscription or about unsubscribing to the newsletter. Here you can add a template(s) that will be used for the actual newsletter itself. To add or edit newsletter templates go to Newsletter menu>Newsletter Templates. On the page that opens you'll see a table with the existing templates (if any). To edit a template click on its row in the table, and to add a new one click on the Add New Template button in the top right corner:
When you edit an existing template you can save it as a new one instead of overwriting the existing one. Just edit the template and click on the Save As button instead of on the Save Template button.
On the add/edit template page there are several options that you have to configure:
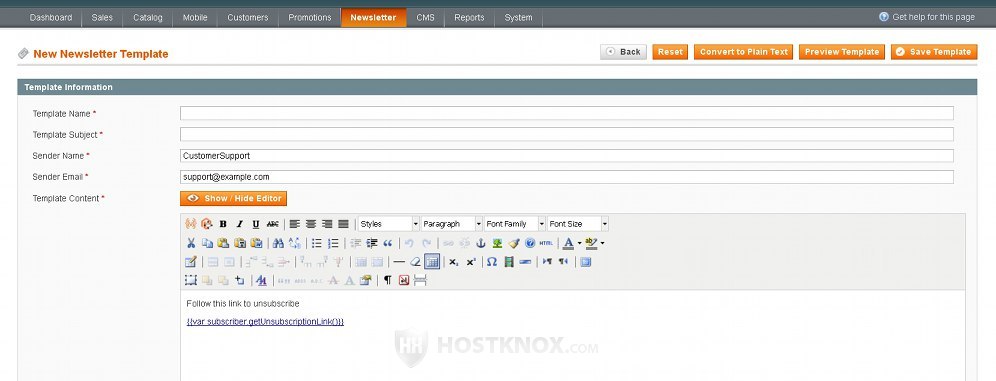
These include:
- Template Name just type some name for the template. It's only for internal use and it's not displayed in the emails sent to subscribers.
- Template Subject - this is for the subject shown in the Subject field of emails received by the customers.
- Sender Name this is the name that's shown in the From field of the emails sent to the subscribers. By default, it's set to CustomerSupport.
- Sender Email that's the email shown in the From field of the messages sent to the newsletter subscribers. By default, that's the email address corresponding to your store's address for customer support (store email addresses can be configured from System>Configuration>Store Email Addresses).
- Template Content this is the built-in text editor for specifying the content of the template. You can use plain text or HTML. You can switch between the two with the Show/Hide Editor button. By default, each new template includes some text and a link for unsubscribing from the newsletter.
After you're done with the settings click on the Save Template button. As we mentioned, in case you're editing an existing template and you want to save it as a new one click on the Save As button. When you send the actual newsletters you can select any of the templates that you've created. Note that when you prepare to send the newsletter you can add some text to the content of the template. We'll come to this a bit further down.
To send the newsletter to your subscribers go to Newsletter menu>Newsletter Template. From the Action drop-down menu of the template that you want to use select Queue Newsletter:
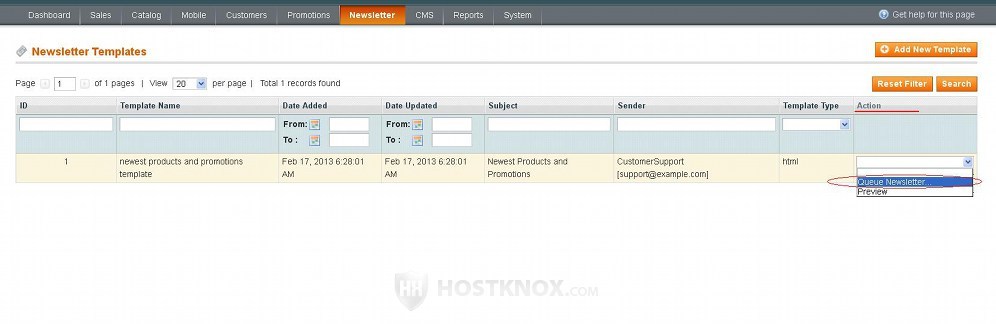
This will automatically display the options that you have to configure/change before queuing the newsletter:
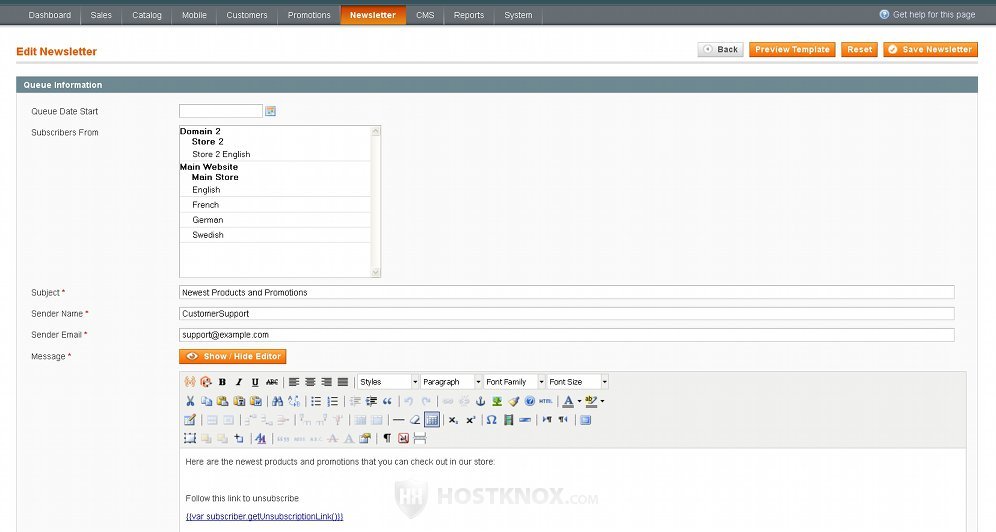
From the Queue Date Start option you can select the date on which the newsletter should be sent. The Subscribers From setting allows you to select any of the store views that you have added. The newsletter will be sent only to those who have subscribed from the selected store view(s). You can select one or more store views. To mark or unmark more than one store view press and hold the Ctrl button on your keyboard and click with the left mouse button on the store view(s).
The values for the options Subject, Sender Name, Sender Email and Message are loaded from the template that you selected but you can change them. In particular you'll probably want to put some additional content. For example, you have created a general template that you use to inform subscribers about new products and promotions. You use the same template each time when you send the newsletter. So in addition to the general content of the template each time you can add using the Message option more information, links, etc. about the particular products and promotions.
After you're done with the settings click on the Save Newsletter button.
Once you do that the newsletter will be queued and it will be sent as soon as possible, depending on the queue start date that you have set. You can go to Newsletter menu>Newsletter Queue to see all the queues:
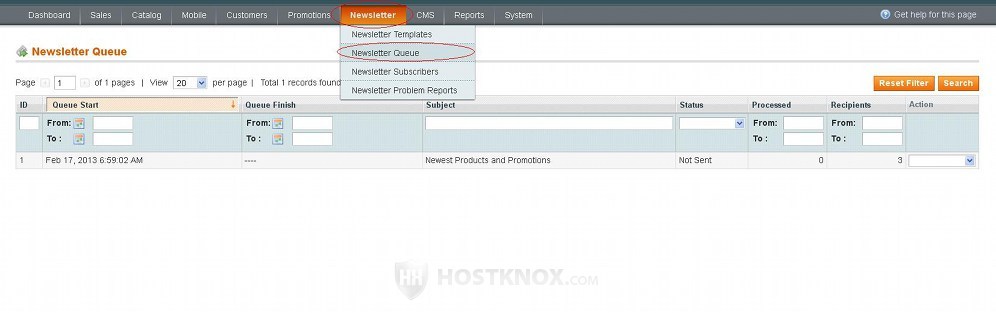
The table on the page shows all the tasks. Both those that are finished and those that are still to be executed. It shows the status of each queue (e.g. Not Sent or Sent), the number of the recipients/subscribers to which the newsletter has to be sent or was sent, and the number of the processed recipients. If the newsletter has to be sent to a lot of subscribers, Magento won't be able to send all emails at the same time, so it will divide them and send them in portions.
In order for Magento to be able to actually send the emails you also have to set up a cron job. To learn how to do it read the section in this tutorial about setting up a cron job.
From Newsletter>Newsletter Subscribers you can view a list of all customers who are subscribed to the newsletter:
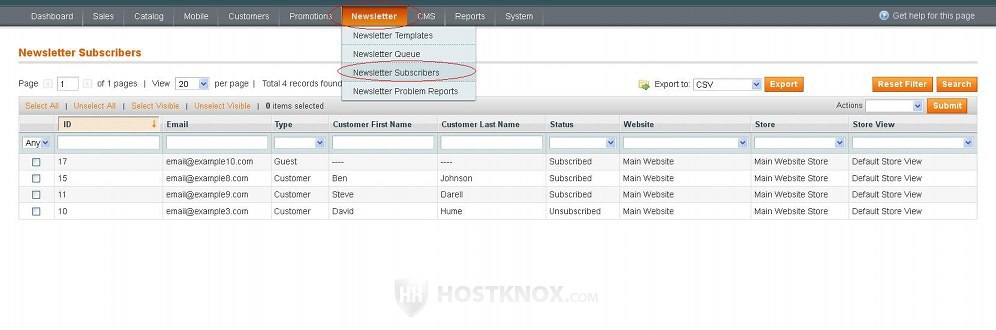
The table lists all that are currently subscribed, as well as those who were subscribed but are currently unsubscribed. The list contains registered customers and guests. On this page you can unsubscribe subscribers and you can directly delete from the list both active subscriptions and those who are currently unsubscribed (this will remove them only from the subscription list, it will not delete any customers). To do this mark the checkbox for the particular customer(s), from the Actions drop-down menu in the top right corner select whether you want to unsubscribe the customer or delete them from the list and click on the Submit button.
Setting up a Cron Job
All queued newsletters will be sent only if you set up a cron job that executes the cron.php file that comes prepackaged with every Magento installation. You can do this from the Cron Jobs section of the HostKnox control panel. Click on the Add Cron Job button in the black area on the right. On the page that opens select from the Frequency drop-down menu how often the cron job is to be executed and type the command in the Command field. The command consists of php -f followed by the full path to the cron.php file on your hosting account. If, for example, your store is installed directly in the public_html folder on your Magento hosting account, making the frontend accessible at yourdomain.com, then the command should look like this:
php -f /home/username/public_html/cron.php
You have to replace username with your actual username. After that click on the Add Cron Job button that's under the options. This is done in almost the same way in cPanel.
Depending on how often the cron job is executed you may also need to modify some cron job settings in the admin panel of your Magento. To access them go to System menu>Configuration>System button in the Advanced section on the left>Cron (Scheduled Tasks) panel on the right. The panel contains different cron related settings. If, for example, the cron job is set up to be executed once every hour, in order for the newsletter to be sent you should increase the value in the field for Missed If Not Run Within (e.g. from 15 to 60).