Magento Products Tutorial
How to add and manage products in Magento
In this part of our Magento tutorial we will show you how to add and manage your products.
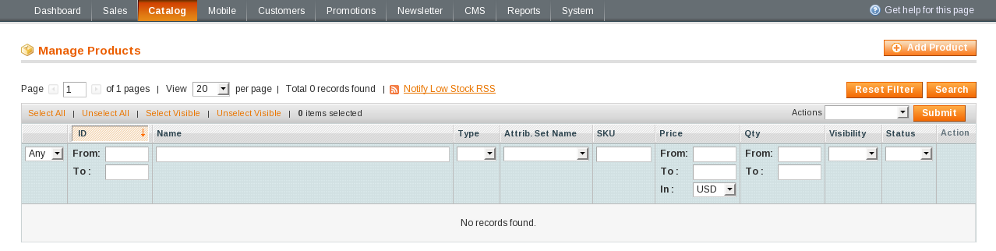
To manage your products, you need to log in to your Magento admin panel, hover over the Catalog tab and click Manage Products. If you have installed the Magento sample data, you will see many products in this section. However, for the purpose of this tutorial, we will show you how to add a product on a Magento with no sample data installed.
To add a new product, click the Add Product button in the top right of the screen:
You will be taken to the Create Product Settings page. From here you can choose an Attribute Set and a Product Type for your new product. Since we have not yet created a custom Attribute Set, we'll use the Default one. In the Product Type drop-down menu there are several product types you can choose from for your new product:
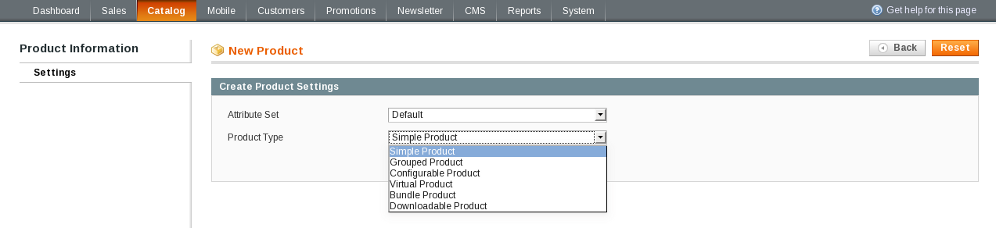
Let's go through the product types in more detail:
Magento Product Types:
- Simple Product - this product type is for items with a single configuration, for example a black T-shirt
- Grouped Product - this type is for creating a new product based on one or more existing products; for example, if you have a black T-shirt and black shorts as separate products, you can group them together and sell them as a grouped product
- Configurable Product - this type will allow your clients to customize a product by having several options to choose from; for example, you cansell the T-shirt and shorts in several different colors; to do this, you need to create a separate simple product for each color you want your clients to be able to choose from and then add these products to a new configurable product
- Virtual Product - this product type is for services that have neither physical nor digital representation, i.e. they don't need to be shipped or provided for downloading; for example, if you want to offer services such as newsletter subscriptions or phone support, you would add them as virtual products
- Bundle Product - this type will allow your clients to customize a product based on a number of configurable options; for example, if you want to sell different laptops with configurable options such as CPU model, amount of RAM, HDD size, etc, you would add them as bundle products
- Downloadable Product - this product type allows you to add different digital products and sell them to your clients by providing a download link for each product; for example, if you want to sell software, music or movies, you would add them as downloadable products
Now let's add the first product to our store. We will create a simple product, so let's select Simple Product from the Product Type drop-down menu and click Continue:

You will be taken to the General settings page for the product:
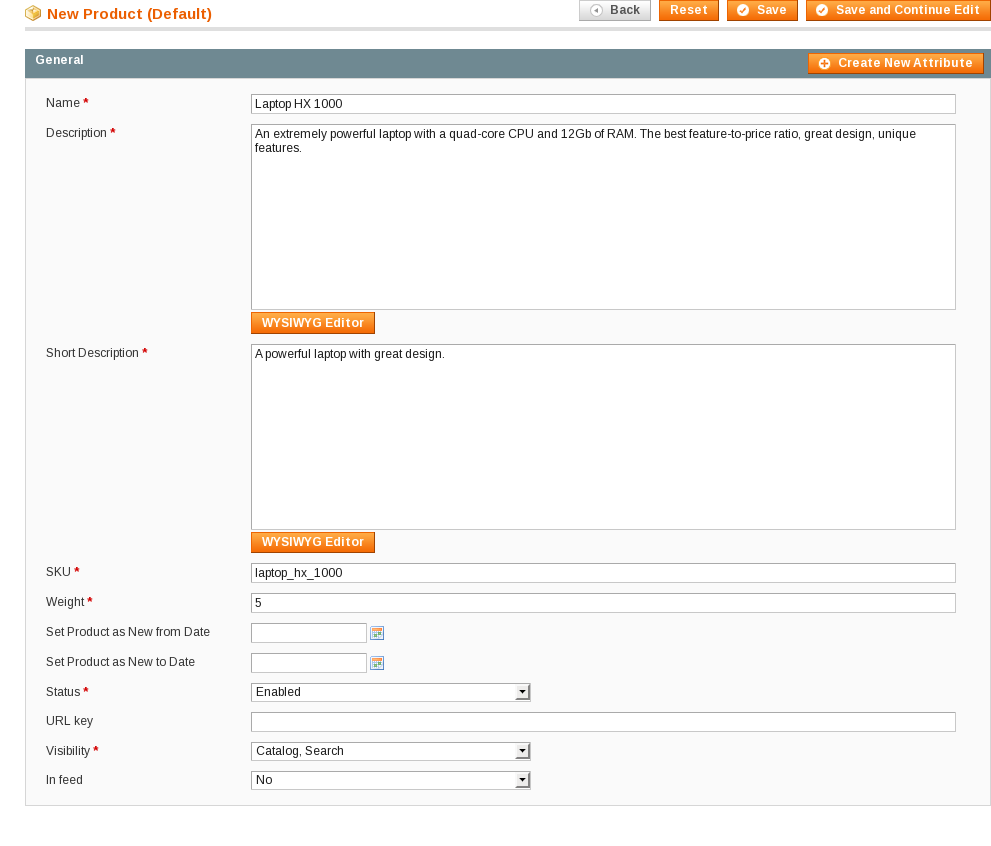
Most settings are self-explanatory, but we will review them one by one anyway:
Simple Product General Settings:
- Name - the name of the product as it will be shown on the store's frontend
- Description - the product description that will be shown in the center of the product page
- Short Description - the product description that will be shown at the top of the product page
- SKU - Stock Keeping Unit - this is a unique identifier for the product valid for all stores and websites
- Weight - the weight of the product; this is used for shipping cost calculations
- Set Product as New from Date - the date from which the product can be promoted as new on your store
- Set Product as New to Date - the date after which the product will no longer be promoted as new
- Status - to display the product on your store's frontend, this has to be set to Enabled; if it is set to Disabled, the product will not be shown on the frontend
- URL key - allows you to override the automatically-generated product URL; Magento automatically generates a SEF (Search Engine Friendly) URL based on the product name; if you want to override that, simply type the URL you want your product to have; no spaces are allowed
- Visibility - where to show your product - in your Catalog, in Search results or in both; you also have the option to make the product not visible individually
- In feed - whether to show the product in your feeds or not
When you are ready with the product's general settings, click Save and Continue Edit to go to the next page - Prices:
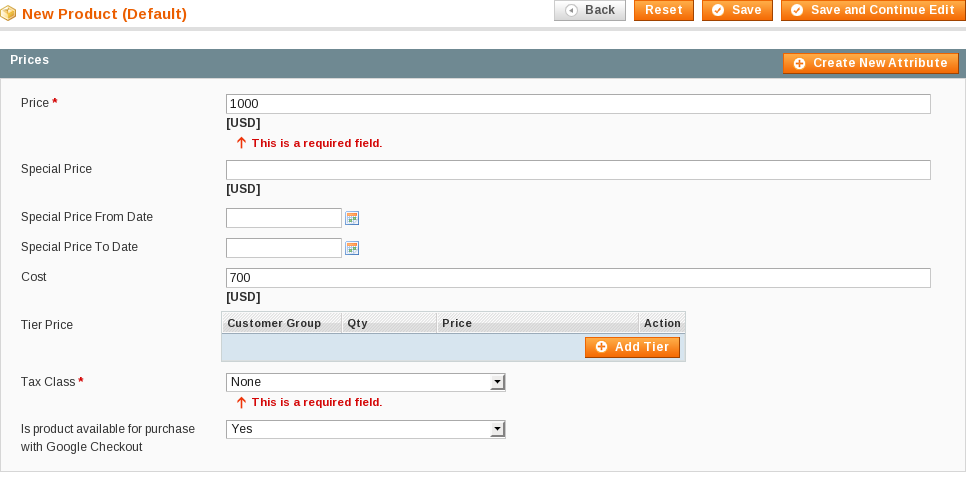
Here is a short explanation of each of the fields:
- Price - the product's price
- Special Price - a special price used for promotions
- Special Price From Date - the start date for the special price promotion
- Special Price To Date - the end date for the special price promotion
- Cost - the price you pay for the product
- Tier Price - this allows you to offer discounts for higher quantities of the product; for example, you can set a promo where clients get a 5% discount if they purchase 3 or more products
- Tax Class - the tax class for the product; by default you can choose from None, Taxable Goods and Shipping; you can add your own tax classes from the Sales tab > Tax > Product Tax Classes
- Is product available for purchase with Google Checkout - if you use Google Checkout and you want to make this product available for purchase through it, set this to Yes
When you are ready with the pricing for your product, click the Save and Continue Edit button. At this point the product will be saved and you will be able to edit various settings for it from the menu on the left.
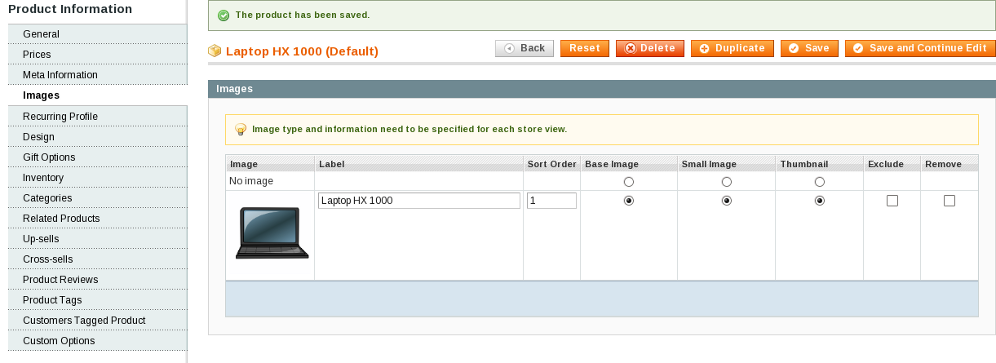
Let's add an image for our new product. To do this, click the Images option on the menu on the left. Then click the Browse File button and locate the product image on your computer. To upload it, click Upload File. Hover over the image box to see the image preview, fill in its Label and click Save and Continue Edit to save the image:
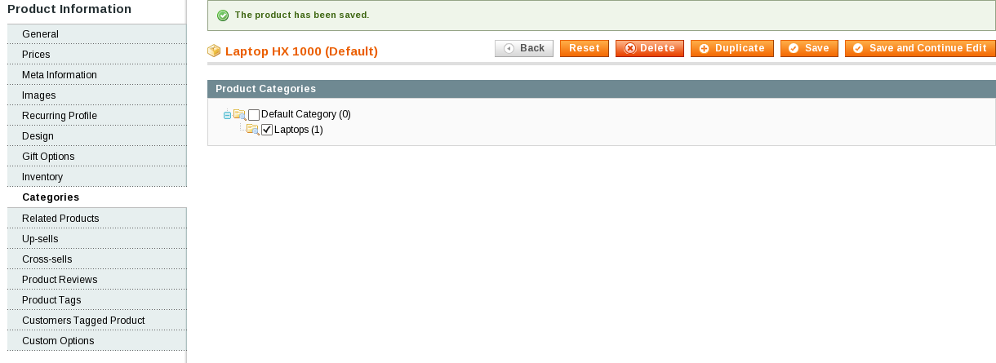
Now you need to choose a category for our product. This can be done from the Categories option on the left. Let's add the product to the Laptops category we created in the Magento categories tutorial. You should simply tick the category you want the product to appear in and then click Save and Continue Edit:
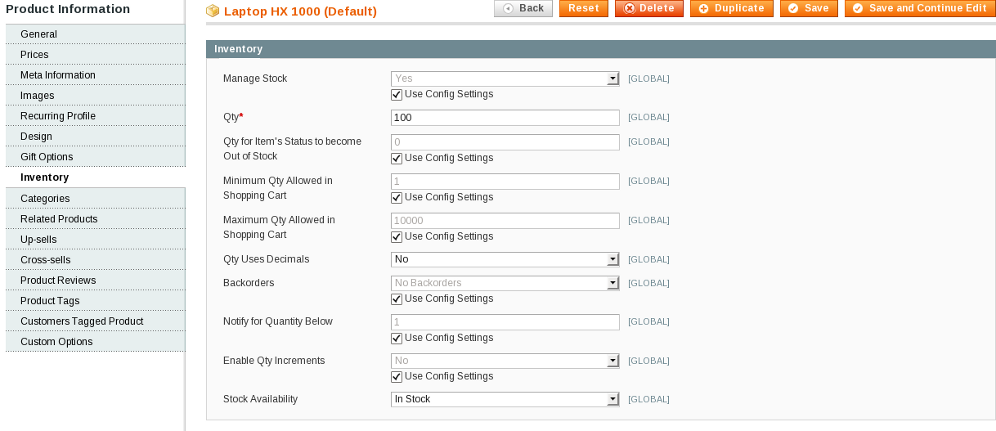
The last thing you need to do to make your product available on your frontend is to configure its >Inventory settings from the menu on the left. You need to set the product's quantity from the Qty field and set its Stock Availability to In Stock:
To save the product, click Save. At this point you may have noticed this notice on your dashboard:
One or more of the Cache Types are invalidated: Blocks HTML output. Click here to go to Cache Management and refresh cache types.
To make sure your Magento cache is properly refreshed to reflect the latest changes, you should follow the Cache Management link and refresh all cache types marked as INVALIDATED.
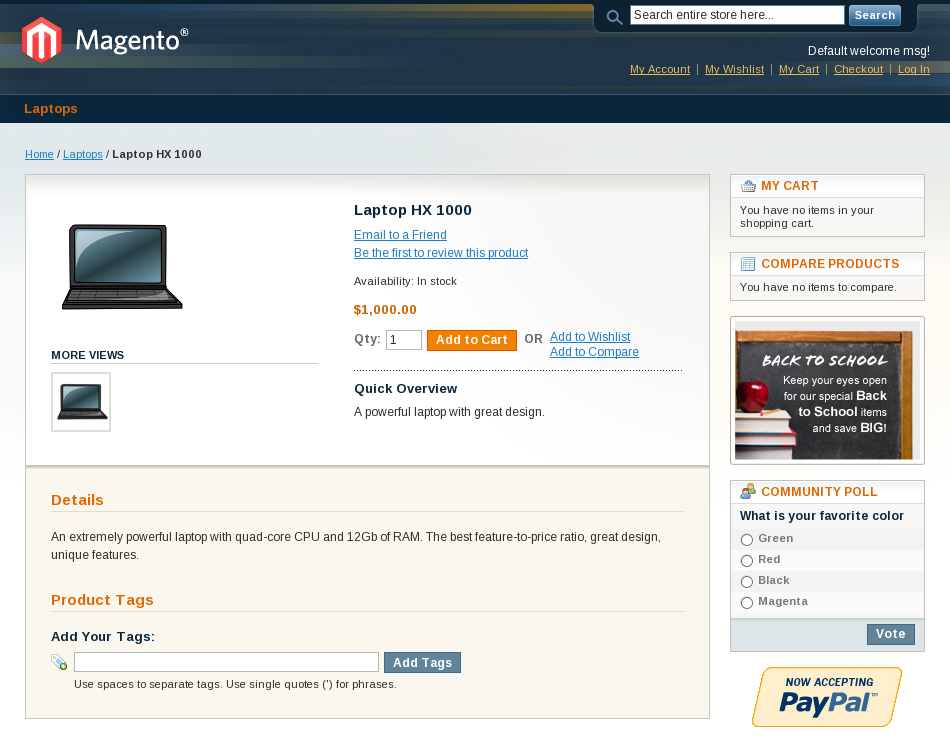
Finally, it is time to go to your store's frontend and see your new product: