Magento Attribute Sets Tutorial
How to configure and manage attribute sets in Magento
In Magento attribute sets are used to group product attributes. This is basically a collection of the product's properties. When you add a product you have to select the attribute set that you'll use to configure that product. By default, a Magento installation with no sample data installed has one preconfigured attribute set called Default, while an installation with sample data has around a dozen attribute sets. Depending on the products that you want to add to your store, you may need to use attributes that are not included by default.
The first thing that you have to do in this case is to create the attributes themselves. For more information on how to do it check out the tutorial on how to configure and manage attributes in Magento.
Once you have the attributes that you need you have to include them in an attribute set. That's the subject of this tutorial. After you log in to the admin panel of your Magento go to the Catalog menu in the top navigation bar, then to Attributes and click on Manage Attribute Sets. On the page that opens you'll see a table with the existing attribute sets:
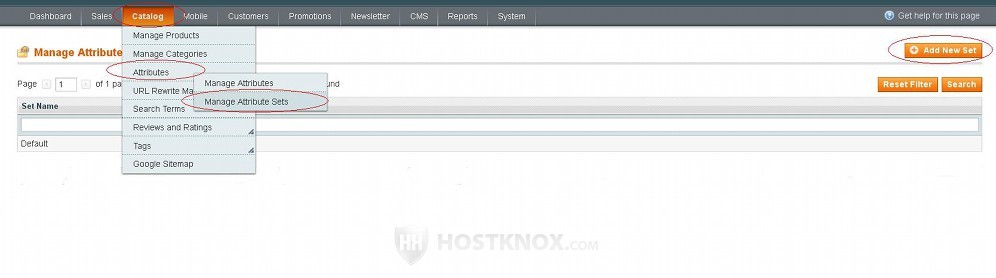
In our example there's just the default set. To edit a set click on its row in the table and to add a new attribute set click on the Add New Set button that's above the top right corner of the table. When you edit a set this will bring you directly to the page on which you can add and remove attributes. In case you add a new set first you'll have to type its name and choose an existing set to base it on.
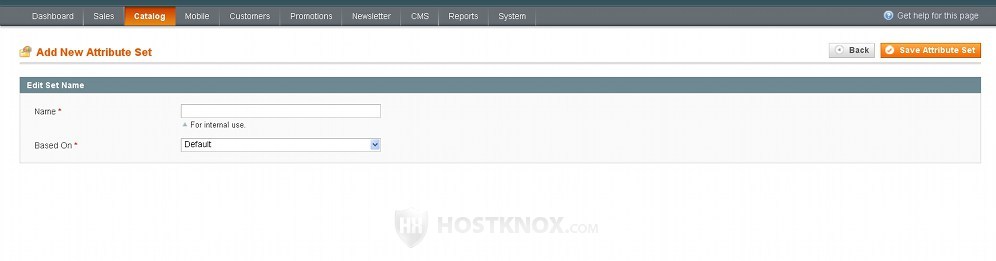
For example, let's say that you want to add shirts as products in your store. You want to include color and size as attributes to all shirts that you add. So you've created the necessary attributes and now you click on the Add New Set button to add a new attribute set that you'll use when adding the products. On the page that opens after you click on the button you have to type a name for the set (e.g. shirts) in the respective field and select a set which will be used as a base for the new one:
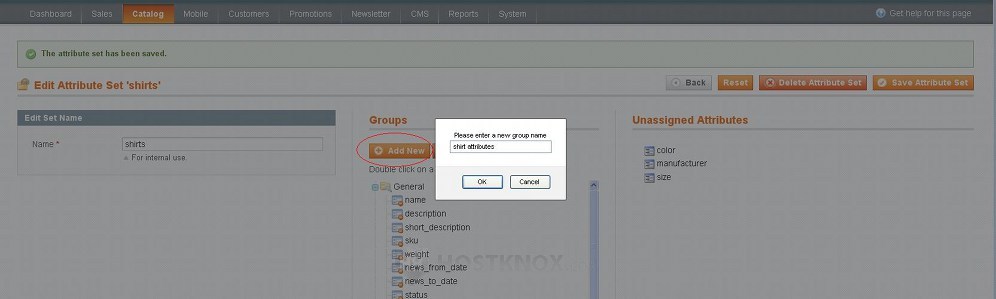
After that click on the Save Attribute Set button. This will display a page with three columns. In the first one you can edit the name of the attribute set, the second one contains the attributes that are assigned to the set which you chose for base, and the last column contains the existing attributes that are not assigned to the set:

The assigned attributes are in groups (e.g. General, Prices, Meta Information, etc.). This is how the attributes appear when you add/edit products. Each group corresponds to a button on the left side of the admin panel on the product add/edit page. For example, when you add/edit a product and you click on the General button on the left, all attributes that are in the General group will be displayed (e.g. name, description, sku, etc.).
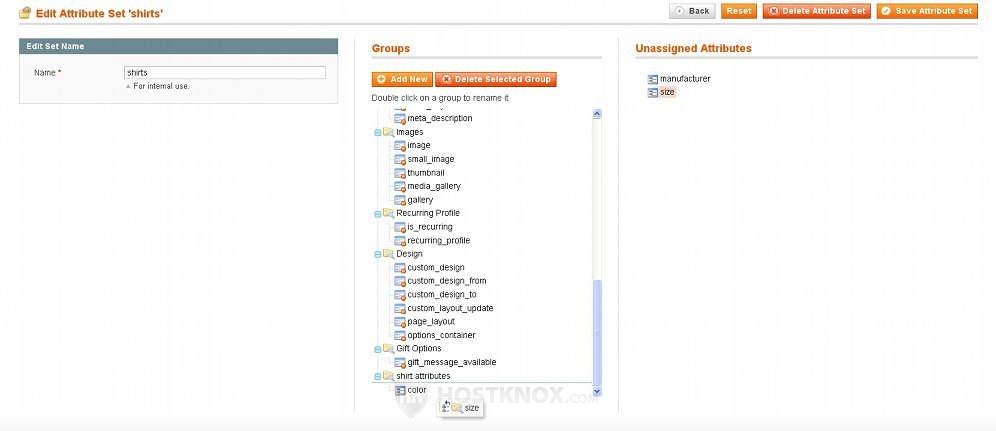
To add an unassigned attribute to the set click with the left mouse button on the attribute (e.g. color), hold the mouse button, and drag and drop the attribute in one of the groups in the desired position within the group. To remove an attribute from the set, drag and drop it from the Groups column to the Unassigned Attributes column. However, you should be careful when removing attributes from a set that you have used to add products and display them on the frontend.
You don't have to add the attributes to any of the existing groups in the set. You can create a new group and add the attributes there. To do this just click on the Add New button that's in the Groups column and then drag and drop the attributes in that group.
For instance, using the above example let's say that you want to add the color and size attributes to the shirt attribute set in a group labeled shirt attributes. So click on the Add New button that's above the attribute groups; a new window will pop out in which you can type the group's name:
The group will be added to the bottom of the list. You can change its position by dragging and dropping it in the desired spot. Then simply drag and drop the attributes from the unassigned column to the newly created group:
After you're done with the changes don't forget to click on the Save Attribute Set button in the upper right corner.
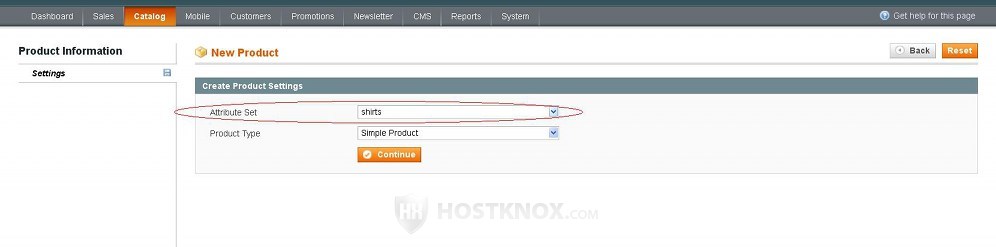
Now when you add products you can select the new attribute set:
Then you can use the buttons on the left to access the desired attribute group and configure its options:
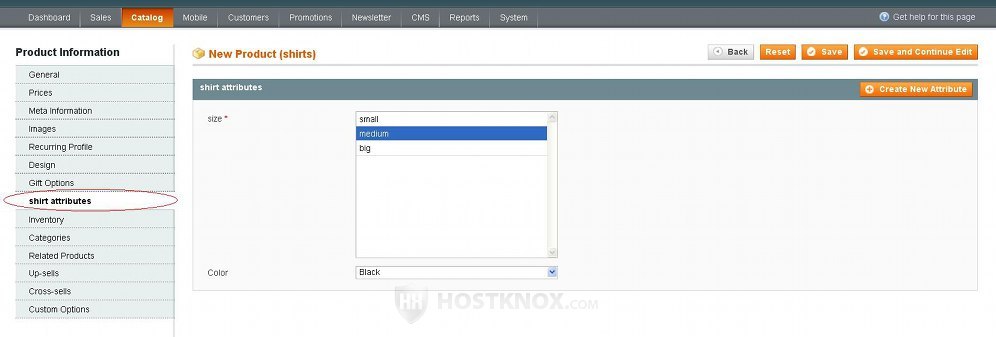
In the example we used these are the attributes that we added to a group labeled shirt attributes.
If you need more information on adding products check out the tutorial on how to add and configure products in Magento.