PrestaShop 1.5/1.6 Image Maps Tutorial
How to create and manage image maps in PrestaShop 1.5
In this tutorial we'll show you how to add and manage category image maps. Image maps are pictures that are displayed on category pages on the frontend. What makes an image map different than a regular category image is that it contains links to products. You can mark an area of the picture to be a link to a particular product. When a visitor hovers the mouse pointer over that area of the picture a window with the name, price, description and thumbnail image of the product appears. If the visitor clicks on the link, they will be redirected to the product page of that particular product. Of course, you can upload and display on the frontend an ordinary category picture that doesn't contain any links. This can be done when adding/editing the category in the admin panel. Image maps, however, are a cool way to put links to some of your products.
We'll show you:
- how to add new image maps
- how to edit existing image maps
- how to delete image maps
- how to disable and enable image maps
Add Image Maps
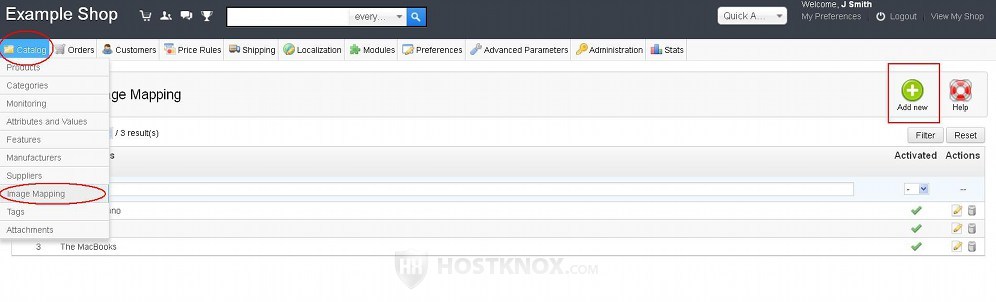
To add an image map, log into the admin panel of your PrestaShop and go to Catalog menu>Image Mapping sub-menu. On the page that opens you'll see a table with the existing image maps. PrestaShop comes with a few example ones. To add an image map click on the Add New button in the top right corner:
This will open the form for adding image maps:
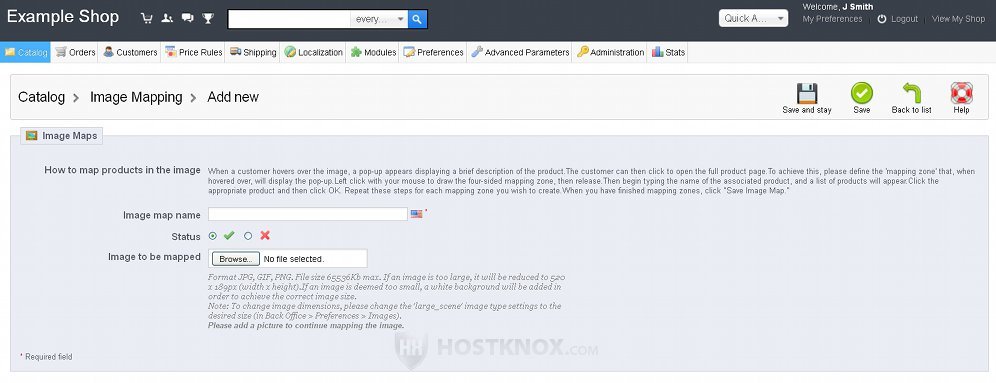
The following settings are available on the page:
- Image map name - type a name for the image map. It doesn't have to be the same name as the category to which you're going to assign the image, but it might help to use a name that will remind you with which category and products the image is associated.
- Status - by default, this option is enabled, meaning the radio button for the green check mark is marked. This means that once you assign the image to a category (or categories) it will be visible on the frontend. If you want to deactivate the image and hide it from the frontend, mark the radio button for the red X symbol.
- Image to be mapped - with this option you can select the actual image that's to be uploaded. Click on the Browse button and use the window that pops out to locate the image on your local computer. After you do that you'll see the name of the image in the text field next to the Browse button. At this point the image is still not uploaded on your hosting account. This will happen after you click on one of the two buttons for saving the options. PrestaShop will upload the original image and a resized copy with the dimensions 520 x 189 pixels will be created. The resized copy will be the one displayed on category pages on the frontend. For better results in terms of how the resized image will look it's a good idea to crop and/or resize the original image to the default dimensions and then select and upload it.
The images for the image maps are store in /img/scenes in the root PrestaShop folder on your hosting account. So, for example, if you PrestaShop is installed directly in the public_html directory on your PrestaShop hosting account, the path to the folder on the account will be public_html/img/scenes.
After you type a name for the image and you locate the image that you want to upload click on the Save and stay button:
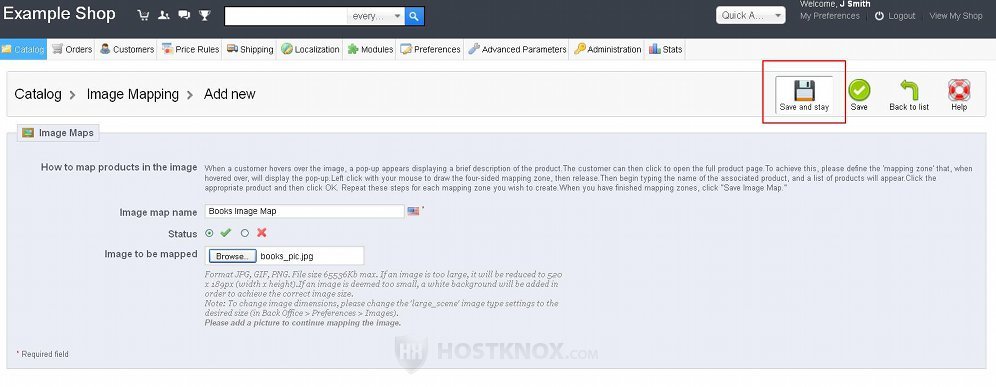
You can click on the Save button instead but this will bring you back to the page that lists the existing image maps, and you'll have to go back and edit the image and configure some more options to turn it into an image map and assign it to a category. By clicking on the Save and stay button you'll save the image and you'll be left on the same page so that you can configure the additional options that appear after the image is saved.
When you save the image it will be uploaded on your hosting account and some more options will appear. You can use them to associate the image with one or more categories and to turn it from a regular image to an image map. On the edit form you'll see displayed the actual image:

The new options are:
- Categories - this is a list of the categories you have created. Mark the checkbox(es) of the category or categories with which you want to associated the image map. It will be shown on the category page of each of the marked categories. If you don't mark any category, the image will not be shown on the frontend.
- Alternative thumbnail - by default, a resized copy of the original image is used as a thumbnail. If you want to use another image as a thumbnail, click on the Browse button and use the window that pops out to find the image on your local computer.
Now let's continue with making the image and image map. To do this, first you have to select the area on the image that you want to be a link to a product. In order to do this click and hold the left mouse button, then drag the mouse cursor on the picture and mark the area that you want to be a link, and release the left mouse button. The marked area will be slightly brighter than the rest of the picture and a text field will appear under the image:
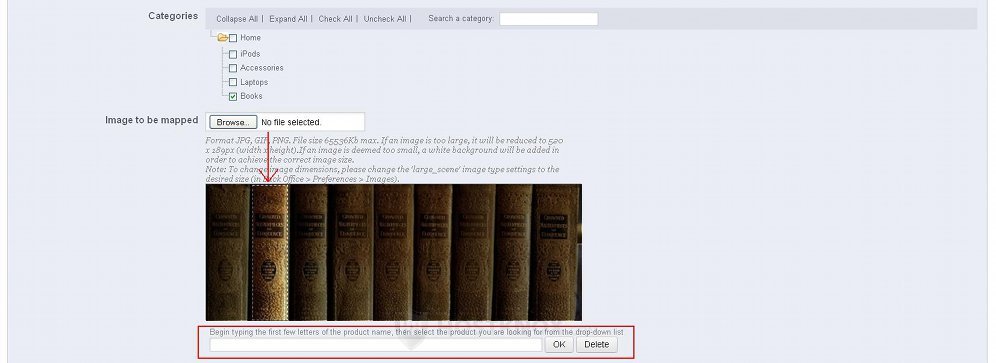
In the text field begin typing the name of the product to which you want the link to point. A drop-down menu will appear from which you can select the product. Alternatively, just finish typing the name and click on the OK button. In any case after you select the product the link will be added. It can be a link to any product; it doesn't have to be a product in the category with which the image map is associated. The marked area on the picture will become white and two buttons will appear: one for editing and another for deleting. To add another link, mark another area of the picture and repeat the procedure.
For each marked area there will be a button that looks like a pencil; it's for changing the product to which the link points. When you click on it the text field for selecting a product will appear under the picture. The other button is for removing the link from the picture; it looks like a trash can:
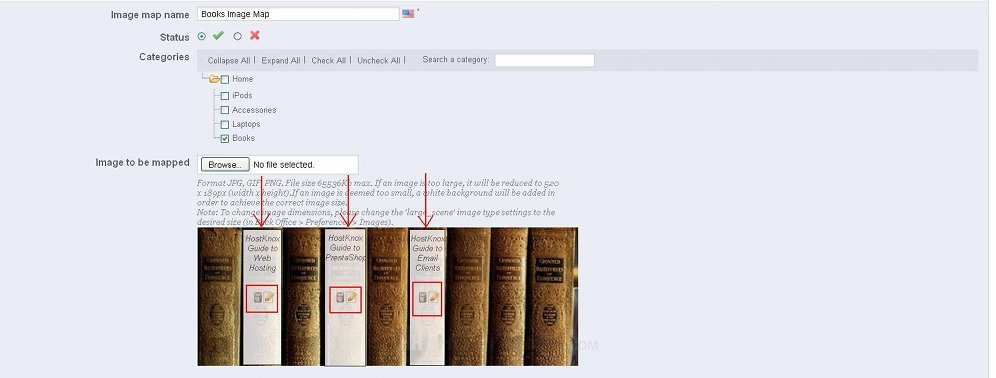
In the white marked area on the picture you'll also see the name of the product that's currently linked to that area.
In our example we've uploaded a picture of books which we'll associate with a category for books. We've linked areas on the picture to separate books that are added as products to the category.
After you're done don't forget to click on the Save or on the Save and stay button in the upper right corner of the page. When you do this the image map will be added to the category and shown at the top of the category page on the frontend. Each area of the picture that's a link is indicated on the frontend with a plus symbol. When a customer hovers the mouse pointer over a mapped area of the picture a small window will appear showing the name, price, short description and thumbnail image of the product:
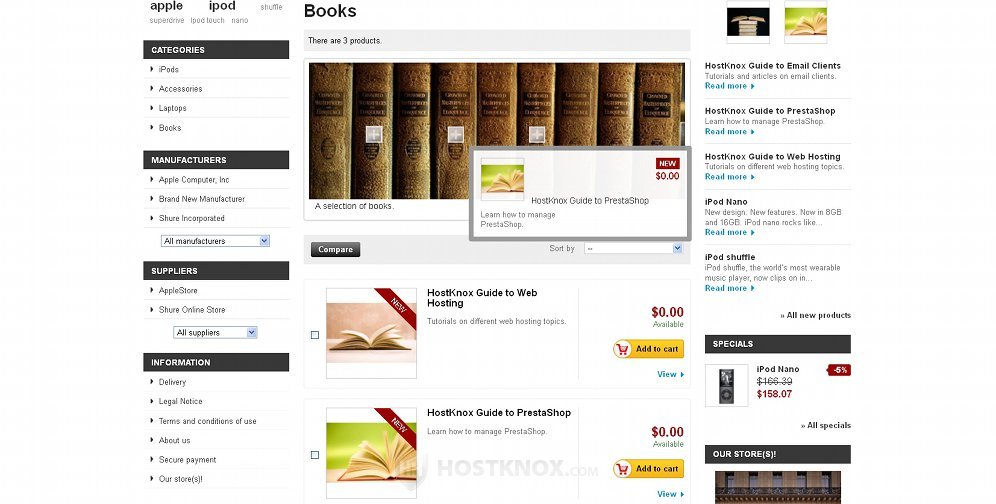
If the customer clicks on the area on the picture that's marked with a plus sign, the product page of the particular product will open.
Note that if you have uploaded a regular image for the category (from Catalog menu>Categories sub-menu) and you associate an image map with that same category, the image map will be shown on the frontend instead of the category image.
You can add more than one image map to a category. In this case on the category page on the frontend one of the images will be displayed as a default one and under it there will be scroll bar with which the other image maps can be viewed.
Edit Image Maps
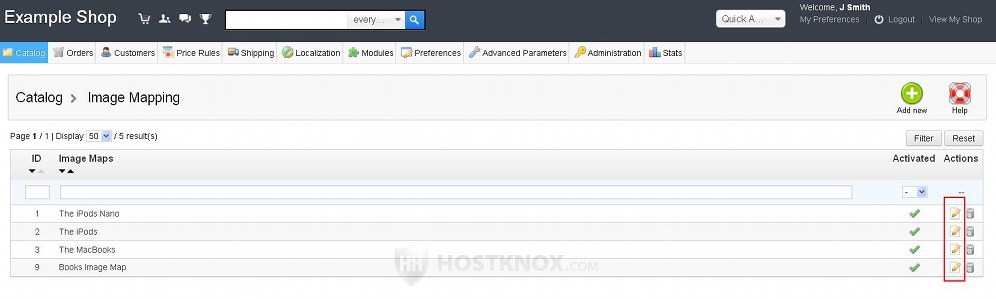
To edit an existing image map, in the admin panel go to Catalog menu>Image Mapping sub-menu. On the page that opens you'll see a table with the image maps. To edit an image map, click on its edit button; it looks like a small pencil:
This will open the edit form with all the settings for the image map. We already discussed the settings in the section on how to add image maps.
Delete Image Maps
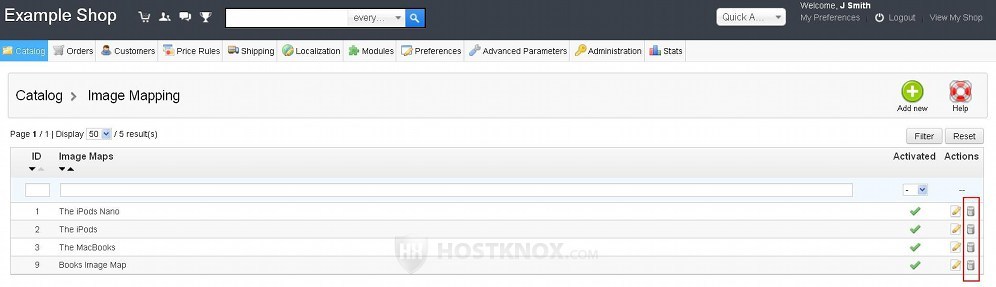
To delete image maps, go to Catalog menu>Image Mapping sub-menu in the admin panel. Then in the table that lists the image maps click on the delete button for the particular image. The delete buttons are in the last column in the table and look like trash bins:
After you click on the button a small window will pop out asking you for confirmation that you really want to delete the image map.
Disable and Enable Image Maps
When you add an image map it's active by default. This means that if the image is associated with a category then it will be visible on the frontend. If you don't want to delete the image but you don't want it to be visible on the frontend, then you can deactivate it. To do this, go to Catalog menu>Image Mapping sub-menu in the PrestaShop admin panel. In the table with the existing image maps there's a column labeled Activated. It shows whether an image is activated or deactivated:

If the image is enabled/activated, this will be indicated with a green check mark. To deactivate/disable it, click on that mark and it will turn into a red X sign. To enable it again, just click on the X sign and it will turn into a green check mark.
You can also activate/deactivate an image map by going to its edit form and configuring the Status option:
