PrestaShop 1.5/1.6 Module Positions Tutorial
How to manage module positions in PrestaShop 1.5-1.6
Each of the modules that's shown on the frontend is added to one or more positions. This determines where on the frontend the particular module is displayed. Positions in PrestaShop are also referred to as hooks. A module can be attached to one or more hooks. Whether a module can be added to a position depends on the particular module, on the positions in which you want to put it and on the theme. In addition to adding and removing modules to and from different positions, you can also change the order of modules within a hook/position. While some hooks are associated with a particular action, others define a space on the frontend where the modules will appear (e.g. left column, header, etc.).
Module positions are manage from the admin panel of your PrestaShop. There is also a useful tool with which you can change module positions by rearranging them directly on the frontend.
In this tutorial we'll show you:
- how to change the order of modules within a position
- how to add a module to a position (transplanting modules)
- how to edit the position settings of a module
- how to remove modules from positions
- how to use the LiveEdit tool to rearrange and remove modules
- links to other of our tutorials and articles related to modules
In this tutorial we've used as a basic example PrestaShop 1.6. The screenshots are also from that PrestaShop version. Although the design of the admin panel is different than that of PrestaShop 1.5, module positions are managed in the same way in both versions. If there are some differences we'll make notes about that in the tutorial.
Rearrange the Order of Modules Within Positions
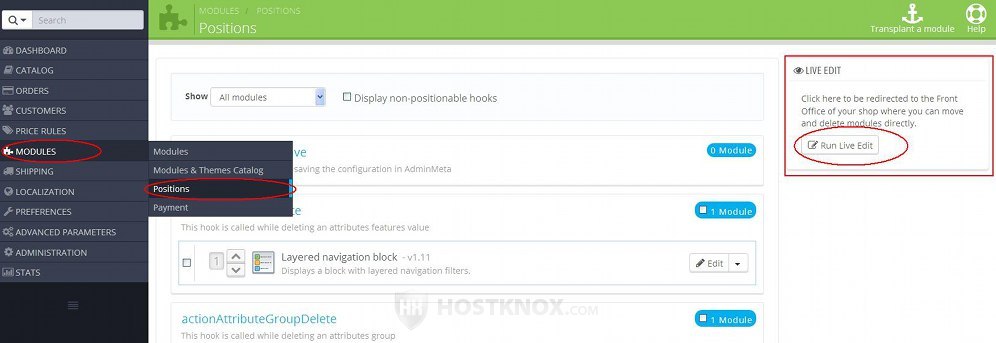
To manage anything related to module positions, log into the admin panel of your PrestaShop and go to Modules menu>Positions sub-menu. On the page that opens you'll see many blocks. Each represents a position/hook and lists the modules (if any) attached to that hook:
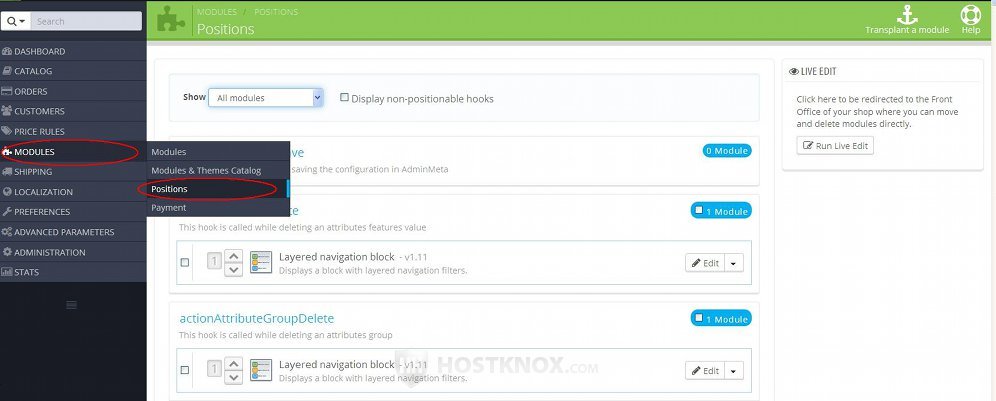
Each hook is presented with a title and under it you'll see a short description of what the hook is for. If you want to find faster all the positions to which a particular module is attached, you can select that module from the Show drop-down menu that's above the positions.
The order in which modules are listed in the block corresponding to a particular hook is the order in which they are shown on the frontend. For example, the first module listed for the hook displayLeftColumn appears at the top of the left column on the frontend. If you don't want it to be at the top, but to be under another module, you'll have to change its position.
To change the position of a module within a hook, first scroll to the particular hook (e.g. displayFooter). There are a couple of ways you can reorder the modules in the hook. One is to use the up and down arrows that are in front of the names of the modules:
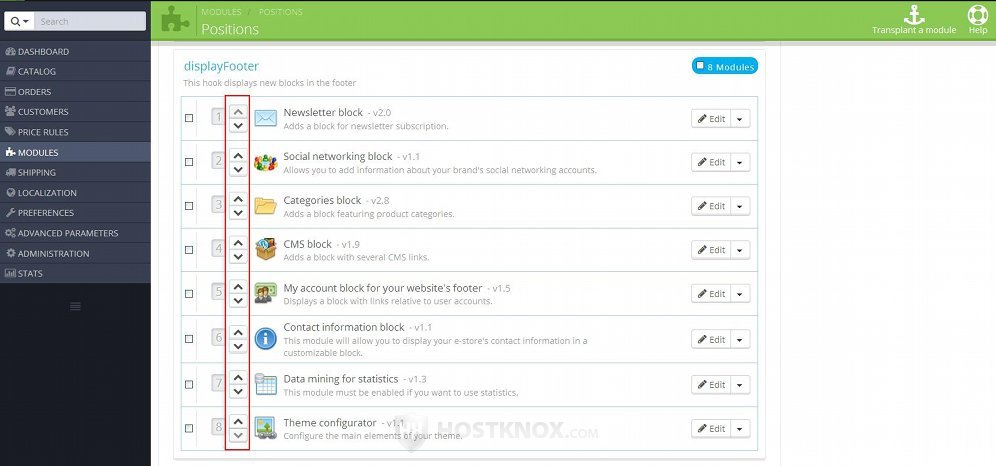
Clicking on an arrow will respectively move the module up or down the list and this will be reflected on the frontend.
If you want to move a module more quickly with more than one position within the same hook, hover the mouse pointer just in front of the up and down arrows until the pointer turns into a four-arrow cursor. Then click and hold the left mouse button, using the mouse drag the module to the desired position (it will turn into a gray area) and release the left mouse button:
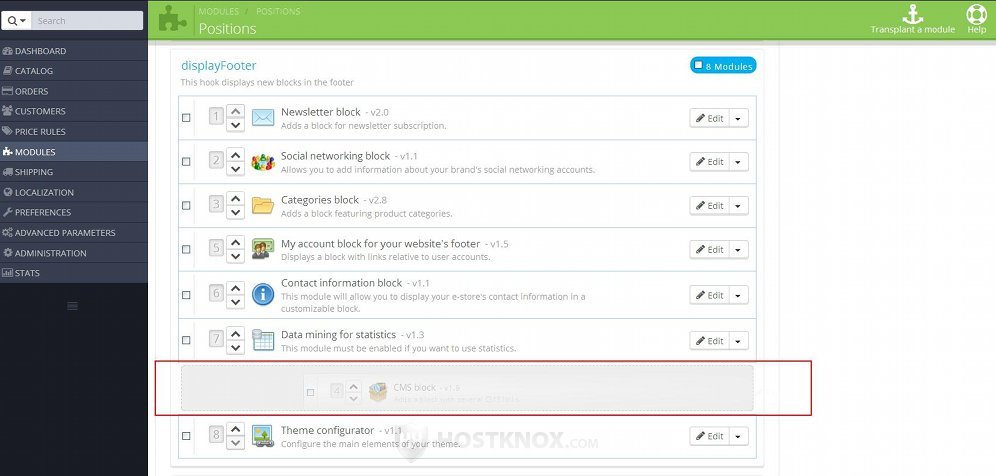
After you drop the module in the position, PrestaShop will automatically update the change and it will be reflected on the frontend.
Note that these two methods can be used only to reorder the positions of modules within the same hook. You can't drag and drop a module to a different hook. If you want a module to be attached to a hook to which it's currently not attached, you have to transplant it (add it to that hook). For more information check the next section of this tutorial.
Transplant Modules
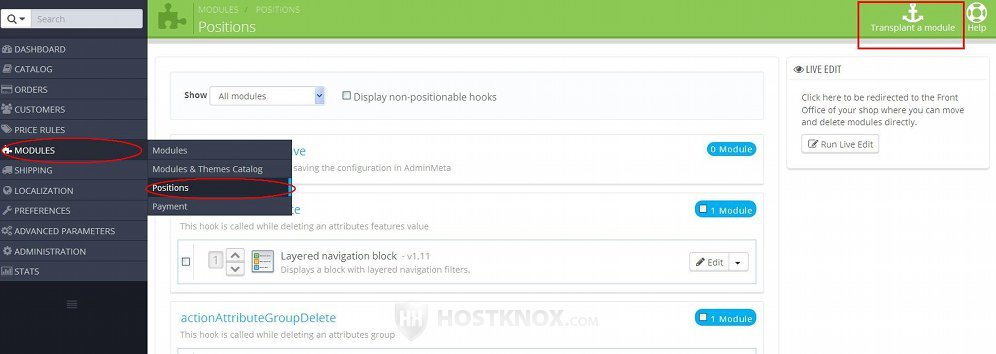
To transplant a module means to add it to a hook/position. To do this, go to Modules menu>Positions sub-menu in the admin panel and on the page that opens click on the button Transplant a module:
This will open a new page with a few options:
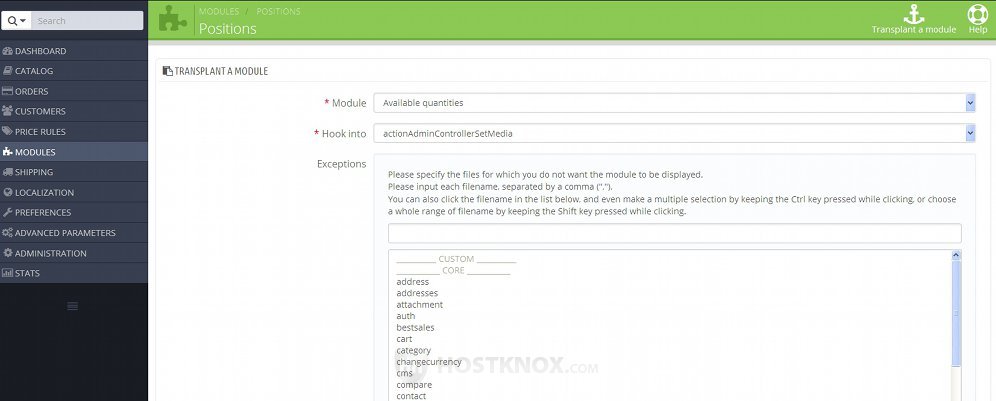
The options are:
- Module - from this drop-down menu you can select the module that you want to add.
- Hook into - from this drop-down menu select the hook to which you want to attach the module.
- Exceptions - this is an optional setting that you're not required to configure. It's, however, a very useful one; with it you can choose to exclude the module from some of the frontend pages. There's a list with the pages. To select one just click on it. You can select more than one; to do this, press and hold the Ctrl button on your keyboard and click with the left mouse button on the names of the pages. If you click on a selected page it will be unmarked.
So, for example, if you mark category and manufacturer, the module will not be shown on category pages, as well as on the page that lists the product manufacturers (e.g. yourdomain.com/manufacturers).
After you're done with the options click on the Save button.
Edit the Settings of a Transplanted Module
For each module that's transplanted to a particular hook you can edit the Exceptions option. To do this, go to Modules menu>Positions sub-menu, scroll down the page to the particular hook and click on the Edit button for the module:
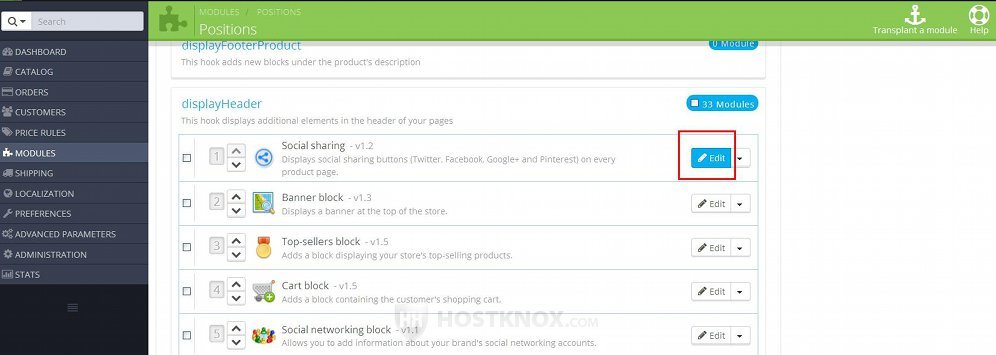
In PrestaShop 1.5 the button is not labeled; it's an icon that looks like a pencil.
This will open a page with the same options as when transplanting a module. The only option, however, that you can edit is the one for excluding the module from particular pages:
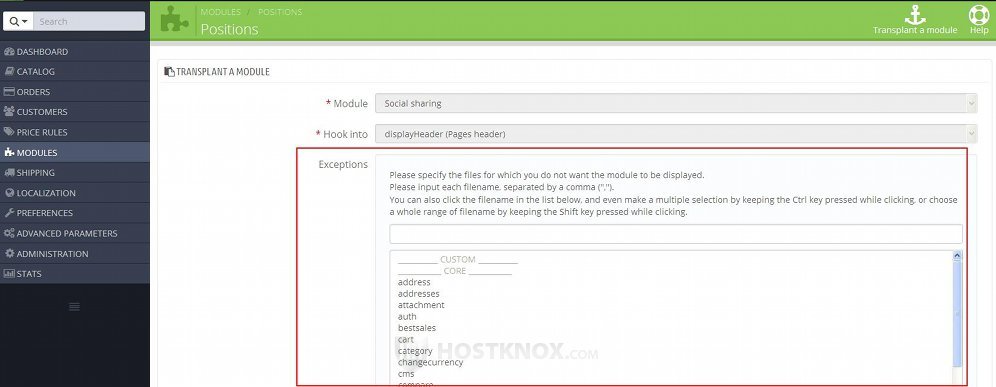
For more information on this particular setting check the previous section of this tutorial. You can't edit the other two options. By editing a transplanted module you cannot attach it to a different hook. To do this, you have to specifically add it to that hook (e.g. go to Modules menu>Positions sub-menu and click on the Transplant a module button).
After you edit the options don't forget to click on the Save button.
Remove Modules from Positions
To remove a module from a hook, go to Modules menu>Positions sub-menu, scroll down to the particular hook, click on the arrow that's next to the Edit button for the module and from the drop-down menu that appears select Unhook:
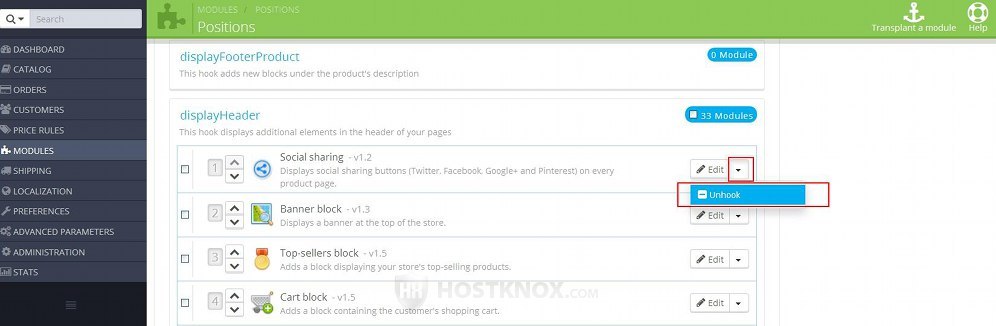
In PrestaShop 1.5 there's no such drop-down menu, instead the button for unhooking is an icon that looks like a trash can.
Use LiveEdit to Rearrange and Unhook Modules
PrestaShop has a tool with which you can rearrange the modules that are already attached to a hook or you can remove attached modules directly from the frontend of your site. With this tool, however, you cannot add/transplant modules to hooks.
To launch the LiveEdit tool, go to Modules menu>Positions sub-menu in the admin panel. On the page that opens you'll see a small block labeled LiveEdit; click on the button Run LiveEdit that's in the block:
This will automatically open a new browser tab with the frontend of your site. Each module that you can move will be marked with red lines. In the top right corner of each of these blocks there will be two buttons. One looks like four green arrows pointing in different directions and the other looks like a trash can. To move a module, hover the mouse pointer over the button with the green arrows, press and hold the left mouse button, drag the module to the position and release the mouse button. If you can drop a module in a particular spot, the space will be marked with green:
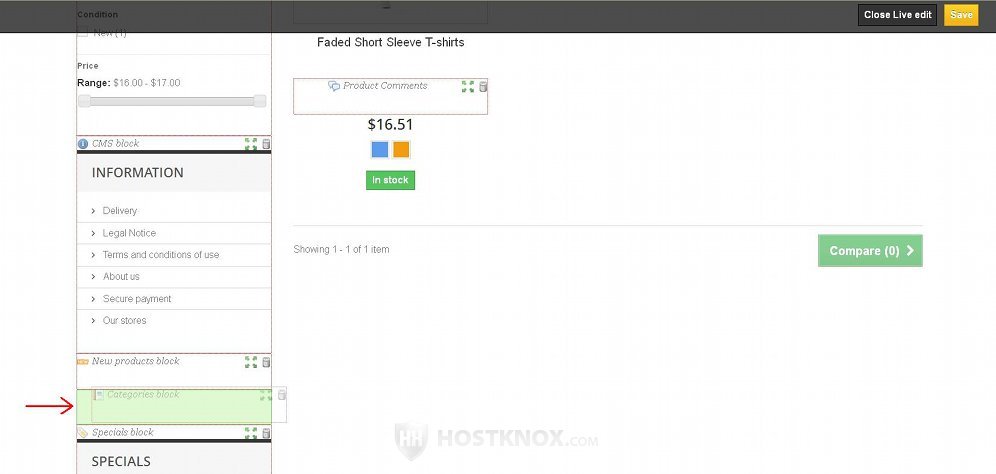
To save the change, click on the Save button at the top of the page. To close the tool, click on the Close Live edit button:

Note that closing the tool without saving the changes will not keep any modifications that you've made to the positions of the modules.
Links to Tutorials and Articles on Managing Modules
You may find useful our other tutorials and articles related to managing modules: