PrestaShop 1.5/1.6 Exporting and Importing Data Tutorial
How to export and import categories, products, customers and other data in PrestaShop 1.5 and 1.6
In PrestaShop you can export and import categories, products, customers, addresses, manufacturers, suppliers, combinations and alias. This is useful if you want, for example, to export categories and products from one store and import them into another. You can export and import information from one PrestaShop instance to another, or you can also import information that has been exported from a store built with a web application other than PrestaShop. The export and import process is done with the help of CSV (comma-separated values) files.
In this tutorial we'll show you:
- how to export categories, products, customers, etc. from PrestaShop
- how to import categories, products, customers and other information into PrestaShop
- how to edit CSV files
- how to import pictures in PrestaShop
In this tutorial we've used as a basic example PrestaShop 1.6. The screenshots are also from that PrestaShop version. Although the design of the admin panel is different than that of PrestaShop 1.5 the options related to exporting and importing data are practically the same. If there are some differences we'll make notes about that in the tutorial.
Export Information from PrestaShop
You can export information from PrestaShop from the page in the admin panel from which you can manage that particular information. For example, to export the categories go to Catalog menu>Categories sub-menu in the admin panel and click on the Export button that's in the top right corner:
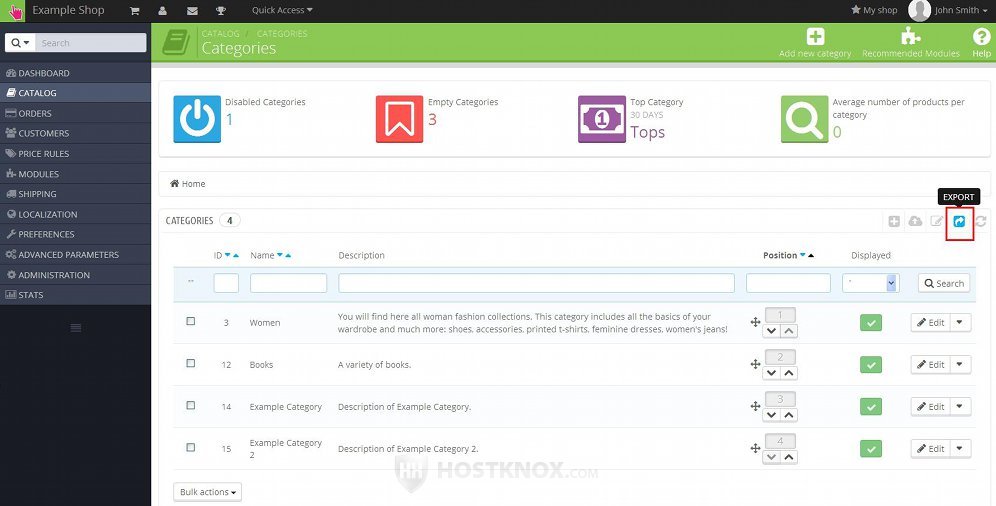
A small window will pop out with which you can save the categories into a CSV file on your local computer.
If you want to export your products, go to Catalog menu>Products sub-menu and use the Export button. In the same way if you want to export the customers, go to Customers menu>Customers sub-menu and use the Export button; for the addresses this will be Customers menu>Addresses sub-menu>Export button, etc.
Once you have the CSV file(s) with the exported information on your local computer you can import it into another PrestaShop instance or in the same one. If necessary you can edit the file before importing it.
Import Information in PrestaShop
Before you import anything in your PrestaShop we suggest that you make a backup of that shop, unless of course it's empty and you have nothing to lose.
You can import categories, products, customers, etc. in PrestaShop from the admin panel by importing a previously exported CSV file. This can be a CSV file exported from another or the same PrestaShop instance as shown in the section in this tutorial on how to export data, or it can be a CSV file exported from another web application. In case you exported it from another web application (e.g. Magento) you'll need to make some changes to the CSV file before importing it into PrestaShop. If the file was exported from PrestaShop there shouldn't be any problems when importing it since it will have the same fields.
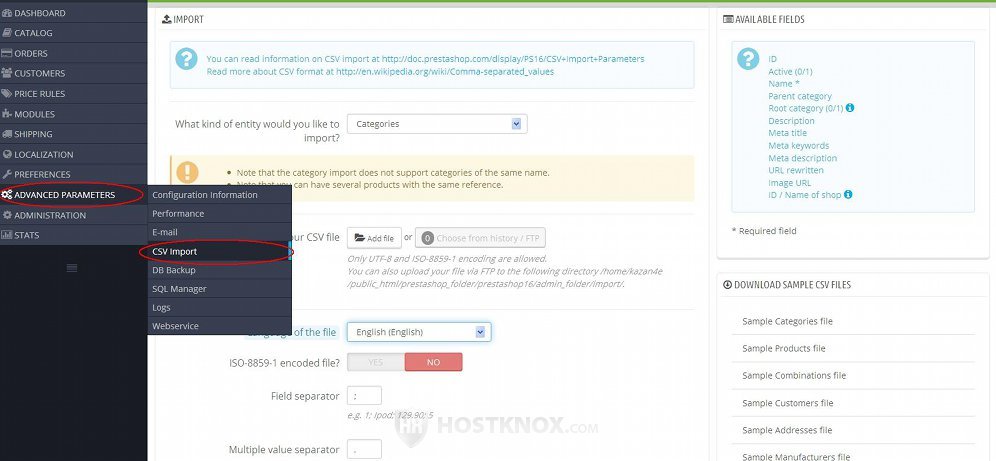
To import a CSV file regardless of whether it's for categories, products, customers, etc., log into the admin panel and go to Advanced Parameters menu>CSV Import sub-menu:
An alternative is to go to the page for managing whatever you want to import and click on the Import button there. For example, if you want to import categories, you can go to Catalog menu>Categories sub-menu and click on the Import button. This will automatically redirect you to the same CSV Import page in the admin panel, so it's just another way to access the same page.
On the CSV Import page there are some options. They are:
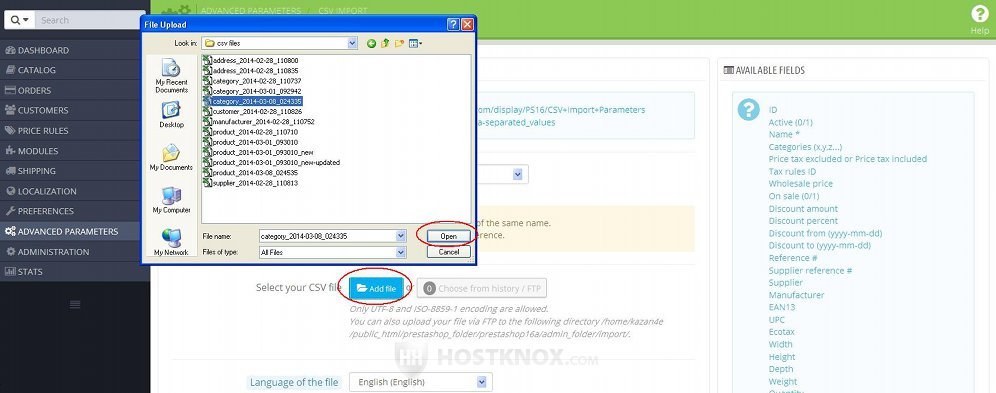
- Select your CSV file (in PrestaShop 1.5 this option is labeled Your CSV file) - from this option you can upload the CSV file that's about to be imported. This is the first thing that you have to do in order to be able to continue with the import. Just click on the Add file button (in PrestaShop 1.5 it's labeled Upload) and use the window that pops out to located the CSV file that you have previously exported on your local computer:
The file will be uploaded on your hosting account in the import folder which itself is in the admin folder of your PrestaShop. So, for example, if your PrestaShop is installed directly in the public_html folder on your PrestaShop hosting account and the name of the admin folder is admin4179, then CSV files will be uploaded in public_html/admin4179/import on your hosting account. So you can also upload CSV files in that folder from the Files section of the HostKnox control panel or with an FTP client (or via SSH). When you go to the CSV Import page in the admin panel you can choose which of the uploaded CSV files you want to import. To do this click on the button Choose from history:
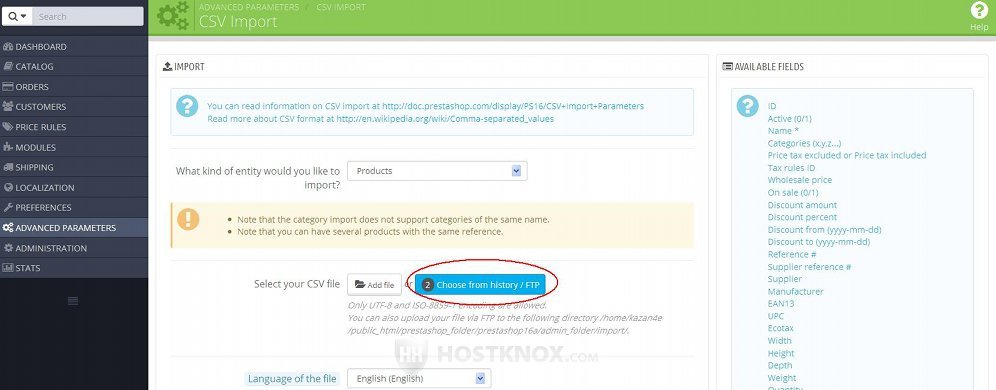
This will display a list of the CSV files that are in the import folder on your account. Click on the Use button for the file you want to import.
Note that in PrestaShop 1.5 there's no button Choose from history. Instead there's a drop-down menu from which you can choose one of the uploaded files.
Let's continue with the rest of the options on the CSV Import page:
- What kind of entity would you like to import? - from this drop-down menu you can select whether the CSV file that you're about to import contains categories, products, customers, address, etc. When you select an entity you'll see the fields for that entity in the area on the right:
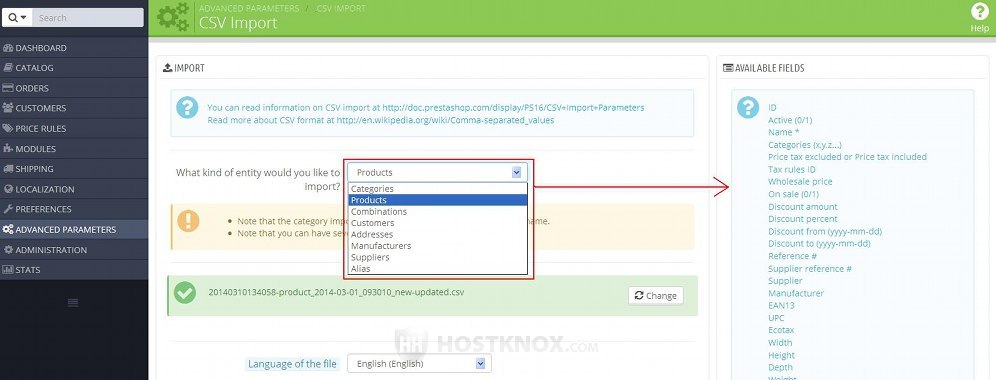
These are the available PrestaShop fields for the particular entity. The required fields are marked with an asterisk. The fields will be populated with the values from the CSV file. Of course, whether these fields are present in the CSV file depends on whether you exported it from a PrestaShop instance. For example, if you have exported the CSV file from an application different than PrestaShop, the fields in the CSV file will be different and they will be organized in a different order. In such a case you'll probably have to edit the CSV file before importing it. At the very least the CSV file should contain the required fields with values for those fields for each item (e.g. category, product, etc.) in the file.
If the CSV file is from a PrestaShop instance, there shouldn't be any problems. However, even when the CSV file has been exported from a PrestaShop most of the fields most likely will not be present in the CSV file. You can always edit and build the CSV file the way you want it but this may take a while, and it can be quite confusing for people who haven't done it before.
Let's go back to the other settings on the CSV Import page:
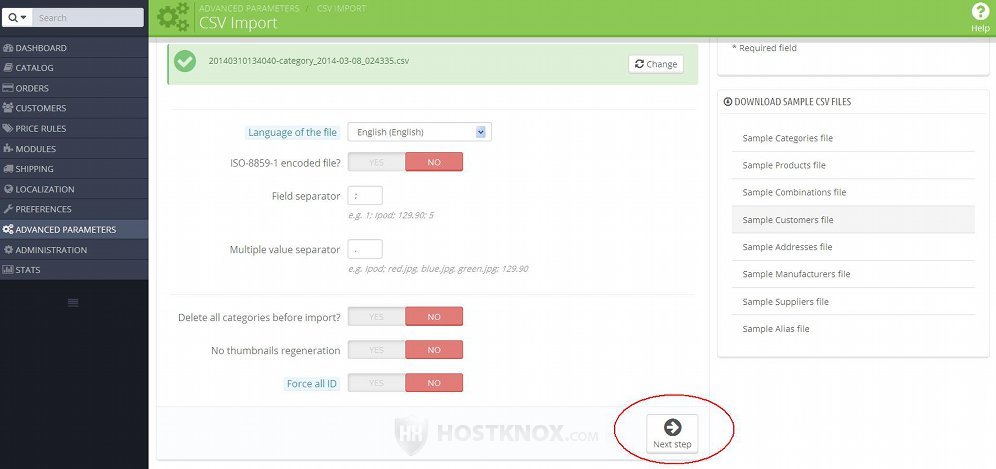
- Language of the file - from this drop-down menu you can select the language of the CSV file. For example, you can import a CSV file for any of the translations that you've installed in the PrestaShop store in which you're about to import the file. Keep in mind however that when you export a CSV file from PrestaShop the default store language is used. This means that the exported CSV file is in the default store language of the store from which you exported it. If you want to import a file for another language, you have to edit the CSV file before importing it and update the values. For instance, you can edit the file and translate all the names and/or descriptions of the categories or products, then before you import the file you can select the respective language from the drop-down menu Language of the file.
- ISO-8859-1 encoded file? - normally, the exported CSV files are in UTF-8 encoding. This is the encoding that's generally used by other applications as well. The other encoding that PrestaShop permits you to use with a CSV file is ISO-8859-1. If the file is in that encoding, you should enable this option. Most likely however the file that you're about to import is in UTF-8, so you should leave this option disabled.
- Field separator - usually the field separator in CSV files is a semicolon. So this option is set to a semicolon. You shouldn't change this option unless you're certain that the field separator of the CSV file that you're about to import is different. You can check this by opening the CSV file. For more information on how to view and edit CSV files check the section in this tutorial on how to edit CSV files.
- Multiple value separator - by default, this is a comma. That's usually what's used in CSV files to separate multiple values for a field. Don't change this unless you're sure that the multiple value separator in the file that you're going to import is different.
- Delete all ... before import - the dots stand for the entity that you're going to import (e.g. categories, products, customers, etc.). This option is disabled by default. This means that if, for example, you're importing categories, the existing categories in the store will not be removed; if you enable the option, the existing categories will be deleted.
- Force all ID's during import - by default, this setting is disabled which means that PrestaShop will assign its own ID's to the imported data. If you want to keep the original ID's, enable this option. We recommend that you leave it disabled.
- Use product reference as key - this option is available only when you're importing products. It's disabled by default which means that the product key that will be used is automatically selected by PrestaShop. If you want to force PrestaShop to use the product reference option as the product key, enable this option. In this case however there should be a value for the reference field for each product that's in the CSV file. It's very likely that this will not be the case, so it's preferable that you leave this option disabled.
After you're done with the settings click on the Next step button that's below them:
On the page that opens you'll see a table with the data that's about to be imported. You can use it to make sure that the headers of the CSV file that you're going to import match the headers required by PrestaShop.
At the top of the table there are some drop-down menus and under them you'll see listed the headers of the columns as they exist in the CSV file:
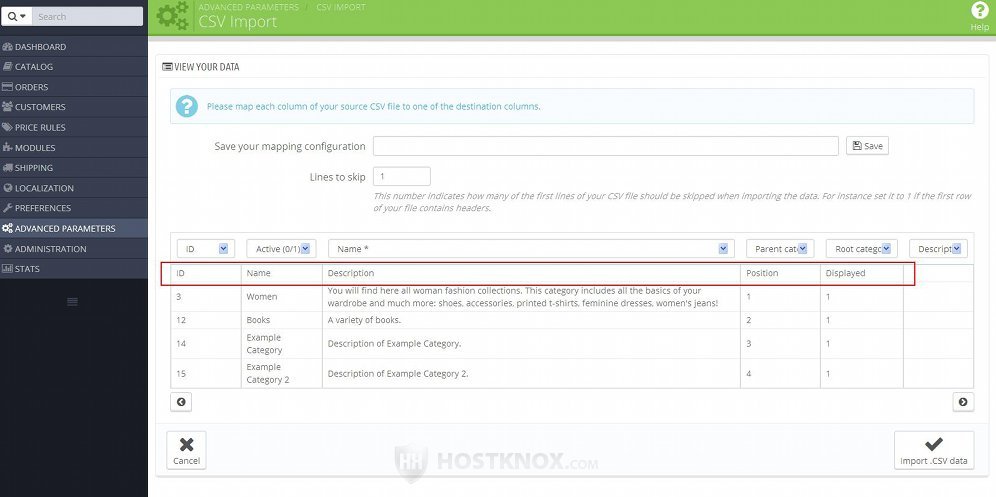
The drop-down menus show what header PrestaShop expects at each particular position of the table. So what you have to do is make sure that the headers in the drop-down menus match the actual headers of the CSV file. On our example screenshot some of the headers don't match the expected positions. So we have to configure the drop-down menus. For example, the first column is set to ID and it matches, so we don't have to change anything. In the second column however the header in the file is Name but the drop-down menu is set to Active (this stands for the Displayed option that determines whether the category is shown on the frontend). The third column also doesn't match. In the file it's Description while the expected position is for Name. So what we have to do is set the second drop-down menu to Name and the third to Description:
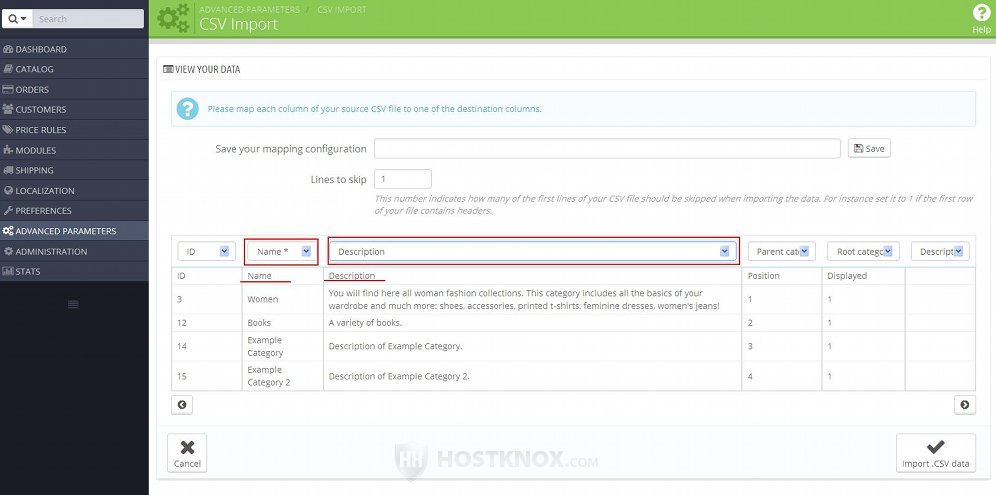
In our example the rest of the columns also don't match so we have to change the headers in the rest of the drop-down menus too. Each drop-down menu also has an option with which you can ignore the particular column so that it's not imported.
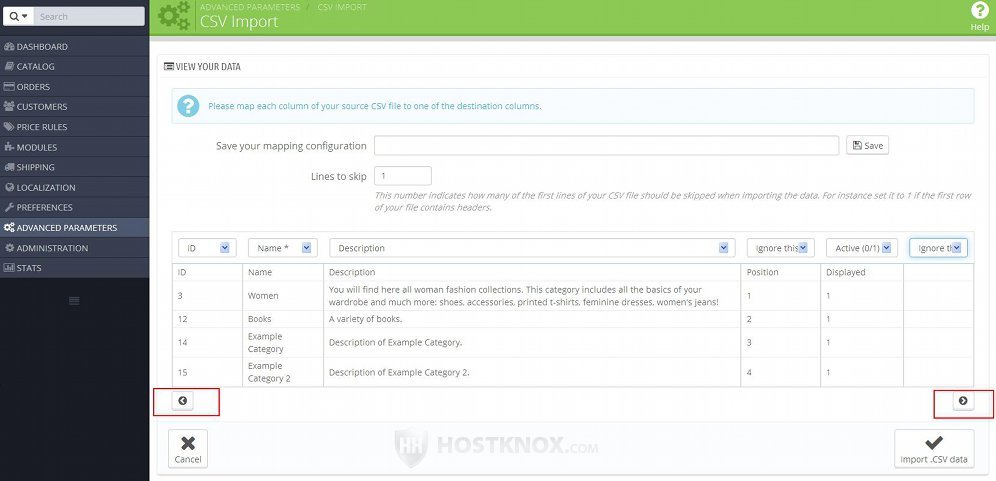
There may be more columns in the file that are currently not shown in the table. You can move back and forth so that you can see them by using the arrow buttons that are on the left and right sides of the table:
If you want to save this particular header arrangement of the drop-down menus so that you can use it when you import a CSV file with the same header configuration, you can do it by using the tool that's available on the same page. Type a name for the configuration in the text field that's above the table and click on the Save button that's next to it. Next time you import data a drop-down menu will be available from which you can select any of your saved header configurations:
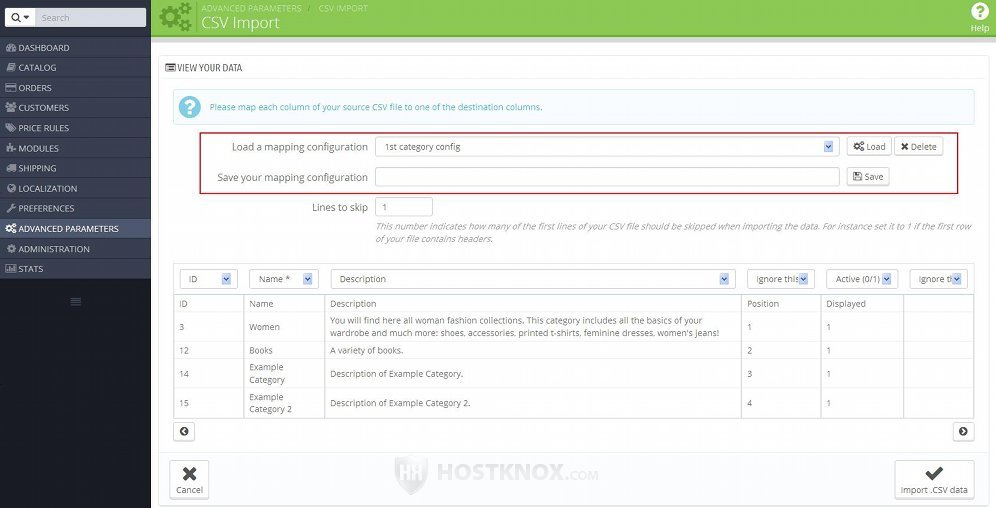
When you are about to import a CSV file that has its headers configured in the same way as one of your saved configurations and you don't want to waste time setting all the drop-down menus, just select the particular configuration from the drop-down menu and click on the Load button; the drop-down menus in the table will be set to the headers as arranged in the saved configuration.
When you're ready click on the Import CSV data button (in PrestaShop 1.5 it's in the upper right corner of the page):
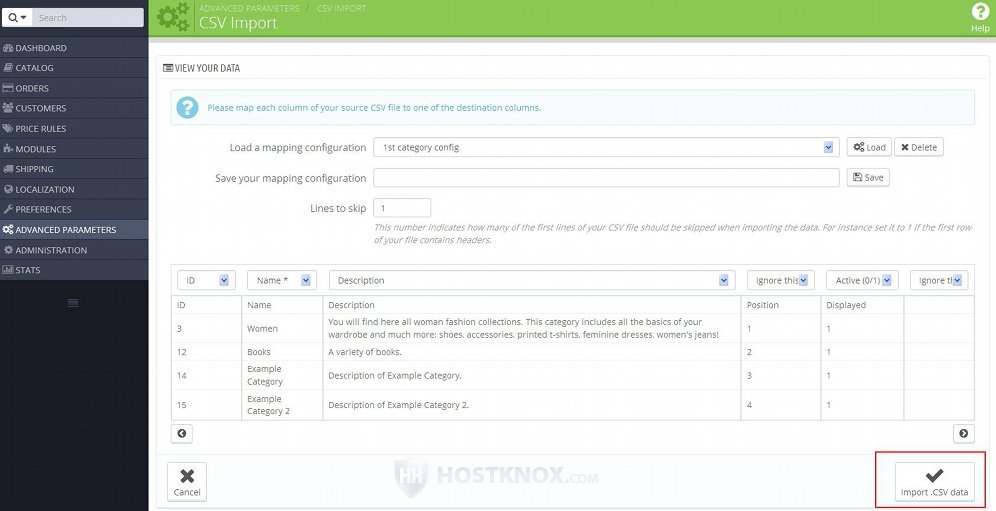
If you change your mind and don't want to import the file click on the Cancel button.
After the data from the file is imported you'll be brought back to the CSV Import page. If there was some problem with the import there will be a message(s) on red background. There might be some other non-critical warning messages which doesn't mean the import wasn't successful. Such messages are shown on brown background:
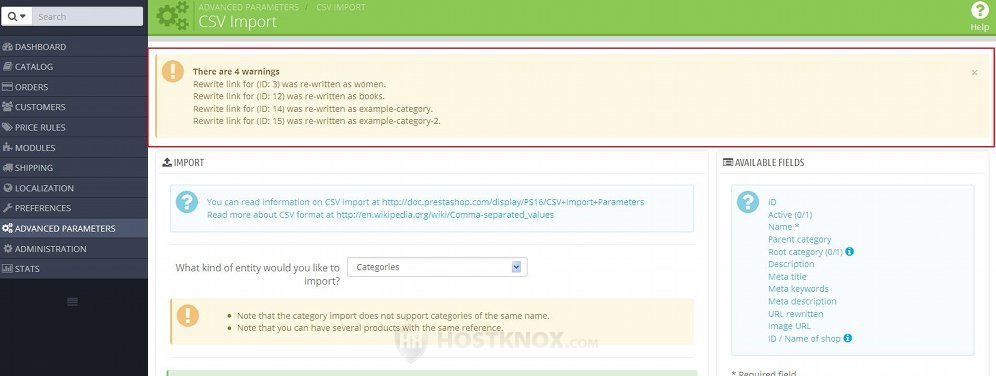
Keep in mind that images are not imported. For information on how to import images check the section in this tutorial on how to import images in PrestaShop.
Edit CSV Files
You can edit the exported CSV file(s) and make changes before importing it into a PrestaShop instance. You can edit CSV files with a text editor such as Wordpad, Notepad ++, etc. You can also use a spreadsheet application like Microsoft Excel or Open Office Spreadsheet.
When you open a CSV file with a text editor it looks like this:
Note that depending on the PrestaShop version from which you exported the CSV file, each of the values in the file may or may not be enclosed in double quotation marks. It will work either way.
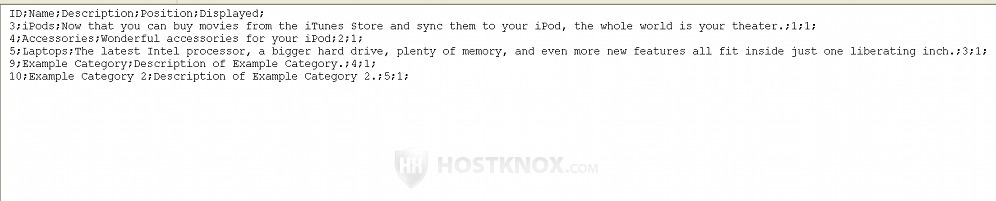
In our example it's a CSV file with exported categories. The first row is the one with the headers (no matter what type of data the file contains). It specifies the order in which the values are arranged in the rows that display the data for the categories. In our example the first row with the headers is:
ID;Name;Description;Position;Displayed;
The headers are separated with semicolons. The first one is for the ID of the category, the second one is for the Name, the third for the Description and so on.
Under the row with the headers each row holds the data for one category. The data is arranged according to the order established by the first header row. For example, the third row in our example file is:
4;Accessories;Wonderful accessories for your iPod;2;1;
This means that the ID of that category is 4; it's name is Accessories, it's description is Wonderful accessories for your iPod, the position is 2 and the Displayed option is set to 1. The values are separated with semicolons. If there is more than one value for a certain header they are usually separated with commas. Some options such as Displayed have one of two possible values: enabled and disabled. With such options in the CSV file 1 stands for enabled and 0 for disabled. If there are two semicolons next to each other without any value between them, this means that the particular item (e.g. category) has no value specified for the corresponding header. You can make changes to the headers and the corresponding values. You have to make sure however that the values are arranged in the same order as specified in the header row. Otherwise everything will get messed up. After you're done with the changes simply save the file.
Import Images in PrestaShop
When you export products from one PrestaShop instance and you import them in another PrestaShop instance the product images are not transferred. The same is true for categories. To import the images and make them appear in the new PrestaShop store (the one in which you import the products/categories) you have to do a couple of things:
- You have to transfer the pictures from the PrestaShop from which you want to export the products to the PrestaShop in which you want to import them.
- You have to edit the exported CSV file, change the data for the URLs of the images, and then import the edited CSV file.
You can transfer the images with an FTP client (e.g. FileZilla). To do this you need to download the images from the first PrestaShop instance to your local computer and then upload them from your local computer to the second PrestaShop instance (the one in which you want to import products). Assuming that the PrestaShop instance from which you exported the CSV file is installed directly in the public_html folder on your PrestaShop hosting account (meaning its frontend is accessible at yourdomain.com), then the path on the hosting account to the folder that contains the product images will be public_html/img/p. So download the p folder from the hosting account to your local computer. Then assuming that you have another hosting account with the second PrestaShop installed directly in the public_html folder you have to upload the p folder from your local computer to public_html/img on that other hosting account. With the same assumptions, if you want to transfer category images, the path to the PrestaShop folder containing them will be public_html/img/c.
In order for the images to be visible in the second PrestaShop you have to edit the CSV file with the product data before importing it. If you have imported it already, just edit the file, upload it on the account and import it again. In the CSV file you have to edit the URLs that link to the images. By default, when you export a CSV file with product information, the URLs to the images in the file are full URLs (e.g. http://yourdomain.com/img/p/2/7.jpg). The URL is, of course, that of the PrestaShop from which you exported the CSV file. What you need to do is to delete the part of the URL that's before /img and put two dots before the forward slash. So, for example, if the image URL is:
http://yourdomain.com/img/p/2/7.jpg
you need to change it to:
../img/p/2/7.jpg
You can edit the file with a text editor (e.g. Wordpad, Notepad). Don't forget when you save the file that it should have the extension .csv (e.g. product-data.csv). For more information on how to edit CSV files check the section in this tutorial on how to edit CSV files.