PrestaShop 1.5/1.6 Geographical Zones Tutorial
How to manage geographical zones in PrestaShop 1.5-1.6
PrestaShop comes preconfigured with several geographical zones. These zones correspond to the different continents, but there are some some differences. For example, Central America is a separate zone and Europe is divided into two zones: for countries in the European Union and for non-EU countries. If you want to, you can create a whole new set of zones.
These world subregions are used for grouping countries. From the settings of each country you can select to which zone the country should belong. You can enable, disable and delete zones; you can also edit their settings, and add new zones.
In this tutorial we'll show you:
In this tutorial we've used as a basic example PrestaShop 1.6. The screenshots are also from that PrestaShop version. Although the design of the admin panel is different than that of PrestaShop 1.5, geographical zones are managed in the same way in both versions. If there are some differences we'll make notes about that in the tutorial.
Add New Zones
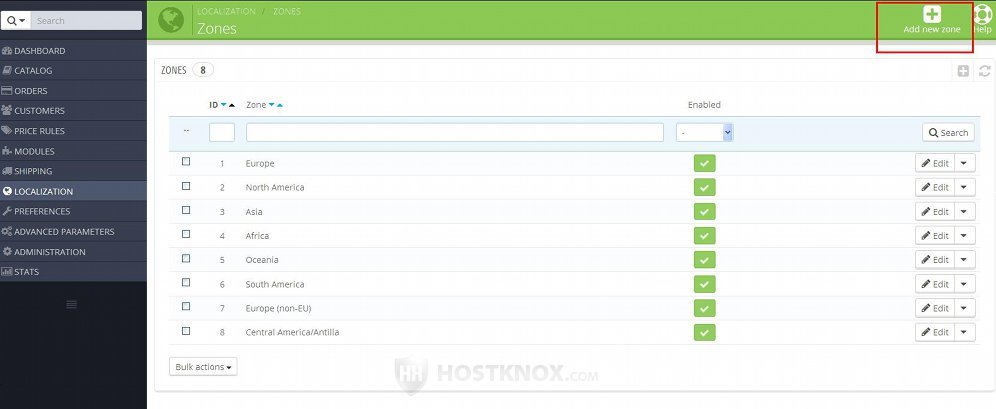
To add a new geographical zone, go to Localization menu>Zones sub-menu in the admin panel of your PrestaShop. On the page that opens you'll see a table with the current zones. To add a new zone, click on the button Add new zone (in PrestaShop 1.5 it's labeled Add new):
This will open the form for adding new world subregions:
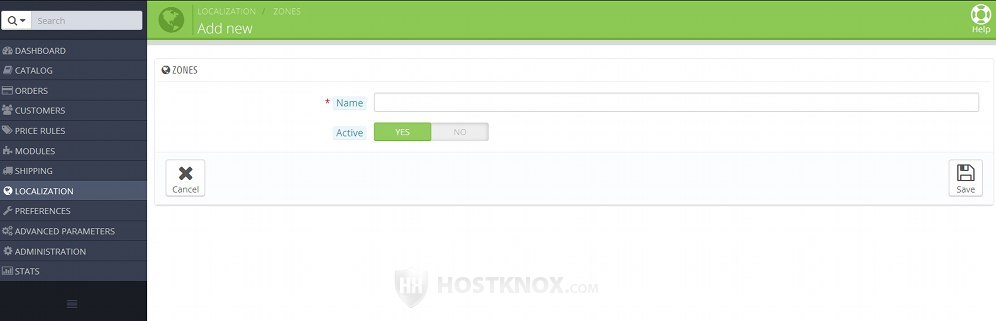
There are only a couple of options. Type a name for the zone in the Name field and from the Active option select whether the zone should be active or not. If the zone is not active, shipping will be disabled for all countries that belong to this zone, and so customers who try to check out with an address in a country that belongs to the zone will not be allowed to do it. Don't forget to click on the Save button to save the zone.
As we mentioned, you can select the zone to which a country should belong from the options of that country. For more information check out the tutorial on how to manage countries in PrestaShop 1.5-1.6.
Note that if you want to, you can disable shipping only to particular countries. You don't have to disable a whole zone. You can do that by disabling the respective country/countries (from Localization menu>Countries sub-menu).
Note that whether shipping is allowed for a particular country/countries also depends on whether the carriers that you've added are configured to deliver orders to those countries. This is done from the options of the carriers (Shipping menu>Carriers sub-menu). From the options of the carrier you can select to which zones it can deliver orders. When you add a new zone and you want a carrier to deliver orders to that zone, you have to edit the settings of the carrier and associate it with the zone.
Edit the Settings of Zones
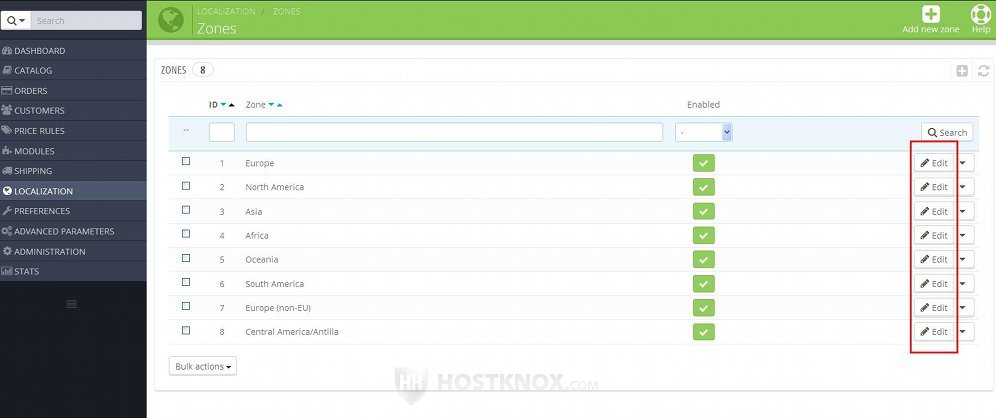
To edit the settings of any of the existing zones, go to Localization menu>Zones sub-menu in the admin panel and in the table with the zones click on the Edit button for the particular zone:
In PrestaShop 1.5 the button for editing is an icon that looks like a pencil.
After you click on the button this will open the form with the zone settings. They are the same as when adding a new zone. There's an option for the name of the zone and another one for activating/deactivating the zone. As we mentioned, when a zone is not activated, shipping will be disabled for countries that belong to that zone.
Enable, Disable and Delete Zones
When you add a new zone it's enabled/activated by default. The zones that come preconfigured with PrestaShop are also enabled by default. What's important about this is that shipping is allowed to countries that are associated with the enabled zones. When a zone is disabled, customers will not be able to check out if their address is in a country that belongs to the disabled zone.
To enable/disable zones, go to Localization menu>Zones sub-menu and in the table with the zones find the column Enabled. The enabled zones are marked with green checkmarks and the disabled ones with red X signs:
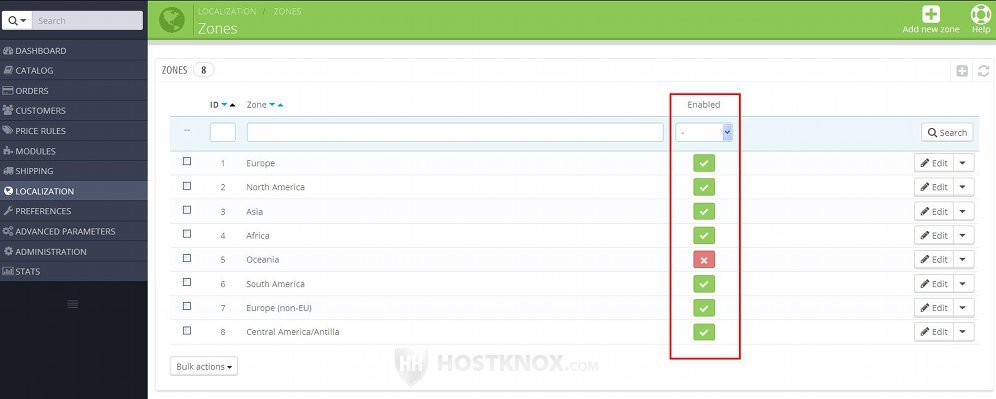
To disable a zone click on its green checkmark; it will turn into a red X sign and the zone will be disabled. To enable a zone, click on its red X symbol to turn it into a green checkmark.
Alternatively, to enable and disable a zone, you can also click on the Edit button of a zone and set the Active option to Yes or No, depending on whether you want to enable or disable it.
To delete a zone, after you go to Localization menu>Zones sub-menu click on the arrow that's next to the Edit button for the particular zone and from the drop-down menu select Delete:
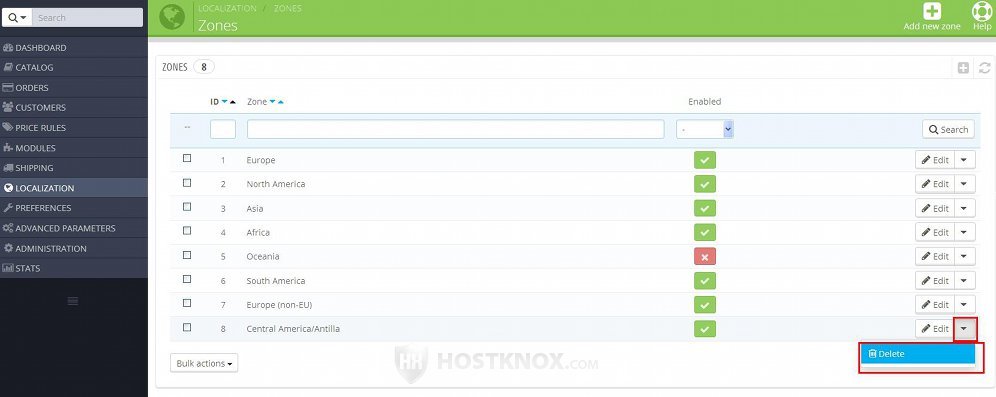
In PrestaShop 1.5 the button for deleting is an icon that looks like a trash can.
Note that when you delete a zone the countries associated with that zone will be left with no zone. So shipping of orders to those countries will be disabled. You have to edit the setting of the countries and assign them to another zone (if you haven't done it before deleting the old zone).