PrestaShop 1.5/1.6 Employees Tutorial
How to manage employees in PrestaShop 1.5-1.6
In PrestaShop you can add users that can access the admin panel and perform various actions there. This is very useful if you need help in managing your store and you want to let other people do certain things in the back office.
To each user you can assign a user role; in PrestaShop it's referred to as a profile. Each profile has a set of permissions that determine what the users associated with that profile can do in the back office. For more information on profiles and permissions check out the tutorial on how to manage user profiles and permissions in PrestaShop 1.5-1.6.
In this tutorial we'll show you:
- how to access the options for adding and managing employees
- how to add new employees
- how to manage existing employees
- how to configure the general employee options
In this tutorial we've used as a basic example PrestaShop 1.6. The screenshots are also from that PrestaShop version. Although the design of the admin panel is different than that of PrestaShop 1.5, the options for managing employees are the same in both versions. If there are some differences we'll make notes about that in the tutorial.
Access the Options for Managing Employees
To manage employees and add new ones, go to Administration menu>Employees sub-menu in the admin panel:
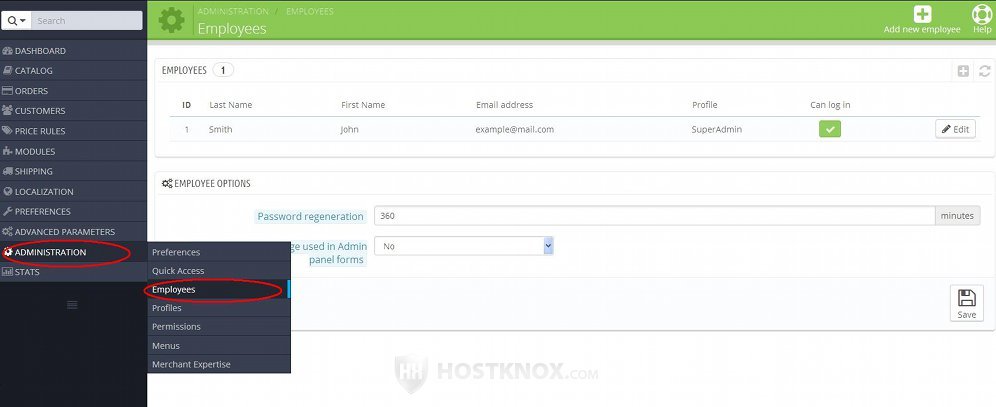
On the page that opens you'll see a table with the current employees. When you install PrestaShop there's one user that's created. It's the user account with which you log into the admin panel once the application is installed. This user account has the SuperAdmin profile and has access to all features in the admin panel. Under the table with the users there's a panel with some general options that affect all employees.
Add Employees
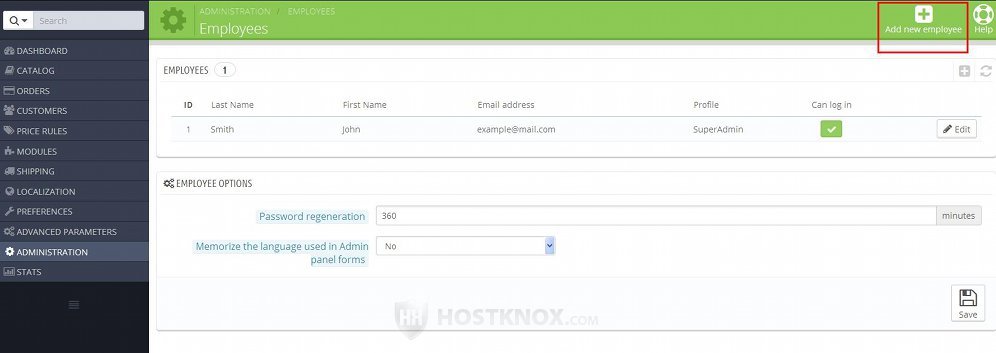
To add a new employee with access to the back office, go to Administration menu>Employees sub-menu in the admin panel and on the page that opens click on the button Add new employee (in PrestaShop 1.5 the button is labeled Add new):
This will open the form for adding new employees (the settings when editing employees are the same):

The available options are:
- First Name and Last Name - in this two fields type respectively the first and last name of the employee.
- Email address - in this field type the email address of the employee. It will be used by the employee to log into the admin panel. On the login page the employee has to provide the email address and the password that you have set for the account of the employee.
- Password - type a password for the account of the employee. For better security use a random string of upper and lower case letters, numbers and symbols. Make sure you set a different password for each employee.
Note that when the account is created PrestaShop will not sent automatically an email with the login credentials to the email address of the employee. So after you create the account you have to inform the employee about the account and the login credentials (the email address and the password). - PrestaShop Addons (this option is not available in PrestaShop 1.5) - next to this option there's a Sign in button. With it you can connect your PrestaShop application to the addons section of the official PrestaShop site. A window will pop out with which you can create an account on the PrestaShop Addons site, or connect to an existing account.
Note that this will connect the currently logged in user (you) and the whole application with the account in PrestaShop Addons. When the employee logs in, the application will not be connected with PrestaShop Addons. The employee has to specifically open the pop-out window (by clicking a link at the top of the admin panel or using the respective button from their account's options) and connect to the account in PrestaShop Addons using the login credentials for that account. - Connect to PrestaShop (this option is not available in PrestaShop 1.5) - this option is enabled by default. This means that the account will be connected to PrestaShop's server and as a result it will show the employee tips on how to better manage the store.
- Default page - from this drop-down menu you can select the admin panel page that will be displayed when the employee logs into the back office. By default, the general dashboard page is displayed. If you want to, you can select another page.
- Language - each employee can see and use the admin panel in a different language. From this drop-down menu you can select the default language for the account. You can select from any of the languages that you've installed.
- Theme - PrestaShop comes prepackaged with a few back office themes. Each employee can use a different theme for their account. From this drop-down menu you can select the theme for the account that you're creating/editing.
- Admin menu orientation (this option is not available in PrestaShop 1.5) - from this option you can choose where the admin menu should be displayed for this employee account. By default, the admin menu is displayed on the left side of the screen. There's an option to display it at the top instead.
- Status - by default, this option is enabled which means that once the account is created the employee will be allowed to log into the back office. If you disable it, the employee will not be allowed to log in. When they try to do it they will receive a message that the employee doesn't exist or the password is incorrect.
- Permission profile - from this drop-down menu you can select the profile (or user role) of the employee. PrestaShop comes prepackaged with a few profiles. Each profile has its own set of permissions that define what the employees assigned to that profile are allowed to do. You can create new profiles and manage the permissions of the existing ones. For more information on this check out the tutorial on how to manage employee profiles and permissions in PrestaShop 1.5-1.6.
After you're done with the settings don't forget to click on the Save button.
Note that once you create a user account and the employee logs into that account, they can modify most of their account settings (e.g. name, email address, password, default page, language, theme, admin menu orientation). However there are a few things that the employee can't change. They can't change their status and permission profile.
In PrestaShop 1.5 there are a few options that are specific to that version (they are not available in PrestaShop 1.6):
- Admin panel color - with this option you can change the background color of the admin panel for the particular employee account.
- Back Office width - by default, the back office is shown on the full width of your screen. If for some reason you want the admin panel to be narrower, you can use this option to set the width (it's in pixels). When the option is set to 0 it's disabled and the admin panel uses the whole width of the screen.
- Show screencast at login - with this option enabled when the employee logs into the admin panel, on the homepage (also know as a dashboard) there will be a welcome video that the employee can play. If you don't want this video to be shown on the dashboard, disable this option.
Manage Existing Employees
To manage the existing employees, go to Administration menu>Employees sub-menu in the admin panel. On the page that opens there's a table listing the users. By default, there should be at least one super admin user. That's the administrator account that's created during the installation of PrestaShop.
To edit the options of an account, click on the Edit button for that account (in PrestaShop 1.5 it's an icon that looks like a pencil):
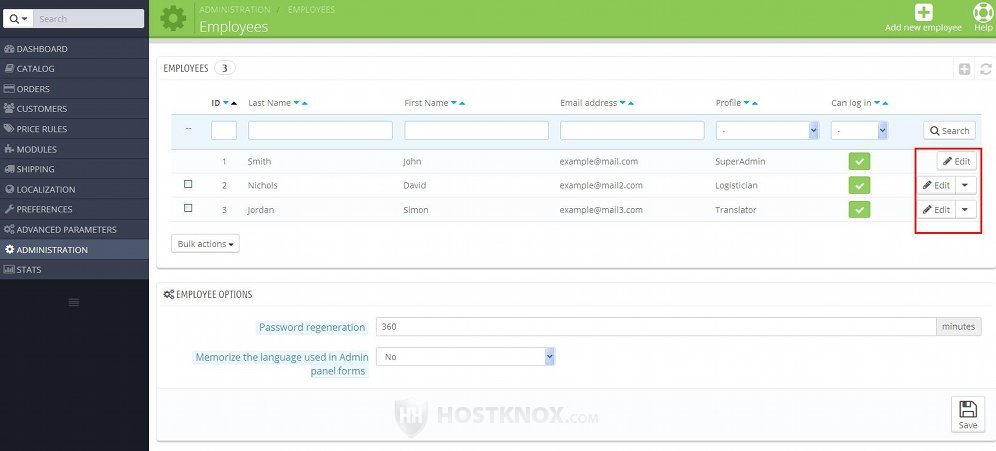
The options that you can edit are the same as when adding a new employee. For a detailed description check the previous section of this tutorial.
To delete the account of an employee, click on the arrow next to its Edit button in the table and from the drop-down menu that appears select Delete:
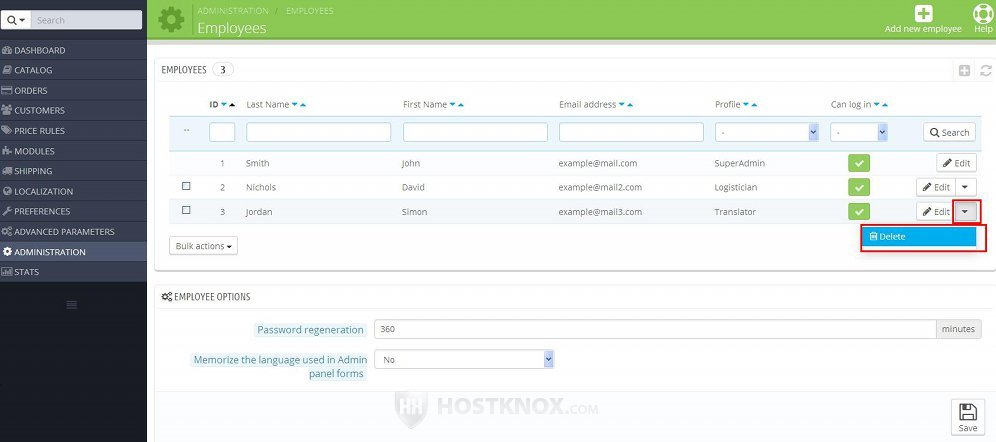
In PrestaShop 1.5 the button is a trash can icon that's next to the button for editing.
Note that you cannot delete the original super admin user that was creating during the installation of the application.
If don't want an employee to be able to log into the admin panel, but you don't want to remove the account, you can just disable it. One way to do this is to edit the account and set its Status option to No. A quicker alternative is to do it directly from the table that lists the employees. In the table there's a column Can log in:
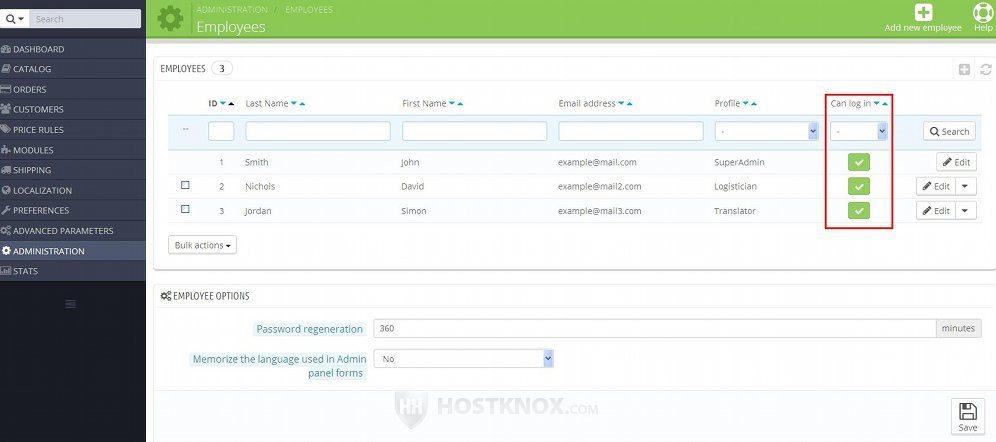
The enabled accounts have a green checkmark and the disabled ones a red X sign. To enable/disable an employee click on the symbol and it will turn into the opposite one.
If you want to enable/disable or delete more than one user at the same time, you can do it with the Bulk actions drop-down menu under the table. First mark the checkbox for each user that you want to be affected (in the first column of the table) and then select the action from the Bulk actions drop-down menu:
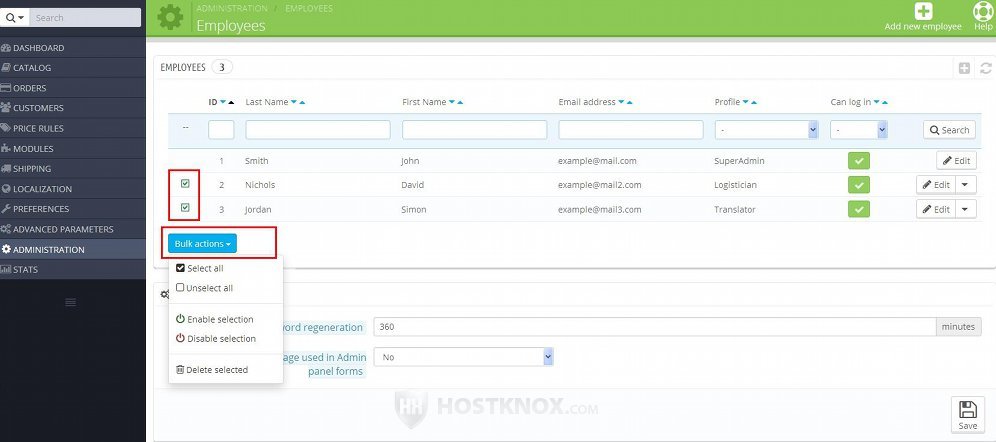
In PrestaShop 1.5 there's no drop-down menu under the table. The buttons for bulk actions are listed directly.
General Employee Options
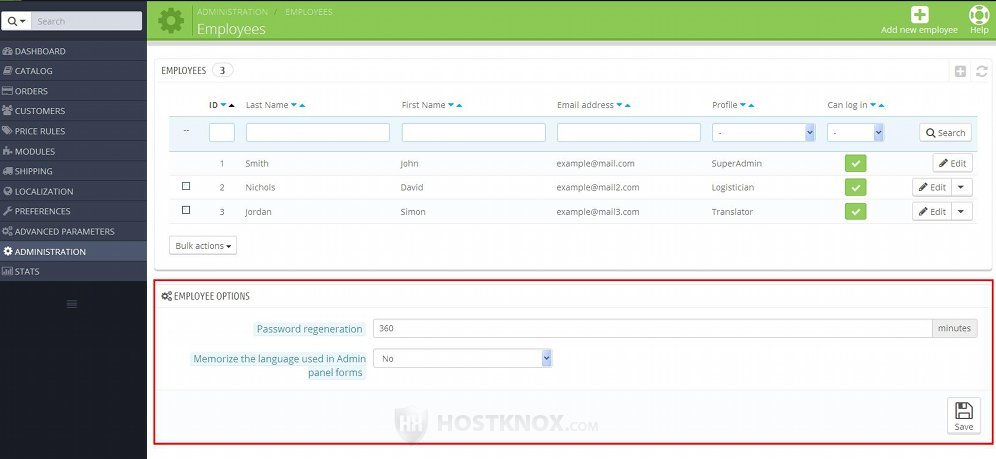
There are a couple of employee options that affect all employees. When you go to Administration menu>Employees sub-menu you'll see these options in a panel labeled Employee Options:
The options are:
- Password regeneration - this option specifies (in minutes) the time that has to pass between two password changes. An employee can change their password from their account settings. After the employee changes the password they will be allowed to change it again after the specified time passes. By default, it's 360 minutes (6 hours). So if an employee changes their password, they can change it again after 6 hours. If they try to do it before that, they will not be allowed.
If you want to, you can change that password regeneration time. - Memorize the language used in Admin panel forms - as you know, when you have more than one language installed, on the forms for adding/editing products, categories, CMS pages, etc. you can specify their names and descriptions in each of the available languages. On the forms there's an option on the right side of text fields from which you can select the language. When this option is enabled and an employee selects a language on a form in the admin panel (e.g. the form for editing a product), the same language is automatically set when the employee opens another form in the admin panel.
If you make any changes to these two options don't forget to click on the Save button.
For information on employee profiles and permissions check out the tutorial on how to manage employee profiles and permissions in PrestaShop 1.5-1.6.