PrestaShop 1.5/1.6 Shopping Cart Price Rules Tutorial
How to set up and manage shopping cart price rules in PrestaShop 1.5-1.6
Shopping cart price rules are used for discounts and promotions that can be applied to products in the shopping cart. You can create cart price rules with all sorts of conditions, and if there are products in the shopping cart of the customer which meet these conditions, and the particular customer is allowed to take advantage of the price rule, then the customer can apply it to the products in the cart. Cart rules are also referred to as vouchers. In fact, in older PrestaShop versions they are called precisely vouchers. The two terms are interchangeable and mean the same thing. In this tutorial we'll use both.
A cart rule can have various conditions that have to be met so that it can be applied. You can limit it to a specific customer or customer groups, to specific countries, carriers; you can set it to apply only for a specific period of time and only to particular customers; there are also other conditions that we'll discuss in this tutorial.
We'll show you how to add new cart rules and manage all the cart rule options; we'll also show you how to edit, remove and manage existing vouchers.
- how to add new cart rules
- how to manage the options for the general information of a cart rule
- how to manage the options for the conditions of a cart rule
- how to manage the options for the actions of a cart rule
- how to edit and remove existing cart rules
- cart rules on the frontend
In this tutorial we've used as a basic example PrestaShop 1.6. The screenshots are also from that PrestaShop version. Although the design of the admin panel is different than that of PrestaShop 1.5, the options for shopping cart price rules are pretty much the same in both versions. If there are some differences we'll make notes about that in the tutorial.
Another way to make discounts and promotions is to use catalog price rules. For more information check out the tutorial on how to set up and manage catalog price rules in PrestaShop 1.5-1.6.
If you want to add a discount only to a particular product, another way to do that is from the options of that product. On the form for adding/editing products click on the Prices tab and on the page that opens use the options in the block Specific Prices. For more information check out the tutorial on how to add and manage products in PrestaShop 1.5-1.6, and in particular the section on the options for price.
Add Shopping Cart Price Rules
To add a new voucher/cart rule, go to Price Rules menu>Cart Rules sub-menu and click on the Add new cart rule button (in PrestaShop 1.5 it's labeled Add new):
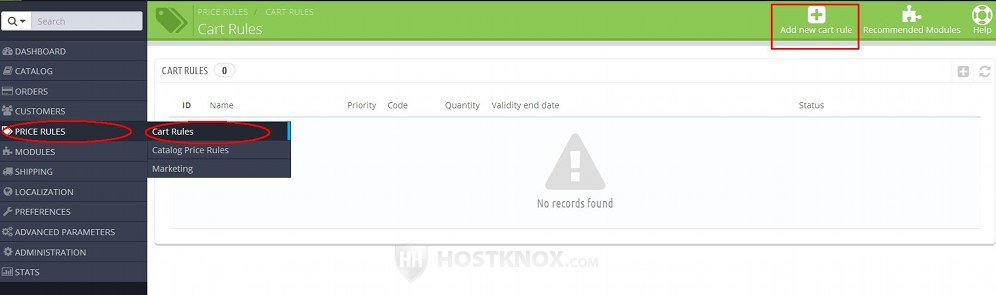
This will open the form for adding new cart rules. The options that you can configure when you add and edit cart rules are the same. There are three groups with options, for each group there's a page that lists them and there's a tab for each page: Information, Conditions, Actions.
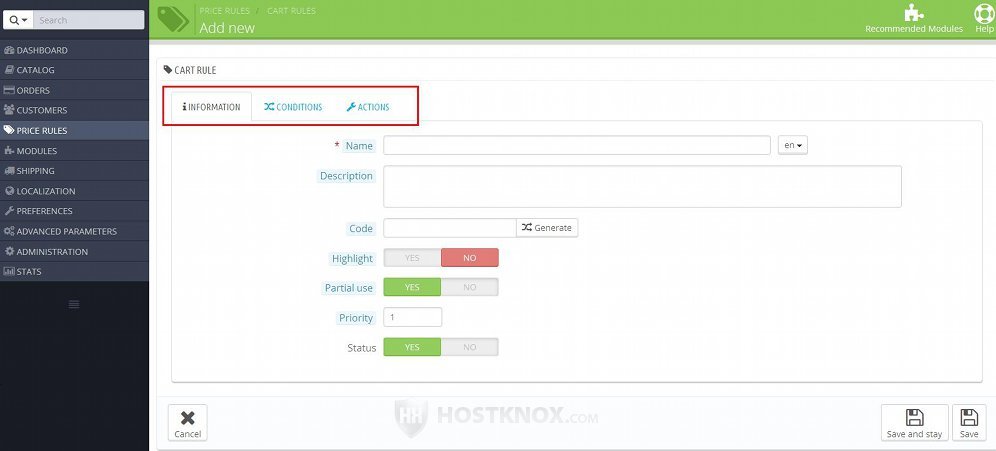
In the next three sections of this tutorial we'll go over the settings on all three pages.
Information Settings of a Cart Rule
When you go to Price Rules menu>Cart Rules sub-menu and you click on the button for adding a new cart rule (or you edit an existing one), this will display the options of the cart rule. By default, the options for the general information of the cart rule are displayed first. You can change the pages with the options using the tabs. The settings for the general information are displayed by clicking on the Information tab:
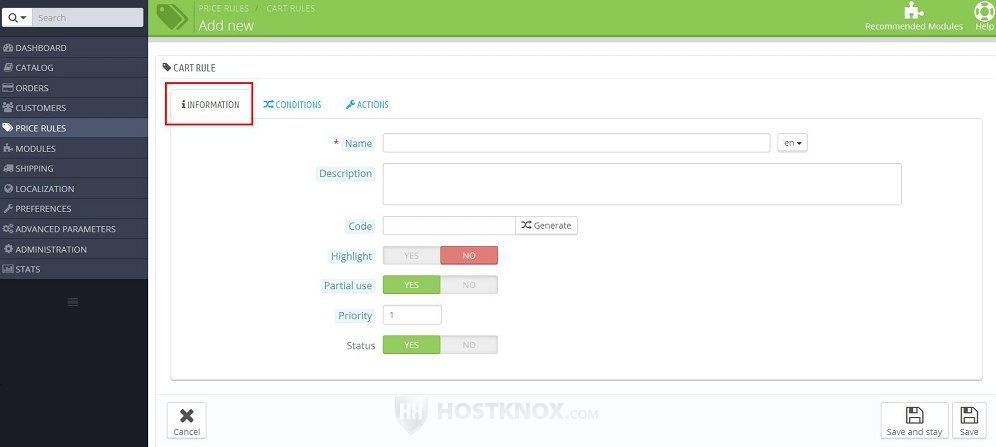
Let's go over the options in more details:
- Name - type a name for the particular voucher. This is the name that's used not only for reference in the admin panel, but it's also shown to customers on the frontend. If you have more than one language installed, from the option on the right side of the field you can set the language to which you want the name to apply.
- Description - you can use this option to type a short description of the cart rule. It's not shown on the frontend; it's just used to remind you and give you more information what the rule is and why you created it.
- Code - you can either type any code that you want manually, or you can generate a random code by clicking on the Generate button that's next to the field. In order for a customer to use this particular voucher, they have to type its code during the checkout process. So you have to provide with the code the customers that you want to be able to use this voucher. Note that if you limit the voucher to a single customer (this is done from the option Limit to a single customer on the Conditions tab page), then the voucher will be automatically listed in the account of the customer on the frontend of your site.
If you leave the field for the code blank, the voucher will be applied automatically any time the conditions of the cart rule are met. - Highlight - if you enable this option and the voucher can be applied to a product(s) in the cart (meaning the cart rule conditions are met), then the voucher will be listed on the checkout page as an available one that can be applied. Note that it will be listed with the code (if any) with which it can be applied, so when enabling this option you should consider who you allow to use that voucher (managed from the options for the conditions of the voucher).
If this option is disabled it doesn't mean that the voucher can't be applied, it just won't be listed. If all the conditions are fulfilled, then the customer can still apply the voucher by typing its code. - Partial use - this option concerns situations when the value of the voucher is greater than the price to which it's applied. In such cases, if this option is enabled, then the voucher will be used and another one will be created with the amount that's left of the applied voucher. Note that the voucher that's created has its conditions automatically configured so that it can be used only by the customer who used the base voucher (the one with the amount greater than the price).
If this option is disabled, the voucher is used and no additional voucher is created; the amount that's left is simply not used and lost. - Priority - with this option you can control the order in which cart rules are applied. If a customer has more than one voucher and they can all be applied to the cart (and the customer wants to apply more than one), the value for priority determines which voucher is processed first. A voucher that has 1 for priority is processed before a voucher that has its priority set to 2.
- Status - with this option you can activate and deactivate the price rule. If you set it to Yes, the price rule will be active and it can be used on the frontend.
After you're done with these options you can click on the Save and stay button and continue with the other options, or just click on one the other tabs to configure the rest of the cart rule settings and save them all in the end.
Options for the Conditions of a Cart Rule
To configure the options for the conditions of a cart rule, on the form for adding/editing cart rules click on the Conditions tab:

This will display a bunch of options with which you can set the conditions that have to be fulfilled so that the cart rule can be applied:
- Limit to a single customer - if you want the voucher to be used only by a particular customer, start typing the name or email address of the customer and a drop-down menu will appear from which you can select the customer.
If you leave this field empty, any customer can use the voucher, provided there's no restriction in terms of the customer groups that can use the voucher (this is managed from the Customer group selection option on the same page). - Valid - from this option you can select the period for which the voucher will be valid. By default, it's valid for one month from the day you create it. You can change that period; just click with the left mouse button in the From and To fields and select the date from the calendars that appear.
- Minimum amount - in this field you can specify a minimum amount for which the voucher can be applied. For example, if you set this to $20 and the order of the customer is $19, then the customer will not be allowed to apply the voucher to that specific order. From the drop-down menus next to the field you can select whether the tax and shipping charges should be included or excluded in the amount of the customer's order when comparing it with the minimum amount. If you include them, this may affect whether the cart rule is applied. For example, if they are excluded, the minimum amount is set to $20 and the price of the customer's order is $19, then the rule will not be applied. If, however, you set the drop-down menu for shipping to Shipping included and the shipping charge is $10, then the cart rule will be applied ( $19 + $10 = 29, which is greater than the minimum amount of $20).
If you set them both to excluded, only the base price of the products will be taken into account when comparing it with the minimum amount that you've set. - Total available - with this option you can configure how many times the voucher can be used. This is the total number of times it can be used, regardless of whether one or more customers use it. For example, if you set it to 5, then it can be used five times either by the same customer(s) or by different customers.
- Total available for each user - in this field you can type the number of times the voucher can be used by a single customer. For example, if you set it to 1 and you set the option Total available to 5, then the voucher can be used by five different people and each of them can use it only once.
- Restrictions - this option actually consists of several checkboxes with which you can limit the use of the voucher in terms of the country of the customer's delivery address, the carrier that they choose to use, the customer group to which the customer belongs, or the products in the cart. Respectively, the checkboxes are:
- Country selection - with this you can select specific countries for which the voucher will be valid. What's taken into account is the country of the customer's delivery address.
- Carrier selection - if you want customers to be able to use the voucher only with specific carriers, you can use this checkbox.
- Customer group selection - with this you can limit the customer groups that can take advantage of the voucher. As you know a customer can belong to more than one group. If you disable the voucher for a particular group, but the customer belongs to other groups for which the voucher is not disabled, then the customer will be allowed to use the voucher (even if the restricted group is the default one for the customer).
If you leave these checkboxes unmarked, the voucher can be used regardless of the country of the customer's delivery address, the carrier that the customer chooses to use, and the group to which the customer belongs. In short, the voucher can be used with any country, carrier and customer group. If you mark a checkbox, a couple of text areas will appear. One is for unselected countries/carriers/customer groups and the other for the selected:
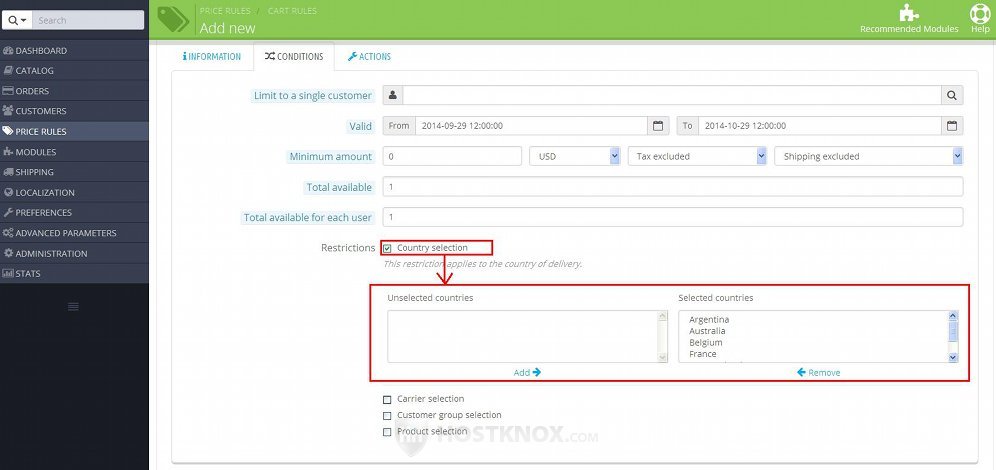
On our example screenshot we've marked the checkbox for countries, but the restrictions for carriers and customer groups are managed in exactly the same way.
The text area Selected lists the countries/carriers/customer groups that can be used with the voucher, and the text area Unselected lists those that can't be used. By default, all the enabled countries/carriers/customer groups are listed in the Selected text area. To move one to the other text area so that it can't be used with this voucher, mark it by clicking on it with the left mouse button and then click on the Remove button under the list. To mark (or unmark) more than one item in the list, press and hold the Ctrl button on your keyboard while marking the countries/carriers/customer groups.
Now let's continue with the rest of the checkboxes for restrictions:
- Compatibility with other cart rules - this checkbox will be available only if there are other cart rules that you've already added. With it you can configure whether the particular cart rule that you're adding/editing can be used together with the other available cart rules. By default, it can be combined with all existing cart rules. If you don't want it to be used at the same time with a particular rule(s), mark the checkbox and use the options that appear to select the cart rules with which you don't want it to be combined. The options that appear after you mark the checkbox are the same and are managed in the same way as for the restrictions described above.
- Product selection - this is the last checkbox for setting restrictions. You can use it to set restrictions in terms of specific products, categories, product attributes, manufacturers and suppliers with which the voucher can be used. When you mark the checkbox a button Product selection will appear under it:
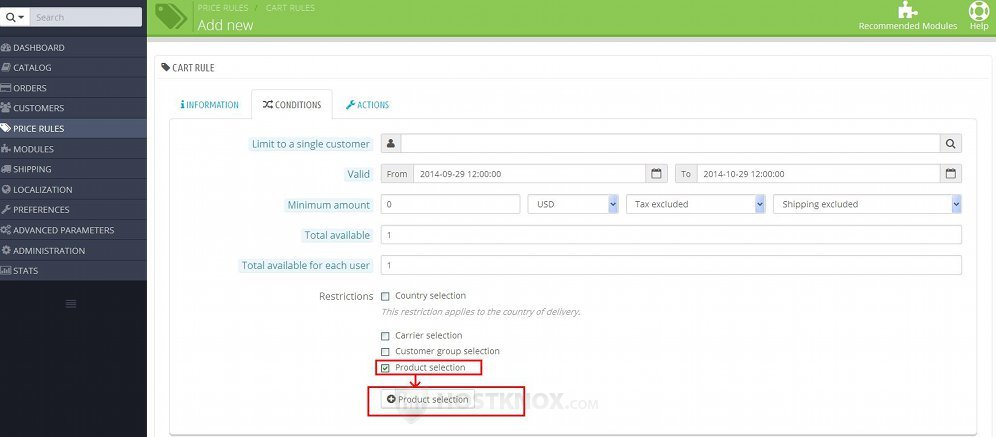
Click on the button and some options will appear:
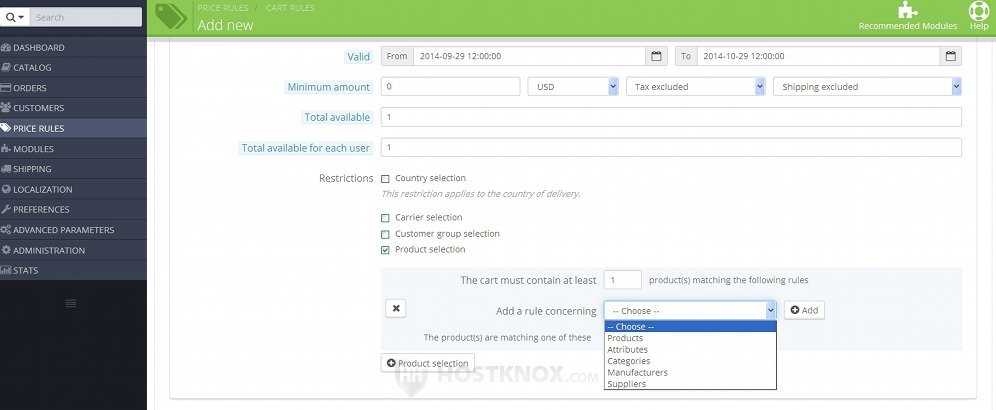
There's a text field in which you can specify how many products that match the rule(s) should be contained in the cart so that the voucher can be applied. Then from the drop-down menu you can select whether the rule should concern products, attributes, categories, manufacturers or suppliers. After you select anything click on the Add button. This will add options with which you can select a specific item from whatever you have selected the rule to apply to (e.g. product, attribute, etc.):
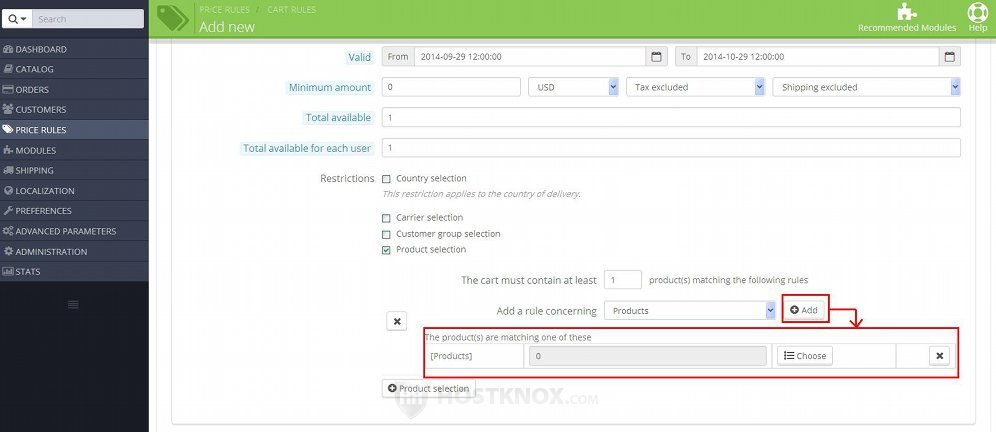
On our example screenshot we have selected the rule to be for products, so from the options that appear we can select a specific product.
Just click on the Choose button and select the product from the list that appears.
If you want to, you can add more rules. Simply select whether you want the rule to apply to products, attributes, etc. click on the Add button again and use the options that appear to select an item. For example, you have added a particular product, that product is offered in different colors and you want the voucher to apply only to a particular color. So in this case you have to add the product as one rule, then select another rule that applies to attributes and from the attribute list select the particular color:
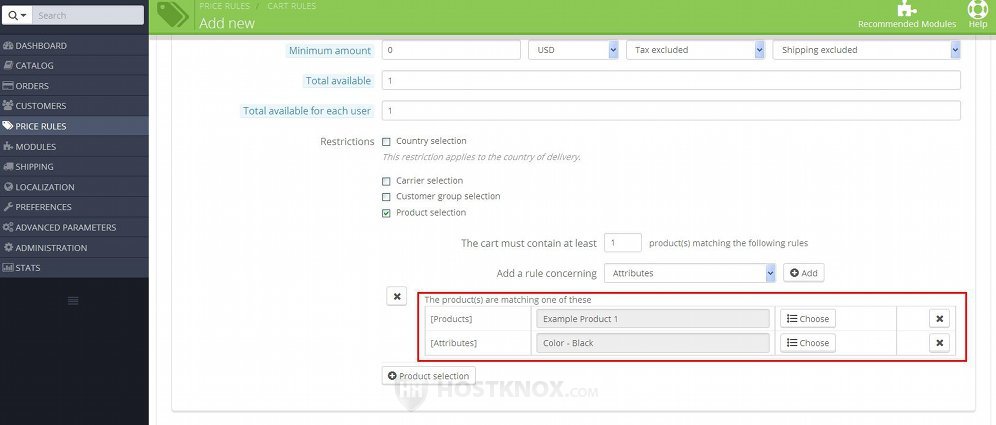
To remove a rule simply click on the X button for that rule.
All the rules within a product selection have to be fulfilled so that the voucher can be applied.
If you want to add another combination of rules, simply click on the Product selection button again and use the options that appear. The rules in one product selection don't influence those of another product selection. Note however that if there's more than one product selection added, they all have to be in the cart so that the voucher can be applied. For instance, let's say that you add a product selection with two rules: a product named Example Product 1 and an attribute set to black; then you add another product selection with a product Example Product 2. If Example Product 1 in black and Example Product 2 are put separately in the cart, the voucher cannot be applied. Only when both products are in the cart (and Example Product 1 is with the black color selected), can the voucher be applied.
After you're done with the options click on the Save and stay button to save the options and configure more options of the cart price rule, or on the Save button to save the options and close the form.
Options for the Actions of a Cart Price Rule
From the options for the actions of a cart rule you can specify what the exact discount of the voucher should be and what form it should take. It can be a percentage of the price, a specific amount; it can be just free shipping or an additional product sent as a gift (or a combination of these things). To manage these options, on the form for adding/editing cart rules click on the Actions tab:
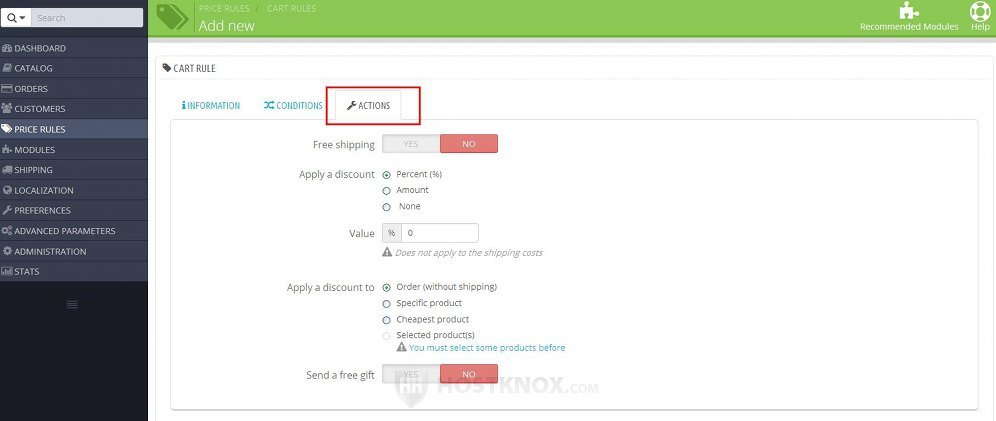
You can configure the following options:
- Free shipping - if you want free shipping to be applied when the voucher is used, enable this option. You can use this in combination with a specific discount, or if you want to, you can disable the discount option and use this voucher only for providing free shipping.
When this option is enabled and the customer applies the voucher on the frontend, the shipping charges will be removed. - Apply a discount - with this option you can select whether the discount should be a percentage of the price, a specific amount, or whether there shouldn't be any discount. There are three radio buttons that you can mark, and depending on which one you mark some additional options may appear. The available radio buttons are:
- None - if you don't want a discount to be applied, mark this checkbox. This is useful if you want the voucher to be only for free shipping and/or a free gift product. When you mark this radio button the option Apply a discount to will be automatically removed.
- Percent (%) - if you want the discount to be calculated as some percentage of the price, mark this radio button. If you mark this button, a field labeled Value will appear under the radio buttons (as shown on the screenshot above). In that field you can type the actual percentage. Marking this button will also make available the radio buttons Cheapest product and Selected product(s) for the option Apply discount to (the next option on the page).
The number that you put in the field for Value is the percentage with which the price of the product(s) will be reduced. So, for example, if the price is $ 150 and you set the percentage to 10, then the price after the discount is applied will be $ 135 (10 % of 150 = 15; 150 - 15 = 135). - Amount - if you want the discount to be a fixed amount that's subtracted from the price, mark this radio button. The amount will be the same regardless of what the price is. When you mark this radio button, a field and a couple of drop-down menus will appear:
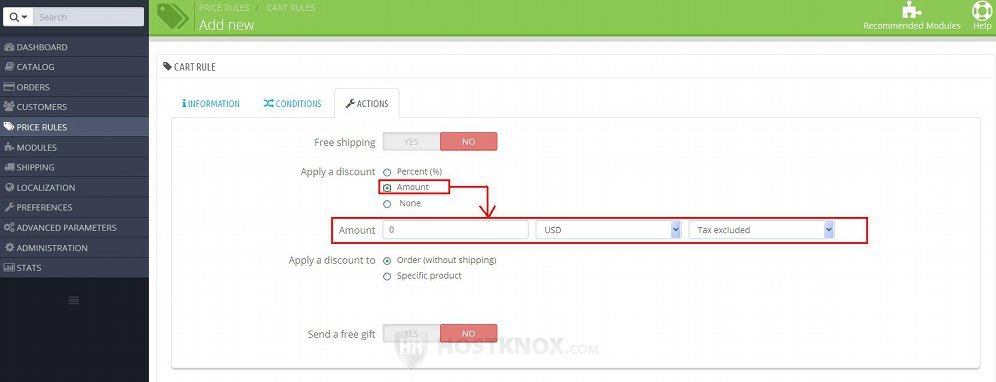
In the Amount field type the actual amount that you want to be subtracted as a discount from the price. If you have more than one currency, from the respective drop-down menu you can select in what currency should the amount be. There's also a drop-down menu from which you can select whether the tax that's applied to the price of the product(s) should also be applied to the discount amount. If you select Tax excluded, the discount amount will not be taxed. If you select Tax included the discount amount will be taxed.
Note that if the discount amount is taxed, this is not specifically indicated with any text or labels on the frontend. The tax amount is simply subtracted from the discount and the final discount amount is shown during the checkout. And the total tax amount that's shown at the Payment step of the checkout only indicates the tax amount that's applied to the price of the product(s); the tax amount applied to the discount is not included in the sum shown for the total tax.
Now let's continue with the rest of the options:
They are:
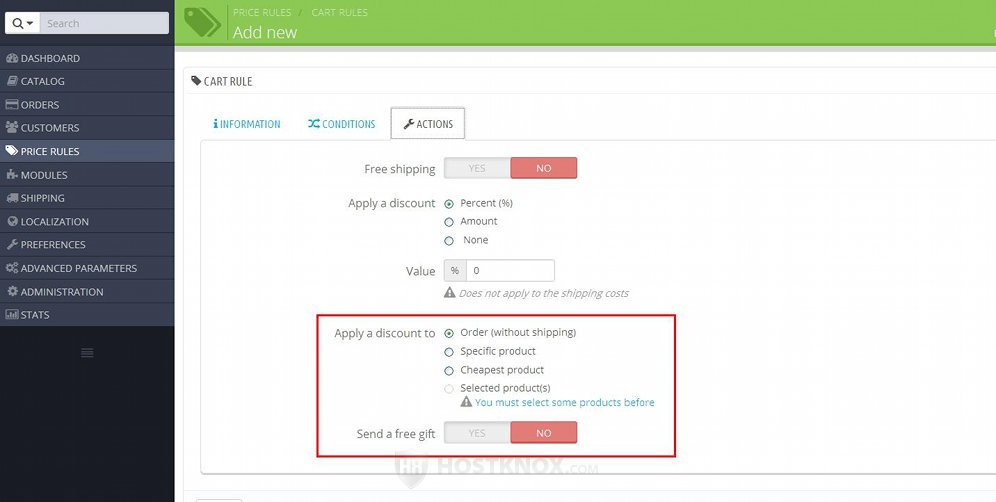
- Apply a discount to - provided that you haven't set the option Apply a discount to None, then this option will be available. With it you can select whether the account should be applied to the total price of the whole order or to specific products. It consists of a few radio buttons:
- Order (without shipping) - if you want the discount to apply to the total price of the whole order (excluding the shipping charges), then mark this radio button.
- Specific product - if you want the discount to be applied only to a specific product, mark this radio button. A text field will appear under the radio buttons. Start typing the name of the product in that field and a drop-down menu will appear from which you can select the product.
- Cheapest product - this radio button is only available if the option Apply a discount is set to Percent. Mark this radio button if you want the discount to be applied to the cheapest product in the cart.
- Selected product(s) - this option is only available if you have set the option Apply a discount to Percent, and it can be marked only if you have selected any products from the Product selection option on the Conditions tab page (discussed in the previous section of this tutorial). It's very useful if you have set a condition(s) for the voucher to be applied only when a particular product(s) is in the cart, and you want the discount to be applied only to that product(s).
If this is the case and you mark this radio button, the discount will be applied to the product(s) selected from the Product selection option. - Send a free gift - if you want the voucher to be for a free gift, enable this option. A text field will appear under the option. When you begin typing the name of the product in that field a drop-down menu will appear from which you can select the product. If the voucher is applied by the customer, the gift product is automatically put in the cart.
You can combine this option with an actual discount. So the voucher can be configured to give the customer a reduction to the price of the ordered product(s) and an additional product sent as a gift.
After you're done with the options click on the Save and stay or on the Save button.
Manage Existing Cart Price Rules
When you go to Price Rules menu>Cart Rules sub-menu on the page that opens you'll see a table with the cart rules that have been created. Using the options in that table you can edit, remove, enable, disable these cart rules and perform bulk actions with them.
To edit a cart rule, click in the table on the Edit button of that cart rule:
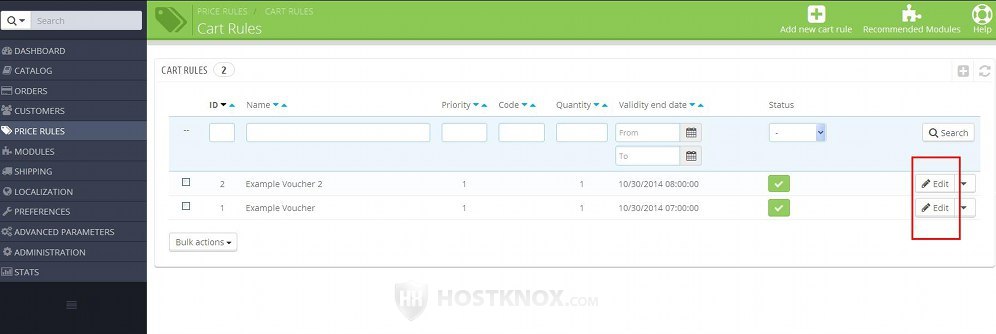
In PrestaShop 1.5 the button is an icon that looks like a pencil.
This will open the form for editing the options of the cart rule. The form has a few pages with options that can be switch with the tabs Information, Conditions, Actions. These options are reviewed in the previous sections of this tutorial.
To delete a voucher, in the table with the vouchers click on the arrow that's next to the Edit button for the particular voucher and from the drop-down menu select Delete:
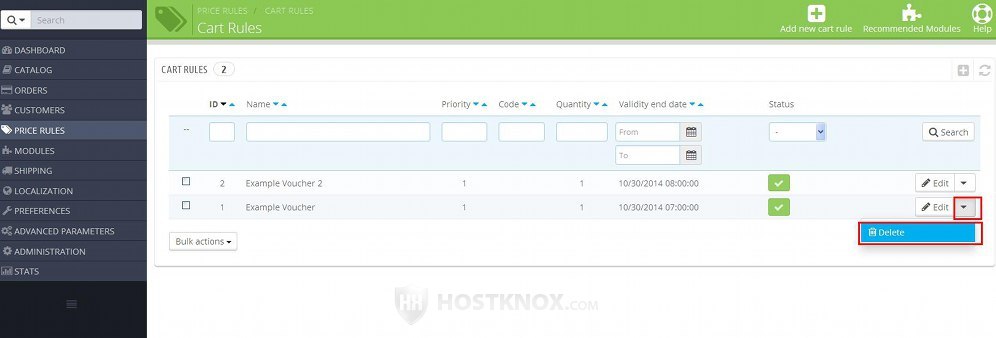
In PrestaShop 1.5 there's no such drop-down menu. The button for deleting is a trash can icon and it's located next to the button for editing the cart rule.
If you delete an active voucher that can still be used by customers to whom you've sent the code for that voucher, it's not a bad idea to inform them that the voucher is no longer available.
If you want to enable/disable a voucher, you can do that either by editing the voucher and configuring its Status option, or you can do it directly in the table that lists the existing vouchers. In the table there's a column labeled Status. It indicates with green checkmarks the enabled vouchers and with red X symbols the disabled ones:
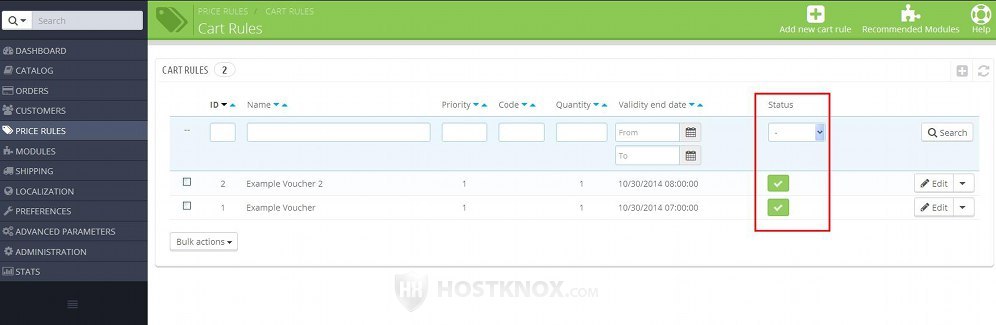
To enable/disable a voucher just click on its symbol in the table and it will turn into the opposite one.
If you want to enable, disable or delete more than one voucher at the same time, you can do that with the Bulk actions drop-down menu that's below the table. First in the table mark the checkbox of each of the vouchers that you want to be affected, then select the action from the drop-down menu:
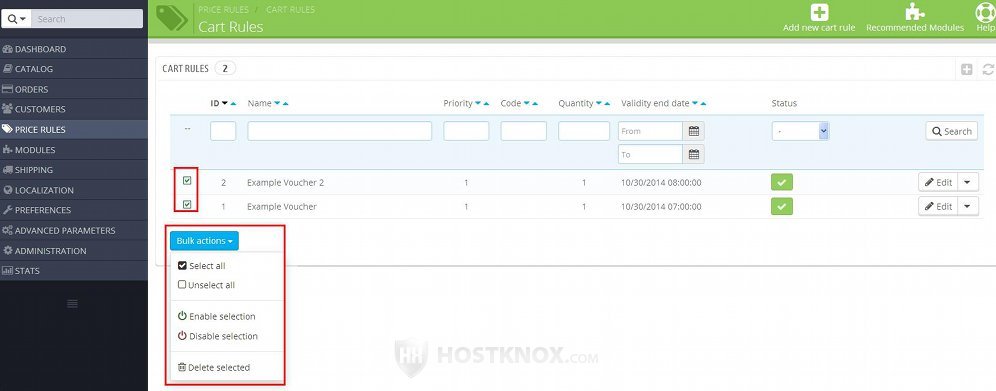
In PrestaShop 1.5 there's no drop-down menu, instead the buttons for bulk actions are listed directly under the table.
Vouchers on the Frontend
On the frontend vouchers can be applied by customers on the checkout page. By default, the checkout is divided into step. Vouchers are listed and can be applied at the Summary step of the checkout. There's a block Vouchers that has a field in which customers can type the code of a voucher:
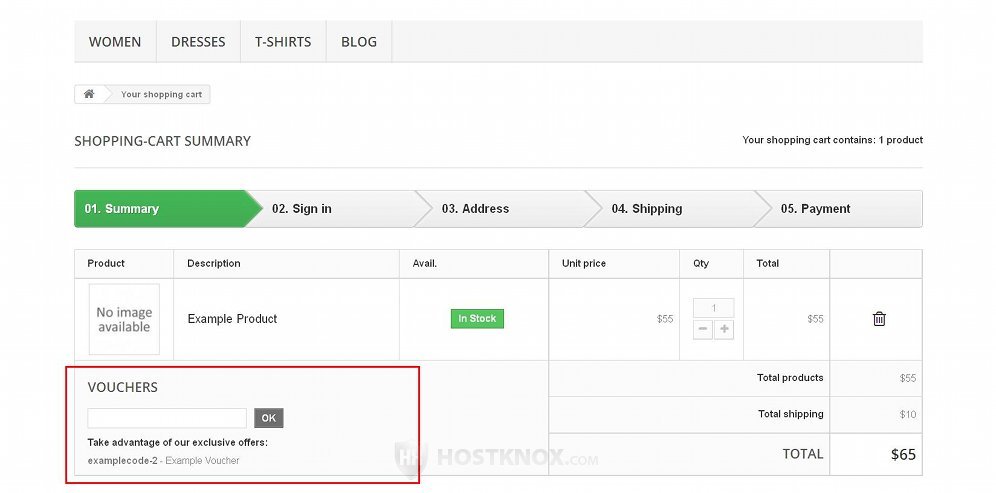
If there are any vouchers that have their Highlight option enabled and their conditions are fulfilled, they will be listed in the block together with the code with which they can be applied.
If there are vouchers with no code and the conditions of these vouchers are fulfilled, they are applied automatically. They are listed in the cart together with the discount that's applied.
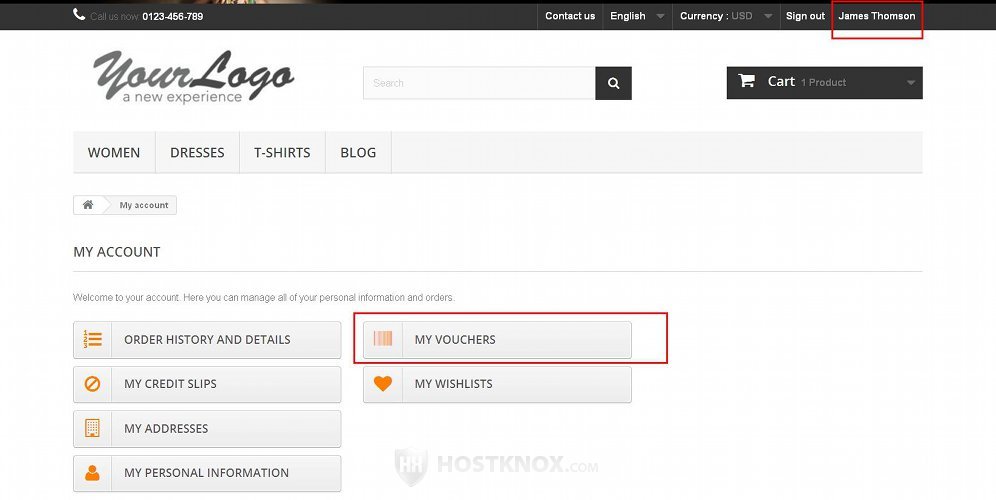
In the customer account on the frontend there's a section that lists the vouchers of the customer. When the customer accesses their account's homepage (by clicking on their name), they'll see a button labeled My Vouchers:
When they click on it a page with a table will open. The vouchers of the customer (if any) are listed in that table:
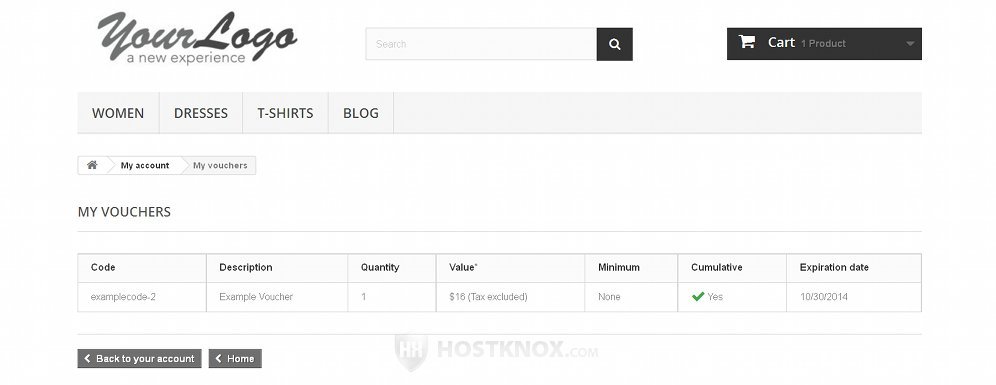
The voucher is listed with its quantity, value, expiration date, and the code with which it can be applied.
Note that in this section of the customer account settings only those vouchers are listed that are limited to the particular customer (this is manage from the option Limit to a single customer of the voucher). If the voucher is not limited to a single customer, it can still be used by the customer, but it won't be listed in the account settings.
So if a there's a voucher with a code that you don't want to be used by a single customer but by several customers (and so you've left the option Limit to a single customer blank), then you have to make sure that you send the code to the particular customers because the voucher will not be listed in their accounts.