PrestaShop 1.5/1.6 Customer Groups Tutorial
How to manage customer groups in PrestaShop 1.5 and 1.6
In PrestaShop each of your customers belongs to one or more customer groups. There's no limit to the number of groups to which a customer can belong, but they should be at least in one group. You can use customer groups to set various discounts. For example, you can create a customer group that has a discount for all or some products on your site and put in that group the customers that you want to take advantage of that discount. You can also use customer groups for other things. For example, you can select for each customer group whether the customers in that group should see the product prices with the tax included or excluded; you can also hide the prices altogether. You can limit the access that a customer group has to different modules. For example, you can make some of the payment methods inaccessible to certain customer groups. Another thing that you can do with customer groups is to block the access to certain product categories on your site for the customers belonging to a particular group(s).
In this tutorial we'll go over the process of adding, editing and managing customer groups. For general information on managing customers read the tutorial on how to manage customers in PrestaShop. In the last section of this tutorial you'll also find links to other tutorials and articles related to managing customers in PrestaShop.
In this tutorial we'll show you:
- how to access the customer groups section in the admin panel of PrestaShop
- how to add customer groups
- how to edit customer groups
- how to delete customer groups
- how to view a summarized information about a customer group
- how to associate customers with customer groups
- how to limit the access of customer groups to product categories
- links to other of our tutorials and articles on managing customers in PrestaShop
In this tutorial we've used as a basic example PrestaShop 1.6. The screenshots are also from that PrestaShop version. Although the design of the admin panel is different than that of PrestaShop 1.5 the options related to managing customer groups are practically the same in both versions. If there are some differences we'll make notes about that in the tutorial.
Access the Customer Groups Section in the Admin Panel
The back office of your PrestaShop has a separate section for managing customer groups. To access it, after you log in go to Customers menu>Groups sub-menu:
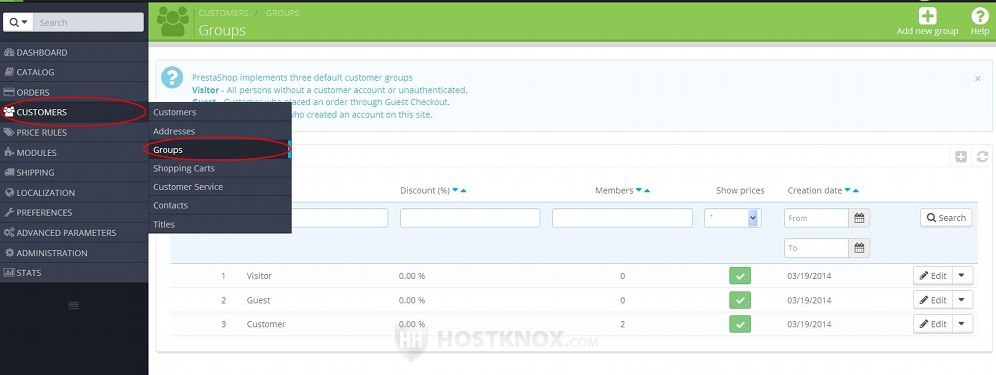
On the page that opens there's a table with the current customer groups. PrestaShop comes preconfigured with three groups: Visitor, Guest, Customer. You can edit their settings but you can't delete them. Older PrestaShop versions (e.g. 1.4) have just one preconfigured group called Default.
At the top of the page just above the table you'll see a description of each customer group. Every user on your site who is not authenticated is automatically considered as part of the Visitor group. The Guest group is for unregistered customers who however have ordered products as guests. Note that guest checkout is disabled by default (it can be enabled from Preferences menu>Orders sub-menu). The Customer group is for all registered customers. It's the most general group for registered customers. When new customers register on the frontend they are automatically put in this group. By default, it doesn't have any discounts set up or limitations in terms of the modules that can be used by the customers belonging to that group.
Add Customer Groups
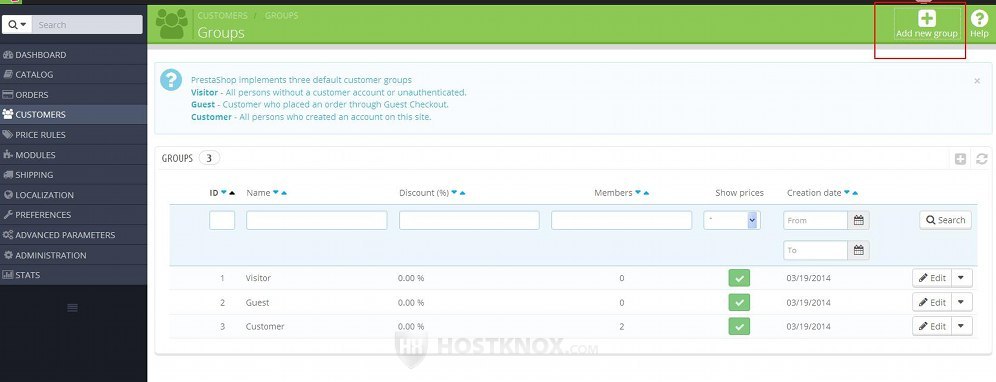
To add a new customer group, go to Customers menu>Groups sub-menu and click on the Add new group button that's in the top right corner of the page (in PrestaShop 1.5 the button is labeled Add new):
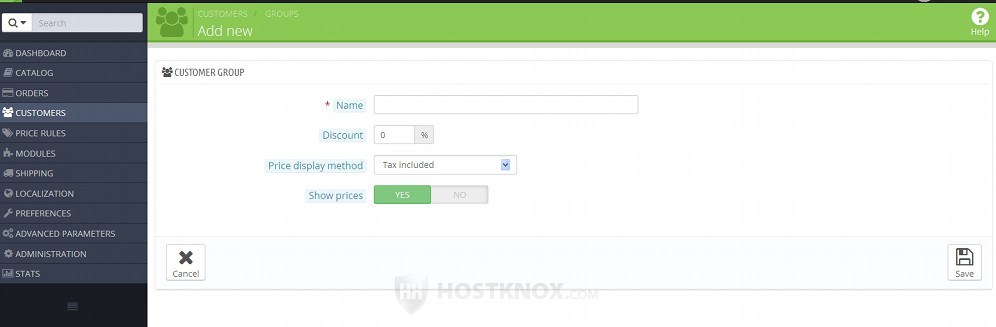
This will open the form for adding customer groups:
Note that after you save the group a couple of options will be added. So the form for editing customer groups has more options than that for adding. Here we'll review all options. First we'll go over the basic options that are present on the form for adding a new group. Then in the next section of this tutorial we'll go over the few options that become available once you save the group.
The options on the form for adding customer groups are:
- Name - type a name for the group in this field.
- Discount - you can use this option to set a discount. It's in percents. By default, there's no discount. If you set a discount from this option it will apply to all products in your store. Only members of this group will take advantage of the discount. Once you save the group another option will appear from which you can set discounts only for particular categories.
If the customer belongs to more than one group, the default group of the customer takes precedence. The customer will get the discount (if any) only if the group is the default for the customer. If a customer belongs to two or more groups and they all have some discount set up, only the discount for the default group will apply. You can set the default group of a customer from the customer account settings of that customer (Customers menu>Customers sub-menu).
Don't forget that another way to make discounts, promotions, etc. is by using cart rules and catalog price rules. These can be manage in the admin panel respectively from Price Rules menu>Cart Rules sub-menu and Price Rules menu>Catalog Price Rules sub-menu. - Price display method - with this option you can select whether product prices should be displayed with or without the tax. The tax is based on the tax rule that's applied to each product and on the address of the customer. So it concerns logged in customers (visitors don't have account settings and thus they have no address specified).
This option affects the prices in the catalog, the Summary and the Payment steps of the checkout process, and also the shopping cart block on the frontend. If you set this option to Tax included, in the catalog and at the Summary and the Payment steps of the checkout process the price of each product will be listed with the tax included; the line that shows the total cost of all products will also be with the tax included. The cart block will also display the price of each product and the total price with the tax included. If you set this option to Tax excluded, the price of each product and the total product price will be shown without the tax. Again, this affects the catalog, the Summary and Payment steps of the checkout process and also the cart block. Note that in this case a separate line that shows the tax amount is displayed at the Payment step of the checkout process.
Whether you choose to include or exclude the tax, there's always a line at the Summary and Payment steps of the checkout that shows the grand total price; that's the final price that includes all taxes, shipping charges, etc.
When it comes to displaying taxes there's another option that affects not just one or more customer groups, but the whole store. To manage it, go to Localization menu>Taxes sub-menu and scroll down to the bottom of the page. There you'll see an option labeled Display tax in shopping cart. If you enable it, a separate line showing the tax will be included at the Summary step of the checkout process regardless of how the Price display method is configured. It's a bit different when it comes to the cart block. If the Price display method is set to include the tax in the price and the Display tax in shopping cart option is enabled, then a separate line showing the tax will also be added to the cart block. If however the Price display method is set to exclude the price, then the tax line will not be included in the cart block; there'll be only a notification that prices are tax excluded.
As with the other group options, if a customer belongs to more than one group, the options of the default group are applied. So whether the tax is displayed or not depends on how the default group for the customer is configured. - Show prices - with this option you can control whether the product prices in the catalog are visible to the customers who belong to the customer group. There might be occasions when you'd like to hide prices for particular customers. So in this case you can put them in a separate customer group and set the Show prices option for that group to No.
Note that this option will affect the customers in the group only if this is the default group for those customers. As you know a customer can be put in more than one group, but only one of the groups to which the customer belongs is their default group. So let's say, for example, that a customer belongs to two groups. The first group can see the prices and the second can't. The customer will be able to see the prices if their default group is the first one; if their default group is the second one, then the customer won't be able to see the prices. You can assign a customer to customer groups and select the default one from the settings of each customer. For more information check the section in this tutorial on how to associate a customer with customer groups and assign a default group.
After you configure the settings click on the Save button. Now that the customer group is created a few more options will become available. To configure them you have to edit the customer group. Check the next section of this tutorial for more information on these settings.
Edit Customer Groups
To edit a customer group, go to Customers menu>Groups sub-menu in the admin panel and in the table with the customer groups click on the Edit button for the particular group:
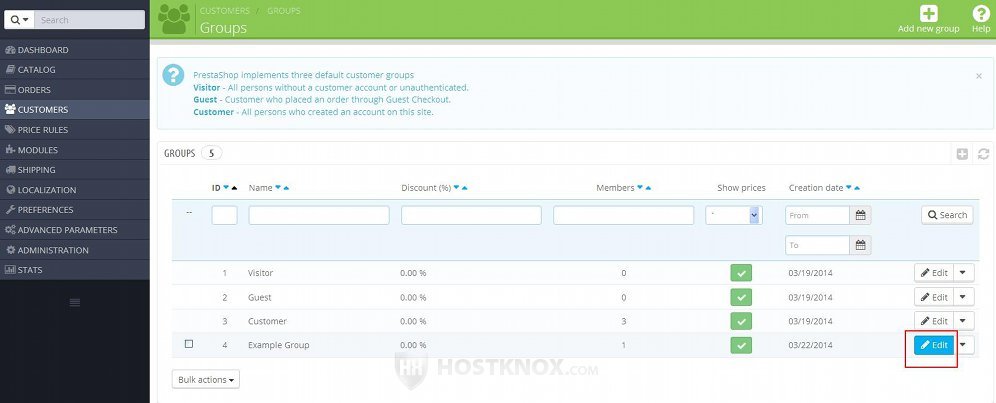
In PrestaShop 1.5 the edit button is not labeled; it's an icon that looks like a small pencil.
Clicking on the button will open the edit form. The basic settings are the same as those on the form for adding new groups. They are reviewed in the section in this tutorial on how to add customer groups. After a group is created, however, a couple of additional options become available:
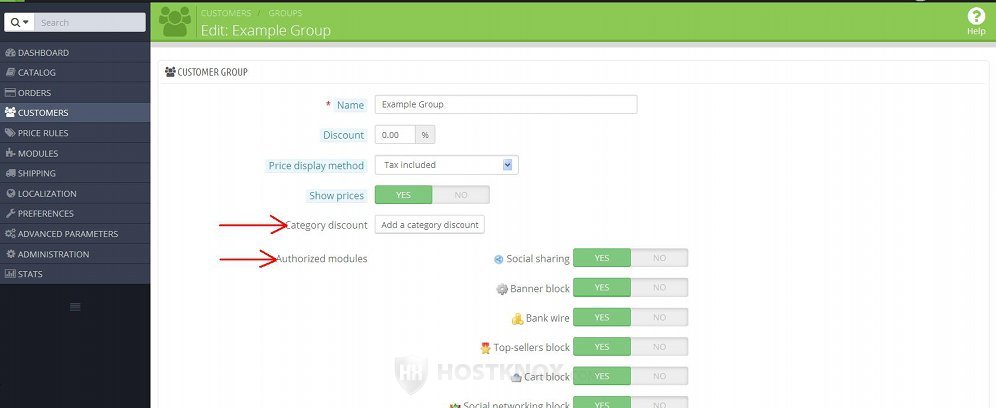
These options are:
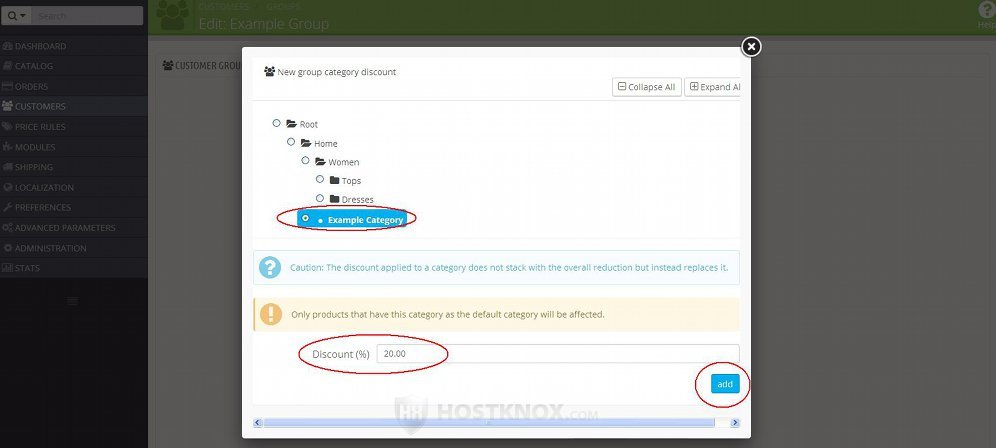
- Category discount - you can use this option to make discounts for products in particular categories. You can add different discounts for each of the categories that you've created. To add a discount click on the button Add a category discount. A window will pop out. Select the category from the list, specify the discount in the text field that's provided and click on the add button:
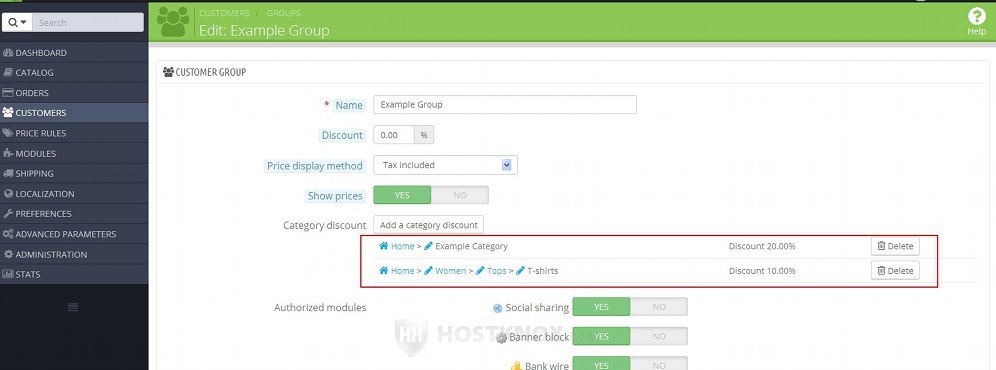
If you want to, you can add more discounts for different categories. Just click on the button Add a category discount again and follow the same steps. All the discounts will be listed. You can remove them by clicking on the Delete button for the particular discount:
There are a few things to remember. The discount will apply to all products in the particular category for which the category is a default one. As you know a product can belong to more than one category. So the discount will apply to a product only if that category is its default category. You can manage the categories to which a product belongs and its default category from the product's options (Associations tab). The category discount that you set up from this option overwrites the general discount. For example, if you have added a general discount from the Discount option on the same page, it will not apply to those categories for which you have set specific discounts from the Category discount option. As with the other group options, this option will affect those customers for whom the group is the default one. If a customer belongs to more than one group, the category discounts of the default group will be applied.
Let's continue with the additional options on the form for editing customer groups:
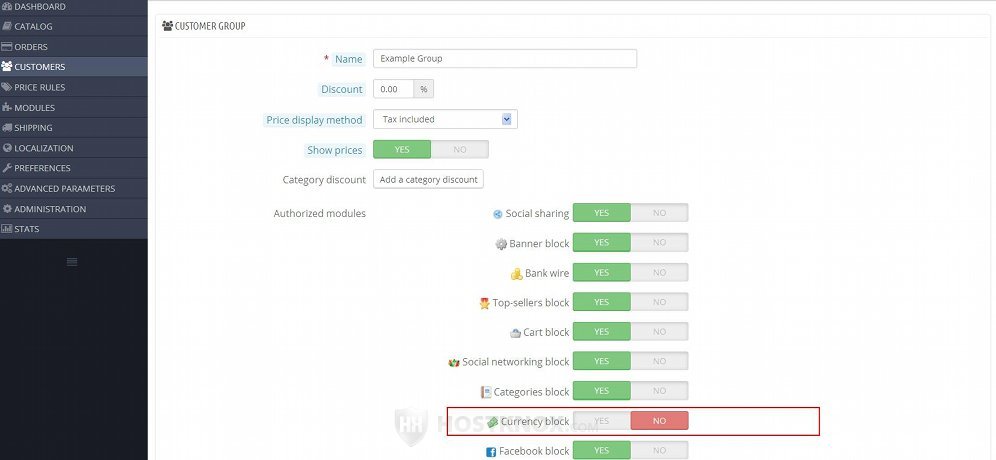
- Authorized modules - this option is a list of the modules. By default, all these modules are authorized which means that the customers belonging to the group can take advantage of whatever options the particular modules provide on the frontend. You can unauthorize modules so that the customers from the group will not be able to use them. For example, if you don't want the customers from that group to be able to see and use the currency block on the frontend, just mark the No button for Currency block:
Note that unlike the other group options if the customer belongs to more than one group, all the groups are considered when it comes to the authorized modules. For example, if you disable a module from the options of the customer's default group and the customer belongs to another group for which this module is not disabled, then the customer will still be able to use the module. If you disable the module in that other group as well, then the customer will not be able to use the module. Another alternative is to put the customer only in one group.
If you make any changes don't forge to click on the Save button.
In PrestaShop 1.5 the Authorized modules option doesn't consist of Yes and No buttons for each module. Instead there are two columns. One for the authorized and another for the unauthorized modules:
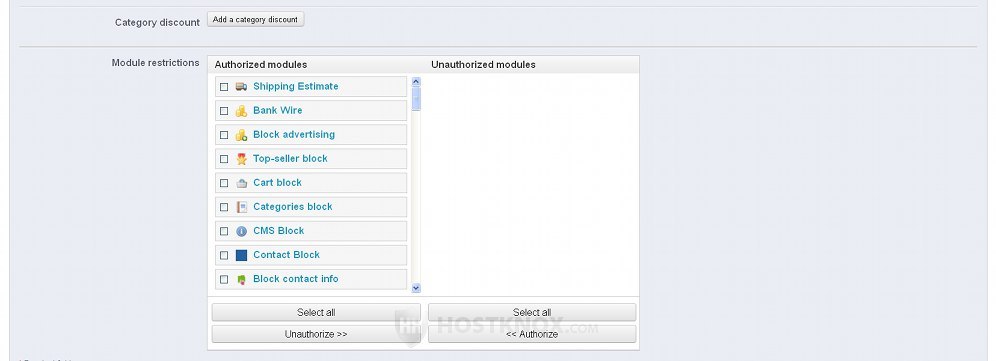
To unauthorize/authorize a module, mark its checkbox and click on the Unauthorize/Authorize button. Alternatively, you can drag-and-drop it using your mouse.
Delete Customer Groups
To delete a customer group, go to Customers menu>Groups sub-menu in the admin panel, click on the arrow that's next to the Edit button of the group that you want to delete and from the drop-down menu that appears select Delete:
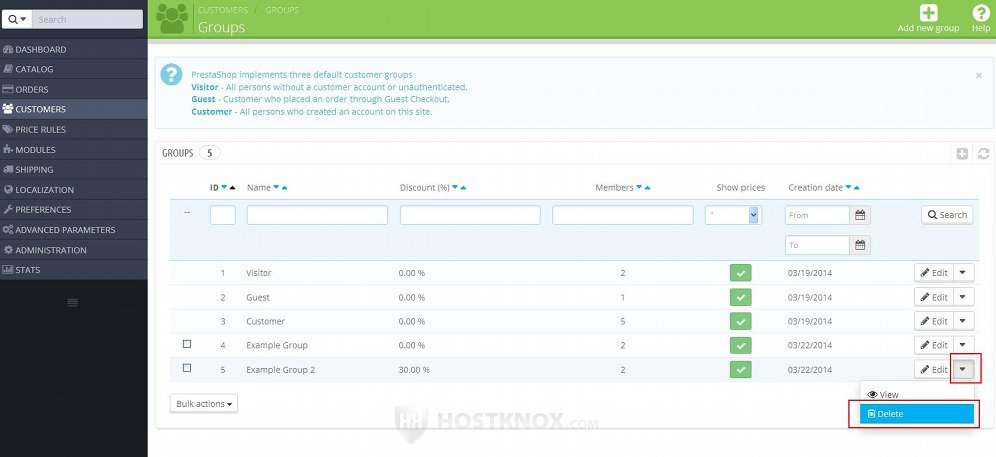
In PrestaShop 1.5 there's no such drop-down menu; the delete button is an icon that's next to the edit button and looks like a trash can.
Note that you can't delete the three preconfigured groups that come with every PrestaShop.
You can delete more than one group at the same time. To do this mark the checkbox that's in the first column of the table for each group that you want to delete, and from the Bulk actions drop-down menu under the table select Delete selected.
Note that if there are customers who belong only to the deleted group, they will be automatically put in the preconfigured Customer group. If there are customers in the deleted group who are associated with other groups and one of these groups is Customers, it will become the default customer group for those customers.
View Customer Group Information
To view a summarized information about a group and the customers who are in that group, go to Customers menu>Groups sub-menu, click on the arrow that's next to the Edit button for the particular group and from the drop-down menu that expands select View:
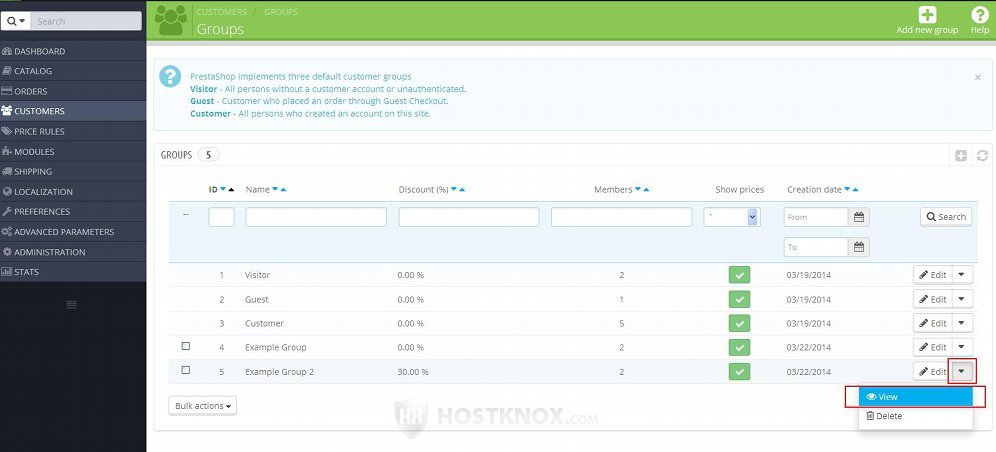
In PrestaShop 1.5 there's no such drop-down menu; the button for viewing a group is right next to the one for editing and it looks like a magnifying glass.
On the page that opens you'll see all the information about the group. This includes the current discounts (if any), how the options for tax and price display are set, and a list of the customers that are in the group:
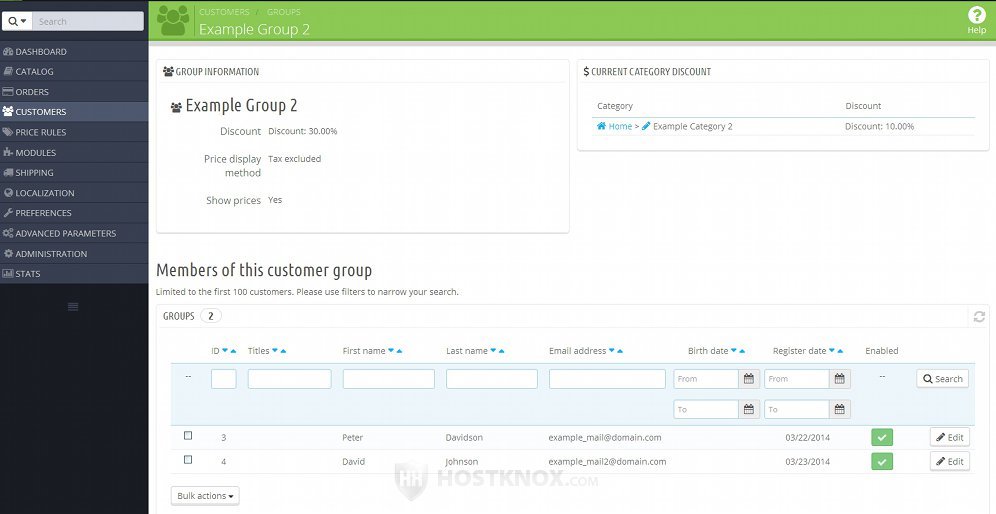
For each customer there's an edit button with which you can edit the settings of the customer's account.
Associate Customers with Customer Groups
You can put a customer in one or more groups or remove them from groups from the account settings of that customer. To do this, go to Customers menu>Customers sub-menu in the back office, on the page that opens find the customer you need in the table with the existing customers, click on the Edit button for that customer, and on the edit form that's displayed there's a list with the groups that you've created. Under it there's a drop-down menu with which you can select the default group for that customer:
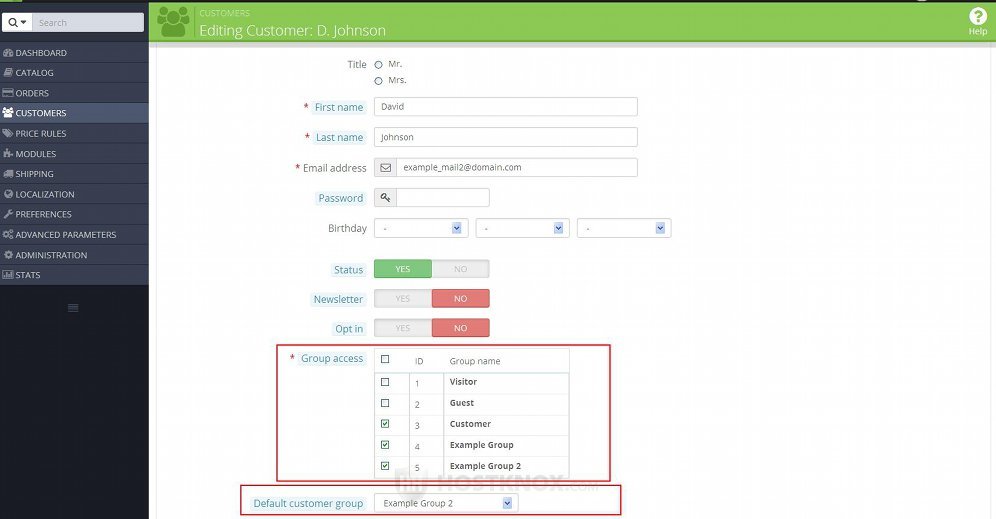
To put a customer in a group, mark the checkbox for the corresponding group. From the drop-down menu Default customer group you can select the default group for the customer. As we already explained, the discount and tax display options of the default group are those that affect the customer.
Limit the Access of Customer Groups to Categories
One of the things that you can use customer groups for is to configure which customer groups have access to each of the product categories in your store. You can do this from the settings of each particular category. Go to Catalog menu>Categories sub-menu, in the table with the categories click on the Edit button for the category that you want to configure, and on the page with the category settings find the option Group Access:
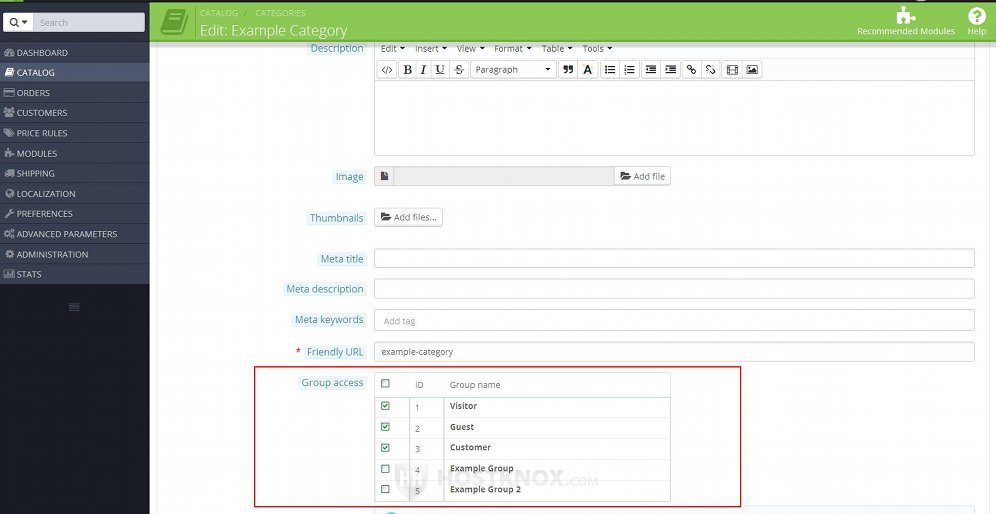
Mark the checkboxes for the groups to which you want to give access to the category you're editing. By default, when you add a new category the three preconfigured groups that come with PrestaShop (Visitor, Guest, Customer) are marked. Note that when you add a new customer group it will not have access to the existing categories. If you want it to have access, you have to edit the categories and mark the checkbox for the group.
If a customer is in a group that has no access to a category, the customer will not be able to open the category page on the frontend and the product pages of the products that are in the category. Note however that if there are products in that category that are also associated with another category or categories to which the particular customer group has access, then the customer will be able to open the and view the product pages of those products.
Another point to make here is that if a customer is a member of more than one group and one of these groups has no access to the category but the other group(s) has access, then the customer will have access to the category. This applies regardless of whether the blocked group with no access is the default one for the customer.
Links to Other Tutorials and Articles on Managing Customers in PrestaShop
We have a detailed general tutorial on how to manage customers and another one on managing customer addresses. If you want to move customers from one PrestaShop instance into another you'll find useful the tutorial on exporting and importing data in PrestaShop:
- how to manage customers in PrestaShop
- how to manage customer addresses in PrestaShop
- how to export and import data in PrestaShop
In our knowledgebase there are some individual articles related to customer registration and to managing customers:
- how to make optional or remove the phone fields from the customer registration form in PrestaShop
- how to make optional or remove the phone fields from the customer account settings in PrestaShop
- how to remove the Company field from the registration form and the customer account settings in PrestaShop
- how to enable guest checkout in PrestaShop
- how to export customer information from PrestaShop using phpMyAdmin