PrestaShop 1.4 Category Image Maps Tutorial
What is a category image map and how to create one in PrestaShop
In this tutorial we'll show you how to make a PrestaShop image map. The image map is displayed on the frontend of your site when a customer opens a product category. The image appears at the top of the category page, above the list of products. It's called an image map because parts of the image are actually links to products within the category. When a customer clicks on a part of the image that's a link, the product page will be displayed. In addition to this when the mouse pointer is hovered over a link on the image map, a small window pops out that shows the product's image and short description.
We'll demonstrate how to add an image map in PrestaShop by creating an image map for an example category with some sample products in it. Of course, you should have the category already created and the products added in it before you can add the image map to that category. If you need more information on these topics you can check the tutorial on creating categories in PrestaShop, and the one about PrestaShop products.
For the purposes of our example we have created a category called Pencils with a few products in it (colored pencils).
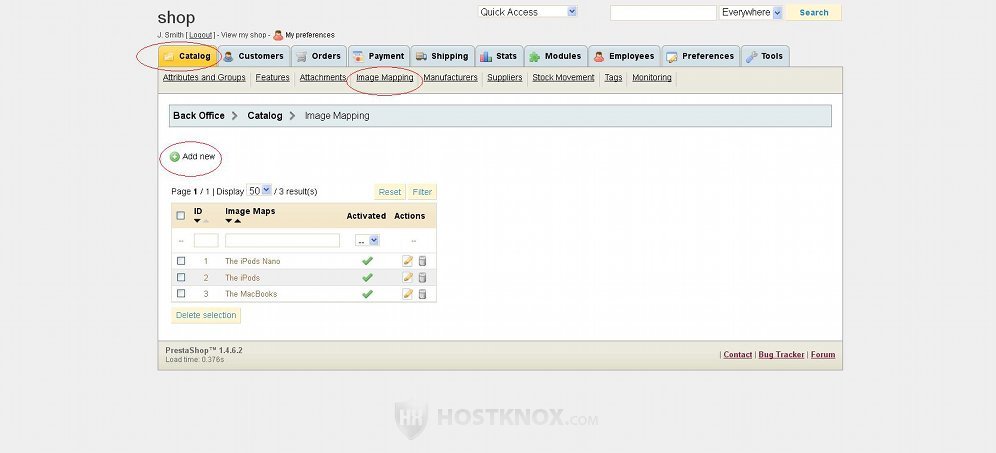
So after you have added the category and the products in it, click on the Catalog tab of your store's backend and then on the Image Mapping sub-tab. On the page that opens you'll see a table with the existing image maps (if any). The full installation mode of PrestaShop comes with a few sample image maps. To add a new image map click on the Add new button:
After you do it a page with some settings will be displayed:
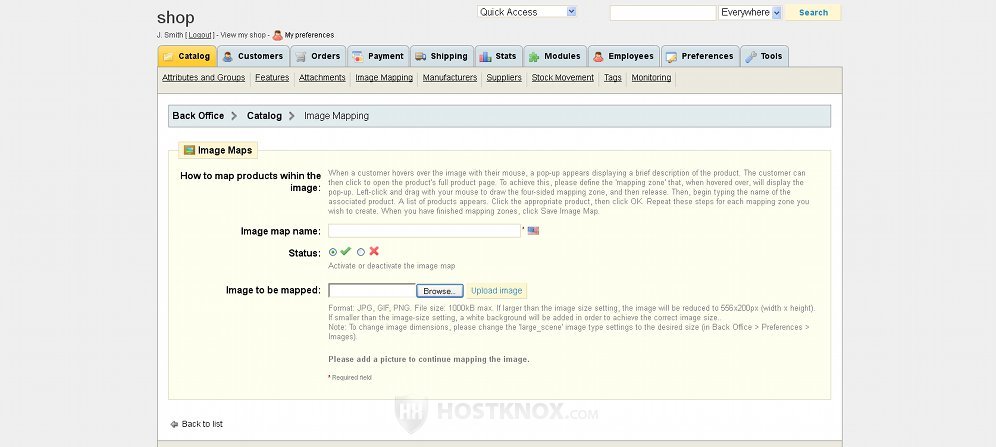
In the field for Image map name type the name of the image.
From the Status option you can enable or disable the image map; leave it enabled if you want the image to be displayed on the frontend. After that click on the Browse button to locate on your local computer the image that you want to use as an image map. The category image dimensions for the default prestashop theme are 500 x 150 pixels (width x height). If the the image that you want to upload is bigger, it will be automatically resized. If the image is smaller, it will be displayed on a white background so as to fit into the default dimensions.
For better results it's advisable to crop and/or resize the image to the correct dimensions before you upload it. After you select the image click on the Upload image button. If you have added a category image while creating the category to which you want to add the image map, you can upload the same image, or you can use another one.
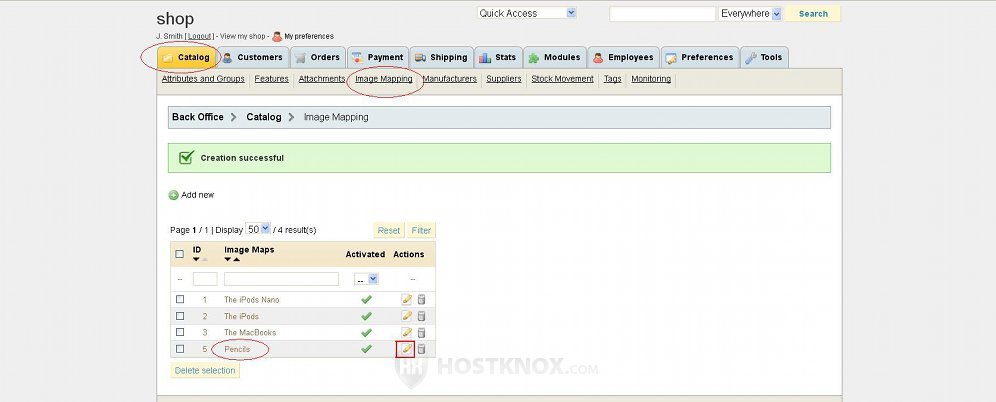
After you click on the Upload image button the image will be uploaded, and you will be automatically taken back to the Image Mapping sub-tab page. Next, you have to convert the uploaded image into an image map. To do this click on the edit icon for the particular image map. In our example the image is called Pencils:
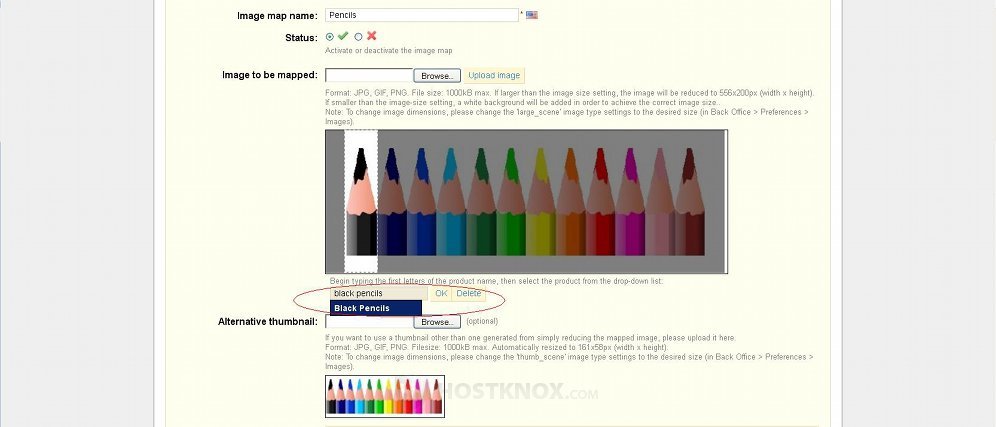
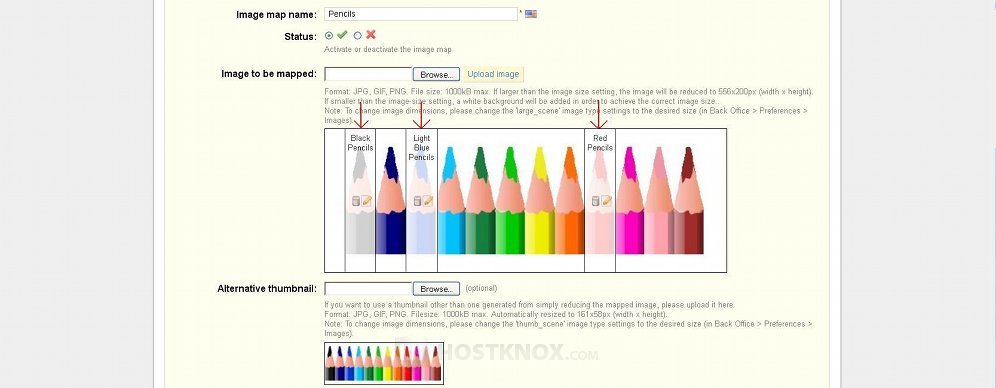
When you click on the edit icon you'll be taken to the settings page again, but this time there should be some additional options. The uploaded image should be displayed somewhere around the middle of the page. To select an area on the image that you want to be turned into a link, simply hover the mouse pointer over the image, click and hold the left mouse button, and drag the mouse cursor around the desired area.
After the area on the image is marked a text field will appear under the image. In this text field start typing the name of the product that you want to be displayed when somebody clicks on this part of the image. A drop-down menu will appear from which you can select the particular product. Select the product, or just finish typing its name and click on the OK button.
In our example Pencils category we have added three products: black pencils, red pencils, light blue pencils. On the image that we uploaded there are different colored pencils. So first we mark the area on the image around the black pencil and we link it to the product black pencils:
After the area on the image is mapped, you'll see in the marked area the name of the product and two icons: an edit icon and a delete icon. If you click on the edit icon you can change the product and adjust the mapped area. If you click on the delete icon, the link to the product and the marked area will be removed.
In our example category we have two other products, so we map the area on the image around the red and the blue pencils and we link them to the corresponding products. In this way we end up with an image map with three links:
If we add more products to the category later, we can add them to the image map too.
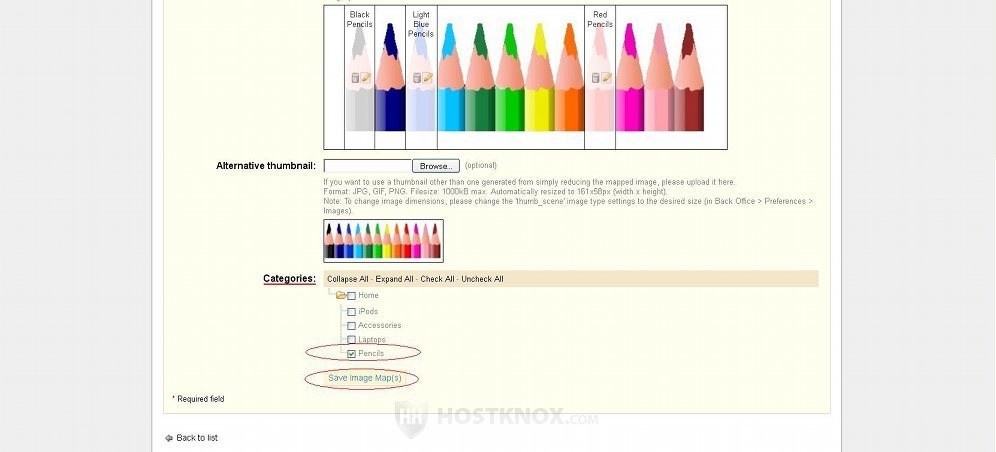
After you map the image, select the category to which you want the image to belong to by marking the checkbox for that category at the bottom of the page. Then click on the Save Image Map(s) button. In our example we select the Pencils category and we save the image map:
You can actually have more than one image map per category. To add another image map to the same category, just mark the checkbox for the same category when you create the new image map. One of the images will be displayed as the default one at the top of the category frontend page. Under it there will be a scroll bar from which customers will be able to select any of the available image maps. The selected image map will be displayed at the top of the page, on the place of the default one.
Now that the image map is created we can refresh the frontend of the shop to see the result:
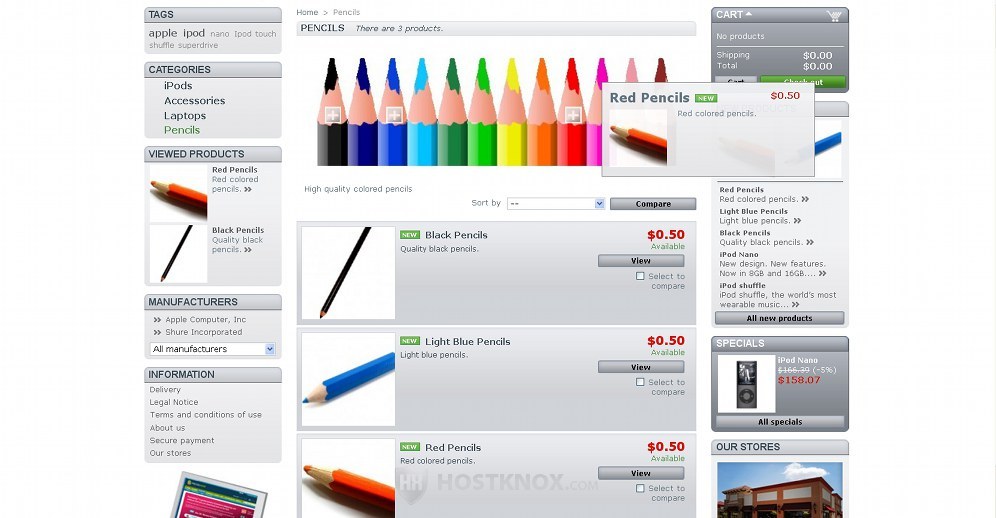
The mapped areas on the image are marked with a "plus" sign. When we hover the mouse pointer over a mapped area, the picture and short description of the product that's linked to the area appear. If we click on the mapped area, the product page will be displayed.