PrestaShop 1.4 CMS Tutorial
How to add and manage CMS pages in PrestaShop
In PrestaShop you can create additional pages, an About us page for example, from the backend of your store. The CMS Block module that comes with the installation package can be used to display links to these pages on the frontend of the store.
In the full PrestaShop installation mode this module is installed and enabled, and there are several pages created for you in advance that the module displays on the frontend. By default, the CMS Block module is configured to show an information block with links to these pages in the left column of your store's frontend, and it is also preconfigured to display some footer links:
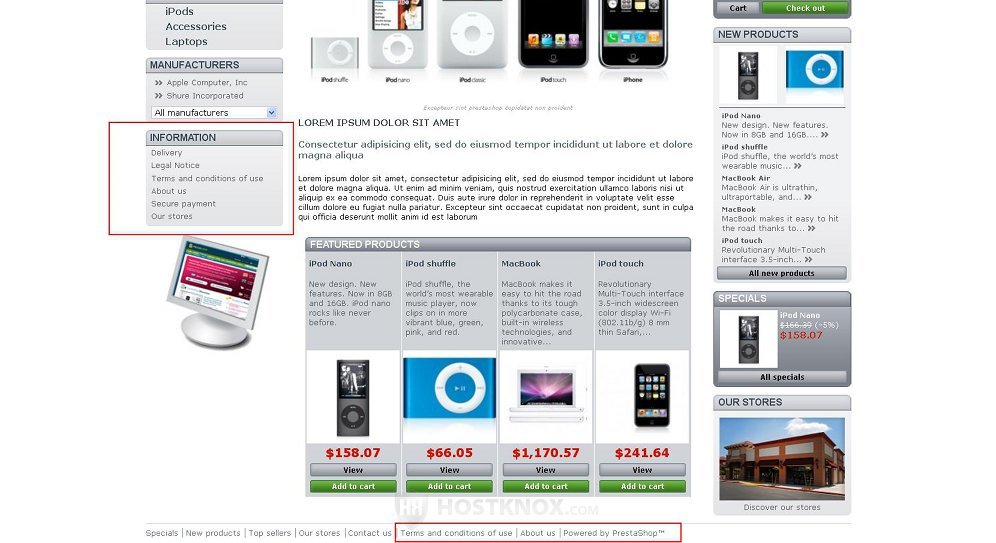
An exception is the Our stores link. It doesn't display a CMS page like the others but it opens the store locator map.
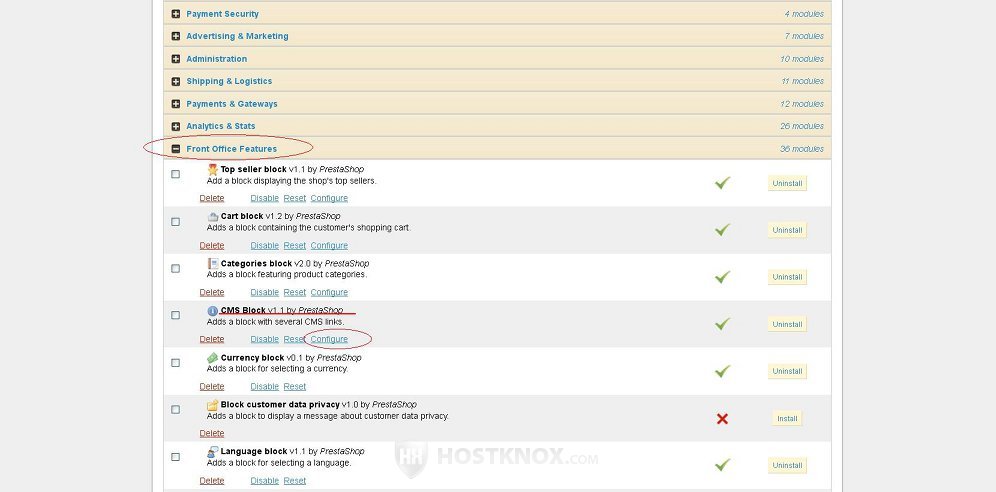
You can remove any of the CMS page links shown in the Information block and the ones at the bottom by configuring the options for the CMS Block module. From these options you can also add links to new pages. To change these settings, log in to the backend of your store, click on the Modules tab, then from the module sections displayed in the middle of the page select Front Office Features, find the module CMS Block and click on the Configure button:
After you click on the Configure button you'll be taken to the page with the settings for that module:
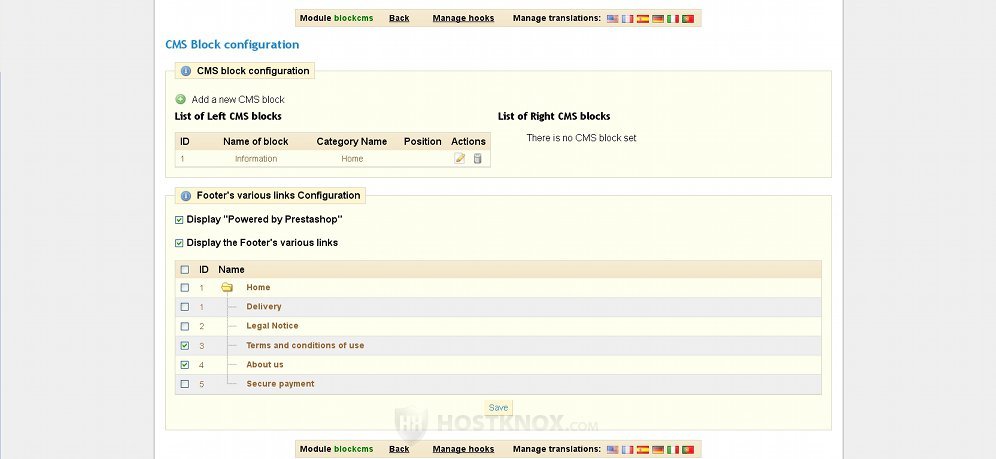
The first section on that page is labeled CMS block configuration and it shows the blocks added to the left and/or right column of your shop's frontend. The default Information block is listed there as a left column block. To edit the options for that block just click on the edit icon (a pencil). Then you'll be able to remove links to CMS pages from the block or add new ones. If you want to add links to new pages, you should have created the pages in advance. We'll come to that a bit later in this tutorial.
You can also add a new CMS block, in the right column for example. Click on the button Add a new CMS Block and configure the options that appear. By default, the CMS Block module is added to the right column position (hook) but there's no right CMS block created, so nothing is displayed on the frontend. Once you add the CMS block you can move it within the position or to other positions. For more information on how to do this read the tutorial on changing the positions of PrestaShop modules.
The second section on the CMS Block settings page is Footer's various links Configuration. From that section you can select for which of the existing CMS pages there should be a link shown at the bottom of your store's frontend.
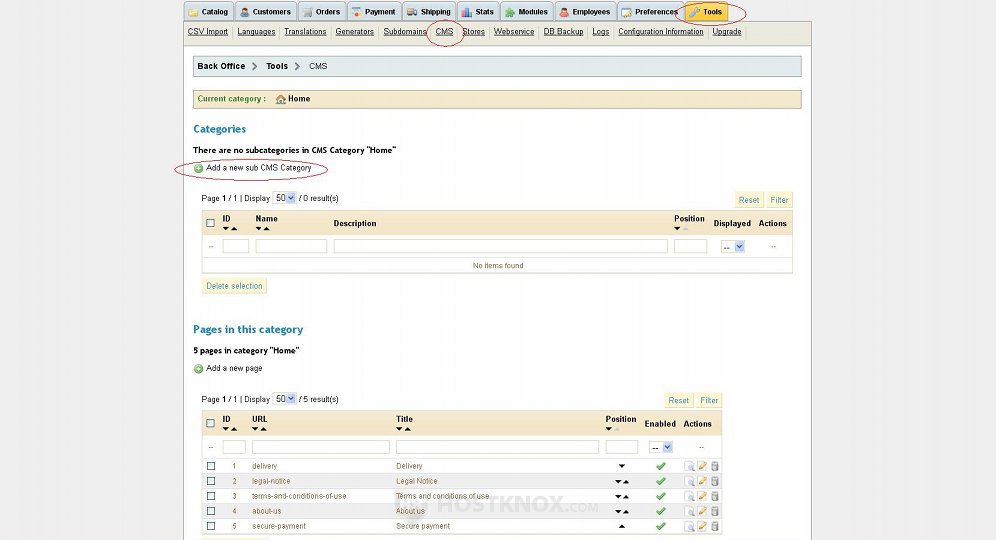
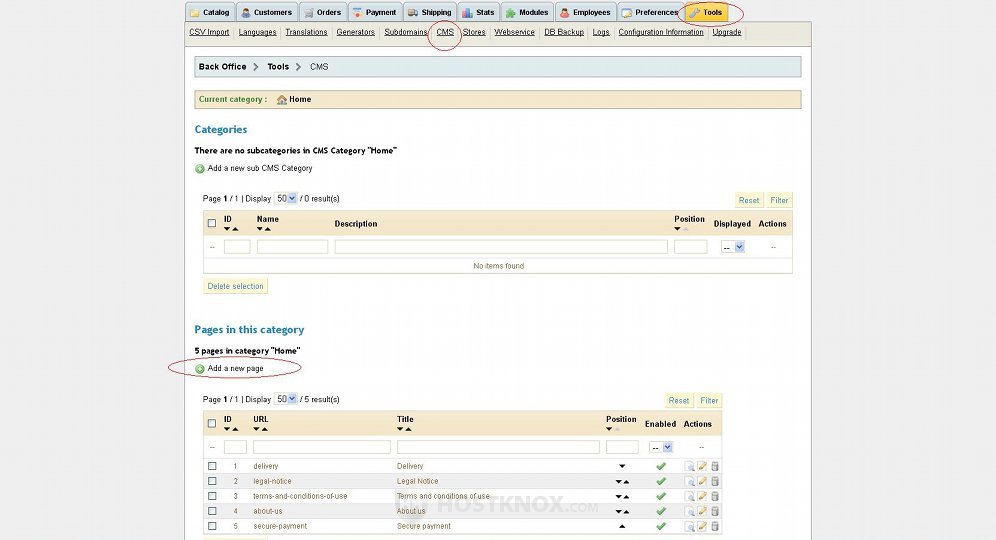
To add, edit or delete CMS pages, click on the Tools tab of your store's backend and then on the CMS sub-tab. On the page that opens there are a couple of tables. One is for subcategories of the default Home CMS category and the other is for the pages in the Home category. To add a new CMS subcategory, click on the button Add a new sub CMS Category in the upper left corner of the CMS sub-tab page:
This will display the CMS category settings:
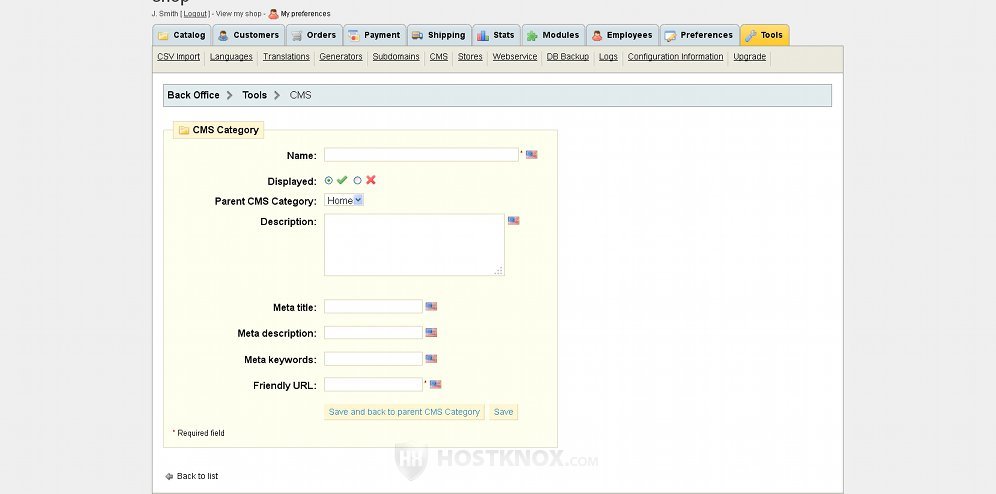
Type the name of the category in the respective field, from the Displayed option enable or disable the subcategory, choose the parent category from the Parent CMS Category drop-down menu (you can create subcategories within other subcategories). In the text field for Description you can type a short description of the subcategory.
The "meta" options are not necessary, but if you want you can configure them. These are search engine optimization options. In the field for Meta title type a title for the category and in the field for Meta description type a brief description of the category. This information is often displayed on search results pages. In the field for Meta keywords type the desired keywords, and separate them with commas, if you use more than one. The field for Friendly URL should be automatically filled according to the name that you typed in the Name field. If you change the URL and there's more than one word, separate the words with hyphens. After you're done click on the Save button.
To add a new page to the Home category or to any subcategory, click on the Add a new page button on the CMS sub-tab page, above the table with the pages in the Home category:
The page settings are very similar to the subcategory settings:
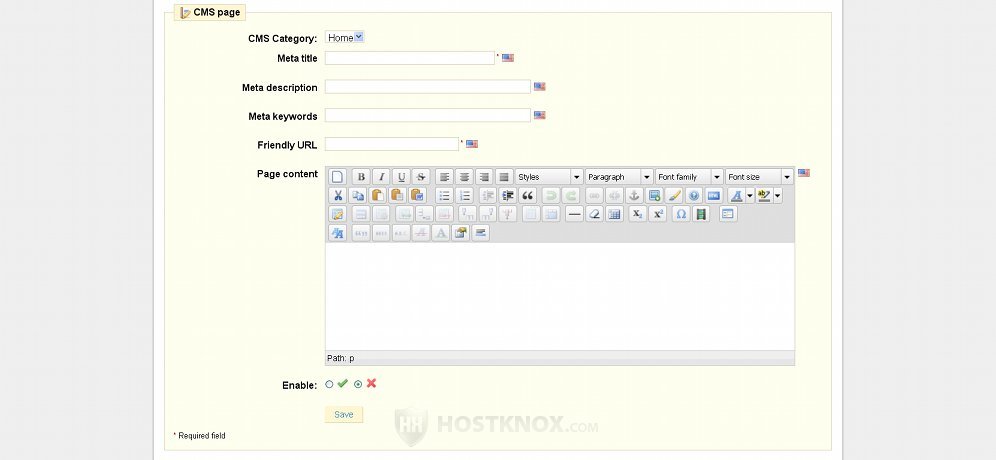
From the CMS Category drop-down menu you can select whether the page should be in the Home category or in a subcategory. The "meta" options are the same as the subcategory ones. The difference is that Meta title here is a required setting. Whatever you type in this field will also be used automatically in the field for Friendly URL. Of course, if you wish, you can change the URL. Use the built-in text editor to type the page content. Under the editor there's an Enable option from which you can enable or disable the page. Then click on the Save button to save your new page.
Now that the new page is added and enabled you can make it more accessible to customers by adding a link to it from the settings of the CMS Block module. Even if you don't add it to any of the CMS blocks, as long as the page is enabled people will be able to access it from your store's sitemap (provided the sitemap link is not removed), or directly by using the URL address of the page. This, however, will make the page much more difficult to find.
From Tools tab>CMS sub-tab you can also edit and delete the pages that you have added. Just click on the respective icon for the particular page.