PrestaShop 1.4 Orders Tutorial
How to manage orders in PrestaShop
Orders are an essential part of any online store. In PrestaShop you can manage all the customers' orders from the backend of your store.
After you log in to your store's admin panel click on the Orders tab. On the page that appears you'll see a table with all the orders placed by customers. The orders are in different colors according to their status. For example, if the payment was accepted, the order should be colored in light blue by default. If you're still awaiting payment for the order, it should be colored in dark blue.
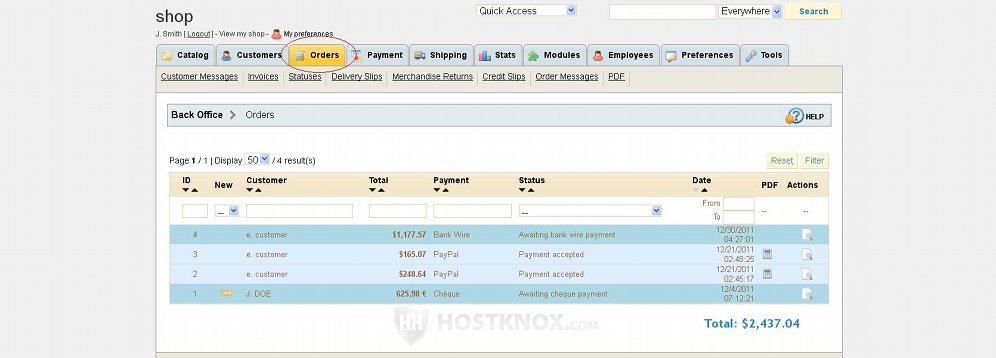
After an order is placed on the frontend of your shop it will be immediately displayed in the table on the Orders tab page of the store's backend. With some payment methods such as PayPal the money transaction should be instantaneous, and so you should receive the payment right away. Some payment methods such as bank wire and check take longer, so you have to wait for the payment. Whatever the case, you can manage the order and view all details connected with it by clicking on the table row where the order is displayed (on the Orders tab page). You can also click on the view details icon (a sheet of paper with a magnifying glass) to see the order details.
On the page that opens you'll see important information that you'll need to complete the whole order process:
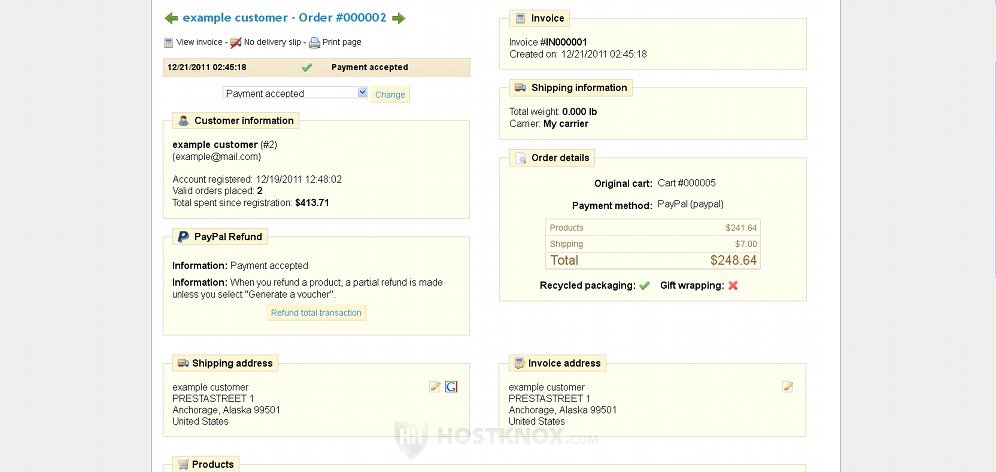
At the top of the page is the name of the customer and the order number (e.g. example customer - Order #000002). Right under it is the order status. In our example the order status is Payment accepted. You can change the order status from the drop-down menu. For example, if you are awaiting the payment for the order, you can change the status from the drop-down menu to Payment accepted after you receive the money. Or, for instance, you can change it to Shipped after you send the ordered product(s).
Under the status drop-down menu there's a section called Customer Information in which you can view details such as the name of the customer, the email address, the account registration date, etc.
Below the Customer Information section there's a section labeled Shipping address which is very important since it lists the address to which you have to send the ordered product(s). Don't forget that a customer can add different addresses in their account, and the delivery address can be different from the invoice address. So you should check the shipping address carefully for each order, even for different orders placed by the same customer. You can use the Google Maps button that's in the upper right corner of the section to see where the address is.
As you can see from the screenshot above, on the right side of the page there are additional details: the invoice address and number (you can also download or view the invoice), some additional shipping information (e.g. weight, carrier) and other order details.
Scrolling down the page there is more information connected with the order:
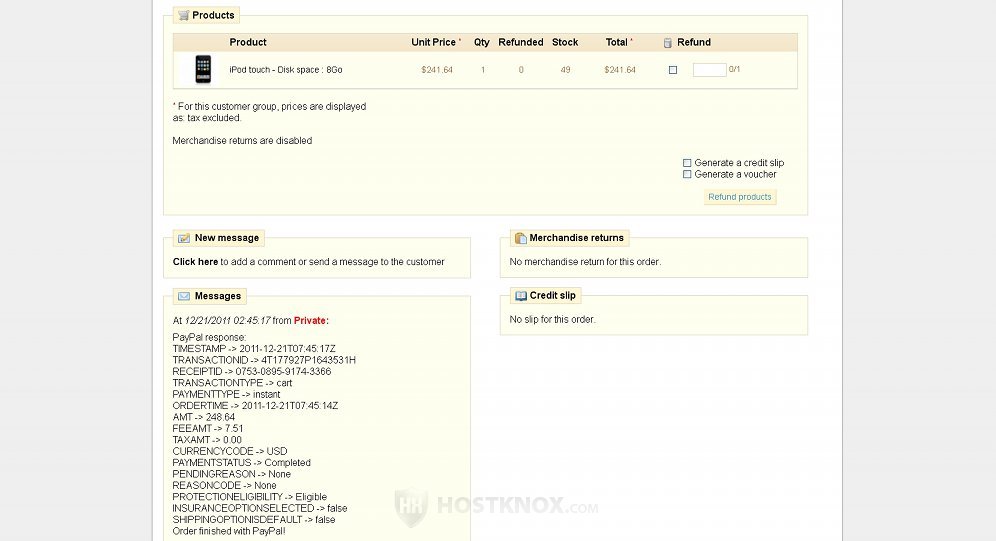
In the Products section you can see what products the customer has ordered. In the Messages section you can check whether the customer has also sent you a message concerning the order. Customers can add a message to the order at the Address step of the checkout process. They can actually also do it after that from the My orders section of their account. You can send a reply by clicking on the Click here link that's in the New message section. On the example screenshot above there's a message sent automatically by PayPal Sandbox (we have used a PayPal sandbox account to make the test order). For some more information on PrestaShop messages read the tutorial on how to manage order and customer messages in PrestaShop.
Next to the Messages section there's a section called Merchandise returns. There shouldn't be anything listed in that section, unless the customer was unhappy with the ordered product(s) and returned it. Merchandise returns are disabled by default. For some more information on this read the tutorial on managing merchandise returns in PrestaShop.
Once the ordered product(s) is delivered you can change the order status to Delivered, and that's the end of the order process:
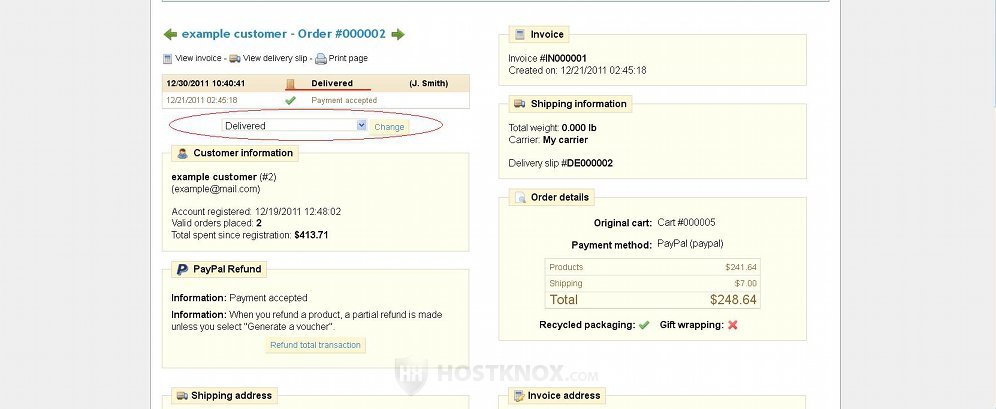
The order will still be listed in the table on the Orders tab page, but with the new status. You can refer to it at any time. For more information on order statuses read the tutorial on managing invoices in PrestaShop.