PrestaShop Update Tutorial
How to update PrestaShop to the latest version
In this tutorial we'll show you how to manually upgrade your PrestaShop store to the latest stable version. It's important to update your PrestaShop when there's a new stable release because updates fix different bugs, make various improvements in terms of security, optimization, etc.
Before you start the update process back up your PrestaShop files and the MySQL database used by the application. You can back up the files by downloading them to your local computer with an FTP client. You can back up the database through phpMyAdmin. If you need more information on how to do this, read the tutorial on backing up your site. You can also back up the database through the backend of your store (Tools tab>DB Backup sub-tab).
If you have made any modifications to the language translations or you've added new translations, you have to export those too. To do this click on the Tools tab of your admin panel and then on the Translations sub-tab. Find the section labeled Export a language, select the language and the theme from the respective drop-down menus and click on the Export button to save the file on your local computer:
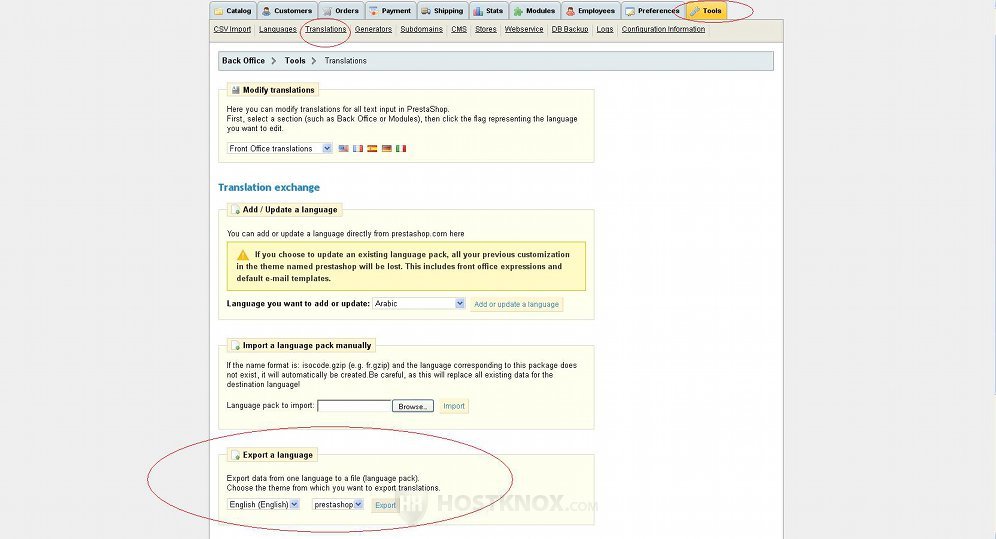
After the update is finished you can import the translations from the same page of the admin panel. Just click on the Browse button in the section Import a language pack manually, locate the file on your local computer and click on the Import button. Of course, you have to do all this only if you have made any modifications to the translations.
Before you start the upgrade you also have to disable the frontend of your store, so that customers won't be able to access it during the update process. If you don't know how to do it, check out the article on how to disable your PrestaShop store.
Next, you have to download the newest stable PrestaShop version. You can do this from the download section of the official PrestaShop site. When there's a new version there should also be a message on the home page of your store's admin panel. The message should contain a link which you can use to download the new version to your local computer.
After you download the archive to your local computer, unzip it. It should contain a folder called prestashop. Inside that folder are all the PrestaShop files and directories. Find the admin folder inside the prestashop directory and rename it to match the actual name of the administrator folder on your PrestaShop hosting account.
As you probably remember, during the installation process you were asked to change the name of the admin folder, so now you should change the name of the admin folder in the new version that's on your local computer with the name of the directory on your account (e.g. newadmin). The names should be the same.
The unpacked prestashop folder (the new version) also contains folders called mails and classes. If you have made modifications to mails or you have added custom classes, copy the same folders from the backup copy of your PrestaShop files to the unzipped prestashop folder with the new version. If you haven't made any modifications, you don't have to do anything.
If you have made any modifications to the code of core files, you should have the changes listed somewhere because they will be overwritten during the upgrade, and you'll have to make them again.
Next, you have to upload the contents of the unzipped prestashop folder (without the prestashop folder itself) to the root PrestaShop directory on your hosting account. For example, if your PrestaShop store is installed in a folder called prestashop in the root public_html directory on your account, upload the files and folders inside the unzipped prestashop directory from your local computer to public_html/prestashop. You can do this using an FTP client. When you're asked, confirm that you want to overwrite the old files on the account with the new ones you're uploading.
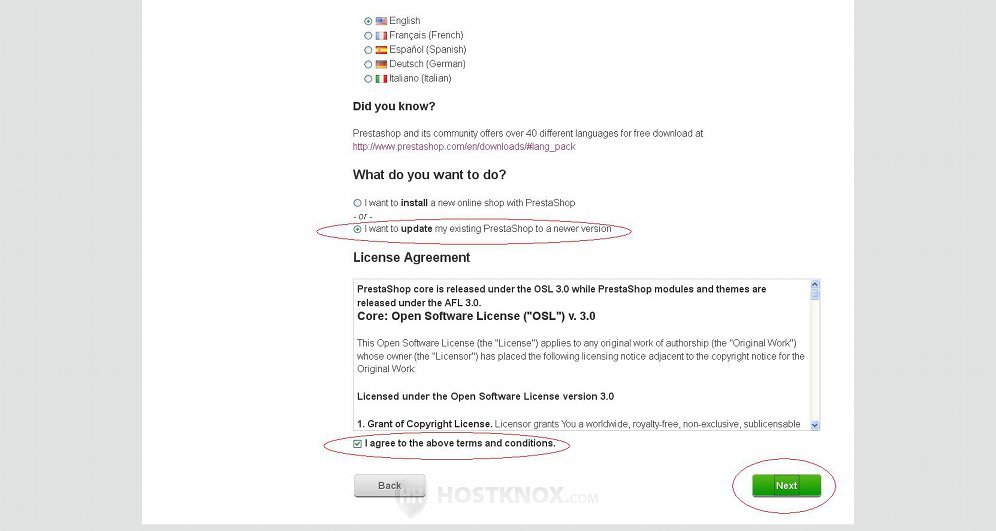
After that you have to start the install script. To do this, open with your internet browser the URL address of the install folder. The install folder should be in the root PrestaShop directory on your account, so just use the URL address of the store followed by /install (e.g. yourdomain.com/prestashop/install). On the new page that opens make sure that the button for I want to update my existing PrestaShop to a new version is marked. Then accept the license agreement by marking the respective checkbox, and click on the Next button in the lower right corner:
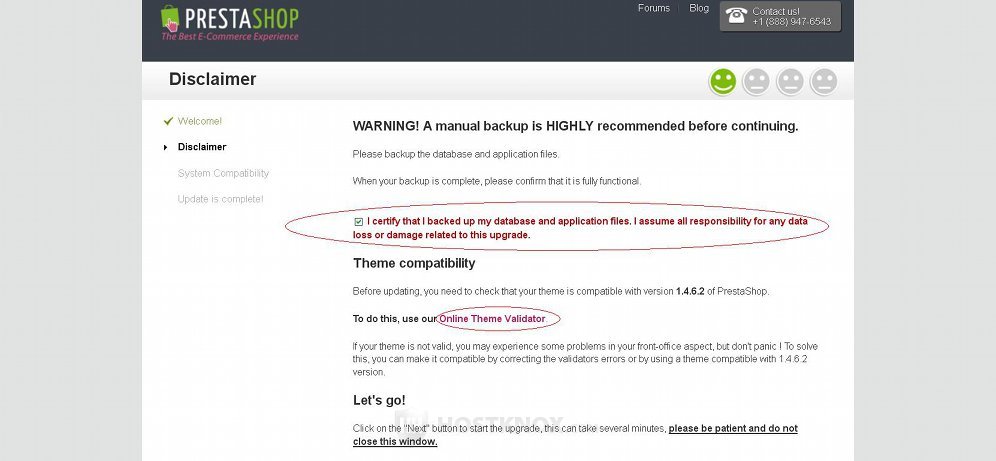
On the next page you have to confirm that you have backed up the PrestaShop files and the database used by the application. Simply mark the respective checkbox. After you do it some additional options and information will appear. You can use the link to the online theme validator to check whether your store's theme is compatible with the new version. This shouldn't concern you if you use the default theme.
Further down the same page there should be some additional information about the number of modifications that will be made during the update: the older the current version, the more modifications. You'll also be shown an estimate of the required time for the update. Under this information there should be some hosting parameters: the allowed time for the upgrade and the allowed memory. Make sure that the estimated upgrade time does not exceed the allowed time. To continue with the upgrade click on the Next button in the lower right corner of the page.
After you do it PrestaShop will check the system compatibility. The results will be displayed on the next page. Everything should be fine.
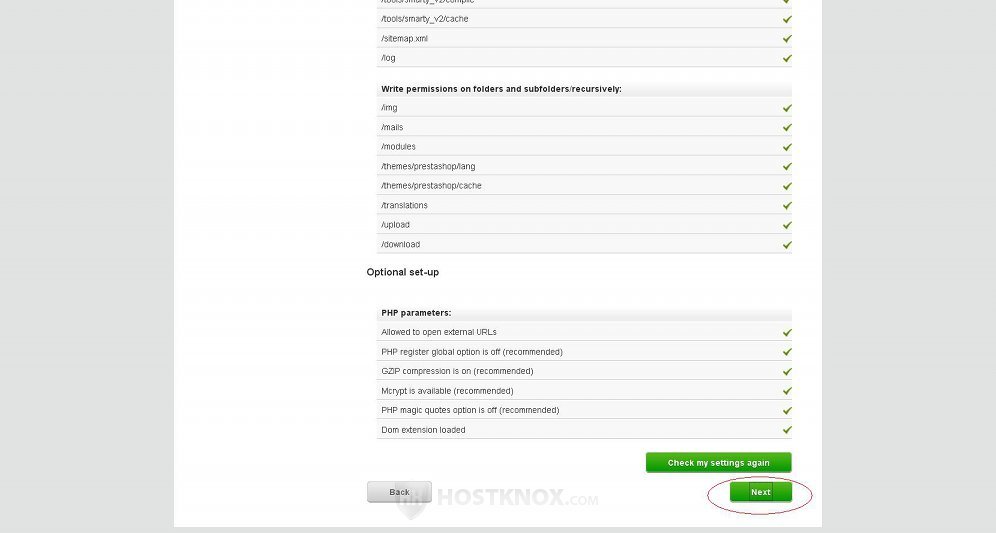
Click on the Next button to continue.
After you do it the update will be completed, and you'll see the last page informing you about the successful completion of the update.
You have to delete the install folder from the root PrestaShop directory on your hosting account (e.g. public_html/prestashop/install). You can do this from the Files section of the HostKnox control panel or with an FTP client.
Now you can go to your store's frontend and backend and check if everything works correctly. If you exported any custom translations, now you can import them back from the Tools tab>Translations sub-tab. After you make sure that everything is fine you can enable the shop from the Preferences tab of the admin panel.