PrestaShop 1.4 Merchandise Returns Tutorial
How to enable and manage merchandise returns in PrestaShop
By default, merchandise returns are disabled in PrestaShop. However, if you want to, you can enable this option to make the return process easier to track and manage.
To do this, log in to the backend of your store, click on the Orders tab and then on the Merchandise Returns sub-tab. On the page that opens there's a section labeled Merchandise return (RMA) options. Mark the Yes button for the option Enable returns:
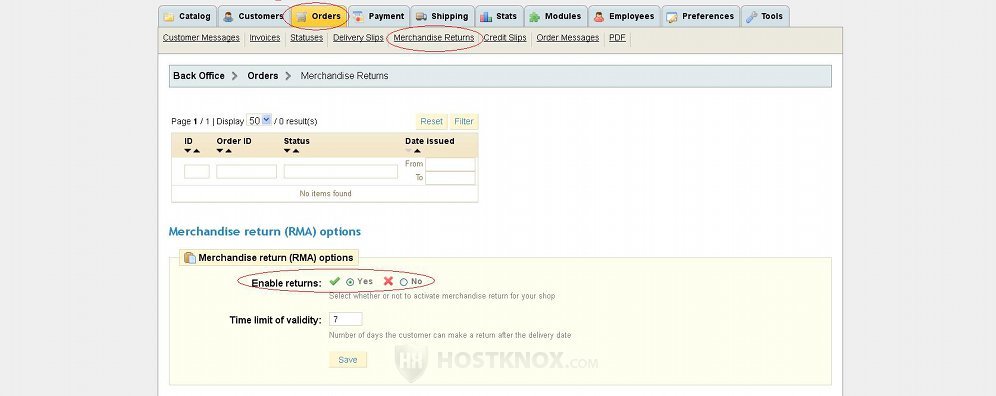
On the same page you can also set the number of days that the customer has to return the product once it has been delivered (e.g. 7 in the screenshot above).
To initiate the return process the customers needs to go to the frontend of your store, log in to their account, and open the order history. Then the customer has to view the details of the particular order by clicking on the order number:

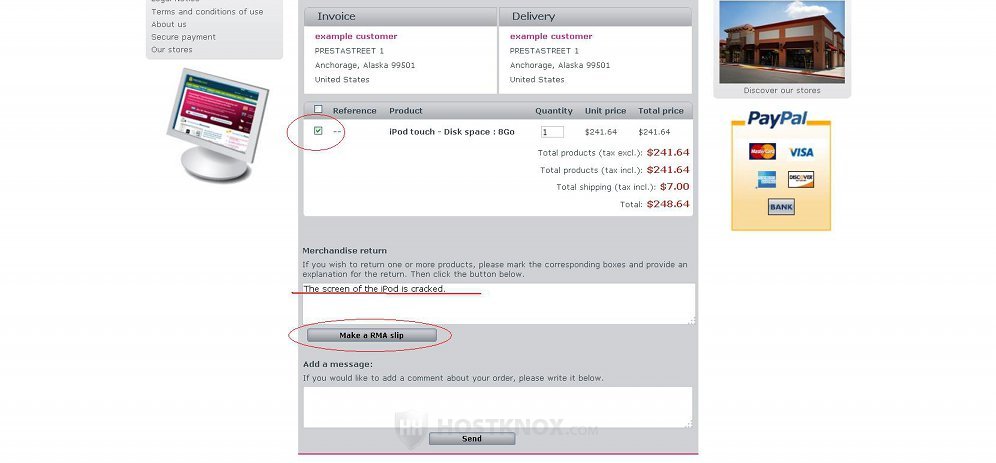
When the customer scrolls down the page they'll be able to see the products within the order. Then the customer has to mark the checkbox for the product that they want to return, provide an explanation in the text field and click on the Make a RMA slip button:
After the customer clicks on the Make a RMA slip button they will be automatically redirected to the Return Merchandise Authorization section of their account:
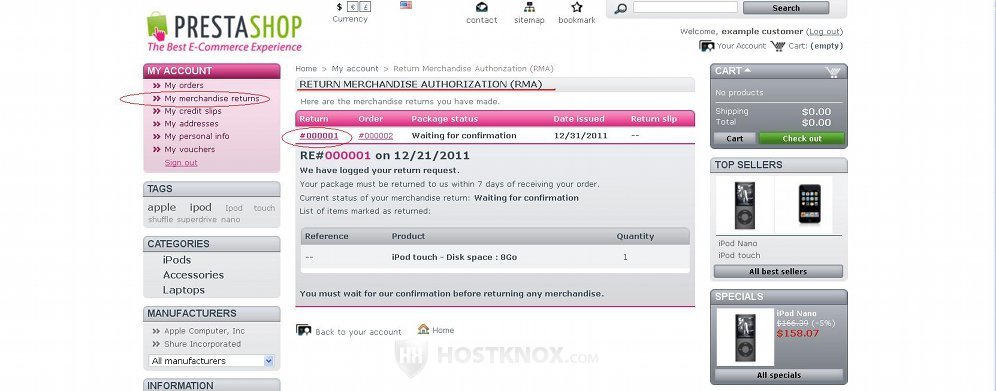
The customer can view the details for the merchandise return by clicking on the return number. The details will provide the customer with information on how many days they have to return the product(s). But first they have to wait for confirmation from you (the return status is automatically set to Waiting for confirmation).
To check for any merchandise returns and change their status, go to the Orders tab of your store's admin panel and then to the Merchandise Returns sub-tab. Above the merchandise return options there should be a table with the returns. PrestaShop doesn't automatically send emails to the shop's email address when a customer generates an RMA slip, so you should check the Merchandise Returns sub-tab regularly. In our example, there's one merchandise return waiting for confirmation:
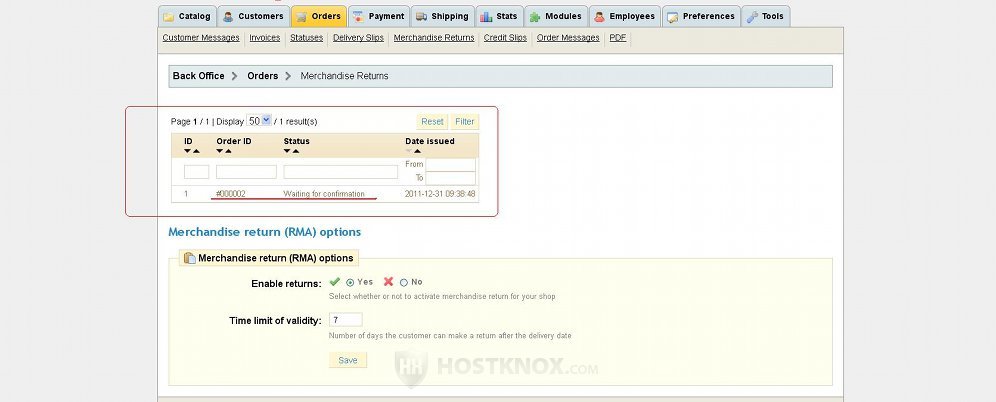
To view the order return details and change its status just click on the order ID or status. The page with the details will open. On that page you can use the respective links to view details about the customer and the order; you can also read the customer's explanation. Use the Status drop-down menu to change the status of the return. In our example we have to confirm the return so that the customer is notified that the return will be accepted and they can go ahead and send back the product(s).
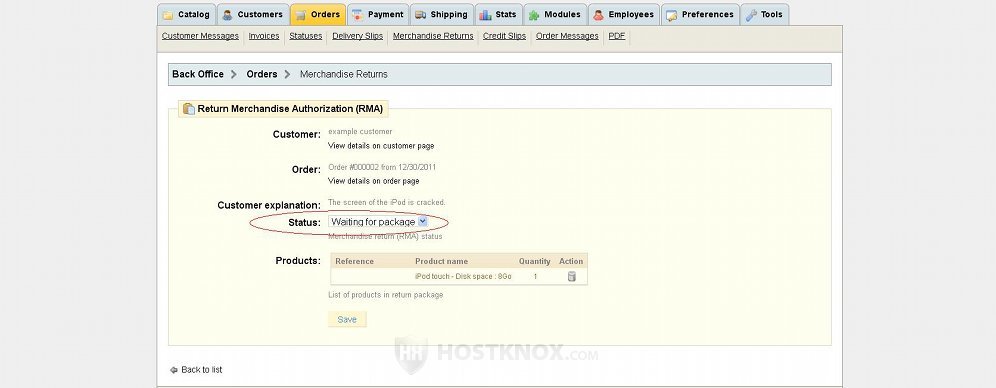
Don't forget to click on the Save button after you change the return status.
When you confirm the return, the customer will be able to see that from the merchandise return section of their customer account. A return slip with the shop's address will also be generated. The customer can download it from the same section, and then send back the product(s). PrestaShop will also automatically notify the customer with an email message when you change the order return status to Waiting for package.
After you receive the package and you change its return status to Package received (the customer will be notified automatically with an email message), you have to create a credit slip. To do this click on the Orders tab of your store's admin panel, find the order in question in the table with all the orders that's displayed on the Orders tab page, then click on its name to view its details. Scroll down the page with the order details and find the section Products. Mark the checkbox(es) for the product(s) that was returned. Under the products there are some checkboxes; mark the one for Generate a credit slip. There are a few other checkboxes that you can mark. For example, if you want also to repay the shipping costs, to restock the product or to give the customer a voucher (e.g. for discounts):
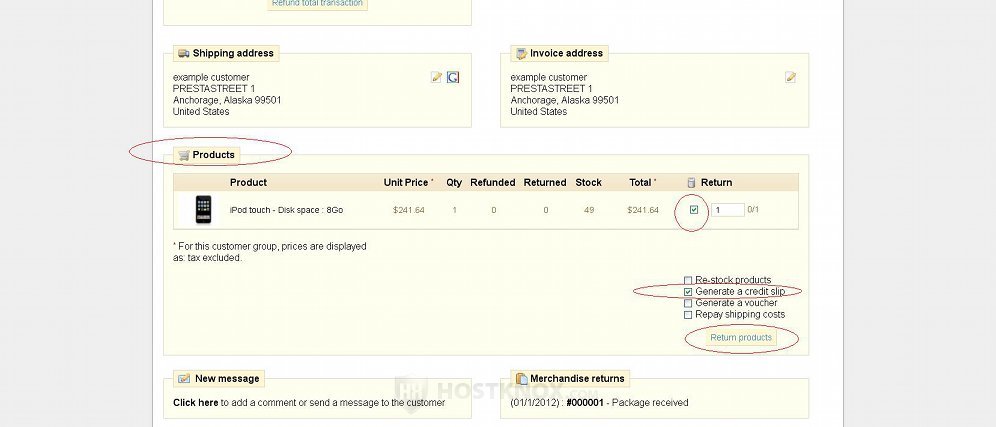
After you configure the settings click on the Return products button. This will generate the credit slip, and PrestaShop will automatically send the customer an email.
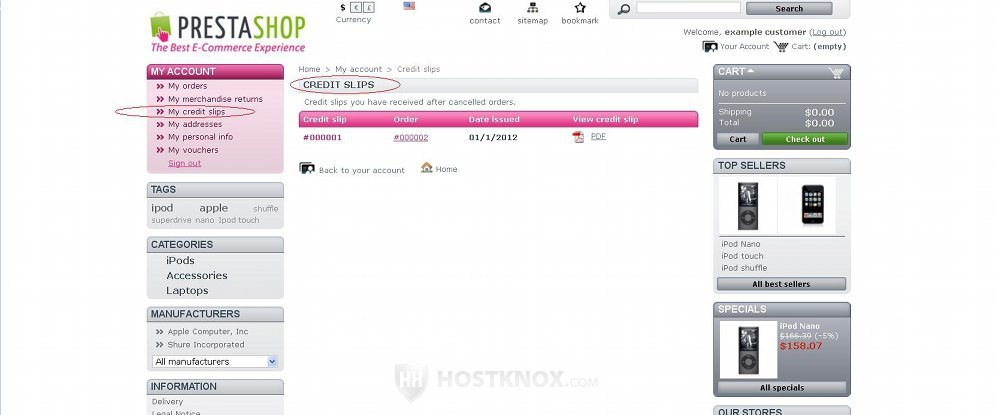
You can view and download the credit slip from the Credit slip section that's on the same page with the order details, or you can go to the Credit Slips sub-tab of the Orders tab where you can find all credit slips.
The customer can find the credit slip in the Credit slips section of their account:
Of course, the return process described above is an ideal variant. In reality it may happen differently. Customers often don't bother to generate RMA (Return Merchandise Authorization) slips; they just send you the product back asking for a refund.
You don't even need to enable merchandise returns from the store's backend options, in order to perform refunds. You can just send back the customer's money when you receive the returned product(s). The merchandise returns options, however, can help you in managing the whole process and keeping record of all returns.