PrestaShop 1.4 Products Tutorial
How to add products in PrestaShop
In this tutorial we'll show you how to add products to the product categories of your PrestaShop, and we'll go over the basic options.
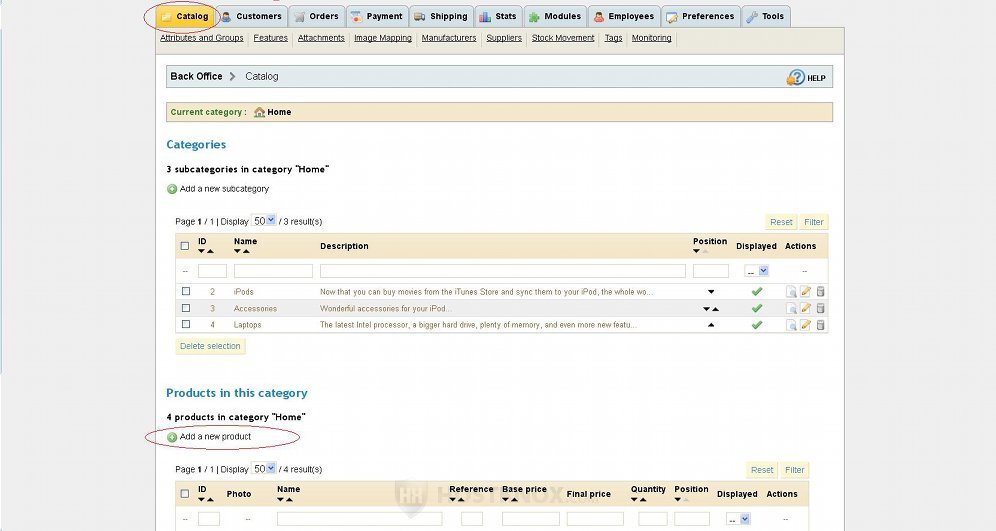
After you log in to the backend of your store click on the Catalog tab. There you'll see two tables. One lists the product categories and the other the featured products that are displayed on the home page of your store. If you installed the full mode of PrestaShop, there should be some sample categories and products.
The featured products displayed on this page are by no means all the products in your store; these are only the products that belong to the Home category (the top most category). To see what products there are in a particular category just click on the name of the category to open the page of that category and see a table with the products in it.
To add a product to this category click on the Add a new product button that's above the table with the products. You can actually click on the same button directly on the home page of the Catalog tab, because when you configure the options for the product you can select which category the product will belong to:
You'll be taken to the page with the settings for the new product. The page has two tabs: Info and Images. The Info tab page contains the most important product settings, and from the Images settings you can upload images of the product.
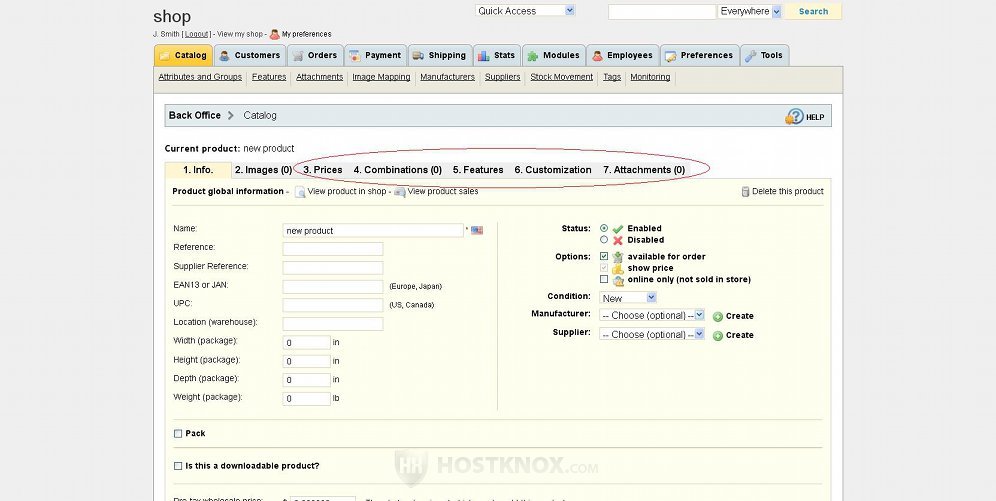
The first group of options on the Info page is for some basic information about the product, such as the name, the size of the package, the condition (e.g. new, used), the manufacturer, the supplier, etc. From the Status drop-down menu you can choose whether the product should be displayed on the frontend of the store after you save it:
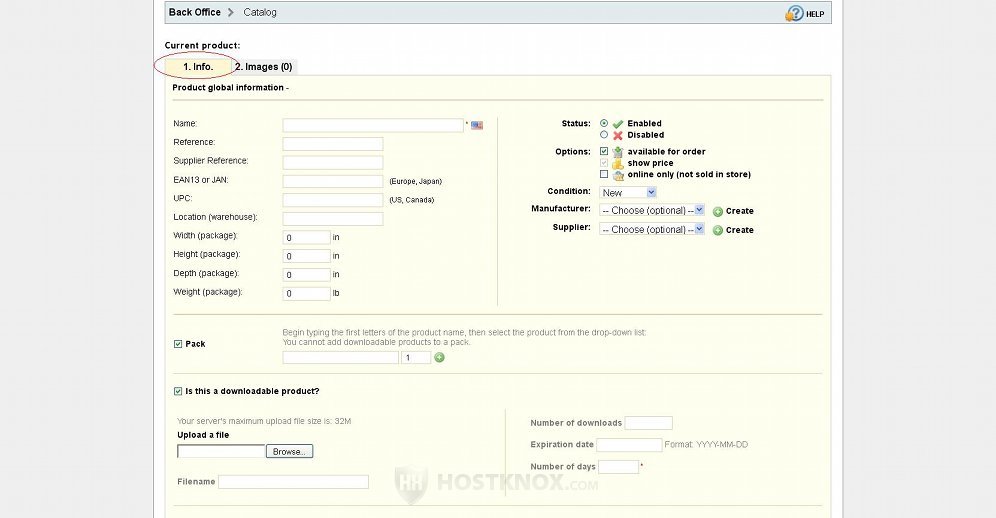
The required options are marked with a red asterisk.
If you want to add a manufacturer and supplier you have to do it in advance, so that you can select them when adding the product. Or you can click on the Create button next to the drop-down menu, but you have to save the product first or you'll lose any information that you have provided so far. You can add manufacturers and suppliers from the respective sub-tabs of the Catalog tab. For some more information check out the tutorial on adding manufacturers and suppliers in PrestaShop.
Below these general options you'll find a couple of checkboxes. One is labeled Pack and the other Is this a downloadable product. The Pack option is for adding other products to the one you're configuring at the moment. For example, you may want to add something to the current product and create a pack with a reduced price. To add a product to the pack, mark the checkbox and a text field will appear. Start typing the name of the product and a drop-down menu will appear from which you'll be able to select the product. Then click on the green button next to the text field to add the product to the pack. Of course, the product that you want to add to the current one that you're configuring should have been added as a separate product before that.
If the product you're adding is downloadable (e.g. mp3 music), mark the checkbox for Is this a downloadable product. A few options will appear from which you can upload the file from your local computer. You can also specify how many times the customer can download the file after the purchase, the expiration day of the offer, and the number of days that the customer has (after the purchase) in order to download the product. Not all fields are required.
Further down the page, the next three groups of options are for the price of the product, some in and out of stock options, and additional shipping cost:
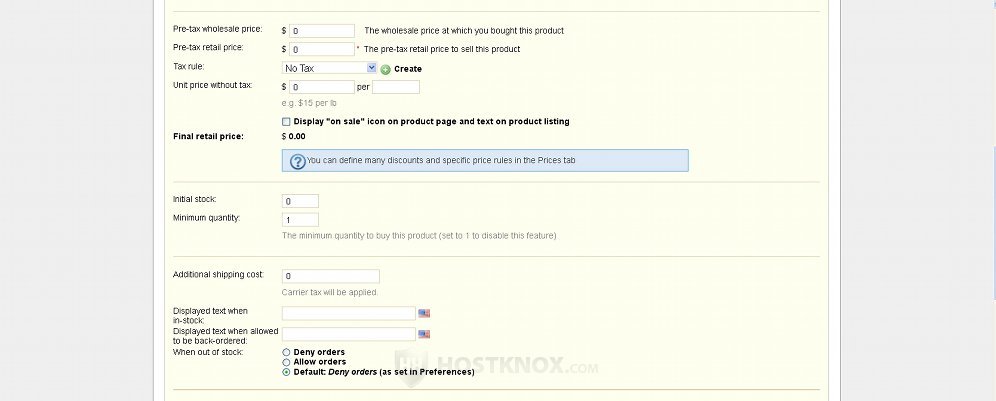
In the field for Pre-tax wholesale price type the price you paid for this product. This, of course, won't be displayed on the frontend of your store. It's there for your convenience, so that you can compare the price you paid for the product with the price at which you'll sell it.
In the field for Pre-tax retail price specify the price for which you want to sell the product. From the Tax rule drop-down menu choose the tax rate from the preconfigured ones. Depending on the default country you chose for your store during the installation process, there should be correctly configured tax rates that you can use. If you want to, you can add other tax rates. To do this go to the Payment main tab, then to the sub-tab Taxes, click on the Add new button and configure the options. On the same page (Payment tab>Taxes) you can configure whether the tax should be included in the price. It's included by default.
The fields for Unit price without tax are optional. For example, if you sell a box of cigarettes as one product, in these fields you can specify what the price per pack is.
Under the options for the price and tax you can specify how many items of the product there are in stock and the minimum quantity that customers have to order (1, by default).
In the field for Additional shipping cost you can add a shipping fee that will apply only to this product. You can specify the general shipping fees for the whole store from the Shipping tab (one of the main tabs at the top of the page). Besides setting an additional shipping cost, this group of options also gives you the opportunity to type a text to be displayed when the product is in stock, and to allow orders when the product is out of stock (denied by default).
Further down the product settings page you'll find options for choosing the category to which you want the product to belong and also some search engine optimization options:
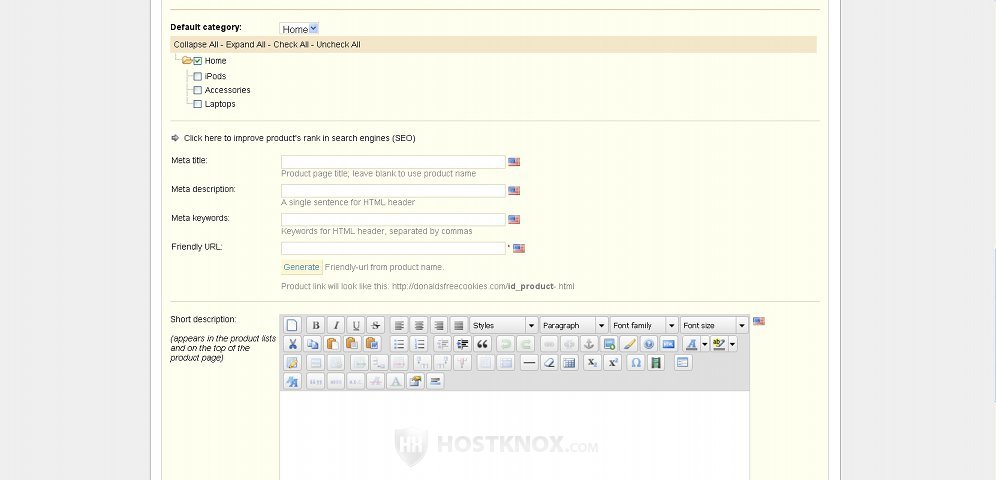
The category should be automatically set to the one from which you chose to add the product. However, if you want to you can move it to another category. Once the product is added you can always edit it and move it to other categories. You can also put the product in several categories, choosing one to be the default.
The SEO options are hidden by default; you have to click on the link to see them. If you have created a category, you should be familiar with these options. The "meta" options don't have much weight when it comes to search engine optimization, but you can configure them nevertheless. They are self-explanatory: type a title for the product, a very short description, and some keywords separated by commas.
In the field for Friendly URL there should be an automatically generated friendly URL based on the name of your product. If you change it to something else, separate the words with hyphens (e.g. product-name). Friendly URLs are actually disabled by default. You can enable them with a few clicks of the mouse. If you haven't done it and you're not sure how to do it, read the article on enabling SEF URLs in PrestaShop.
Scrolling down the page the last options are the descriptions of the product:
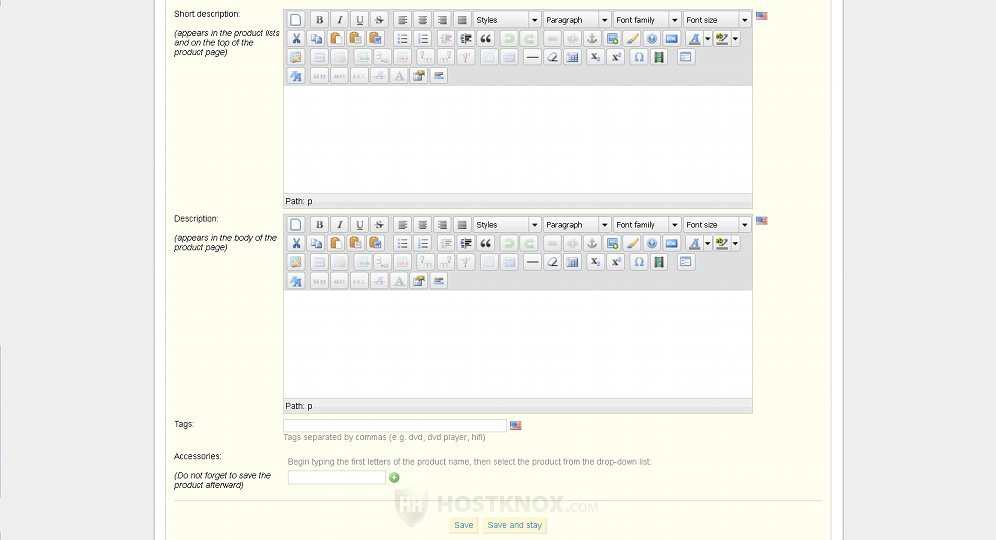
There are built-in text editors that you can use to write the descriptions. The first is a short description that will appear at the top of the product page, and it will also be displayed under the product's name on the page with all the products in the category. Type a few sentences to capture the attention of the customers. The other description is shown on the product page itself. You can use it to give some more information about the product.
Under the text-editors there's a text field for Tags. You can type some tags that describe the product. This will make it easier for customers to navigate through your shop. The very last option on this page is Accessories. If there's a product in your store that can be used as an accessory to the product you're adding, you can include this accessory as part of the offer. To add the accessory just type the name in the text field, and a drop-down menu will appear from which you can select the accessory.
After you're done with all the settings click on the Save or Save and stay button at the bottom of the page.
The other default tab with product settings is the Images tab. You can use it to upload images of the product.
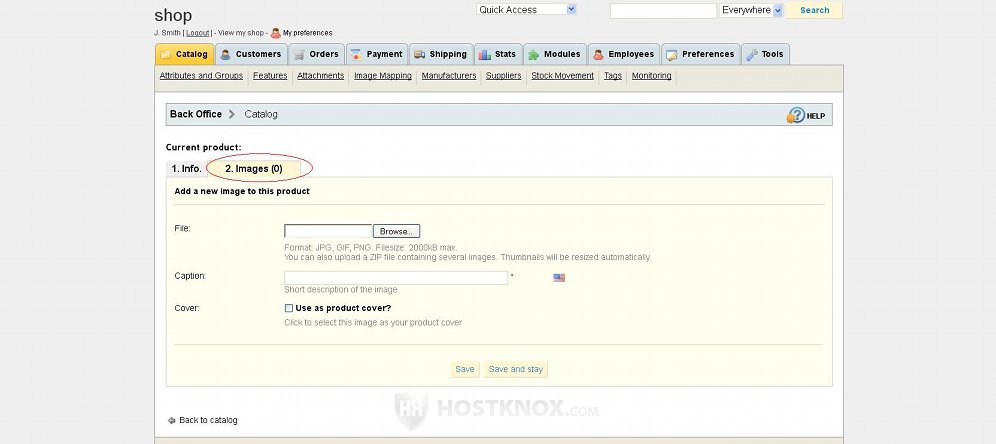
Click on the Browse button to select an image from your local computer. In the field for Caption type a name for the picture or a very short description. Mark the checkbox for Cover if you want this image to be the main image for the product; it will appear anywhere the product is shown or listed (e.g. product list page, viewed products panel, new products panel, etc.). Then click on the Save or Save and stay button. After you do it the image will be uploaded to your account.
In addition to the original image, five other copies with different dimensions will be added on your PrestaShop hosting account. PrestaShop automatically resizes the original image and creates these copies. This is required because, for example, the product image on the product list page has to be much smaller than the same image on the product page itself. The dimensions of these copies are fixed and they are the same for all product images that you upload. You can change them from the admin panel of your store (Preferences tab>Images). You can also upload other images of the product. Don't forget to change the Caption for each image. The other images (non-cover) will be visible on the product page.
When you save a new product, in addition to the Info and Images tabs there will appear several other tabs with settings. These are not required settings but they give you much more flexibility.
From the Prices tab you can set discounts and various promotions for the product. You can set the period of the promotion, to which countries the promotion will apply, the discount itself, and you can also set quantity discounts.
From the Combinations tab you can create different combinations for the product. For example, you can offer the product in different colors. In addition to colors, you can have many other attribute groups that you can use to create all sorts of variations of the product. If you need more information on how to create attribute groups and attributes, read the tutorial on adding attributes and attribute groups in PrestaShop.
From the Features tab you can assign to the product various features (e.g. height, width, weight, material, etc.) and specify values for those features. These will give the customers more information about the product, and they are also useful when a customer compares similar products (e.g. cell phones).
For some more information on how to add and manage combinations and features, read the tutorial on adding product combinations and features in PrestaShop.
From the Customization tab you can offer the customers the chance to customize the product. For example, your store specializes in offering unique T-shirts. So you can offer customers the opportunity to send you an image or a text that you can stamp on the T-shirt.
You can use the Attachments tab to upload documents or some files associated with the product. Customers will be able to download the file from the product page on the frontend of your store.
For some more information on customization and attachments read the tutorial on adding customizations and attachments to products in PrestaShop.