PrestaShop 1.4 Product Combinations and Features Tutorial
How to add combinations and features to products in PrestaShop
In PrestaShop you can make variations of a product by adding different attributes to it, and you can also add features to the product, so that customers will have more information about it.
Once the particular product is saved (added) more options that you can configure will appear. You can see these options by clicking on the tabs that are displayed when you're editing the product. Initially, before you save the product there are only two tabs with options (Info, Images). When you save the product several other tabs will appear. Two of them are named Combinations and Features.
For more information on the basic product settings read the tutorial on adding products in PrestaShop.
Combinations
To add product combinations click on the Combinations tab:
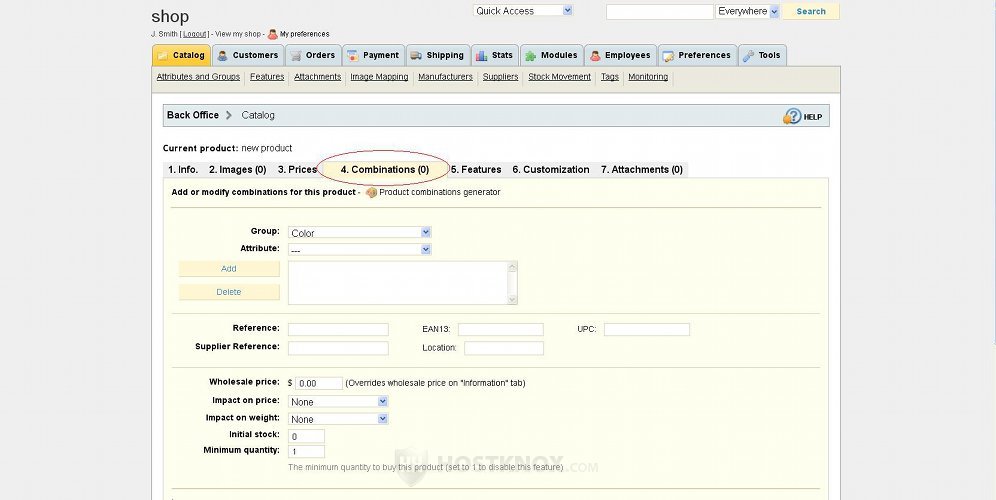
In order to add product combinations you should have attributes groups consisting of different attributes. For example, the full installation mode of PrestaShop comes with a few groups of attributes. One of them is the color group, and the attributes in that group are the different colors. You can add any group of attributes with attributes in it. If you're not sure how to do it, check out the tutorial on adding attributes and attributes groups in PrestaShop.
So after you click on the Combinations tab, the page with the settings will be displayed. First, from the Group drop-down menu select the attributes group (e.g. color), then from the Attribute drop-down menu select the attribute itself (e.g. red). To add this attribute to the product click on the Add button that's right below the two drop-down menus, and the attribute will appear in the text field next to the button. If you want to, you can add an attribute from another group to the same product. Just change the group from the respective drop-down menu, select the attribute from the other menu and click on the Add button.
For example, the sample product iPod Nano that comes with the full installation mode is offered in different colors and in two variations in terms of disk space. So each color attribute is combined first with one of the disk space attributes (e.g. 8 gigabytes), and then with the other (e.g. 16 gigabytes). The more attributes groups you add to the product the more combinations.
The next important set of options on the Combinations tab page are the price and availability options. In the field for Wholesale price you can specify if the price of this combination is different than the one you've specified in the general options of the Info tab (the wholesale price is the price you paid for the product).
From the Impact on price drop-down menu you can select whether the retail price of this combination is greater or less compared to the one you've set from the general options. If the price is different and you select Increase or Reduction from the drop-down menu, a field will appear in which you can specify how much more or less the customer has to pay for this product combination.
For example, if the general options for the iPod Nano are configured for the 8 gigabyte version and this combination is for a 16 gigabyte variation, then, obviously, the price will be greater (both the wholesale and retail).
From the settings under the price options you can specify the number of items in stock and the minimum order quantity.
Further down the Combinations tab page there are a few other options:
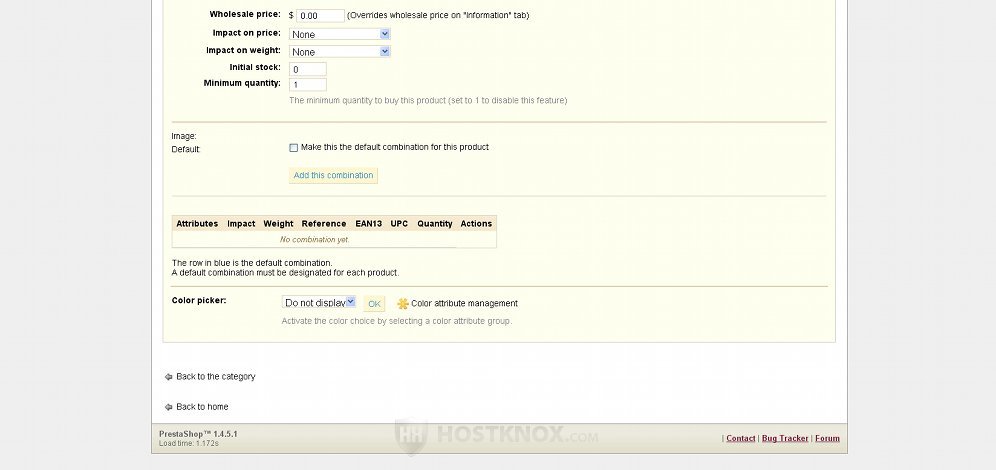
Under the price and availability options you can select an image for this combination. Of course, you have to upload it first. You can do this from the Images tab of the product settings page. If the combinations you're adding are the same in terms of outside appearance, you can use the same image.
If you want this combination to be the default one mark the checkbox for Make this the default combination for this product. This means that when a customer views the product, this is the combination that will be displayed first. To save the combination click on the Add this combination button. The combination will be listed in the table right under the button. You can edit any of the combinations using this same table. Just click on the edit icon (a pencil) for the combination and its options will be displayed on the Combinations tab page.
Features
From the Features tab of the product settings page you can give more details about the product. These features will apply to all the product combinations (if any); you can't assign features only to a single variation of the product.
You can add/create features that later you can use for all the products. To do this, after you log in to the backend of your store click on the Catalog tab and then on the Features sub-tab:
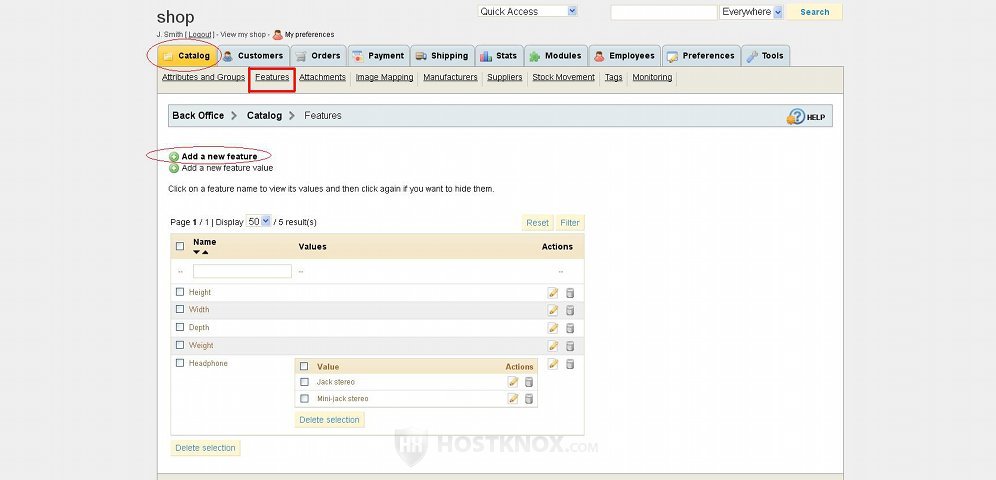
There are two Features tabs so don't get confused. This one is a sub-tab of the main Catalog tab. From this tab you can add new features that can be used for all the products. The other Features tab is only visible when you edit a particular product.
On the Features sub-tab page (of the main Catalog tab) you'll see a table with the features added so far. The full installation mode of PrestaShop comes with several features (height, width, depth, weight, headphones). To add a new feature simply click on the Add a new feature button, then on the new page that opens type the name of the feature and click on Save.
Optionally, you can also add a value to the feature; click on the Add a new feature value button, then type the value in the respective text field and from the Feature drop-down menu select to which feature you want the value to apply.
You don't have to add a value to the feature. When editing the product features you can also use the fields for custom values to type any value you want. It all depends on the feature itself. For example, from the pre-added features only the feature Headphone has values added to it. The features that you add here can be used to give more information about any of your products.
Now, to add features to a product open the edit screen for that product and click on the Features tab:
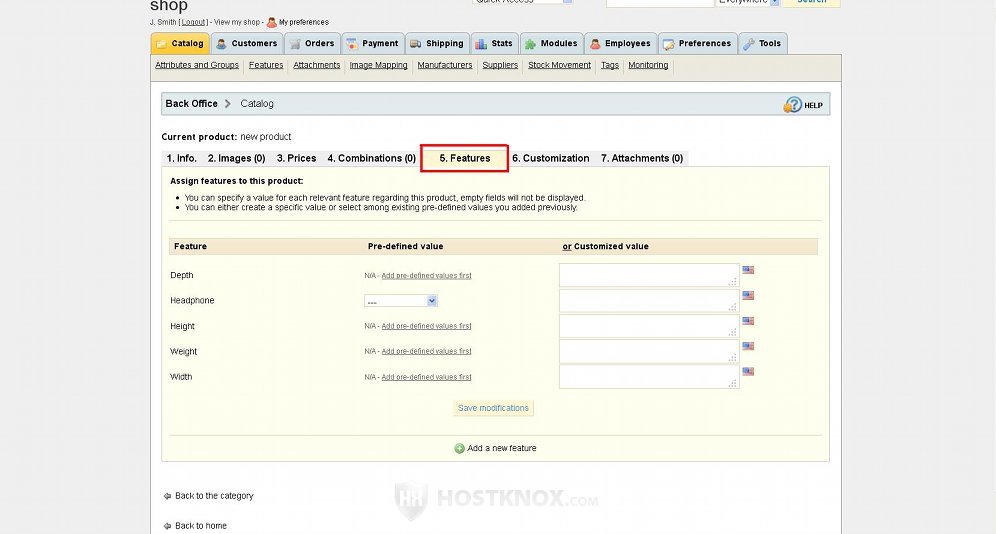
You'll see a table with all the features that you have created from the other Features tab. One of the columns of the table is for predefined values (if any) and the other is for custom values. For example, you can type the width of the product directly in the text field for custom value; you don't need a predefined value.
You don't have to configure all or any of the features. However, it's useful to specify values for the features that apply to this product. This will give more information about the product to the customers. The information will be visible on the product page (on the frontend of your store). This information is also used when customers compare products; it's especially useful when comparing, for example, the technical information of two similar products (e.g. cell phones).
As we mentioned, on this page are listed all the available features added from the Features sub-tab of the main Catalog tab. Some features will be applicable to the particular product, and some will be applicable to other products. For example, the feature Headphone won't be needed if the product in question is a vacuum cleaner. Specify values only for the features that apply to this product. If you don't provide a value for a feature, it won't be displayed on the frontend of the store.
After you're done with the settings on this page click on the Save modifications button.